

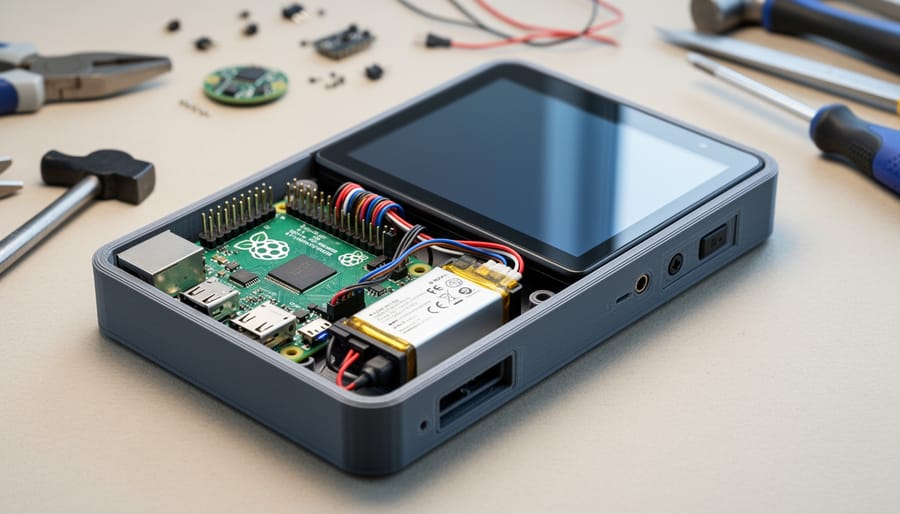
Building a Raspberry Pi PDA lets you create a pocket-sized, fully customizable handheld computer for under $150 in parts, with a weekend build time and moderate soldering skills. This project transforms a single-board computer into a portable workstation complete with touchscreen, battery power, and GPIO access, giving you the flexibility to run Linux applications, write code on the go, or control hardware projects from your palm.
The appeal of a DIY PDA goes beyond nostalgia for the Palm Pilot era. Modern makers want devices that respect their priorities: open-source software, repairable hardware, and the ability to add sensors, radios, or interfaces that commercial manufacturers would never include. A Raspberry Pi gives you that foundation, and the growing ecosystem of compact displays, power management boards, and 3D-printable cases makes handheld builds more accessible than ever.
This guide walks you through component selection, proper power system design to avoid battery failures, physical assembly with attention to thermal management, and software optimization for small-screen productivity. You’ll learn which Raspberry Pi model offers the best balance of power efficiency and performance for portable use, how to wire a safe battery system with proper charging circuits, and which software tweaks make desktop Linux usable on a 5-inch touchscreen.
Whether you’re prototyping an IoT field tool, building a retro computing tribute, or just want a hackable device that fits in your pocket, this build delivers practical hardware integration experience while producing something genuinely useful.
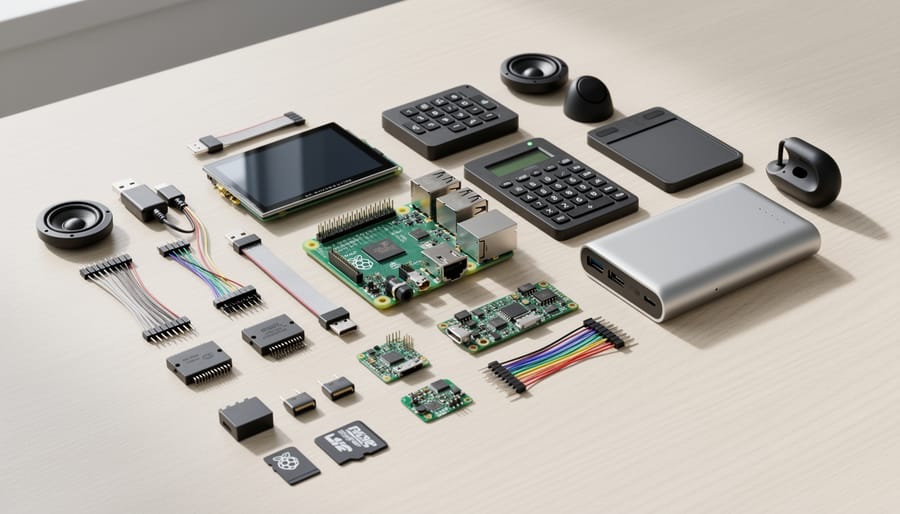
What You’ll Need: Components and Materials
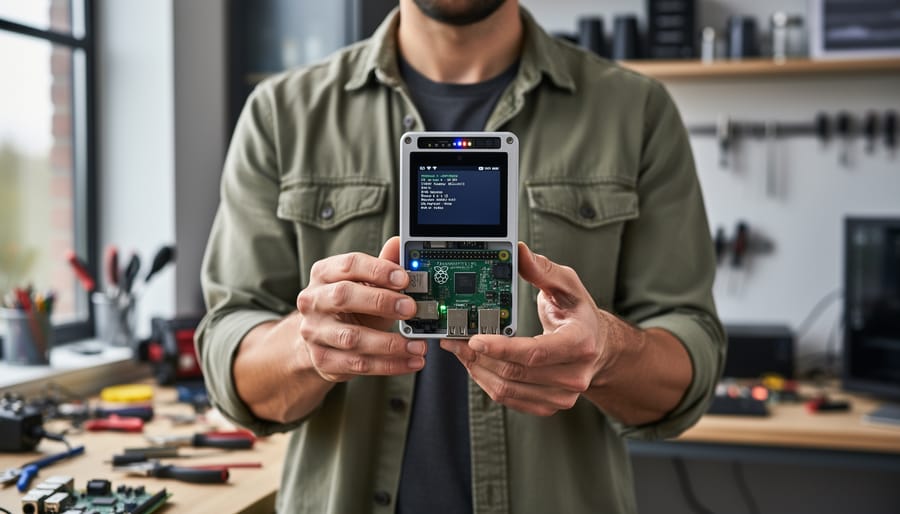
Choosing Your Raspberry Pi Board
The Raspberry Pi board you choose shapes your PDA’s portability, battery life, and capability. For ultra-portability, the Raspberry Pi Zero 2 W is the clear winner. Its compact 65×30mm footprint and 0.5-1.2W Zero 2 W power consumption profile make it ideal for pocket-sized builds running 6-8 hours on a 2000mAh battery. The quad-core 1GHz ARM Cortex-A53 handles lightweight tasks, terminal work, note-taking, basic web browsing, without draining power. You’ll compromise on raw speed, but gain a device you can actually carry all day.
If you need more horsepower for multitasking, media playback, or running heavier applications, the Raspberry Pi 4 (2GB or 4GB) delivers significantly better performance. Expect 3-5W power draw, which means bulkier batteries and shorter runtime. The larger form factor (85×56mm) also demands a bigger case. For custom integrations, the Compute Module 4 offers the Pi 4’s performance in a smaller package with flexible I/O, though it requires a custom carrier board, adding complexity suited to experienced builders.
Match your board to your priorities: Zero 2 W for pocketability and battery life, Pi 4 for desktop-like performance in a handheld shell.
Display and Input Hardware
Touchscreen displays are the centerpiece of your PDA build. The most popular options range from 2.8-inch to 5-inch screens, balancing portability with usability. Smaller displays (2.8-3.5 inches) suit ultra-compact builds but require carefully designed interfaces. The 3.5-inch and 4-inch screens offer better readability while maintaining pocket-friendly dimensions. For maximum functionality, consider 5-inch displays, though they push the limits of “pocket-sized.”
Display interfaces matter significantly. SPI screens are easiest to wire but slower, acceptable for basic tasks, frustrating for video. DSI and HDMI interfaces provide better performance and are worth the slightly more complex setup for a responsive PDA experience. Resolution varies from 320×480 on budget screens to 800×480 on larger models. Capacitive touchscreens feel more responsive than resistive alternatives but cost more.
For input, mini wireless keyboards work immediately but add bulk. GPIO-connected button matrices keep the profile slim, you’ll wire individual keys to GPIO pins and configure them in software. Tactile feedback matters: mechanical switches feel better than membrane keyboards for regular typing. Some builders integrate slide-out keyboards for the classic PDA form factor, though this requires custom case design and more advanced fabrication skills.
Power System Components
A reliable power system is the backbone of any portable Raspberry Pi PDA. For the battery, you have two main routes: lithium polymer (LiPo) packs or USB power banks. LiPo batteries, typically 3.7V cells in 2000-5000mAh capacities, offer the smallest footprint and lightest weight, making them ideal for compact builds. However, they require a dedicated charging circuit like the Adafruit PowerBoost 1000C or similar board that handles 5V boost conversion and safe charge management. USB power banks are the simpler, safer option: they come with built-in protection circuits and you just connect via USB-C or micro-USB. The trade-off is bulk; even slim 10,000mAh banks add noticeable thickness.
Whichever battery you choose, you’ll need a power management board if you want clean shutdown capability and battery monitoring. Boards like the PiJuice HAT or Witty Pi integrate directly with the Raspberry Pi’s GPIO, providing real-time battery status and programmable power control. For bare LiPo setups, add a voltage regulator or buck converter to ensure stable 5V output under varying load. Check that your chosen components can deliver at least 2.5A for a Pi Zero 2 W or 3A for a Pi 4 to avoid brownouts during peak usage.
Safety Precautions and Common Pitfalls
Building a Raspberry Pi PDA involves working with components that can pose serious risks if mishandled. Taking proper precautions protects both you and your project from damage.
Battery Safety
Lithium polymer (LiPo) and lithium-ion batteries power your PDA but require careful handling. Never puncture, crush, or short-circuit battery terminals. Store batteries in a cool, dry location away from flammable materials, and never charge them unattended.
Inspect batteries before each use for swelling, leaking, or damage. If a battery shows any of these signs, dispose of it properly at an electronics recycling facility rather than attempting to use it.
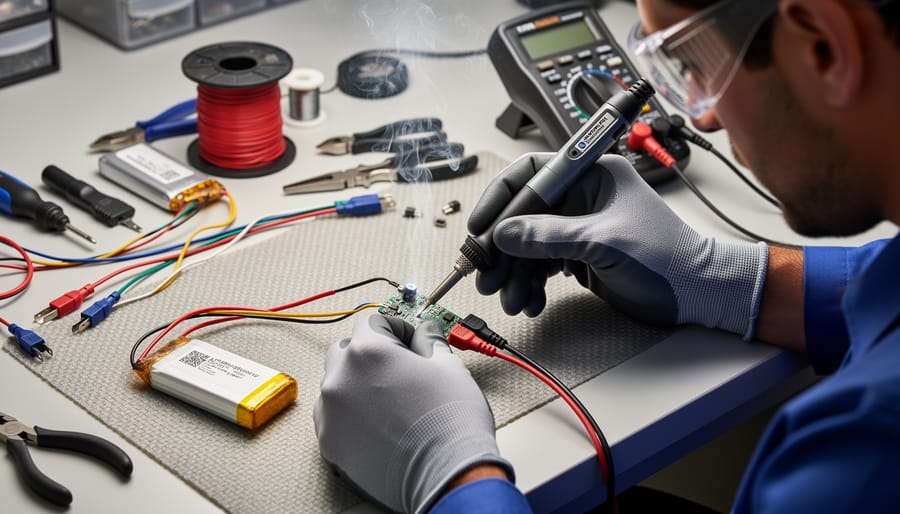
Soldering and Electronics Work
Work in a well-ventilated area when soldering, as flux fumes can irritate your respiratory system. Use a fan or fume extractor to direct smoke away from your face. Keep a fire extinguisher rated for electrical fires nearby, and never leave a hot soldering iron unattended.
Before handling sensitive electronics like the Raspberry Pi, discharge static electricity by touching a grounded metal surface or wearing an anti-static wrist strap. Static discharge can permanently damage GPIO pins and integrated circuits.
Common Mistakes to Avoid
Double-check polarity before connecting power sources, reversed connections can destroy your Pi instantly. Verify voltage levels with a multimeter before powering on for the first time. Don’t force connectors or GPIO headers, as bent pins are difficult to repair. Start with individual component testing rather than assembling everything at once, making troubleshooting far simpler when issues arise.
Step-by-Step Build Process
Preparing the Display and Input Hardware
Start by connecting your display to the Raspberry Pi’s GPIO header or DSI connector, depending on the screen type. Most small touchscreens (3.5″ or smaller) use the GPIO pins for both power and data, while larger displays typically connect via the DSI ribbon cable for better performance. Align the ribbon cable carefully into the DSI port, ensuring the metal contacts face the correct direction, then lock the connector by pushing the plastic tab back into place.
Once physically connected, power on the Pi and check if the display shows the boot sequence. If you see only a white or black screen, you’ll likely need to install manufacturer-specific drivers. Download the driver package from your display vendor’s repository, then run the installation script using `sudo bash ` or follow the provided instructions. Many displays require editing `/boot/config.txt` to enable the correct display interface, and using proven hardware interface solutions simplifies this configuration process.
After the display works, calibrate the touchscreen by running `xinput_calibrator` and following the on-screen prompts to tap each corner accurately. Save the calibration data to your X11 configuration to make it persistent across reboots. For physical buttons or mini keyboards, connect them to available USB ports or wire tactile switches to GPIO pins, then test input responsiveness in a text editor before proceeding.
Installing and Configuring the Operating System
Download Raspberry Pi OS Lite from the official Raspberry Pi website, it’s the ideal starting point for a PDA build because it boots to a command line without the desktop overhead, giving you full control over what runs. Use the Raspberry Pi Imager tool to flash the image to your microSD card (16GB minimum, 32GB recommended). During setup in the Imager, configure your Wi-Fi credentials and enable SSH through the advanced settings menu to streamline first boot.
Insert the card into your Pi and power on. Connect via SSH from another computer or attach a keyboard directly. Run `sudo apt update && sudo apt upgrade` to ensure all packages are current. Install a lightweight desktop environment suited to small screens: `sudo apt install lxde`. Enable boot-to-GUI with `sudo raspi-config`, navigate to System Options → Boot/Auto Login, and select Desktop Autologin.
For Raspberry Pi OS performance optimization in portable mode, disable unnecessary services: `sudo systemctl disable bluetooth` if you’re not using it, and reduce GPU memory allocation to 16MB in raspi-config under Performance Options since you’re running a minimal display.
Install essential PDA software: a file manager (`sudo apt install pcmanfm`), lightweight browser (`sudo apt install midori`), and terminal emulator. Configure automatic screen blanking after two minutes to preserve battery, and enable the on-screen keyboard with `sudo apt install matchbox-keyboard` for touchscreen input when the physical keyboard isn’t accessible.
Wiring the Power System
Wiring the power system correctly is critical for safe, reliable PDA operation. Before connecting anything, verify your battery voltage matches your power management board’s specifications, most Raspberry Pi boards require 5V input, so ensure your charging circuit outputs stable 5V from your LiPo battery’s 3.7V nominal voltage.
Start by connecting the battery to the charging circuit’s B+ and B- terminals. Double-check polarity with a multimeter, reversing these connections can destroy components or create fire hazards. Solder connections if using bare wire leads, applying heat for 2-3 seconds maximum to avoid damaging the battery protection circuit. Use heat-shrink tubing to insulate all exposed connections.
Next, connect the charging circuit’s output to your power management board’s input terminals, again verifying polarity before soldering. Many boards like the PowerBoost series have clearly labeled pads, follow the silkscreen markings exactly. Test voltage at this stage with a multimeter set to DC voltage; you should read a steady 5V.
Wire the power management board’s output to the Raspberry Pi’s 5V and ground GPIO pins (physical pins 2 and 6, or 4 and 6). Avoid using the micro-USB or USB-C port for battery power as it bypasses protective circuitry on quality power boards. Solder a 22-gauge wire for these connections, thinner wire risks voltage drops under load.
For the shutdown button, connect a momentary push-button between GPIO3 (physical pin 5) and ground (physical pin 9). This allows safe software-triggered shutdown when held, preventing SD card corruption from sudden power loss.
Hardware Integration and Cable Management
With all components wired and tested, the challenge shifts to making everything fit in a pocket-sized form factor. Start by laying out your Pi, display, battery, and any peripherals on a flat surface to visualize the most compact arrangement. The goal is to minimize cable lengths while keeping heat-generating components (the Pi itself, power management board) away from the battery.
Bundle power cables separately from data cables using small zip ties or heat-shrink tubing every few centimeters, this prevents interference and makes troubleshooting easier later. For ribbon cables connecting the display, fold them in gentle accordion pleats rather than sharp bends to avoid damaging the traces. Secure these folds with small pieces of Kapton tape.
Use mounting brackets or standoffs to create a layered component stack. Position the battery at the bottom for weight distribution, the Pi in the middle, and the display on top. Apply small dabs of hot glue at cable connection points (not on the connectors themselves) to prevent accidental disconnections from movement. Leave GPIO headers and USB ports accessible for future modifications.
Before closing everything into a case, do a final inspection: check that no bare wires touch metal surfaces, verify cable routing won’t be pinched by case screws, and ensure ventilation paths remain clear around the Pi’s processor.
Final Assembly and Enclosure Fitting
With all components wired and tested, it’s time to bring everything together in a proper enclosure. A well-designed case transforms your loose assembly into a genuine handheld device.
Start by test-fitting components before permanent mounting. Lay out the Pi, battery, and display inside the case to identify potential clearance issues. Mark where mounting posts or standoffs contact the Pi board, these are your anchor points. Use M2.5 screws and nylon standoffs to secure the Raspberry Pi, avoiding overtightening that could crack the board.
Position the battery carefully. It shouldn’t press directly against the Pi or display back. If using double-sided tape or velcro strips, ensure the battery sits flat without bulging the case. Route all cables along case edges, using cable ties or adhesive clips to prevent tangles.
Before closing the case, verify port access. Your power input, USB ports, and any external connectors should align with case cutouts. Test all buttons, especially power and GPIO-connected inputs, to confirm they actuate properly through the case material.
Ventilation matters for extended use. If your case lacks vent holes, drill small slots near the Pi’s processor using a step bit to avoid cracking. Space them to allow airflow without exposing components.
Snap or screw the case halves together, checking for gaps that might snag on pockets or stress internal connections.
Testing and Verification
Once your Raspberry Pi PDA is fully assembled, methodical testing confirms every component works as intended before you rely on the device. Start with the power-on test: disconnect from mains power, flip the power switch, and verify the boot LED sequence on your Raspberry Pi board. The display should illuminate within 15-20 seconds and show the OS loading screen. If nothing appears, check your power management board’s voltage output with a multimeter, it should read 5V ±0.25V at the Pi’s GPIO pins.
Next, validate the touchscreen and input hardware. Open the terminal and run a calibration tool like `xinput_calibrator` if your screen responds inaccurately to touch. Tap all four corners and the centre to confirm responsiveness across the entire panel. Test physical buttons or keyboard inputs by launching a text editor and verifying every key registers correctly. Sluggish or missed inputs often indicate loose ribbon cable connections or insufficient power delivery under load.
Battery life validation requires real-world usage. Fully charge the battery, then run typical PDA tasks, web browsing, note-taking, terminal commands, while monitoring voltage with `vcgencmd get_throttled`. The Pi should operate for at least two hours without throttling warnings. If runtime falls short, revisit your power system wiring or consider a higher-capacity battery pack.
For connectivity, open the network settings and scan for available WiFi networks. If your Zero 2 W build struggles here, our guide to getting perfect WiFi on Pi Zero covers antenna positioning and driver tweaks. Test Bluetooth by pairing a wireless mouse or headphones, successful pairing confirms the radio functions properly.
Perform this final checklist before considering the build complete:
- Display brightness adjusts through software controls
- Audio output plays through speaker or headphone jack
- SD card reads and writes files without errors
- Shutdown button triggers clean OS shutdown within five seconds
- Temperature under load stays below 70°C (check with `vcgencmd measure_temp`)
If boot failures occur, remove the SD card and verify the OS image integrity on another computer. Corrupted partitions cause intermittent crashes that mimic hardware faults. Re-flash the card if filesystem errors appear during `fsck` checks, and always perform a clean shutdown to prevent future corruption.
Software Customization for PDA Functionality
With your PDA hardware assembled and tested, transforming it into a genuinely useful pocket device requires deliberate software choices. Start by stripping unnecessary services, disable desktop effects, remove bulky applications you won’t use on a small screen, and stop background daemons that drain battery. Run `sudo systemctl disable bluetooth` if you’re not using wireless peripherals, and consider disabling the GUI login manager to boot straight to a lightweight window manager like Openbox or i3.
For daily productivity, install Leafpad or FeatherPad for quick text editing, they launch instantly and use minimal resources. Organize files with PCManFM, a lightweight file manager that handles both local storage and network shares without the overhead of Nautilus. For web browsing, Midori or NetSurf render pages faster than Chromium on limited RAM, though you’ll sacrifice some compatibility. If you need terminal access frequently, configure your launcher to open LXTerminal with a single tap.
Custom launchers make or break the handheld experience. Tools like jgmenu or rofi let you build touch-friendly application menus with large icons and minimal nesting. You can also build a professional GUI using Python and Tkinter for one-touch access to your most-used functions, email, calendar, notes, and system controls.
Power management demands attention. Install `tlp` for automatic CPU frequency scaling, set your display timeout to 30 seconds, and reduce screen brightness to 50% by default in `/boot/config.txt`. For advanced users, kernel optimization can squeeze extra runtime from your battery by trimming unused drivers and modules. Configure suspend-on-lid-close if your case includes a magnetic switch, and you’ve got a PDA that actually lasts through a workday.
Common Issues and Troubleshooting
Display problems top the list of issues builders encounter. If your screen stays black after boot, first verify the display ribbon cable is firmly seated in both the Pi and the display connectors, partial connections cause intermittent or no output. Check that you’ve enabled the correct display driver in `/boot/config.txt` by uncommenting or adding the line specific to your screen model. Power issues also masquerade as display failures: measure the voltage reaching your Pi with a multimeter to confirm it’s getting at least 5V under load. Some displays draw enough current to cause voltage sag if your power supply is undersized.
Touchscreen unresponsiveness usually stems from misconfigured drivers or calibration drift. Run `xinput list` in a terminal to verify the touch device is detected, then recalibrate using `xinput_calibrator` for X11-based systems or the manufacturer’s calibration utility. If touch works but feels inaccurate around edges, you may need to adjust the transform matrix in your X11 configuration or edit the device tree overlay parameters. Physical issues like loose flex cables or damaged digitizers require reopening the case for inspection.
Battery life falling short of expectations points to either inadequate capacity for your workload or power management problems. Check that you’ve disabled unnecessary services (Bluetooth if unused, HDMI output when the lid is closed) and enabled CPU frequency scaling. Use `vcgencmd measure_temp` and `vcgencmd measure_clock arm` to verify your Pi isn’t running full-throttle constantly. A power management IC logging utility can reveal if your charging circuit is functioning correctly or if parasitic drain is occurring when the device should be in standby.
Why won’t my Raspberry Pi PDA boot after assembly?
Verify the SD card is properly imaged with a working OS, the power supply delivers sufficient current (at least 2A for Pi Zero 2 W, 3A for Pi 4), and all power connections are secure with correct polarity. Remove peripherals one by one to isolate hardware conflicts.
How do I fix persistent overheating during normal use?
Add heatsinks to the CPU and ensure your case has ventilation holes positioned over hot components. If temperatures exceed 80°C, enable the fan GPIO control or reduce CPU clock speed in `/boot/config.txt` using `arm_freq` settings.
What should I do if Wi-Fi constantly disconnects?
Check for interference from the battery or poorly shielded power cables near the antenna. Disable Wi-Fi power management with `sudo iwconfig wlan0 power off` and verify your OS has the latest firmware updates installed.
Boot failures with the green LED flashing specific patterns indicate SD card errors or insufficient power. Flash a fresh OS image to rule out corruption, and test with a known-good power supply. If the Pi boots without peripherals attached but fails with the display connected, your power system can’t handle the combined load, upgrade to a higher-capacity battery or more robust charging circuit.
Overheating becomes apparent when the Pi throttles performance or displays the temperature warning icon. Compact PDA cases trap heat, so active cooling or strategic vent placement is essential. The official temperature limits are 85°C for throttling and 60°C for comfortable handheld use. Thermal paste between the CPU and heatsink makes a measurable difference in these confined spaces.
Connectivity dropouts (Wi-Fi or Bluetooth) often trace to antenna placement or electrical noise from the power system. Route antenna wires away from the battery and charging circuitry, and add ferrite beads to power cables if interference persists. Some USB power banks introduce noise that disrupts wireless performance, switching to a cleaner LiPo setup resolves this.
You’ve just built a fully functional Raspberry Pi PDA from scratch, a genuine handheld computing device tailored to your exact specifications. This isn’t an off-the-shelf product; it’s a custom piece of hardware that you assembled, configured, and brought to life through careful integration of components and software. That’s a significant achievement in the maker world.
The beauty of this build is that you’re nowhere near finished. Your PDA is a platform for endless experimentation. Consider adding GPS functionality for location-aware apps, integrating environmental sensors to log temperature and humidity data, or installing a cellular modem for true mobile connectivity. The GPIO pins you haven’t used yet are waiting for buttons, LEDs, or whatever expansion modules catch your interest.
If you’re looking to refine the hardware, designing a custom PCB to replace breadboard connections will shrink the footprint and improve reliability. Upgrading to a higher-capacity battery extends runtime, while a better enclosure design, perhaps one with mounting points for accessories, makes daily use more practical.
The Raspberry Pi community is full of builders who’ve tackled similar projects. Forums, Discord servers, and sites like Hackaday showcase PDA builds with clever solutions to problems you might encounter. Share your build, ask questions, and learn from others refining their portable Pi projects. Your PDA isn’t just finished, it’s ready to evolve.