
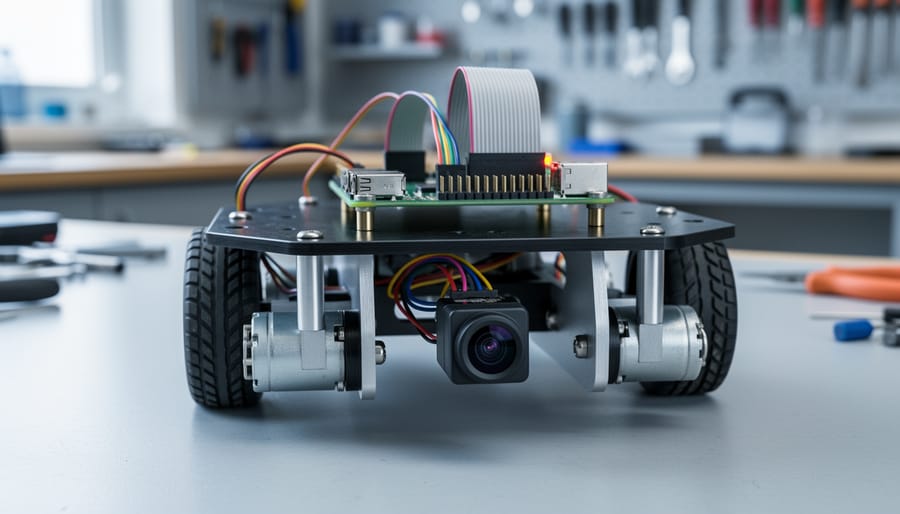
Building robots with Raspberry Pi combines powerful single-board computing with accessible hardware at a price point that puts serious robotics within reach of anyone willing to learn. You’ll need a Raspberry Pi (any model from Pi 3 onward works well), a motor driver board, motors, wheels, a power supply, and basic sensors to create your first functioning robot, with total costs starting around $80 to $150 for a complete beginner setup.
The Raspberry Pi excels in robotics because it runs a full Linux operating system, supports Python and other programming languages out of the box, and offers GPIO pins that connect directly to motors, sensors, and other hardware components. Unlike microcontrollers such as Arduino that handle low-level tasks exceptionally well, Raspberry Pi brings the processing power needed for computer vision, web connectivity, and complex decision-making algorithms while still controlling physical hardware in real time.
This combination opens remarkable possibilities. Students build line-following robots that use camera modules and OpenCV for image processing. Hobbyists create autonomous rovers that map rooms using ultrasonic sensors and save data to cloud services. Educators teach programming concepts through tangible, moving machines that respond to code changes instantly.
The learning curve is gentler than you might expect. If you’ve used a Raspberry Pi for any project before, you already understand the basics of connecting to it, running Python scripts, and working with the GPIO interface. Robotics adds motors and sensors to that foundation, but the principles remain straightforward: read sensor data, make decisions in code, and send signals to motors.
The real power emerges when you realize that your robot isn’t just a collection of motors and sensors. It’s a Linux computer that can simultaneously control movement, process camera feeds, respond to voice commands, log data to databases, and communicate over WiFi. That versatility makes Raspberry Pi robotics both an exceptional learning platform and a legitimate prototyping tool for more ambitious projects.
Why Raspberry Pi Powers Modern Educational Robotics
Raspberry Pi has become the backbone of educational robotics because it delivers genuine computing power at a price point schools and individuals can actually afford. A Raspberry Pi 4 or Pi 5 costs between $35 and $60, making it possible to equip an entire classroom with robotics hardware for the price of a single traditional robotics kit. This affordability extends beyond the board itself, compatible sensors, motors, and accessories are widely available from multiple suppliers, creating a competitive market that keeps costs low.
The platform’s flexibility sets it apart from purpose-built robotics controllers. Where dedicated systems lock users into specific components and workflows, Raspberry Pi runs a full Linux operating system that supports Python, Scratch, C++, and Java. Students can start with block-based visual programming in Scratch, transition to Python as they build confidence, then move to lower-level languages for performance-critical applications. This progression mirrors real-world software development, giving learners transferable skills rather than proprietary knowledge tied to a single vendor’s ecosystem.
GPIO pins provide the hardware bridge that makes robotics possible. These 40 general-purpose input/output pins let students control motors, read sensor data, and interface with servos using nothing more than jumper wires and basic electronic components. The learning curve here is gentle, beginners can make an LED blink with three lines of Python code, then apply the same principles to control wheels, arms, or grippers. For those interested in how this computing approach extends to other applications, this edge computing overview shows the broader capabilities of the platform.
The community support surrounding Raspberry Pi robotics is unmatched. Thousands of documented projects, troubleshooting forums, and tutorial videos mean students rarely get stuck for long. When a motor controller misbehaves or a sensor returns garbage data, someone has almost certainly solved that exact problem and shared the solution online. This collaborative knowledge base accelerates learning and reduces the frustration that kills interest in technical subjects.
Essential Components for Your Raspberry Pi Robot
Hardware Foundation
Starting a Raspberry Pi robot requires getting a few core hardware pieces right. The good news? Most components are affordable, widely available, and beginner-friendly. Here’s what you actually need.
Raspberry Pi Model Selection
Your choice of Raspberry Pi board shapes everything from processing power to physical size. The Raspberry Pi 4 (4GB or 8GB RAM) remains the workhorse for robotics projects in 2026, it delivers plenty of processing power for sensor integration, camera vision, and simultaneous motor control. The Raspberry Pi 5 offers faster performance and improved GPIO capabilities, making it ideal for advanced projects that demand real-time processing or multiple sensors running in parallel.
For smaller, lighter robots or projects with tight space constraints, the Raspberry Pi Zero 2 W provides surprising capability in a compact package. It handles basic robotics tasks well, motor control, simple sensors, basic vision, at a fraction of the cost and size. Just know that its single-core processor limits complex multitasking compared to the Pi 4 or 5.
Motor Controllers and Drivers
Motors need more current than Raspberry Pi GPIO pins can safely provide, which is where motor controllers come in. The L298N dual H-bridge module is the beginner standard, it controls two DC motors independently, handles direction and speed changes, and costs under ten dollars. Its main drawback is heat generation under heavy loads and relatively low efficiency.
The TB6612FNG offers a compact, more efficient alternative with better thermal performance. It handles the same two-motor control in less space and wastes less energy as heat, making it better suited for battery-powered robots that need extended runtime.
| Kit Name | Raspberry Pi Model | Key Components | Skill Level | Price Range |
|---|---|---|---|---|
| SunFounder Smart Robot Car Kit | Pi 4 (4GB) | L298N motor driver, ultrasonic sensor, camera mount, chassis | Beginner | $80-$110 |
| CanaKit Robotics Bundle | Pi 4 (8GB) | TB6612 driver, IR sensors, servo motors, power bank | Intermediate | $120-$150 |
| Adeept RaspTank | Pi 4 (4GB) or Pi 5 | Camera module, robotic arm, ultrasonic sensor, complete chassis | Intermediate | $140-$180 |
Power Solutions
Powering both your Raspberry Pi and motors requires planning. Most robots use rechargeable lithium-ion battery packs rated between 5000mAh and 10000mAh at 5V for the Pi itself. Motors typically run on separate 6V to 12V power, either from additional battery packs or through voltage regulation from a higher-voltage source.
Voltage regulators step down battery voltage to safe levels. A buck converter efficiently drops 12V to the 5V your Raspberry Pi needs, preventing damage from overvoltage while maximizing battery life. For sustainable outdoor projects, you can even power with solar panels during daylight operation.
Sensors for Robot Awareness
Sensors give your robot the ability to perceive and respond to its environment. Ultrasonic sensors (like the HC-SR04) measure distance using sound waves, perfect for obstacle detection up to about four meters. They’re cheap, reliable, and easy to code.
Infrared sensors detect objects at close range and work well for line-following robots or edge detection to prevent falls. Camera modules transform your robot into a vision-capable system that can recognize objects, track colors, or navigate using visual landmarks.
Chassis and Frame Options
The physical foundation matters more than beginners realize. Acrylic or plastic chassis kits provide lightweight, pre-cut platforms with motor mounts already positioned correctly. Metal chassis offer durability for outdoor use or rougher handling but add weight that demands more powerful motors and larger batteries.
Many first-time builders choose two-wheel-drive platforms with a caster wheel for balance, they’re simple to assemble and control. Four-wheel-drive systems provide better traction and obstacle climbing but require synchronized motor control.
Software and Programming Tools
The software foundation for Raspberry Pi robotics begins with Raspberry Pi OS (formerly Raspbian), a Debian-based operating system optimized for the platform. It comes pre-installed with many robotics-friendly tools and provides the stable environment your robot needs to run reliably.
For programming, Python stands out as the ideal starting language. It’s beginner-friendly yet powerful enough for complex robotics applications. The GPIO Zero library simplifies hardware interaction dramatically, you can control motors and read sensors with just a few lines of intuitive code. For absolute beginners, especially younger learners, Scratch offers a visual, block-based programming interface that teaches fundamental logic without syntax hurdles.
Advanced users can leverage C++ for performance-critical applications where millisecond response times matter, though Python handles the vast majority of educational robotics projects perfectly well.
The Robot Operating System (ROS)despite its name, isn’t actually an operating system but rather a sophisticated robotics framework. ROS excels at coordinating complex multi-component robots, managing sensor fusion, and implementing advanced navigation algorithms. It’s overkill for simple projects but becomes valuable as you tackle autonomous navigation, computer vision integration, or multi-robot coordination.
Essential Python libraries beyond GPIO Zero include RPi.GPIO for lower-level pin control, OpenCV for camera-based vision projects, picamera for Raspberry Pi Camera Module integration, and NumPy for sensor data processing. The gpiozero documentation includes pre-written recipes for common robotics scenarios, obstacle avoidance, line following, and motor control, that you can adapt rather than building from scratch.
Start with Raspberry Pi OS and Python with GPIO Zero. You can always add complexity as your projects demand it.
Building Your First Raspberry Pi Robot: A Beginner Project
Assembly and Wiring
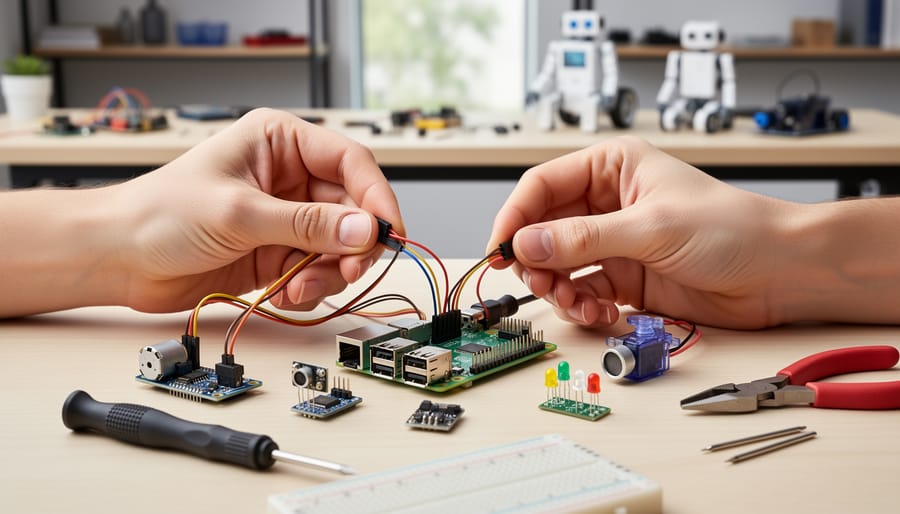
Start by gathering your workspace, you’ll need a clean, flat surface with good lighting and your components laid out where you can see them. Before touching anything electrical, power off your Raspberry Pi and disconnect it from any power source. This seems obvious, but it’s the most important safety step you’ll take.
The motor controller acts as the bridge between your Raspberry Pi’s brain and the motors’ muscle. Most beginner projects use an L298N dual motor driver because it handles the higher current motors need while accepting the low-voltage signals from the Pi’s GPIO pins. Think of it like a translator: your Pi speaks in gentle 3.3V whispers, but motors need commanding 5-12V shouts to move.
- Mount the Raspberry Pi securely to your robot chassis using standoffs or the mounting holes built into most kits. Keep it accessible, you’ll need to reach the GPIO pins and possibly swap SD cards during testing.
- Position the L298N motor controller near the motors but away from the Pi to minimize electrical interference. Secure it with double-sided tape or screws if your chassis has mounting points.
- Connect your motors to the motor controller’s output terminals (OUT1, OUT2 for the left motor; OUT3, OUT4 for the right motor). The polarity doesn’t matter yet, if a motor spins backward later, you’ll just swap these two wires.
- Wire the power supply to the motor controller first. Connect your battery pack’s positive lead to the controller’s +12V input and negative to GND. Most L298N boards have a jumper near the power input, leave it in place if you’re using 7-12V, remove it if using lower voltage and powering the Pi separately.
- Connect the motor controller to your Pi’s GPIO pins using female-to-female jumper wires. For the L298N, you’ll typically use: IN1 to GPIO 17, IN2 to GPIO 18, IN3 to GPIO 27, and IN4 to GPIO 22. Connect one of the controller’s GND pins to a Pi GND pin (pin 6 or 9 works well).
- Mount the ultrasonic sensor (HC-SR04) at the front of your chassis, facing forward with nothing blocking its “eyes”, the two circular transducers need a clear view. Connect VCC to Pi pin 2 (5V), GND to pin 6, Trig to GPIO 23, and Echo to GPIO 24. The Echo pin technically needs a voltage divider to step down from 5V to 3.3V, but many builders skip this for quick prototypes, just know you’re operating outside spec.
- Add a separate power connection for the Pi if your motor controller doesn’t provide regulated 5V output, or use a USB power bank connected to the Pi’s USB-C port. Never power the Pi directly from an unregulated battery, voltage spikes will corrupt your SD card or worse.
- Double-check every connection against your diagram before applying power. Look for loose wires, verify no bare wire strands are touching adjacent pins, and confirm positive and negative leads go to their correct terminals.
Once everything’s connected, power up just the Pi first (not the motors) to test your sensor readings. This staged approach helps isolate problems, if something’s wrong, you’ll know whether it’s the logic circuit or the power circuit. Keep your expectations realistic for this first assembly: a few backward-spinning motors or misread sensors are normal, not failures. That’s what the testing phase fixes.
Programming Robot Behavior
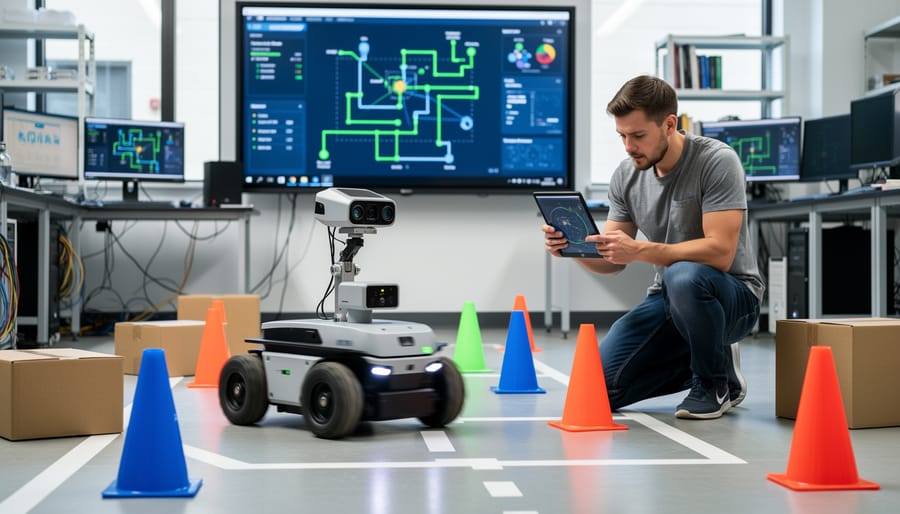
With your robot assembled, it’s time to bring it to life with code. Python offers the most beginner-friendly approach for programming Raspberry Pi robots, combining readable syntax with powerful GPIO control.
Start by installing the `gpiozero` library if you haven’t already: `sudo apt-get install python3-gpiozero`. This library simplifies hardware interaction, making your code cleaner and easier to understand.
Here’s a basic obstacle-avoidance program:
“`python
from gpiozero import Motor, DistanceSensor
from time import sleep
motor_left = Motor(forward=17, backward=18)
motor_right = Motor(forward=22, backward=23)
sensor = DistanceSensor(echo=24, trigger=25)
while True:
distance = sensor.distance * 100 # Convert to centimeters
if distance > 20:
motor_left.forward()
motor_right.forward()
else:
motor_left.backward()
motor_right.forward()
sleep(0.5)
sleep(0.1) # Small delay for stability
“`
Let’s break this down. The first three lines import necessary modules. The initialization block creates objects for your motors and ultrasonic sensor, matching the GPIO pins from your wiring. The `while True` loop runs continuously, checking sensor readings and making decisions.
The decision logic is straightforward: when the sensor reports more than 20 centimeters of clearance, both motors drive forward. When an obstacle appears closer, the left motor reverses while the right continues forward, creating a turn. This simple if-else structure demonstrates how robots make autonomous decisions based on sensor input.
The processing principles here scale beyond basic robots to more complex applications like edge computing with Pi where real-time sensor analysis drives immediate actions.
Try adjusting the distance threshold or turn duration to change behavior. Add `print(distance)` inside the loop to watch sensor values in real time. This experimentation builds intuition about how code translates to physical movement and prepares you for more sophisticated programming challenges ahead.
Testing and Troubleshooting
After uploading your code, test the robot on a flat surface with clear obstacles. If motors don’t spin, verify your GPIO pin assignments match the code and check all wire connections are secure. Inconsistent sensor readings usually indicate loose connections or incorrect power supply. If the robot behaves erratically, your battery voltage may be too low, rechargeable packs should stay above 7V for reliable performance.
Each problem you solve teaches you more about how robots work. Try adjusting sensor thresholds, motor speeds, and detection distances to see how behavior changes. This trial-and-error process builds troubleshooting skills that transfer to every future robotics project.
Advanced Raspberry Pi Robotics Projects
Once you’ve mastered the fundamentals with an obstacle-avoiding robot, you’re ready to tackle projects that introduce computer vision, precise control systems, and more sophisticated programming patterns. These advanced builds teach professional robotics concepts while remaining accessible to dedicated hobbyists.
Line-Following Robots with PID Control
Line-following robots use infrared sensors to detect and track a path marked on the floor. While the basic concept sounds simple, implementing smooth, fast tracking requires learning PID (Proportional-Integral-Derivative) control algorithms. You’ll mount three to five IR sensors beneath your robot chassis to read reflected light from black tape on a white surface. The challenge lies in writing code that adjusts motor speeds proportionally to how far off-track the robot drifts. This project teaches closed-loop control systems, a fundamental robotics concept used in everything from drones to industrial automation. Expect to spend time tuning PID constants through trial and error. Complexity: Moderate. Key learning: Control theory fundamentals and sensor array processing.
Camera-Based Vision Systems
Adding the Raspberry Pi Camera Module or a USB webcam unlocks computer vision capabilities. Start with colour detection to create a robot that follows a coloured ball or sorts objects by hue using OpenCV libraries. Progress to face detection, QR code reading, or even object recognition using TensorFlow Lite. Vision processing demands significant computational resources, so you’ll need a Pi 4 or Pi 5 with adequate cooling to run ML safely. These projects reveal how robots perceive their environment and make decisions based on visual input. Complexity: High. Key learning: Image processing pipelines, machine learning inference, and real-time decision-making.
Remote-Controlled Rovers
Build a rover you can pilot from your phone or laptop using Wi-Fi or Bluetooth connectivity. Implement a web interface with Flask or use joystick input through pygame libraries. Add a camera feed for first-person view driving, GPS for outdoor navigation, or log sensor data to track routes. This project teaches network communication, user interface design, and how to structure code that handles multiple inputs simultaneously. Complexity: Moderate to High. Key learning: Wireless protocols, web development for robotics interfaces, and concurrent programming.
Robotic Arms with Inverse Kinematics
Multi-jointed robotic arms controlled by servo motors introduce mechanical complexity and advanced mathematics. You’ll position servos to create shoulder, elbow, and wrist joints, then write inverse kinematics code that calculates the angles needed for the gripper to reach a specific coordinate in 3D space. Add position feedback for precision or integrate vision systems to pick and place objects autonomously. Complexity: High. Key learning: Trigonometry in robotics, servo control, and mechanical design principles.
Raspberry Pi Robotics in the Classroom
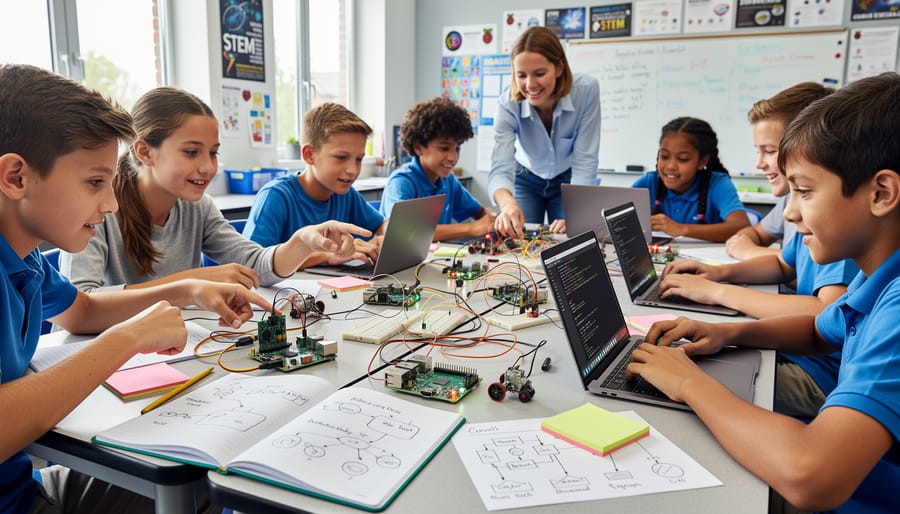
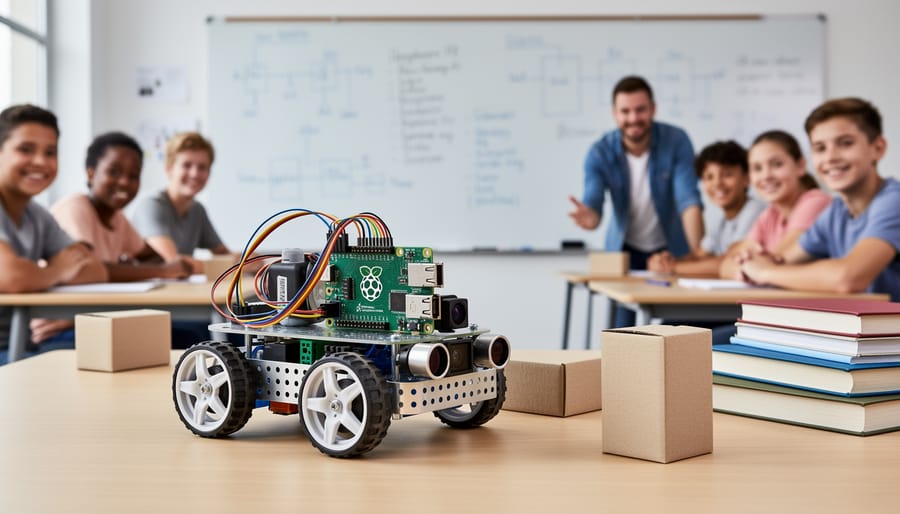
Teachers across grade levels have discovered that Raspberry Pi robotics transforms abstract STEM concepts into tangible learning experiences. The platform’s combination of hands-on building and real programming makes it particularly effective for engaging students who struggle with traditional textbook approaches.
In elementary classrooms, educators typically start with pre-assembled robot kits paired with Scratch visual programming. Students learn sequencing, loops, and conditional logic by making robots navigate mazes or respond to obstacles. These simplified projects introduce computational thinking without overwhelming young learners with syntax. Teachers often structure lessons around design challenges where groups of three to four students collaborate to solve problems like “make the robot follow a path” or “avoid obstacles in a cluttered area.”
Middle school curricula transition to Python programming with more complex builds. Students construct their own chassis, wire components themselves, and write code that controls multiple sensors simultaneously. Lesson plans at this level integrate mathematics (calculating motor speeds, sensor distances), physics (friction, momentum, gear ratios), and engineering design cycles. Assessment typically combines technical execution (does the robot work?), code quality (is it readable and efficient?), and teamwork documentation through engineering notebooks.
High school and university programs push into advanced territories like computer vision, machine learning integration, and autonomous navigation systems. Students might program robots to recognize objects using camera modules, implement PID control for precision movement, or develop swarm robotics behaviors. These projects mirror real-world engineering challenges and often extend across entire semesters.
Many educators structure curriculum around progressive complexity. A class might begin with basic movement control, advance through sensor integration, and culminate in open-ended capstone projects where students design solutions to self-defined problems. This progression builds both technical skills and creative confidence, showing students how the same foundation applies to everything from smart hub projects to maker projects ideas across domains.
Competitions provide external motivation and real deadlines. Programs like FIRST Robotics, RoboCup Junior, and regional maker fairs give students opportunities to showcase their work beyond classroom walls. Teachers report that competition preparation dramatically increases student engagement and problem-solving persistence, as teams work through challenges with genuine stakes attached.
Common Questions About Raspberry Pi Robotics
Do I need programming experience to start with Raspberry Pi robotics?
No prior experience is required. Visual programming tools like Scratch let complete beginners control robots through drag-and-drop blocks, while Python’s simple syntax makes text-based coding accessible within a few hours of learning. Most educational robot projects include annotated code you can copy and modify as you learn.
Which Raspberry Pi model works best for robotics projects?
The Raspberry Pi 4 (2GB or 4GB RAM) offers the best balance of processing power, GPIO pins, and affordability for most robot projects. For smaller, lighter robots where space matters, the Pi Zero 2 W provides adequate performance at lower weight and cost, though setup requires more technical knowledge.
Can kids build robots with Raspberry Pi?
Children as young as eight can successfully build basic Raspberry Pi robots with adult guidance, particularly when using pre-built kits and Scratch programming. Teenagers typically work independently on standard projects, while younger students benefit from collaborative classroom environments where they tackle one component at a time.
How much does it cost to build your first robot?
A basic obstacle-avoiding robot costs $80-120, including the Raspberry Pi board, motor controller, chassis kit, sensors, and battery pack. This initial investment covers components you’ll reuse across multiple projects, making subsequent robots significantly cheaper as you only need to purchase new sensors or specialty parts.
The learning curve surprises most beginners in a positive way. You can assemble and program a simple moving robot in an afternoon, though understanding why the code works takes a few sessions of tinkering and modification. The progression feels natural: your first robot teaches basic motor control and sensor reading, which then becomes the foundation for adding complexity one feature at a time. Unlike abstract programming exercises, robotics provides immediate visual feedback when something works or breaks, which accelerates learning through experimentation.
Raspberry Pi’s widespread adoption in education means you’re never stuck alone with a problem. Forums like the Raspberry Pi subreddit and dedicated Discord channels connect you with thousands of hobbyists and educators who’ve encountered the same wiring mistakes, code errors, and hardware quirks. Most questions get answered within hours, often with photos or video demonstrations. This community support transforms frustrating obstacles into brief learning moments rather than project-ending roadblocks.
Raspberry Pi has transformed robotics education from an expensive, specialized pursuit into an accessible hands-on learning opportunity for anyone with curiosity and determination. The combination of a £50 computer, affordable motors and sensors, and free programming tools means you can build a functioning robot for less than the cost of many educational kits, while gaining deeper understanding of how robotics actually works.
What makes this platform special isn’t just the low cost. It’s the way building and programming your own robot creates genuine understanding. When you wire a motor controller, write the code to read a sensor, and watch your creation navigate around obstacles, you’re not memorizing theory. You’re experiencing the cause-and-effect relationships that make robotics work. Each troubleshooting session teaches you more than a textbook chapter ever could.
The beauty of starting simple is that your first project becomes the foundation for everything that follows. The obstacle-avoiding robot you build today teaches you GPIO control, sensor integration, and basic algorithms. Those same skills scale up to line-following robots, camera vision systems, and beyond. Every addition to your robot is a new learning opportunity.
The hardest step is always the first one. Gather your components, follow the beginner project guide, and accept that mistakes are part of the process. Your first robot doesn’t need to be perfect, it just needs to move. Start building today, and you’ll be surprised how quickly you progress from basic movement to sophisticated autonomous behaviors.