


Transform your Raspberry Pi into a specialized powerhouse by building a custom operating system tailored to your exact specifications. While mastering the Raspberry Pi basics is essential, creating your own OS opens up unprecedented control over hardware resources, boot processes, and system behavior. Whether you’re developing an automated industrial controller, a specialized media center, or a secure IoT gateway, a custom OS eliminates bloatware, optimizes performance, and provides complete control over every system component.
Modern build tools like Yocto Project and Buildroot have simplified the once-daunting process of OS customization, making it accessible to developers of all skill levels. By carefully selecting only the required components, your custom OS can boot in seconds, consume minimal resources, and deliver maximum performance for your specific use case. This level of customization isn’t just about efficiency—it’s about creating purpose-built solutions that perfectly match your project requirements.
Imagine running your Raspberry Pi with an operating system that contains exactly what you need and nothing more. From real-time processing capabilities to specialized driver support, every aspect can be fine-tuned to create an optimal environment for your applications. Let’s explore how to turn this possibility into reality.
Why Build a Custom Raspberry Pi OS?
Performance Optimization
Custom operating systems offer significant opportunities to optimize Raspberry Pi performance through targeted system modifications. By removing unnecessary services and packages, a custom build can reduce memory usage and CPU overhead, resulting in faster boot times and improved overall responsiveness. Users can fine-tune kernel parameters specifically for their hardware configuration and use case, whether it’s for a media center, network storage, or IoT device.
Key optimization techniques include implementing lightweight init systems, configuring appropriate CPU governors, and optimizing filesystem parameters. Custom builds also allow for the integration of specialized drivers and modules compiled specifically for the target hardware, eliminating the bloat of generic distributions.
Memory management can be significantly improved by adjusting swap settings and implementing appropriate caching strategies. Users can also choose lightweight alternatives to common system services, such as replacing systemd with lighter init systems when full system management capabilities aren’t required. These optimizations can lead to performance improvements of up to 30% in specific use cases, making custom OS builds particularly valuable for resource-intensive applications.

Resource Management
Resource management is crucial when developing a custom OS for your Raspberry Pi, as it directly impacts performance and functionality. By carefully allocating system resources, you can optimize your OS for specific project requirements while ensuring smooth operation.
Start by determining your project’s memory requirements. For lightweight applications, consider reducing the default memory allocation for system processes and redirecting resources to your primary applications. The Raspberry Pi’s limited RAM makes efficient memory management essential, especially for resource-intensive projects.
CPU scheduling can be customized to prioritize specific tasks. For real-time applications, implement appropriate scheduling policies and adjust process priorities. This ensures critical processes receive necessary computing power when needed.
Storage management should focus on efficient file system organization and strategic use of swap space. Consider using lightweight file systems like ext2 for better performance on SD cards, or implement a custom storage hierarchy based on your project’s needs.
Power management features can be tailored to extend battery life for portable projects or optimize performance for stationary applications. Implement selective CPU frequency scaling and peripheral power controls to achieve the right balance between performance and power consumption.
Essential Tools and Prerequisites
Development Environment Setup
Before diving into building a custom OS for your Raspberry Pi, you’ll need to set up a proper development environment. Start with a Linux development setup, as it provides the most stable and compatible environment for cross-compilation and system development.
Essential tools you’ll need to install include:
– Cross-compiler toolchain for ARM architecture
– Build essentials package
– Git for version control
– Text editor or IDE of your choice
– Qemu for testing and emulation
Begin by updating your system packages and installing the required dependencies. For Ubuntu or Debian-based systems, use:
“`bash
sudo apt-get update
sudo apt-get install build-essential git libncurses5-dev bc bison flex libssl-dev
“`
Next, install the cross-compiler toolchain for ARM architecture. This is crucial as it allows you to compile code on your development machine that will run on the Raspberry Pi’s ARM processor.
Create a dedicated workspace directory for your project to keep things organized. This will house your source code, build files, and final output. Remember to maintain a clear directory structure as your project grows.
Consider setting up version control from the start – it’s invaluable for tracking changes and collaborating with others. Initialize a Git repository in your workspace to begin tracking your development progress.
Required Dependencies
Before starting the build process for your custom Raspberry Pi OS, you’ll need to gather several essential dependencies. First, ensure you have a Linux-based development system (Ubuntu or Debian recommended) with at least 30GB of free disk space and 4GB of RAM.
Install these base packages using your package manager:
– build-essential (for compilation tools)
– git (for source code management)
– bison and flex (for parsing)
– libncurses5-dev (for menuconfig interface)
– crossbuild-essential-arm64 (for cross-compilation)
– bc (for kernel calculations)
– qemu-user-static (for testing)
You’ll also need specific Raspberry Pi tools:
– The Raspberry Pi firmware files
– Bootloader components
– Device tree compiler
– ARM cross-compiler toolchain
For creating the root filesystem, install:
– debootstrap (for minimal Debian system)
– dosfstools (for FAT partition handling)
– parted (for partition management)
– rsync (for file synchronization)
Make sure to configure your development environment with appropriate paths and permissions. Keep your build tools updated to their latest stable versions to avoid compatibility issues. Having these dependencies properly set up will ensure a smooth build process and help prevent common errors during OS development.
Building Your Custom OS
Kernel Configuration
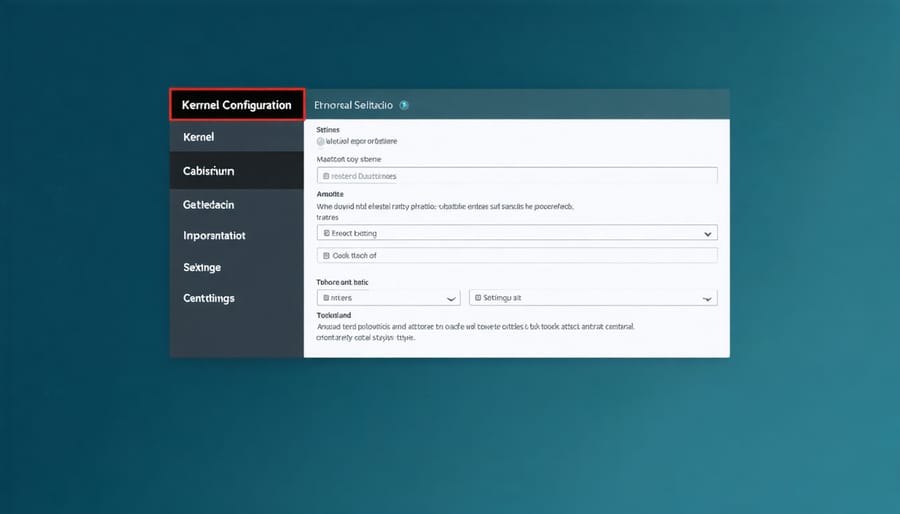
Configuring the kernel is a crucial step in creating a custom OS for your Raspberry Pi. Through Linux kernel customization, you can optimize performance, reduce boot time, and ensure your system only includes the features you need.
Start by downloading the Raspberry Pi kernel source code from the official repository. Once downloaded, navigate to the kernel configuration interface using the command:
make ARCH=arm menuconfig
This opens an interactive menu where you can customize various kernel options. Key areas to focus on include:
1. Device Drivers: Select only the drivers necessary for your hardware components
2. File Systems: Choose support for file systems you’ll actually use
3. Networking: Enable only required networking protocols
4. System Type: Configure Raspberry Pi-specific settings
For most custom OS projects, you’ll want to disable unnecessary features like legacy hardware support, debugging options, and unused network protocols. This helps reduce kernel size and improve boot times.
Some recommended optimizations include:
– Enabling GPIO support for hardware interfacing
– Configuring CPU frequency scaling for power management
– Setting up appropriate USB device support
– Including relevant networking protocols
After making your selections, save the configuration and compile the kernel using:
make ARCH=arm CROSS_COMPILE=arm-linux-gnueabihf-
The compilation process may take 30-60 minutes depending on your configuration choices and computer specifications. Once complete, you’ll have a custom kernel tailored to your specific needs.
Remember to thoroughly test your customized kernel before deployment, as removing essential features can lead to system instability. It’s recommended to maintain a backup of your working configuration file for future reference.
Package Selection
Package selection is a crucial step in creating your custom Raspberry Pi OS, as it determines the functionality and performance of your final system. Start by identifying the essential packages needed for your specific use case. The base system typically requires core utilities like systemd, networking tools, and basic command-line interfaces.
For a minimal system, consider including only essential packages such as bash, coreutils, and apt for package management. If you’re building a media center, add packages like VLC or Kodi. For development environments, include build tools, compilers, and relevant programming languages.
Use package management tools to handle dependencies efficiently. The apt package manager allows you to create a list of required packages in a text file, which can be used to automate the installation process. Consider using tools like aptitude or dpkg –get-selections to generate a comprehensive package list from an existing system.
Be mindful of storage constraints when selecting packages. The Raspberry Pi’s SD card has limited space, so prioritize packages that serve your primary purpose. Remove unnecessary documentation, language packs, and optional dependencies to optimize storage usage.
Configure package repositories carefully to ensure system stability. Stick to official repositories when possible, and only add third-party sources when absolutely necessary. Create a custom package configuration file to specify installation preferences and prevent unwanted packages from being installed automatically.
Remember to include any hardware-specific packages required for your Raspberry Pi model, such as firmware updates and GPIO libraries. Document your package selection process to make future updates and modifications easier.
System Integration
After developing individual components of your custom Raspberry Pi OS, the integration phase brings everything together into a cohesive system. Start by combining your bootloader with the kernel image, ensuring all dependencies are properly linked. Create a master build script that automates the compilation and linking process, making future updates more manageable.
Next, integrate your custom drivers and system services into the main OS image. Use a tool like buildroot or Yocto to manage dependencies and create a consistent build environment. Pay special attention to the initialization sequence, ensuring services start in the correct order and handle dependencies appropriately.
Configure your system’s root filesystem by organizing essential directories, system libraries, and configuration files. Include only the necessary components to keep the OS lightweight and efficient. Implement your custom user interface or system controls, ensuring they interact correctly with the underlying system components.
Test the integrated system thoroughly, checking for boot times, memory usage, and system stability. Common integration issues include missing dependencies, incorrect file permissions, and initialization conflicts. Use debugging tools like strace or gdb to identify and resolve any integration problems.
Finally, package your custom OS into a bootable image file. Create documentation detailing the system architecture, component interactions, and any special configuration requirements. Consider implementing an update mechanism to facilitate future system modifications and security patches.
Remember to maintain version control throughout the integration process, tracking changes and maintaining the ability to roll back if necessary. Regular testing of the complete system ensures all components work together as intended, providing the specialized functionality your project requires.
Testing and Optimization
Performance Testing
Performance testing is crucial for ensuring your custom Raspberry Pi OS operates efficiently and meets your project requirements. Several tools and techniques can help you evaluate system performance systematically.
Start with basic benchmarking tools like sysbench for CPU and memory testing, and hdparm for storage performance analysis. These tools provide baseline metrics that you can use to compare against standard Raspberry Pi OS distributions or track improvements in your custom build.
For real-time monitoring, htop offers an interactive view of system resources, while iotop focuses specifically on disk I/O operations. These tools are particularly useful during stress testing and optimization phases.
When testing network performance, iperf3 is invaluable for measuring bandwidth and latency. For graphics performance, especially important for GUI-based systems, glxgears and mesa-utils provide basic benchmarking capabilities.
Consider creating automated test scripts using shell commands or Python to ensure consistent testing across different versions of your OS. Include tests for:
– Boot time measurement
– Memory usage and management
– File system performance
– Network throughput
– Temperature monitoring
– Power consumption
Document all test results methodically, noting hardware configurations and environmental conditions. This helps track performance improvements and identify potential bottlenecks.
Remember to test your OS under various load conditions, simulating real-world usage scenarios. Tools like stress-ng can help create artificial load for stability testing. Monitor the system’s temperature during these tests using vcgencmd, as thermal throttling can significantly impact performance.
For comprehensive analysis, combine multiple testing tools and create a standardized testing protocol that you can repeatedly use throughout your development process.

Debugging and Troubleshooting
When developing a custom OS for your Raspberry Pi, you’re likely to encounter various challenges. Understanding common Raspberry Pi issues and their solutions can save you considerable time and frustration during development.
One frequent issue is boot failure after implementing custom kernel modifications. If this occurs, verify your kernel configuration file for any misconfigurations, particularly in the device tree settings. Sometimes, simply reverting to the last working configuration and making incremental changes can help identify the problem.
Network connectivity problems often arise when customizing network stack components. Double-check your network interface configurations and ensure all necessary drivers are included in your kernel build. If SSH access fails, verify that the SSH service is enabled in your custom build and the correct ports are open.
Package dependencies can also cause headaches during the build process. Maintain a clean build environment and document all dependencies in your build scripts. If you encounter “missing package” errors, check your package repositories and ensure they’re properly configured in your build system.
File system corruption is another common challenge. Always implement proper shutdown procedures in your custom OS and consider using a journaling file system. Keep backup copies of your working configurations and maintain a recovery partition with a stable OS version.
For debugging, utilize the serial console output and system logs. Adding debug prints to your custom components can help trace issues, but remember to remove them in production builds. When all else fails, the Raspberry Pi community forums are an invaluable resource for troubleshooting specific issues.
Creating a custom OS for your Raspberry Pi opens up a world of possibilities for specialized projects and unique applications. Throughout this guide, we’ve explored the essential steps and considerations for building your own operating system, from understanding the basic requirements to implementing advanced features and optimizations.
Remember that successful custom OS development requires careful planning, attention to detail, and systematic testing. Start with a clear project goal, choose the right build tools and frameworks, and maintain proper documentation throughout the development process. Whether you’re creating a dedicated media center, an IoT hub, or a specialized development environment, the principles we’ve covered will help you achieve your objectives.
For those ready to begin their custom OS journey, we recommend starting with a small-scale project to build familiarity with the development process. Experiment with existing distributions as a base, gradually implementing customizations as you become more comfortable with the tools and concepts. Join the Raspberry Pi community forums and development groups to share experiences and learn from others working on similar projects.
Don’t forget to regularly back up your work and maintain version control of your custom OS. As you progress, consider contributing your knowledge and improvements back to the community, helping others learn and grow in their projects.
The world of custom OS development for Raspberry Pi is constantly evolving, with new tools and possibilities emerging regularly. Stay curious, keep learning, and don’t hesitate to push the boundaries of what’s possible with your Raspberry Pi.