


Connect your Raspberry Pi to your computer through SSH by enabling SSH in the Raspberry Pi Configuration menu, finding your Pi’s IP address using your router’s admin panel or a network scanner, then opening a terminal and typing “ssh pi@[IP-ADDRESS]” to establish a remote command-line connection. This method works perfectly when both devices share the same network and you need quick access without a monitor.
Set up a direct Ethernet connection by linking your Pi and computer with a single cable, configuring your computer’s Ethernet adapter to share internet connection, then accessing your Pi at the default link-local address 169.254.x.x or using the hostname “raspberrypi.local” – ideal for headless setups where WiFi isn’t available or when you need a stable, isolated connection for sensitive projects.
Enable VNC for full desktop access by installing RealVNC Server on your Pi, activating it through raspi-config, then downloading VNC Viewer on your computer to control your Pi’s graphical interface remotely – particularly useful for beginners who prefer visual navigation or when running GUI-based applications and educational projects.
Configure USB gadget mode on Pi Zero models by editing boot files to enable ethernet-over-USB, allowing you to power and connect your Pi through a single USB cable to your computer – the most compact solution for portable projects and development work where space and power sources are limited.
Each connection method serves distinct scenarios, from classroom demonstrations requiring visual interfaces to embedded projects needing minimal hardware footprint. Understanding which approach matches your specific use case ensures efficient setup and optimal performance for your Raspberry Pi projects.
Understanding Your Connectivity Options

Direct vs. Network Connections
When connecting your Raspberry Pi to a computer, you’ll choose between two main approaches: direct physical connections or network-based methods. Each has distinct advantages depending on your project needs and setup constraints.
Direct physical connections include USB cables and HDMI output paired with keyboard and mouse. The USB connection method, particularly using USB gadget mode on Pi Zero models, creates a simple plug-and-play experience. You’ll get immediate access without network configuration, making it ideal for initial setup or portable projects. HDMI connections let you use the Pi like a traditional desktop computer, providing the most intuitive experience for beginners. However, direct connections limit mobility and require dedicated peripherals or available ports on your host computer.
Network-based connections operate through SSH for command-line access, VNC for graphical remote desktop, or RDP as an alternative remote desktop protocol. These methods offer flexibility since you can access your Pi from anywhere on your network without physical proximity. SSH provides lightweight, secure terminal access perfect for headless server projects, while VNC and RDP deliver full desktop experiences through your computer’s screen. Network connections consume minimal resources and allow multiple simultaneous connections.
The trade-off? Network methods require initial configuration, working WiFi or Ethernet, and basic networking knowledge. They also introduce slight latency compared to direct HDMI output. For first-time setup, direct connections typically prove easier. Once configured, network-based access offers superior convenience for ongoing projects, especially when running your Pi headless or accessing it remotely from different locations around your home or workspace.
Headless vs. Desktop Setups
When connecting your Raspberry Pi to a computer, one of your first decisions is choosing between a headless or desktop setup. This choice significantly impacts how you’ll establish and manage the connection.
A headless setup means running your Raspberry Pi without a dedicated monitor, keyboard, or mouse attached directly to it. Instead, you control everything remotely through your main computer using methods like SSH for command-line access or VNC for a graphical interface. This approach is popular among experienced users and those working on space-constrained projects like home servers, IoT devices, or automated systems. The main advantage is convenience – once configured, you can manage your Pi from anywhere on your network without additional peripherals cluttering your workspace.
A desktop setup involves connecting a monitor, keyboard, and mouse directly to your Raspberry Pi, treating it like a standalone computer. This approach is beginner-friendly since you can see exactly what’s happening in real-time without network configuration complexity. It’s ideal for learning, troubleshooting connection issues, or running desktop applications.
Your choice determines your connectivity approach: headless setups require initial network configuration and remote access tools, while desktop setups allow direct physical interaction but need extra hardware. Many users start with a desktop configuration for initial setup, then switch to headless operation once everything works smoothly.
Method 1: SSH Connection for Command-Line Control
Enabling SSH on Your Raspberry Pi
SSH (Secure Shell) lets you control your Raspberry Pi remotely from your computer using command-line access. Before you can establish an SSH connection, you need to enable it on your Pi. There are two straightforward methods to accomplish this.
If you already have your Pi up and running with a monitor and keyboard attached, open the terminal and type “sudo raspi-config”. Navigate to “Interface Options,” select “SSH,” and choose “Yes” to enable it. After optimizing your Pi OS, this is often one of the first configuration steps you’ll want to complete.
For a headless setup where you don’t have a monitor connected, there’s an even simpler method. Before inserting the SD card into your Pi, place it in your computer’s card reader. Navigate to the boot partition (it should appear as a drive labeled “boot”). Create a new empty file named exactly “ssh” with no file extension. On Windows, you can do this through Notepad by saving an empty file and ensuring it’s named “ssh” without “.txt”. On Mac or Linux, open Terminal, navigate to the boot drive, and type “touch ssh”. When your Pi boots up, it will automatically detect this file and enable SSH, then delete the file.
Finding Your Pi’s IP Address
Before you can connect to your Raspberry Pi remotely, you need to know its IP address on your network. Let’s explore several methods to find it, from easiest to most technical.
The simplest approach is checking your router’s admin panel. Log into your router’s web interface (usually by typing 192.168.1.1 or 192.168.0.1 into your browser) and look for a list of connected devices. Your Pi will typically appear as “raspberrypi” or show its MAC address.
If you prefer a dedicated tool, network scanner applications work brilliantly. For Windows users, Advanced IP Scanner is free and user-friendly. Mac users can try LanScan, while Linux enthusiasts might prefer the command-line tool nmap. These scanners display all devices on your network with their IP addresses and hostnames.
For those with a spare monitor and keyboard, temporarily connecting them to your Pi provides direct access. Once booted, open the terminal and type “hostname -I” to display the IP address immediately.
Alternatively, if you enabled SSH during initial setup, try accessing your Pi using “raspberrypi.local” instead of an IP address. Many modern networks support this mDNS hostname resolution, making the connection process more straightforward without hunting for IP addresses.
Connecting via SSH Client
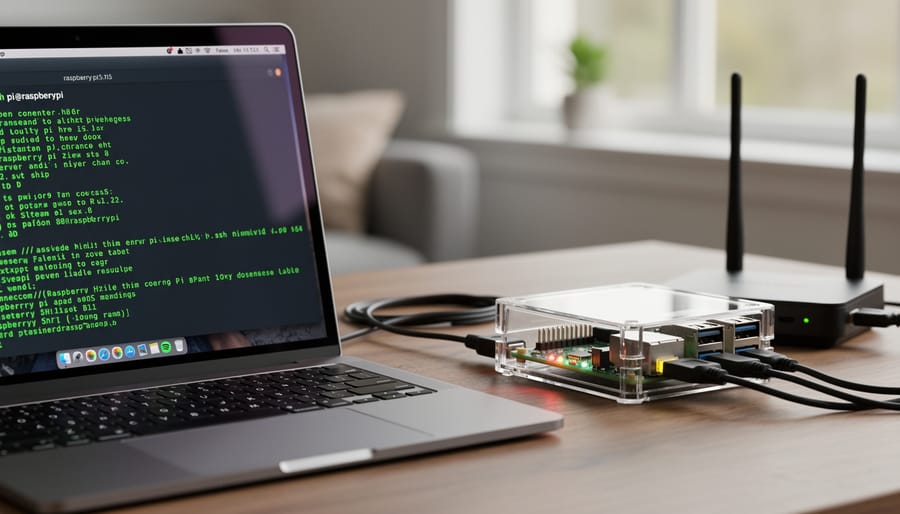
SSH (Secure Shell) provides a reliable way to control your Raspberry Pi remotely through a command-line interface. The setup process varies slightly depending on your computer’s operating system, but the core concepts remain the same.
For Windows users, PuTTY has long been the go-to SSH client. Download and install PuTTY, then launch it and enter your Pi’s IP address in the “Host Name” field. Ensure port 22 is selected and connection type is set to SSH. Click “Open” to initiate the connection. Windows 10 and 11 users can alternatively use the built-in Windows Terminal or Command Prompt by typing “ssh pi@[your-pi-ip-address]” directly.
macOS and Linux users have it simpler with native Terminal support. Open Terminal and type “ssh pi@[your-pi-ip-address]” replacing the bracketed text with your actual IP address. Press Enter to connect.
Regardless of your platform, you’ll be prompted for the username (default is “pi”) and password (default is “raspberry” on older installations, though newer versions require setup during initial boot). For security, change the default password immediately using the “passwd” command.
Common connection issues include incorrect IP addresses, SSH not being enabled on your Pi, or firewall blocking. If connection fails, verify SSH is enabled through the Raspberry Pi Configuration tool and double-check your network settings.
Method 2: VNC for Full Desktop Access
Installing and Configuring VNC Server
VNC (Virtual Network Computing) provides a graphical desktop experience for your Raspberry Pi, making it perfect for projects where you need visual feedback or GUI-based applications. Let’s walk through setting up a VNC server that starts automatically.
First, you’ll want to enable VNC through the Raspberry Pi Configuration tool. Open a terminal and type “sudo raspi-config”, then navigate to Interface Options and select VNC. Enable it and exit the tool. This installs and activates RealVNC Server, which comes pre-packaged with Raspberry Pi OS.
For those preferring TigerVNC, install it with “sudo apt install tigervnc-standalone-server tigervnc-common”. TigerVNC offers more customization options, though RealVNC works seamlessly out of the box for most users.
Now, configure your screen resolution to ensure proper display when connecting remotely. Run “sudo raspi-config” again, go to Display Options, then Resolution, and select your preferred setting. A resolution of 1920×1080 works well for most monitors.
To ensure VNC starts automatically on boot with RealVNC, the raspi-config enablement handles this automatically. For TigerVNC users, you’ll need to create a systemd service file. Create the file with “sudo nano /etc/systemd/system/vncserver@.service” and add the appropriate service configuration.
Test your connection by finding your Pi’s IP address using “hostname -I” and connecting from your computer using a VNC viewer application. You should see your Raspberry Pi desktop displayed remotely, ready for interaction.
Connecting with VNC Viewer
VNC (Virtual Network Computing) provides a visual desktop experience, making it perfect for users who prefer graphical interfaces over command-line access. Let’s get you connected!
First, download VNC Viewer on your computer. For Windows and macOS users, head to RealVNC’s website and grab the free version. Linux users can install it through their package manager – Ubuntu and Debian users can simply run “sudo apt install realvnc-vnc-viewer” in the terminal. The software is lightweight and installs in minutes.
Before connecting, ensure VNC is enabled on your Raspberry Pi. If you configured this during initial setup, you’re good to go. If not, access your Pi via SSH and run “sudo raspi-config,” navigate to Interface Options, and enable VNC. This step is crucial for the connection to work properly.
Launch VNC Viewer on your computer and enter your Raspberry Pi’s IP address in the connection bar at the top. You can find this IP address through your router’s admin panel or by checking your network configuration. Press Enter to initiate the connection.
A security warning may appear on first connection – this is normal. Click Continue to proceed. You’ll then see the authentication window requesting your Raspberry Pi username and password. Enter your credentials (default is username “pi” with your custom password) and check “Remember password” for convenience on trusted networks.
Success! You should now see your Raspberry Pi desktop displayed beautifully on your computer screen, ready for your next project.
Method 3: Direct Ethernet Connection
Setting Up Internet Connection Sharing
Once you’ve established a physical connection between your computer and Raspberry Pi, you’ll likely want to share your computer’s internet connection so your Pi can access the web for updates and downloads. This process varies depending on your operating system, but both Windows and macOS make it straightforward.
For Windows users, Internet Connection Sharing (ICS) is your go-to solution. Start by opening the Network Connections window through Control Panel or by searching “View network connections” in the Start menu. Right-click on the adapter that’s connected to the internet (typically your Wi-Fi or primary Ethernet connection), select Properties, then navigate to the Sharing tab. Check the box that says “Allow other network users to connect through this computer’s Internet connection” and select the connection to your Raspberry Pi from the dropdown menu. Click OK to apply the changes. Your Pi should now have internet access through your computer.
Mac users have an equally simple process. Open System Preferences and navigate to Sharing. In the list on the left, select Internet Sharing but don’t enable it yet. First, choose your internet source from the “Share your connection from” dropdown (usually Wi-Fi or Ethernet). Then, in the “To computers using” box below, check the connection method you’re using to connect to your Pi. Finally, enable Internet Sharing by checking the box next to it in the left panel. Confirm when prompted, and your Mac will begin routing internet traffic to your Raspberry Pi automatically.
Configuring Static IP Addresses
Setting up static IP addresses ensures your Raspberry Pi maintains the same network identity every time you connect, eliminating guesswork and connection headaches. This is especially valuable for direct Ethernet connections between your Pi and computer.
On your Raspberry Pi, edit the dhcpcd configuration file by typing `sudo nano /etc/dhcpcd.conf` in the terminal. Add these lines at the bottom, adjusting the IP to match your network setup:
“`
interface eth0
static ip_address=192.168.1.100/24
static routers=192.168.1.1
static domain_name_servers=192.168.1.1
“`
Save and reboot your Pi with `sudo reboot`.
On your computer, navigate to network settings and assign a static IP in the same subnet. For Windows, open Network Connections, right-click your Ethernet adapter, select Properties, then Internet Protocol Version 4. Set the IP to 192.168.1.101 with subnet mask 255.255.255.0.
Once configured, you can access your Pi using `ssh pi@192.168.1.100` from your computer’s terminal. This method works great alongside WiFi setup for Pi Zero projects where you need multiple connection options available simultaneously for maximum flexibility.
Method 4: USB Gadget Mode (Pi Zero/Zero 2 W)
Enabling USB Gadget Mode
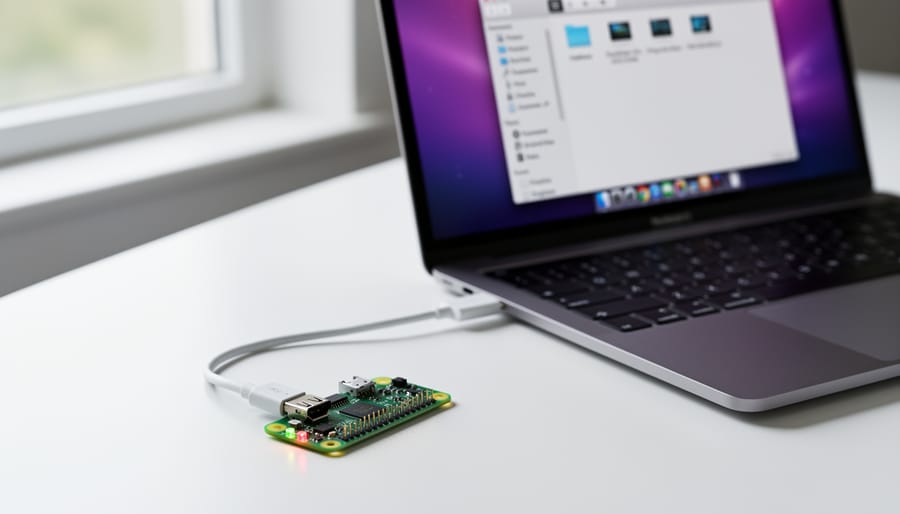
USB Gadget Mode transforms your Raspberry Pi into a virtual USB device, allowing direct connection to your computer with just a single USB cable. This method is particularly useful for headless setups where you don’t have access to a monitor or keyboard. It works with Raspberry Pi Zero, Zero W, Zero 2 W, and Pi 4 models.
To enable this feature, you’ll need to modify two configuration files on the boot partition of your SD card. Before powering on your Pi, insert the SD card into your computer. Open the config.txt file and add this line at the bottom: dtoverlay=dwc2. This enables the USB controller driver needed for OTG (On-The-Go) functionality.
Next, open cmdline.txt and locate the text that starts with rootwait. Immediately after rootwait, add a space followed by modules-load=dwc2,g_ether. Be careful not to create new lines, as everything must remain on a single line. This loads the Ethernet gadget driver, which creates a virtual network connection over USB.
Save both files, safely eject the SD card, and insert it back into your Raspberry Pi. When you connect your Pi to your computer using a USB data cable (not just a power cable), it will appear as a network device, ready for SSH access.
Connecting and Accessing Your Pi Zero
The Pi Zero’s USB gadget mode makes it incredibly easy to connect directly to your computer with just a micro USB cable. Start by enabling USB ethernet gadget mode on your Pi Zero. Edit the config.txt file on the boot partition by adding “dtoverlay=dwc2” on a new line at the end. Then open cmdline.txt and insert “modules-load=dwc2,g_ether” after “rootwait”, leaving a single space before and after.
Once configured, connect your Pi Zero to your computer using the data USB port, not the power-only port. Your computer should recognize it as a USB ethernet device. Windows users may need to install RNDIS drivers, which typically install automatically. Mac and Linux users usually have native support.
To access your Pi, open your terminal or command prompt and SSH into it using “ssh pi@raspberrypi.local” with the default password “raspberry”. For a graphical interface, install VNC Server on your Pi using “sudo apt install realvnc-vnc-server” and enable it through raspi-config. Download VNC Viewer on your computer and connect using the same hostname. This connection method is perfect for headless setups where you need quick, cable-only access without network infrastructure.
Personalizing Your Setup for Specific Use Cases
Setup for Portable Projects
When working on portable projects with your Raspberry Pi and laptop, you’ll want a streamlined setup that works reliably in the field without requiring external monitors or routers. The most efficient approach is establishing a direct Ethernet connection between your Pi and laptop, which creates a self-contained network that doesn’t depend on Wi-Fi availability.
For battery-powered projects, consider the power draw carefully. Your Pi will consume between 500mA to 1.2A depending on the model and workload. Using a quality USB power bank with at least 10,000mAh capacity gives you several hours of runtime. Many developers prefer powered USB hubs that can charge both the laptop and Pi simultaneously from a single outlet when available.
The USB gadget mode setup works exceptionally well for ultra-portable configurations, requiring only a single USB cable for both power and data transfer. This eliminates the need for separate Ethernet cables and power supplies, making your kit lighter and more compact.
Remember to enable SSH and VNC before heading into the field, as you won’t have access to external displays for troubleshooting. Save your connection profiles and IP configurations as presets to speed up deployment at each location.
Setup for Home Server Applications
When setting up your Raspberry Pi as a home server, Network Attached Storage (NAS), or media center, a reliable connection is essential for 24/7 operation. For these applications, a wired Ethernet connection is strongly recommended over WiFi, as it provides consistent speeds and eliminates potential wireless interference that could disrupt streaming or file transfers.
Start by connecting your Pi directly to your router using an Ethernet cable. This ensures your server remains accessible even if WiFi credentials change or the network resets. Configure a static IP address in your router’s DHCP settings to prevent your Pi’s address from changing, which would break remote connections and bookmarks.
Enable SSH access for command-line management and configure any necessary port forwarding if you plan to access your server from outside your home network. For media centers running Plex or Kodi, ensure your Pi has adequate power supply specifications, as underpowered units can cause connection drops during intensive streaming.
Consider setting up automated backups and monitoring tools to maintain server health. This stable configuration ensures your home server applications run smoothly with minimal maintenance required.
Setup for Education and Workshops
Managing multiple Raspberry Pis in a classroom setting requires thoughtful planning to ensure smooth connectivity for all students. The most effective approach involves creating a dedicated wireless access point that all Pis connect to, eliminating dependency on institutional networks that may have restrictive firewall settings or authentication requirements.
Configure a router specifically for your workshop space, establishing a local network where students can connect their laptops and Pis without internet complications. This controlled environment makes SSH and VNC connections straightforward and consistent. Use standardized hostnames like pi-station01, pi-station02, and so on to simplify addressing.
For initial setup, prepare all Raspberry Pis beforehand with SSH enabled and identical credentials documented on quick-reference cards. This preparation prevents troubleshooting bottlenecks during class time. Consider using Ethernet cables for the initial connection phase, then transition students to wireless once they’re comfortable with the basics.
Create a connection checklist that students follow step-by-step, covering network joining, IP address verification, and successful SSH login. Having pre-configured SD card images saves considerable setup time and ensures consistency across all devices, letting you focus on teaching rather than technical troubleshooting.
Enhancing Security for Your Connection
Connecting your Raspberry Pi to a computer opens up exciting possibilities, but it also creates potential security vulnerabilities if left unprotected. Let’s walk through essential practices to keep your connection secure without getting overwhelmed by complexity.
The first and most critical step is changing your Raspberry Pi’s default password immediately after setup. The default username “pi” with password “raspberry” is widely known, making your device an easy target. Use the command `passwd` in the terminal to set a strong, unique password combining letters, numbers, and special characters.
For SSH connections, upgrading to key-based authentication dramatically improves security over password-only access. Generate an SSH key pair on your computer using `ssh-keygen`, then copy the public key to your Pi with `ssh-copy-id pi@your_pi_ip_address`. Once configured, you can disable password authentication entirely by editing `/etc/ssh/sshd_config` and setting `PasswordAuthentication no`. This prevents brute force attacks since only devices with the correct private key can connect.
Next, configure your Pi’s built-in firewall using UFW (Uncomplicated Firewall). Install it with `sudo apt install ufw`, then enable it with `sudo ufw enable`. Allow only necessary connections by specifying ports, such as `sudo ufw allow 22/tcp` for SSH or `sudo ufw allow 5900/tcp` for VNC. This blocks unauthorized access attempts while keeping your intended services accessible.
Finally, keep your system updated regularly with `sudo apt update && sudo apt upgrade` to patch security vulnerabilities. Consider changing the default SSH port from 22 to a custom number to reduce automated attack attempts. These straightforward practices create multiple security layers, protecting your Raspberry Pi connection while maintaining convenient access for your projects.
Troubleshooting Common Connection Issues
Can’t Find Pi on Network
If your computer can’t detect your Raspberry Pi on the network, don’t worry—this is a common issue with straightforward solutions. Start by verifying your Pi is actually connected and powered on. Check that the activity LED flickers occasionally, indicating network activity.
First, confirm both devices are on the same network. Your Pi and computer must connect to the same router or switch. If you’re using separate WiFi bands (2.4GHz vs 5GHz), this can create isolation between devices. Try connecting both to the same band.
Next, check for IP conflicts. If another device already uses the IP address assigned to your Pi, discovery will fail. Restart your router to refresh DHCP assignments, then reboot your Pi. Wait a full minute after powering on before attempting connection again.
If discovery still fails, access your router’s admin panel through a web browser. Look for the connected devices list, which shows all active network clients including your Pi’s hostname (typically “raspberrypi”) and IP address. This method bypasses discovery tools entirely.
Consider network scanning apps like Angry IP Scanner or Fing, which actively probe your network for devices. These tools often succeed where simple ping commands fail. For persistent issues, connecting via direct Ethernet cable eliminates WiFi variables and provides a reliable troubleshooting baseline.
Authentication and Permission Errors
Authentication issues can be frustrating, but they’re usually straightforward to fix. If you’re experiencing login failures with SSH, first verify you’re using the correct username and password. The default credentials are username “pi” and password “raspberry,” though these should be changed immediately for security reasons. If you’ve forgotten your password, you can reset it by accessing the SD card from another computer and editing the user configuration files.
For SSH key authentication problems, ensure your public key is properly added to the authorized_keys file on your Raspberry Pi. Check file permissions too, as SSH is strict about security. The .ssh directory should have 700 permissions, and authorized_keys should be set to 600. You can fix this by running chmod commands through direct access or by remounting the SD card.
VNC authentication troubles often stem from outdated software or incorrect settings. Make sure both your VNC server on the Pi and viewer on your computer are updated to compatible versions. If direct authentication fails, try switching between VNC and Unix password authentication methods in the VNC Server settings. Additionally, verify that VNC Server is enabled in the Raspberry Pi Configuration tool under Interface Options.
Connecting your Raspberry Pi to a computer doesn’t have to be complicated, and there’s certainly no single right way to do it. Throughout this guide, we’ve explored multiple methods from SSH and VNC for wireless convenience to direct Ethernet and USB gadget mode for cable-based reliability. Each approach has its strengths, and the best choice really depends on your specific project requirements, available equipment, and personal preferences.
Don’t hesitate to experiment with different connection methods. You might find that SSH works perfectly for headless server projects, while VNC becomes essential when you need visual feedback for educational demonstrations. USB gadget mode might be your go-to for portable projects, and direct Ethernet could be ideal for permanent setups requiring maximum stability.
Remember that learning through hands-on experimentation is part of the Raspberry Pi experience. If one method doesn’t work initially, troubleshoot and try another. The official Raspberry Pi documentation and community forums are excellent resources when you need additional help or want to explore advanced configurations. Start with the method that seems most accessible to you, master it, and then branch out to discover which connectivity setup truly fits your workflow and project needs.