

Transform your Raspberry Pi into a powerful control center by mastering its versatile interface options. The Pi’s GPIO pins, combined with standard protocols like I2C, SPI, and UART, open up endless possibilities for connecting sensors, displays, motors, and other electronic components. Whether you’re building a home automation system, creating an interactive robot, or developing educational projects, understanding these interface capabilities is crucial for unlocking your Pi’s full potential.
From basic LED control to complex sensor arrays, the Raspberry Pi’s interface architecture supports both simple and sophisticated applications. Its 40-pin header provides direct access to digital and analog signals, while built-in communications protocols enable seamless integration with thousands of compatible devices. Modern Raspberry Pi models also feature USB, HDMI, and network interfaces, making them ideal platforms for both standalone projects and networked applications.
This comprehensive guide explores essential interface techniques, practical implementations, and best practices for connecting external hardware to your Raspberry Pi. Learn how to properly configure pins, protect your device from electrical damage, and develop reliable control systems for your next project.
Understanding Raspberry Pi’s Hardware Interface Options
GPIO Pins: Your Gateway to Hardware Control
The GPIO (General Purpose Input/Output) pins are the heart of hardware interaction on your Raspberry Pi, serving as direct connection points between your Pi and the physical world. These versatile pins, arranged in two rows on the board, can be programmed to either send or receive electrical signals, making them perfect for controlling LEDs, motors, sensors, and other electronic components.
Your Raspberry Pi features 40 GPIO pins, with 26 of them being general-purpose pins that you can freely program. The remaining pins provide power (3.3V and 5V) and ground connections. Each programmable pin can function as either an input (reading signals from sensors) or an output (controlling external devices), and they can be controlled using various programming languages like Python, C++, or Node.js.
These pins operate at 3.3V logic level and can handle up to 16mA current per pin, making them suitable for most basic electronics projects. However, it’s crucial to note that connecting components requiring higher voltage or current will need additional circuits or drivers to prevent damage to your Pi. Always double-check your wiring and voltage requirements before connecting any hardware to these pins.

I2C, SPI, and UART: Choosing the Right Protocol
When connecting external devices to your Raspberry Pi, choosing the right communication protocol is crucial. The three most common protocols are I2C, SPI, and UART, each with its unique advantages and use cases.
I2C (Inter-Integrated Circuit) is perfect for connecting multiple devices using just two pins: SDA (data) and SCL (clock). It’s ideal for sensors and displays that don’t require high-speed data transfer. While it’s slower than SPI, I2C’s simplicity and ability to support up to 127 devices make it a popular choice for many projects.
SPI (Serial Peripheral Interface) offers faster data transfer rates and full-duplex communication. It requires more pins (MOSI, MISO, SCLK, and CS) but provides better performance for high-speed applications like SD cards or displays. The main trade-off is that each device needs its own chip select pin.
UART (Universal Asynchronous Receiver/Transmitter) is the simplest protocol, using just two pins for TX (transmit) and RX (receive). It’s perfect for basic serial communication and debugging but is limited to one-to-one connections. UART is commonly used for GPS modules and communication with other microcontrollers.
Choose I2C for multiple slow-speed devices, SPI for high-speed applications, or UART for simple point-to-point communication.
Setting Up Your First Hardware Interface
Essential Tools and Safety Considerations
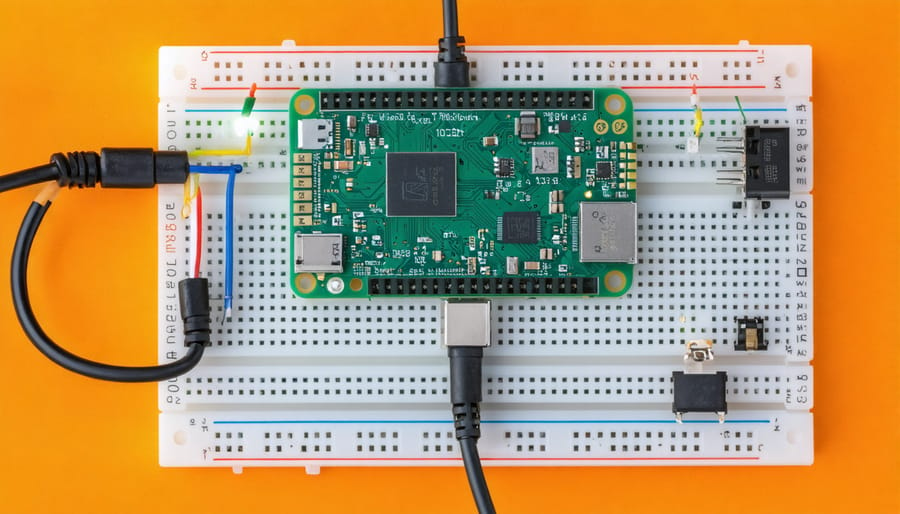
Before diving into Raspberry Pi interfacing projects, gathering the right tools and understanding safety precautions is crucial. Essential tools include a reliable multimeter for voltage testing, anti-static wrist straps to prevent electrostatic discharge, and a quality soldering iron with stand for connection work. You’ll also need jumper wires (both male-to-male and male-to-female), a breadboard for prototyping, and basic hand tools like wire strippers and precision screwdrivers.
Safety should always come first. Always disconnect power before making any connections, and use appropriate current-limiting resistors to protect both your Pi and connected components. Keep your workspace clean, well-lit, and free from conductive materials. When handling the Raspberry Pi or sensitive electronics, ensure you’re properly grounded to prevent static damage.
Store components in anti-static bags and maintain proper ventilation when soldering. For beginners, it’s recommended to start with low-voltage projects and gradually progress to more complex interfaces as your experience grows. Remember to double-check all connections before powering up your system to avoid short circuits or component damage.
Basic Connection and Testing
Before diving into complex interfaces, it’s essential to ensure your Raspberry Pi is properly set up and functioning. Start by connecting the basic peripherals: plug in your keyboard, mouse, and HDMI display. Insert your microSD card with the operating system installed, and connect the power supply last.
Once powered on, you should see the Raspberry Pi boot sequence on your display. If you don’t see anything, double-check your HDMI connection and ensure your display is set to the correct input source. The boot process typically takes about 30 seconds, after which you’ll see the desktop environment or command line interface, depending on your OS configuration.
Next, you’ll want to configure network connectivity to ensure you can access updates and additional software. For Wi-Fi connections, click the network icon in the top-right corner of the desktop and select your network. For ethernet connections, simply plug in the cable.
Test your setup by opening a terminal window and running these basic commands:
– ping google.com (tests internet connectivity)
– vcgencmd measure_temp (checks system temperature)
– vcgencmd get_throttled (verifies power status)
If all these tests pass successfully, your Raspberry Pi is ready for interfacing with external hardware and sensors. Remember to shut down properly using the menu option or ‘sudo shutdown -h now’ command to avoid corrupting your SD card.
Programming Your Hardware Interface
Python Libraries for Hardware Control
Python offers several powerful libraries that make hardware control on the Raspberry Pi both accessible and efficient. The GPIO Zero library stands out as a beginner-friendly option, providing an intuitive interface for controlling basic hardware components like LEDs, buttons, and sensors. This high-level library simplifies common tasks while maintaining robust functionality.
For more advanced control, the RPi.GPIO library gives you direct access to the GPIO pins, offering precise timing and complex signal manipulation. It’s particularly useful when you need to implement specific protocols or work with specialized hardware.
The pigpio library excels in handling PWM (Pulse Width Modulation), servo control, and precise timing requirements. It’s especially valuable for projects involving motor control or accurate sensor readings. Similarly, the SMBus library facilitates I2C communication, making it easier to interface with various sensors and displays.
When working with displays or creating user interfaces, libraries like Tkinter and PyQt enable you to build a GUI interface for your projects. These libraries offer extensive widgets and tools for creating professional-looking applications.
For specialized hardware protocols, libraries like spidev (for SPI communication) and pyserial (for serial communication) provide essential functionality. The gpiozero.tools module includes helpful utilities for common tasks like button debouncing and LED patterns, saving you time in development.
Remember to install these libraries using pip, Python’s package manager, and always check compatibility with your Raspberry Pi’s Python version before starting your project.
Code Examples and Common Patterns
Here’s a practical example of interfacing with an LED using Python and the GPIO library:
“`python
import RPi.GPIO as GPIO
import time
LED_PIN = 18
GPIO.setmode(GPIO.BCM)
GPIO.setup(LED_PIN, GPIO.OUT)
while True:
GPIO.output(LED_PIN, GPIO.HIGH)
time.sleep(1)
GPIO.output(LED_PIN, GPIO.LOW)
time.sleep(1)
“`
For those interested in more direct hardware control through baremetal programming, you can access hardware registers directly. However, most projects will use the GPIO library for simplicity.
Here’s how to read input from a button:
“`python
import RPi.GPIO as GPIO
BUTTON_PIN = 23
GPIO.setmode(GPIO.BCM)
GPIO.setup(BUTTON_PIN, GPIO.IN, pull_up_down=GPIO.PUD_UP)
while True:
if GPIO.input(BUTTON_PIN) == GPIO.LOW:
print(“Button pressed!”)
“`
For I2C communication with sensors, this pattern is commonly used:
“`python
import smbus
import time
bus = smbus.SMBus(1)
DEVICE_ADDRESS = 0x68
while True:
data = bus.read_byte_data(DEVICE_ADDRESS, 0x00)
print(f”Sensor reading: {data}”)
time.sleep(0.5)
“`
Remember to always clean up GPIO resources when your program exits:
“`python
GPIO.cleanup()
“`
These examples demonstrate basic interfacing patterns that you can adapt for various hardware components and sensors.
Troubleshooting and Best Practices
Debug Tools and Techniques
When troubleshooting Raspberry Pi interface issues, several essential debug tools and techniques can help identify and resolve problems quickly. The GPIO command-line utility provides real-time status of pins and allows manual testing of connections. For visual debugging, the Raspberry Pi GPIO viewer offers a graphical interface to monitor pin states and voltage levels.
Using a multimeter is crucial for testing voltage levels and continuity between connections. When working with I2C devices, the i2cdetect command helps verify device addresses and proper communication. For SPI interfaces, oscilloscopes can be invaluable for analyzing signal timing and quality.
LED indicators serve as simple but effective debugging tools – connecting them to GPIO pins helps verify output signals. For software debugging, enabling verbose logging in your Python scripts with print statements or dedicated logging modules can track program flow and identify issues.
Common troubleshooting steps include:
– Checking physical connections and wire continuity
– Verifying correct GPIO pin numbering in code
– Monitoring system logs for hardware-related errors
– Testing interface connections with simple test scripts
– Using pull-up/pull-down resistors properly
For network-related interfaces, tools like wireshark can monitor data traffic, while GPIO event monitoring helps debug interrupt-based interfaces. Remember to always power down your Raspberry Pi before making hardware changes to prevent damage to components.
Performance Optimization Tips
To ensure optimal performance of your Raspberry Pi interface, start by taking steps to optimize your Raspberry Pi OS for your specific needs. Reduce unnecessary background processes by disabling unused services and removing autostart applications that aren’t essential for your interface requirements.
Implement proper buffering mechanisms when handling data streams, especially for high-speed interfaces like SPI or I2C. Use appropriate buffer sizes to prevent data overflow and maintain consistent communication speeds. Consider using hardware-based interrupts instead of polling when possible, as this can significantly reduce CPU usage and improve response times.
For GPIO operations, utilize direct memory access (DMA) when working with time-sensitive applications. This bypasses the CPU for certain operations, leading to more reliable timing and better overall performance. When working with multiple interfaces simultaneously, prioritize critical communications and implement proper error handling to prevent system hangups.
Keep your interface connections clean and secure, using appropriate pull-up or pull-down resistors where needed. Monitor your power supply quality, as voltage fluctuations can cause interface instability. For projects requiring high-speed data transfer, consider using level shifters to ensure signal integrity between different voltage levels.
Remember to regularly monitor system temperature and CPU usage. Implement proper cooling solutions if needed, as thermal throttling can significantly impact interface performance and reliability.
The world of Raspberry Pi interfacing opens up endless possibilities for creating innovative hardware projects. Throughout this guide, we’ve explored various interfaces, from basic GPIO connections to advanced communication protocols like I2C and SPI. These fundamental building blocks empower you to develop everything from simple LED controls to complex sensor networks and automation systems.
Remember that successful hardware interfacing with your Raspberry Pi relies on understanding both the physical connections and the software implementation. Whether you’re controlling motors, reading sensors, or building complete home automation systems, the principles we’ve covered provide a solid foundation for your projects.
Don’t be intimidated by the technical aspects of hardware interfacing. Start with simple projects and gradually work your way up to more complex implementations. The Raspberry Pi community is vast and supportive, offering countless resources, tutorials, and example projects to help you along your journey.
We encourage you to take what you’ve learned and apply it to your own unique projects. Experiment with different sensors, try new communication protocols, and push the boundaries of what’s possible with your Raspberry Pi. The skills you develop while working with hardware interfaces will prove invaluable in both hobby projects and professional applications.
Ready to begin? Grab your Raspberry Pi, gather some basic components, and start building. The only limit is your imagination!