

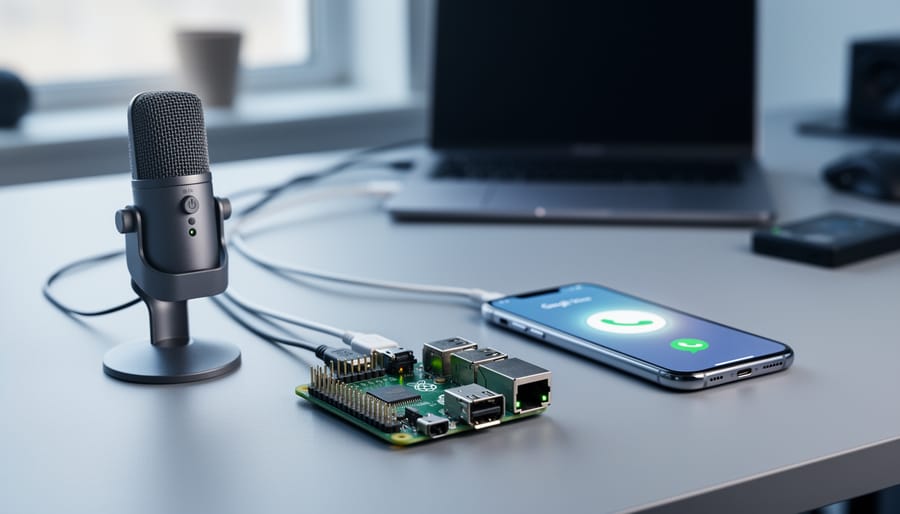
Integrating Google Voice with your Raspberry Pi transforms your single-board computer into a fully capable communication hub, enabling free voice calls and SMS messaging through voice commands or automated triggers. With the right Python libraries and API credentials, you can build projects that make phone calls, send text messages, and even respond to incoming communications, all without additional hardware beyond a speaker and microphone. Most implementations take 2-3 hours to complete and work reliably on any Raspberry Pi model running the latest operating systems.
This guide walks you through the complete setup process, from registering your Google Voice account and obtaining API credentials to installing the necessary Python packages and writing your first voice-activated call script. The beauty of this integration lies in its flexibility. You can create smart home systems that call your phone when motion is detected, build medication reminder systems for elderly relatives, or develop custom voice assistants that handle your communications.
The technical barrier is lower than you might expect. Google’s APIs are well-documented, and the Python ecosystem offers mature libraries that handle the complex authentication and communication protocols. You don’t need advanced programming skills to get started, just patience to follow the configuration steps carefully.
Whether you’re expanding an existing voice recognition project or building your first Pi-based communication system, this tutorial provides everything you need to connect, test, and deploy a working Google Voice integration that opens up entirely new project possibilities.
Understanding Google Voice and Raspberry Pi Voice Recognition Systems
What Google Voice Brings to Voice Recognition Projects
Google Voice transforms a basic Raspberry Pi voice assistant into a communications hub. It lets your Pi make phone calls and send text messages through voice commands alone, no smartphone required. You can check voicemail transcriptions, receive incoming calls on your Pi-based system, and manage multiple phone lines from one device.
The real power shows up in automation scenarios. Your voice assistant can send SMS alerts when sensors trigger (a security camera detects motion, for instance), place calls to predefined contacts during emergencies, or read incoming messages aloud through your Pi’s speakers. Because Google Voice works over your internet connection rather than cellular networks, it integrates smoothly with Pi network setup and doesn’t need additional hardware like GSM modules.
Smart home projects benefit particularly well. Imagine asking your Pi assistant to “call Mom” or “text John that I’m running late” while you’re cooking. The system handles caller ID, call forwarding, and even conference calling, capabilities that would otherwise require complex telephony hardware or expensive cloud services.
System Requirements and Compatibility
Any Raspberry Pi model from the Pi 3 onward works for Google Voice integration, though the Pi 4 offers the smoothest performance thanks to its faster processor and increased RAM. The Pi 3B, 3B+, and Pi 400 all handle voice recognition tasks adequately, but expect slightly longer response times during audio processing.
Your operating system needs to be Raspberry Pi OS (formerly Raspbian) Buster or newer, with Python 3.7 or later installed. Ubuntu Server 20.04 LTS and later versions also work well if you prefer that environment. The full desktop version isn’t required, a headless setup runs perfectly fine for voice projects.
A stable internet connection is non-negotiable. Google Voice requires constant internet access to process calls and messages through Google’s servers. Wired Ethernet provides the most reliable connection, but Wi-Fi works if your signal strength stays consistently strong. Plan for at least 5 Mbps download and 1 Mbps upload speeds to avoid choppy audio during voice calls.
You’ll also need a USB microphone and speaker or a USB audio adapter that supports both input and output, since the Pi lacks built-in audio input.
Tools and Materials You’ll Need
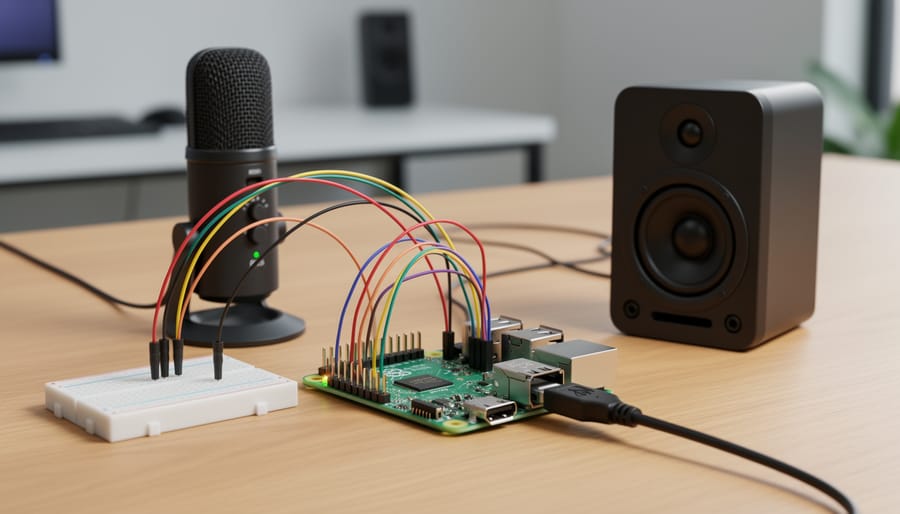
Before you begin integrating Google Voice with your Raspberry Pi voice recognition project, gather these essential components and ensure you have the necessary accounts and software ready.
Hardware Components
You’ll need a Raspberry Pi board capable of running Python 3.7 or higher. The Raspberry Pi 3B+, 4, or 5 works best due to their processing power and built-in connectivity. A USB microphone or USB sound card with microphone input is essential for capturing voice commands reliably. For audio output, either use the Pi’s built-in 3.5mm jack with powered speakers or a USB speaker for clearer voice playback. A stable internet connection via Ethernet or Wi-Fi is critical since Google Voice requires continuous network access. You’ll also need a microSD card (16GB minimum) and a power supply appropriate for your Pi model.
Required Software and Accounts
- Raspberry Pi OS (Bullseye or newer) with desktop or lite version
- Python 3.7 or higher with pip package manager
- Active Google account with Google Voice service enabled
- Google Cloud Platform project with Voice API credentials
- PyAudio library for audio processing
- SpeechRecognition library for voice input handling
- OAuth 2.0 client credentials JSON file from Google
Optional Enhancements
Consider adding a USB sound card for superior audio quality if you plan extensive voice interaction. A case with a built-in fan helps prevent thermal throttling during continuous operation. An external battery pack enables portable voice assistant applications. These additions aren’t mandatory but significantly improve performance and reliability in real-world deployments.
Make sure your Google Voice account is fully activated and can send/receive calls and messages before starting the integration process.
Important Considerations Before You Start
Before diving into the setup process, you need to understand several critical limitations and security considerations that could affect your project.
The authentication landscape has changed significantly. You can’t simply enter a username and password anymore. Modern implementations require generating OAuth credentials through the Google Cloud Console, which involves creating a project, enabling APIs, and managing tokens that expire periodically. This adds complexity but improves security.
Privacy is another serious concern. Any voice data processed through Google’s services is subject to their data collection policies. If you’re building a device for home use, everyone in your household should know that voice commands and call metadata flow through Google’s servers. You don’t have the same privacy guarantees as a fully local solution.
Account security matters too. Never hardcode your Google credentials directly into scripts. Use environment variables or secure credential storage, especially if you plan to share your code or publish it on GitHub. A compromised token could let someone make calls or send texts on your behalf.
Rate limits exist for the Google Voice API. Free tier accounts face restrictions on daily calls and messages, which could break projects that rely on frequent automated notifications. Check current API quotas before designing your system around specific usage patterns.
Finally, Google Voice isn’t available in all countries. If the service doesn’t operate in your region, this project won’t work regardless of your technical setup.
Preparing Your Raspberry Pi Environment
Installing Required Python Libraries
With your Raspberry Pi environment ready, installing the Python libraries for Google Voice communication requires a few targeted commands. The most commonly used package is the jaraco/googlevoice library which provides programmatic access to Google Voice features through Python.
Open your terminal and run:
“`
pip3 install googlevoice
“`
You’ll also need the requests library for handling HTTP communications and the beautifulsoup4 package for parsing responses:
“`
pip3 install requests beautifulsoup4
“`
If you’re building a voice recognition project, add the SpeechRecognition library:
“`
pip3 install SpeechRecognition
“`
For audio processing, install PyAudio:
“`
sudo apt-get install portaudio19-dev python3-pyaudio
pip3 install pyaudio
“`
Verify successful installation by launching Python 3 and attempting to import the libraries:
“`
python3
>>> import googlevoice
>>> import speech_recognition
“`
If no errors appear, your libraries are ready. Note that some users prefer gvoice as an alternative to googlevoice for better maintenance and updated authentication methods. You can install it with `pip3 install gvoice` if you encounter compatibility issues with the standard googlevoice package.
Configuring Audio Input and Output

Before diving into Google Voice integration, your Pi needs to reliably capture and play back audio. Start by connecting a USB microphone and speakers to available USB ports, onboard audio jacks rarely deliver the quality needed for speech recognition.
List your audio devices with `arecord -l` for input and `aplay -l` for output. Note the card and device numbers (typically “card 1, device 0” for USB devices). Edit `/etc/asound.conf` or `~/.asoundrc` to set defaults:
“`
pcm.!default {
type asym
playback.pcm “hw:1,0”
capture.pcm “hw:1,0”
}
“`
Replace `1,0` with your actual card and device numbers. For Raspberry Pi audio output test playback with `speaker-test -c2`. Record a sample with `arecord -d 5 test.wav` and play it back using `aplay test.wav` to verify capture quality.
If levels seem low, run `alsamixer` and use arrow keys to adjust PCM and microphone gain, press F6 to select your USB device first. For a pro audio setup with PulseAudio, install it via `sudo apt install pulseaudio` and use `pavucontrol` for graphical level adjustment. Save settings with `sudo alsactl store` to persist across reboots.
Setting Up Google Voice Account and Authentication
Getting your Google Voice account ready and properly authenticated is the critical foundation for this project. While Google Voice itself is straightforward to create, integrating it with your Raspberry Pi requires specific API access and secure credential management.
Start by creating a Google Voice account if you don’t already have one. Visit and sign in with your Google account. Choose a phone number and complete the verification process. Remember that Google Voice availability is limited to certain regions, primarily the United States, so confirm service availability in your location before proceeding.
For Raspberry Pi integration, you’ll need to access Google Cloud Services rather than just the standard consumer interface. This requires setting up a Google Cloud project and enabling the necessary APIs. Here’s the complete setup process:
- Navigate to the Google Cloud Console at and create a new project specifically for your Raspberry Pi voice recognition system.
- In the API Library section, search for and enable the “Google Voice API” along with any related speech or telephony services you plan to use.
- Go to the Credentials section and create OAuth 2.0 credentials by selecting “Create Credentials” and choosing “OAuth client ID.”
- Configure the OAuth consent screen with your project details, adding your own email to the test users list during development.
- Download the JSON credentials file when prompted, which contains your client ID and client secret.
Transfer the credentials file to your Raspberry Pi using SCP or by downloading it directly on the Pi. Place it in a dedicated directory like `/home/pi/google-voice-config/` and rename it to something recognizable like `credentials.json`. Set proper file permissions with `chmod 600 credentials.json` to prevent unauthorized access.
You’ll also need to generate an OAuth token by running your authentication script for the first time. This typically involves opening a browser URL, granting permissions to your application, and receiving an authorization code that your script exchanges for an access token. Store this token file in the same secure directory as your credentials.
For enhanced security, never commit these credential files to version control systems or share them publicly. Consider encrypting the credentials directory or using environment variables to reference file paths rather than hardcoding them in your scripts.
Integrating Google Voice with Voice Recognition Software
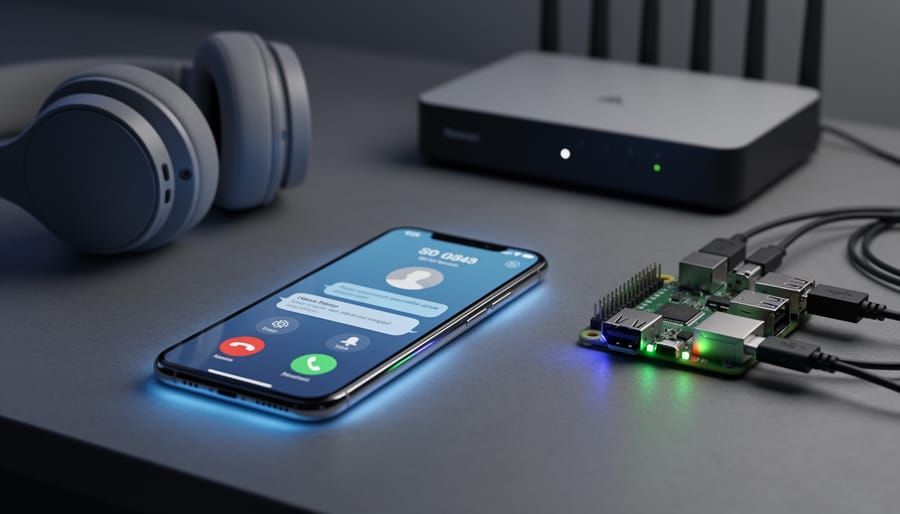
Creating the Integration Script
With your Raspberry Pi environment configured and Google Voice authenticated, you’re ready to write the Python script that actually sends commands to Google Voice when your voice recognition system detects specific phrases.
Start by creating a new Python file in your project directory. Name it something descriptive like `gv_handler.py`. This script will contain functions that handle calling and texting actions.
The core structure requires importing your authentication credentials and defining functions for each Google Voice action. A basic calling function looks like this:
“`python
from googlevoice import Voice
def make_call(phone_number):
voice = Voice()
voice.login()
voice.call(phone_number, forwarding_number)
return f”Calling {phone_number}”
“`
For text messaging, create a similar function that uses the `send_sms()` method instead. Include error handling with try-except blocks to catch authentication failures or network issues gracefully.
The critical part is creating a dispatcher function that your voice recognition system can call. This function receives the recognized command text, parses the action and parameters (like phone numbers or message content), then executes the appropriate Google Voice function.
Use regular expressions to extract phone numbers from voice commands. For example, when someone says “call 555-1234,” your regex should isolate those digits and format them correctly for Google Voice.
Test each function independently in the Python interpreter before integrating with your voice recognition pipeline to ensure they work reliably.
Configuring Voice Commands and Triggers
Once your integration script is ready, you need to teach your voice recognition system which spoken phrases should trigger Google Voice actions. This configuration determines how users interact with calling and messaging features through natural speech.
Start by defining wake words in your voice recognition engine’s configuration file. For Mycroft, edit `mycroft.conf` to add a custom wake word like “Hey Phone” or “Call Assistant” specifically for Google Voice functions. If you’re using PocketSphinx directly, modify your `keywords.txt` file to include trigger phrases with their sensitivity thresholds (typically 1e-20 for reliable detection without false positives).
Next, map specific commands to Google Voice actions in your integration script. Create clear command patterns that your system will recognize:
– “Call [contact name]” or “Phone [number]”
– “Send text to [contact]” or “Message [name]”
– “Check voicemail” or “Read messages”
Use regular expressions or keyword matching to extract contact names and message content from recognized speech. For example, a command pattern like `r”call (\w+)”` captures the contact name after “call” in Python.
Configure command confidence thresholds to prevent accidental triggers. Set your recognition system to require at least 70-80% confidence before executing Google Voice actions, calling someone accidentally is far worse than missing an unclear command.
Test each trigger phrase multiple times with different voices and speaking speeds. Adjust your phonetic dictionary if certain contact names aren’t recognized consistently, adding custom pronunciations for unusual names in your speech recognition configuration.
Testing and Verifying Your Setup
Common Issues and Solutions
Authentication failures top the list of headaches when running Google Voice on a Pi. If your script throws “invalid credentials” errors, regenerate your OAuth token and ensure the credentials.json file has correct read permissions (chmod 600). Double-check that your Google account allows less-secure app access or uses app-specific passwords if you’ve enabled two-factor authentication. For persistent login issues, clearing cached tokens and re-authenticating through remote access often resolves conflicts.
Audio problems usually stem from incorrect ALSA device selection. Run `arecord -l` and `aplay -l` to identify your actual microphone and speaker card numbers, then update your `.asoundrc` configuration to match. If you hear choppy playback or no input detection, increasing buffer sizes in your audio config typically smooths things out.
- 429 errors (rate limiting): Add exponential backoff delays between API calls, typically starting at 2 seconds
- Network timeouts: Increase request timeout values to 30+ seconds and verify stable internet connectivity
- Module import failures: Reinstall pygooglevoice with `pip3 install –upgrade –force-reinstall pygooglevoice`
- Permission denied on audio devices: Add your user to the audio group with `sudo usermod -a -G audio $USER`
Rate limiting kicks in when scripts make too many rapid requests. Implementing a simple sleep timer between calls prevents 429 errors while maintaining functionality for most home automation scenarios.
Next Steps and Project Ideas
Now that your Google Voice integration is running, you can expand it into more sophisticated voice recognition applications. Building on your basic setup opens doors to practical home automation and communication projects that leverage the Pi’s versatility.
Consider transforming your setup into an automated notification system that reads incoming Google Voice messages aloud through your speakers, announces caller names when calls arrive, or sends voice-to-text summaries to your phone. You can configure scheduled announcements like daily weather briefins or reminder alerts that use Google Voice’s SMS capabilities to reach you wherever you are.
For deeper integration, connect your Google Voice system to MQTT or Home Assistant to create unified smart home controls. This lets you trigger voice calls or texts based on sensor events, imagine your security camera sending you a voice call when motion is detected, or your doorbell system calling your phone automatically when someone presses it.
Here are additional project directions worth exploring:
- Voice-activated intercom system between multiple Raspberry Pi units throughout your home
- Custom wake-up assistant that calls you at scheduled times with personalized voice messages
- Hands-free calling station for accessibility, with large buttons or touch controls for speed dialing
- Automated customer service responder for small businesses using voice recognition and scripted replies
- Emergency alert system that places calls to predefined contacts when specific conditions are met
Performance optimization matters as your projects grow more complex. Upgrade to a higher-quality audio interface to improve voice recognition accuracy and call quality, especially if you’re processing multiple audio streams. Consider running lightweight services only, offloading heavy processing to cloud APIs when possible, and implementing caching for frequently used voice commands to reduce latency.
Document your custom commands and automation rules as you add features, this makes troubleshooting easier and helps you build incrementally without breaking existing functionality.
Frequently Asked Questions
Is Google Voice free to use with Raspberry Pi?
Yes, Google Voice itself is free for personal use in the United States, including making domestic calls and sending SMS messages. The only costs you’ll incur are for your Raspberry Pi hardware, microphone, speakers, and potentially your internet connection. However, international calls through Google Voice do have per-minute charges, and you’ll need to maintain a stable internet connection for the service to work properly.
Do I need programming experience to set this up?
Basic familiarity with the command line and Python will make the process much smoother, but you don’t need to be an expert programmer. Most of the integration involves following step-by-step instructions to run commands, edit configuration files, and possibly modify example scripts. If you can copy and paste commands into a terminal and understand basic file editing, you can handle the setup. The Python libraries handle the complex authentication and API calls for you.
What happens to my privacy when using Google Voice on a Raspberry Pi?
Is Google Voice compatible with all voice recognition systems?
Google Voice works with most Python-based voice recognition frameworks including Mycroft, Jasper, and custom scripts using libraries like SpeechRecognition. Compatibility depends on whether the system can execute Python scripts and trigger actions based on recognized commands.
How complex is the initial setup process?
The setup typically takes 1-2 hours for someone comfortable with Raspberry Pi basics. You’ll need to install dependencies, configure authentication, and test audio settings, but each step follows a logical sequence.
Are there alternatives to Google Voice for Raspberry Pi voice projects?
Yes, services like Twilio offer similar functionality with pay-as-you-go pricing and often simpler API integration. Other options include Nexmo (now Vonage) and open-source solutions like Asterisk, though each has different setup requirements and cost structures.
What are the ongoing costs after setup?
After initial setup, there are no recurring costs for domestic Google Voice usage beyond your existing internet service. You only pay for international calls if you make them.
Your voice data passes through Google’s servers for processing, which means Google’s privacy policy applies to your calls and messages. Store your authentication credentials securely on the Pi and use environment variables rather than hardcoding them in scripts. Consider whether you’re comfortable with Google having access to your call and message metadata, and review what permissions you grant during the OAuth process.
Can I use Google Voice on Raspberry Pi outside the United States?
Google Voice availability is limited to US-based accounts, though you can access it from abroad with a VPN. You’ll need a US phone number to register for Google Voice initially. The voice recognition components work internationally, but the Google Voice calling and messaging features require a US account and may have reduced functionality or additional costs when used from other countries.
You’ve now built a complete voice-controlled communication system that bridges Google Voice with your Raspberry Pi. This setup transforms your Pi into a hands-free assistant capable of making calls, sending texts, and responding to voice commands, all without touching a screen.
The real power comes from customization. Start small by adding new voice commands for frequent contacts or automated reminders. As you grow comfortable with the system, consider expanding it into a full smart home hub, integrating calendar notifications, weather alerts, or doorbell announcements through Google Voice.
Keep your system running smoothly with regular maintenance. Update your Python libraries monthly, monitor API usage to avoid rate limits, and back up your authentication credentials securely. Test voice recognition accuracy periodically, especially after system updates that might affect audio drivers.
Remember that voice recognition technology constantly improves. Watch for updates to speech recognition libraries and Google Voice API changes that could enhance functionality or require configuration adjustments.
Your Raspberry Pi voice project is a foundation, not a finished product. Each tweak teaches you more about voice interfaces, API integration, and system automation. The skills you’ve developed here transfer directly to other IoT projects and voice assistant platforms.