


Environmental monitoring sensors have revolutionized our ability to track, measure, and respond to changes in our surroundings with unprecedented precision. From Arduino-based weather stations to sophisticated IoT environmental monitoring networks, these sensors serve as our digital eyes and ears in understanding the world around us.
Modern environmental sensors can detect everything from air quality and temperature to humidity and soil moisture levels, making them invaluable tools for both hobbyists and professionals. Whether you’re monitoring your home garden’s conditions or developing a city-wide pollution tracking system, these versatile devices provide real-time data that drives informed decision-making and automation.
The integration of environmental sensors with microcontrollers like Arduino has democratized environmental monitoring, allowing makers and engineers to build custom solutions for specific monitoring needs. Combined with wireless connectivity and cloud platforms, these sensor systems can now form comprehensive environmental monitoring networks that provide continuous, reliable data streams for analysis and action.
This hands-on guide will explore the essential components, setup procedures, and practical applications of environmental monitoring sensors, with a focus on creating your own DIY monitoring solutions using readily available components and open-source platforms.
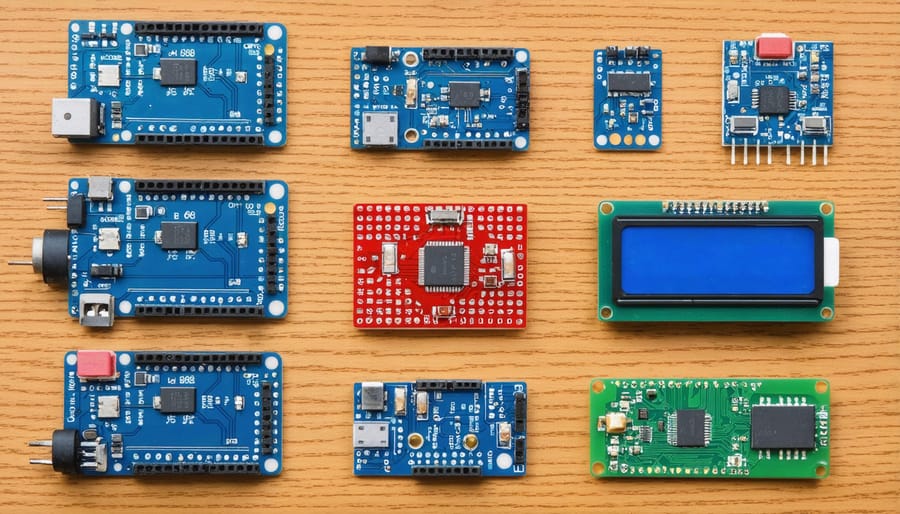
Essential Environmental Sensors for Arduino
Temperature and Humidity Sensors
Temperature and humidity sensors form the backbone of most environmental monitoring systems, with the DHT11/22 and BME280 being among the most popular choices. The DHT11 offers basic temperature and humidity sensing capabilities at an affordable price point, making it ideal for beginners and basic projects. While its accuracy (±2°C and ±5% RH) may be limited, it’s perfectly suitable for hobby projects and basic monitoring needs.
The DHT22, an upgraded version, provides better accuracy (±0.5°C and ±2-5% RH) and a wider measurement range, making it more suitable for serious applications. Both sensors use a simple digital signal output and require minimal setup with most microcontrollers.
For more demanding applications, the BME280 stands out as a professional-grade option. This sensor not only measures temperature and humidity but also includes barometric pressure sensing. With superior accuracy (±1°C and ±3% RH) and faster reading capabilities, it’s perfect for weather stations and precise environmental monitoring. The BME280 communicates via I2C or SPI, offering greater flexibility in complex projects while maintaining reliable performance across various environmental conditions.
Air Quality Sensors
The MQ series sensors are versatile and affordable options for monitoring various air quality parameters. The most commonly used variants include the MQ-135 for detecting toxic gases, MQ-7 for carbon monoxide, and MQ-2 for smoke and combustible gases. These sensors operate on a simple principle: when target gases are present, their internal resistance changes, producing an analog signal that can be easily read by your microcontroller.
For more precise air quality monitoring, particulate matter (PM) sensors like the PMS5003 or SDS011 are essential additions to your setup. These sensors can detect tiny particles in the air, categorizing them by size into PM2.5 and PM10 measurements. This data is particularly valuable for monitoring indoor air quality or tracking pollution levels in your local environment.
When working with air quality sensors, proper calibration is crucial for accurate readings. Most MQ sensors require a warm-up period of 12-24 hours for initial stabilization, and regular recalibration may be necessary to maintain accuracy. For best results, mount these sensors away from direct airflow and ensure adequate ventilation to prevent false readings from accumulated particles or gases.
Light and UV Sensors
Light Detection Resistors (LDRs) and UV index sensors are essential components for monitoring ambient light conditions and harmful ultraviolet radiation levels. LDRs work by changing their resistance based on light intensity, making them perfect for automated lighting systems and daylight detection. These affordable sensors can detect a wide range of light levels, from complete darkness to bright sunlight.
UV index sensors, such as the ML8511 or GUVA-S12SD, measure ultraviolet radiation intensity, particularly in the UV-A and UV-B ranges. These sensors are crucial for environmental monitoring stations, helping users track potentially harmful UV exposure levels. When connected to an Arduino, they can provide real-time UV index readings, enabling automated responses like triggering alerts when UV levels become dangerous.
Both sensor types are easy to integrate into Arduino projects using analog inputs, requiring minimal additional components and straightforward programming logic.
Setting Up Your Arduino Environmental Station
Hardware Requirements
To build an effective environmental monitoring system, you’ll need the following essential components:
Core Components:
– Arduino Uno or compatible microcontroller board
– Breadboard for prototyping
– USB cable for Arduino programming
– Power supply (7-12V DC adapter or battery pack)
Environmental Sensors:
– DHT22/DHT11 temperature and humidity sensor
– BMP280/BME280 barometric pressure sensor
– MQ-135 air quality sensor
– Light dependent resistor (LDR)
– Soil moisture sensor (if monitoring plants)
Additional Hardware:
– Male-to-male jumper wires (at least 20)
– Male-to-female jumper wires (at least 10)
– 10kΩ resistors (2-3 pieces)
– LCD display (16×2 or 20×4) for real-time readings
– SD card module for data logging
Optional Components:
– Real-time clock (RTC) module for timestamp logging
– Wi-Fi module (ESP8266) for remote monitoring
– Project enclosure for outdoor installation
– Mounting hardware and waterproof housing for outdoor sensors
Basic tools needed include a small Phillips screwdriver, wire strippers, and a multimeter for troubleshooting. For outdoor installations, consider adding weatherproof connectors and heat shrink tubing.
Wiring and Connections
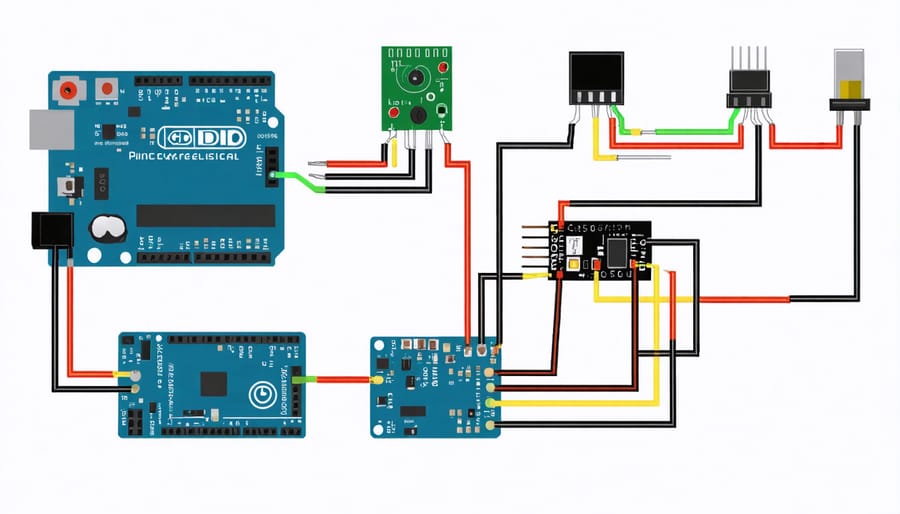
Proper wiring of environmental sensors is crucial for accurate readings and reliable operation. Most environmental sensors connect to your Arduino board using either the I2C, SPI, or 1-Wire communication protocol, depending on the sensor model.
For I2C sensors, connect the SDA pin to Arduino’s A4 (or SDA) pin and SCL to A5 (or SCL). Always connect VCC to your Arduino’s 3.3V or 5V power pin (check your sensor’s specifications), and GND to any ground pin on the Arduino.
SPI sensors typically require four connections: MOSI (Master Out Slave In), MISO (Master In Slave Out), SCK (Clock), and CS (Chip Select). These connect to Arduino pins 11, 12, 13, and any digital pin respectively.
For reliable readings, follow these best practices:
– Use short, high-quality wires to minimize interference
– Add pull-up resistors (4.7kΩ) for I2C communications
– Keep sensors away from heat sources and electromagnetic interference
– Consider using shielded cables for outdoor installations
– Double-check polarity before powering up
When connecting multiple sensors, ensure each device has a unique address or uses a separate CS pin. For breadboard prototyping, organize wires by color (red for power, black for ground, yellow/blue for data) to maintain clear connections and simplify troubleshooting.
Power Management
Power management is crucial for environmental monitoring sensors, especially in remote deployments where constant power access isn’t available. Battery-powered sensors require careful consideration of power consumption to ensure long-term operation. Using power-efficient MCU options can significantly extend battery life.
Popular power supply options include lithium-ion batteries, solar panels with rechargeable batteries, and USB power banks. For outdoor installations, weatherproof solar panels paired with deep-cycle batteries provide reliable, sustainable power. Indoor sensors can operate effectively with standard alkaline batteries or USB power adapters.
To optimize power consumption, implement sleep modes during idle periods and use low-power components. Consider using voltage regulators to maintain stable power delivery and protect sensitive components. For battery-powered setups, include voltage monitoring to alert users when batteries need replacement.
When designing your system, calculate the power requirements of all components and factor in a 20% safety margin. This ensures reliable operation and helps prevent unexpected system failures due to power issues.
Programming Your Environmental Monitor
Required Libraries
To get started with your environmental monitoring project, you’ll need to install several essential Arduino libraries. These libraries provide the necessary functions to communicate with various sensors and process their data effectively.
First, install the DHT library for temperature and humidity sensors. Open the Arduino IDE, go to Sketch > Include Library > Manage Libraries, and search for “DHT sensor library” by Adafruit. Click Install to add it to your project.
For air quality monitoring, you’ll need the MQ series sensor libraries. Search for and install “MQUnifiedsensor” to work with sensors like MQ-135 and MQ-7. If you’re using a BMP280 pressure sensor, install the “Adafruit BMP280 Library.”
Light sensors typically use the BH1750 library for accurate lux measurements. Search for “BH1750” in the library manager and install the latest version.
Don’t forget to install dependencies when prompted. Some sensors may require additional libraries like “Adafruit Unified Sensor” to function properly. Once installed, restart your Arduino IDE to ensure all libraries are properly integrated.
These libraries come with helpful example sketches that you can use as starting points for your project.
Sensor Reading Code
Here’s a basic code example for reading data from common environmental sensors using an Arduino. We’ll demonstrate reading temperature and humidity from a DHT22 sensor, which is perfect for getting started with environmental monitoring:
“`cpp
#include
#define DHTPIN 2 // DHT sensor connected to digital pin 2
#define DHTTYPE DHT22 // DHT22 (AM2302) sensor type
DHT dht(DHTPIN, DHTTYPE);
void setup() {
Serial.begin(9600);
dht.begin();
}
void loop() {
float humidity = dht.readHumidity();
float temperature = dht.readTemperature();
if (isnan(humidity) || isnan(temperature)) {
Serial.println(“Failed to read from DHT sensor!”);
return;
}
Serial.print(“Temperature: “);
Serial.print(temperature);
Serial.print(“°C, Humidity: “);
Serial.print(humidity);
Serial.println(“%”);
delay(2000); // Wait 2 seconds between readings
}
“`
To expand your monitoring capabilities, you can easily add more sensors. For example, here’s how to incorporate a BMP280 pressure sensor alongside the DHT22:
“`cpp
#include
#include
Adafruit_BMP280 bmp;
// Add this to your loop() function
float pressure = bmp.readPressure() / 100.0F;
Serial.print(“Pressure: “);
Serial.print(pressure);
Serial.println(” hPa”);
“`
Remember to initialize the BMP280 in your setup() function with `bmp.begin()`. These code snippets provide a foundation that you can build upon for more complex environmental monitoring projects.

Data Logging and Display
Effective data logging and visualization are crucial components of any environmental monitoring system. Modern microcontrollers offer various options for storing sensor readings, from local SD card storage to cloud-based solutions. For beginners, the simplest approach is using a microSD card shield with your Arduino, which can store data in CSV format for easy analysis.
For real-time monitoring, consider implementing a serial communication system that displays readings directly on your computer. Popular visualization tools like Processing or Python with matplotlib can create dynamic graphs of your sensor data. Many makers also use platforms like ThingSpeak or Adafruit IO, which provide ready-to-use dashboards and secure data transmission features.
When designing your logging system, consider these key factors:
– Sampling frequency: How often you need to record readings
– Storage capacity: Available space on your storage medium
– Power consumption: Especially important for battery-powered devices
– Data accessibility: How easily you can retrieve and analyze the data
For visualization, most makers prefer web-based dashboards that offer:
– Real-time data updates
– Customizable charts and graphs
– Mobile accessibility
– Export capabilities for further analysis
– Alert systems for threshold violations
Remember to implement error handling and backup systems to prevent data loss during power outages or system failures.
Troubleshooting and Optimization
When working with environmental monitoring setups, you might encounter several common challenges. Here’s how to address them effectively and optimize your system’s performance.
Signal interference is a frequent issue that can affect sensor readings. Keep sensors away from strong electromagnetic sources and use shielded cables when possible. If you notice erratic readings, try repositioning sensors or adding electromagnetic shielding.
Calibration drift occurs over time and can lead to inaccurate measurements. Implement regular calibration checks against known reference values and document any adjustments. Most quality sensors should be recalibrated every 3-6 months, depending on usage and environmental conditions.
Power management problems can disrupt data collection. Consider using battery backup systems and implementing sleep modes for your microcontroller. Following IoT security best practices while optimizing power consumption will ensure both efficient and secure operation.
Data consistency issues often arise from poor sampling rates or inadequate storage. Optimize your code to handle sensor readings efficiently and implement error checking routines. Consider using a rolling average for more stable readings and implement data validation checks before storage.
For moisture sensors, regular cleaning and maintenance prevent corrosion and ensure accurate readings. Temperature sensors benefit from proper ventilation and protection from direct sunlight. Remember to weatherproof outdoor installations and check connection points periodically for signs of wear or damage.
Environmental monitoring sensors have become indispensable tools for makers and tech enthusiasts looking to create intelligent, data-driven solutions. From measuring air quality to tracking temperature and humidity changes, these sensors provide valuable insights into our surroundings. By following the guidelines and best practices outlined in this article, you can build your own monitoring system tailored to your specific needs.
As you embark on your environmental monitoring project, start small with basic sensors and gradually expand your system’s capabilities. Remember to regularly calibrate your sensors, implement proper data logging practices, and consider power management strategies for long-term deployment. The next step might be to explore IoT connectivity options or integrate multiple sensor types for a more comprehensive monitoring solution.
Whether you’re a hobbyist or an educator, the possibilities for environmental monitoring projects are endless, and the skills you develop will serve as a foundation for more advanced applications.