

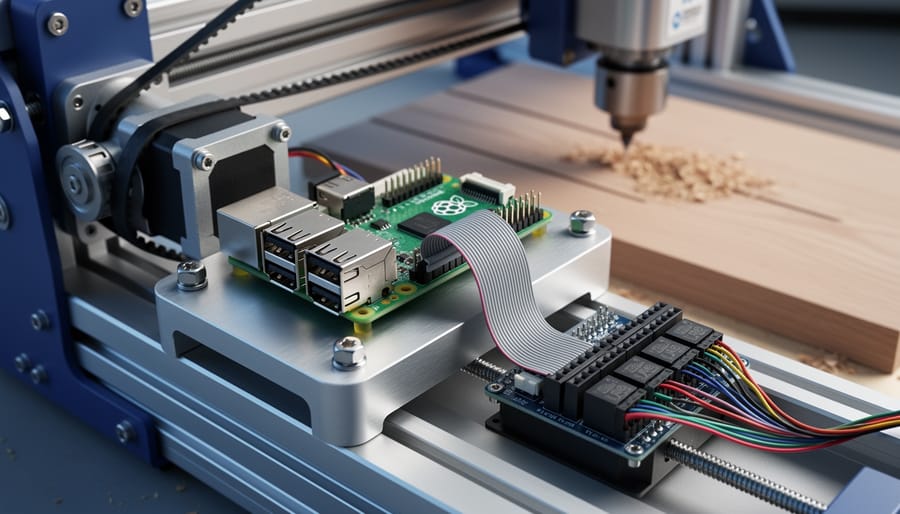
Transform your Raspberry Pi into a precision CNC controller by installing GRBL-compatible software like bCNC or Universal Gcode Sender, connecting stepper motor drivers through GPIO pins, and loading G-code files to mill, cut, or engrave materials with sub-millimeter accuracy. Mount the Pi directly to your CNC frame, wire it to a controller board like the Raspberry Pi CNC Hat or Arduino shield, configure motor steps-per-millimeter in your firmware, and start cutting within an afternoon.
Choose between dedicated CNC controller boards designed specifically for Raspberry Pi or adapt existing Arduino-based systems using USB serial communication. The Pi’s low cost and compact size make it ideal for retrofitting older CNC machines or building new desktop mills and laser cutters from scratch. Unlike traditional parallel port controllers, Raspberry Pi solutions offer network connectivity for wireless operation, camera integration for real-time monitoring, and touch screen interfaces that eliminate the need for a separate computer.
Similar to Raspberry Pi robotics projects, CNC control requires precise timing and reliable hardware interfacing. The Pi 4’s faster processor handles complex toolpaths smoothly, while older Pi 3 models work perfectly for basic two-axis operations. You’ll need basic electronics knowledge to wire stepper drivers, understanding of G-code fundamentals, and safety awareness when working with spinning bits and moving axes.
This guide walks you through hardware selection, software installation, calibration procedures, and troubleshooting common issues like missed steps and communication errors. Whether you’re machining custom PCBs, carving wooden signs, or cutting aluminum parts, Raspberry Pi delivers professional CNC control at hobbyist prices.
Why Raspberry Pi Makes Sense for CNC Control
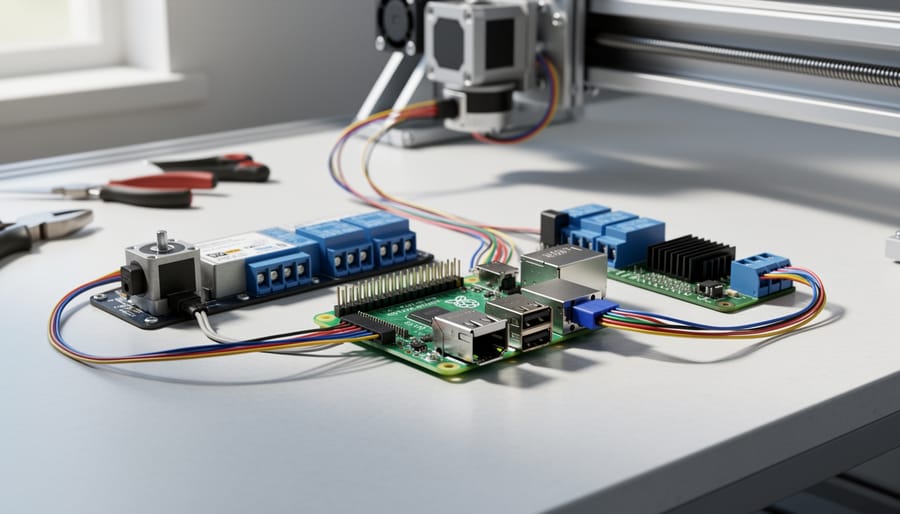
Cost Comparison: Raspberry Pi vs. Traditional CNC Controllers
The cost savings of using a Raspberry Pi for CNC control are substantial compared to traditional controllers. A Raspberry Pi 4 (4GB model) costs around $55-65, while commercial CNC controllers typically range from $200 to over $1,000 depending on features. When you add essential components like a motor controller board (HAT), you’re looking at an additional $30-80, bringing your total to approximately $100-150 for a complete Raspberry Pi CNC system.
In contrast, popular commercial options like the Mach3 controller system costs $175 for just the software license, plus another $150-200 for compatible motion control hardware. Industrial-grade controllers from manufacturers like Fanuc or Siemens can exceed $2,000. The Raspberry Pi approach delivers similar functionality at a fraction of the price, making it ideal for hobbyists and educators.
Beyond the initial investment, the open-source nature of Raspberry Pi solutions means zero ongoing licensing fees. The same Pi that controls your CNC machine can also function as professional test equipment when not in use, maximizing your investment. For workshop setups or educational institutions purchasing multiple units, these savings multiply significantly, making Raspberry Pi an economically smart choice without sacrificing capabilities.
Processing Power You Actually Need
Good news: you don’t need a supercomputer to run a CNC machine. The Raspberry Pi handles CNC operations through G-code interpretation, which requires modest processing power. Your Pi isn’t doing the heavy computational lifting – it’s primarily reading instruction files and sending step-by-step commands to your stepper motors.
For basic CNC operations, even a Raspberry Pi 3B works reliably. It can handle standard milling, routing, and plotting tasks without breaking a sweat. However, the Raspberry Pi 4 (with 2GB RAM or higher) offers noticeable improvements: faster boot times, smoother web interface performance, and better multitasking if you’re running a camera feed or monitoring software alongside your CNC controller.
The Raspberry Pi 5 pushes performance further, but for most hobbyist CNC projects, it’s overkill. Save your budget unless you’re planning complex simultaneous operations or running computationally intensive CAM software directly on the Pi.
Real-world performance depends more on your controller software choice and SD card speed than raw processing power. A quality, fast SD card makes a bigger difference than you’d expect. For straightforward three-axis CNC machines, any Pi from generation 3 onward delivers reliable results.
What You’ll Need to Get Started
Essential Hardware Components
Building a CNC machine with a Raspberry Pi requires careful selection of compatible hardware components that work together seamlessly. Let’s break down what you’ll need to get started.
At the heart of your setup, you’ll want a Raspberry Pi 4 Model B with at least 2GB of RAM, though 4GB is recommended for smoother performance when running CNC control software like LinuxCNC or GRBL. The Raspberry Pi 3 Model B+ can also work for simpler projects, but you may experience processing limitations with complex toolpaths.
For CNC control, you’ll need a specialized HAT (Hardware Attached on Top) or control board. Popular options include the Protoneer Raspberry Pi CNC HAT, which offers direct motor driver connections, and the GRBL-compatible CNC boards that connect via GPIO pins. These boards translate your Raspberry Pi’s commands into precise motor movements.
Stepper motors are the muscles of your CNC machine. NEMA 17 motors work well for smaller desktop CNCs, while NEMA 23 motors provide more torque for larger, heavier machines. You’ll need one motor for each axis – typically three for X, Y, and Z movement.
Power requirements vary based on your motor selection. Most setups need a 12V or 24V power supply capable of delivering 5-10 amps. Make sure to use a separate power supply for your motors, not the Raspberry Pi’s power adapter, to prevent voltage fluctuations and potential damage.
Additional mechanical components include linear rails or rods for smooth axis movement, lead screws or timing belts for motion transfer, and limit switches for homing accuracy. Quality components here directly impact your machine’s precision and reliability.
Software and Operating Systems
When it comes to controlling your CNC machine with a Raspberry Pi, choosing the right software is crucial for achieving smooth, precise operations. The good news is that several robust options have been optimized for the Pi’s ARM architecture, each with distinct strengths.
LinuxCNC stands as the most comprehensive solution, offering industrial-grade features like trajectory planning, real-time motion control, and support for complex multi-axis configurations. While traditionally associated with more powerful desktop computers, recent versions run on Raspberry Pi 4, though you’ll want at least 4GB of RAM for optimal performance. LinuxCNC excels in precision and customization but does have a steeper learning curve.
GRBL represents the opposite end of the spectrum, focusing on simplicity and efficiency. This lightweight, open-source firmware runs on Arduino-compatible microcontrollers but pairs beautifully with Raspberry Pi through sender applications like bCNC or Universal Gcode Sender. The Pi handles the user interface and file management while GRBL manages the real-time motion control. This combination offers excellent reliability for hobby-scale projects.
For beginners, consider exploring CNCjs, a web-based interface that runs directly on your Raspberry Pi. You can access it from any device with a browser, making it incredibly convenient for workshop setups. It supports GRBL, Marlin, and other controllers while providing an intuitive dashboard for monitoring your jobs.
Each software option requires different setup approaches and hardware configurations, so consider your project complexity, technical comfort level, and specific CNC requirements when making your selection.
Best Raspberry Pi Models for CNC Projects
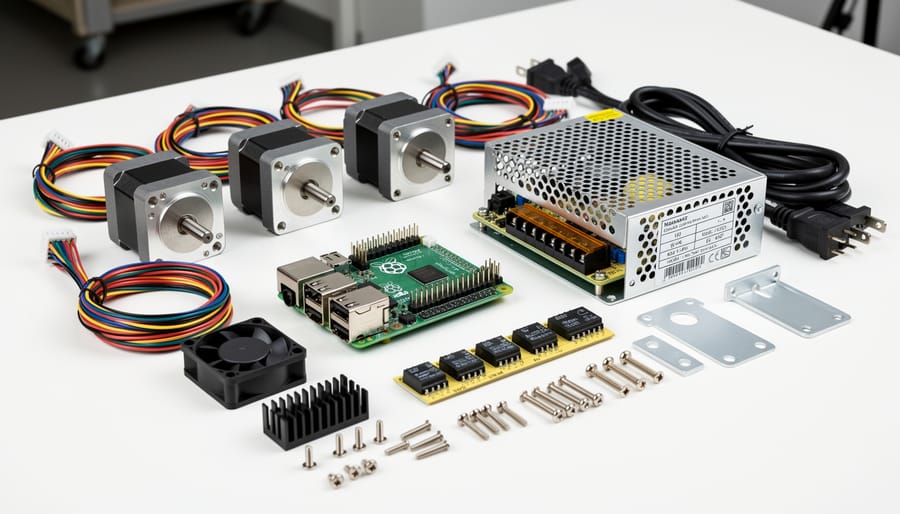
Raspberry Pi 4: The Powerhouse Option
The Raspberry Pi 4 stands out as the top choice for demanding CNC applications, thanks to its significant hardware upgrades. With up to 8GB of RAM available, it handles complex toolpath calculations and large G-code files without breaking a sweat. The quad-core ARM Cortex-A72 processor running at 1.5GHz delivers roughly three times the performance of the Pi 3, making it ideal for running sophisticated CNC control software like LinuxCNC or GRBL alongside visualization tools.
This extra processing power proves especially valuable when managing multiple stepper motors simultaneously or processing intricate designs with thousands of movement commands. The Pi 4’s dual micro-HDMI ports also let you set up a dual-monitor workspace, perfect for displaying both your design software and real-time machine status. If you’re planning to machine detailed parts, run camera-based monitoring, or use your CNC controller for educational demonstrations with live previews, the Pi 4’s enhanced capabilities justify the modest price increase over earlier models.
Raspberry Pi 3B+: The Budget-Friendly Choice
The Raspberry Pi 3B+ remains a solid choice for basic CNC operations, especially if you’re running simpler machines or working within a tight budget. While it has lower specs than newer models, the 3B+ handles standard G-code streaming and controls three-axis CNC machines without issue. You’ll find it particularly sufficient for smaller routers, pen plotters, and laser engravers where real-time processing demands aren’t extreme.
To maximize performance, keep your operating system lean by using Raspberry Pi OS Lite instead of the full desktop version. This frees up valuable RAM and processing power for CNC control software. Consider adding active cooling with a small fan to prevent thermal throttling during extended milling sessions. Running your CNC control software headless and accessing it remotely through SSH or a web interface also reduces system load significantly. The 3B+ proves that you don’t always need the latest hardware to bring your CNC projects to life, making it an excellent entry point for beginners exploring computer-controlled manufacturing.
Raspberry Pi Zero: Compact Solutions
The Raspberry Pi Zero presents an ultra-compact option for lightweight CNC projects, particularly excelling in small-scale plotters, pen drawing machines, and basic laser engravers. Its minimal footprint and low power consumption make it perfect for portable CNC builds where space is premium. The Zero handles stepper motor control adequately for two-axis machines running simple G-code operations.
However, the Zero has notable limitations. Its single-core processor and 512MB RAM struggle with complex toolpaths or high-speed operations. Multi-axis machines with simultaneous movement can experience lag and stuttering. Real-time control suffers compared to more powerful Pi models, making the Zero unsuitable for precision milling or routing applications. For educational projects and simple automation tasks, the Zero works brilliantly. For serious CNC machining, consider upgrading to a Pi 3 or 4 to ensure smooth, reliable performance.
Top CNC HATs and Expansion Boards
Protoneer Raspberry Pi CNC Hat
The Protoneer Raspberry Pi CNC Hat stands out as one of the most popular and accessible solutions for converting your Raspberry Pi into a CNC controller. This compact board sits directly on top of your Pi, featuring four stepper motor drivers that can handle NEMA 17 or NEMA 23 motors, making it suitable for small to medium-sized CNC routers, laser engravers, and 3D printers.
What makes this board particularly appealing is its compatibility with GRBL firmware, the industry-standard G-code interpreter that many makers already know and trust. The hat includes screw terminals for easy wiring, eliminating the need for soldering, which is perfect for beginners just starting their CNC journey.
The board works best with lightweight CNC machines designed for soft materials like wood, plastic, and PCB milling. While it won’t power heavy industrial equipment, it excels in educational settings and home workshops where precision and affordability matter most. The straightforward setup process and active community support make troubleshooting simple, ensuring you spend more time creating and less time wrestling with technical issues.
PiBot CNC Controller Board
The PiBot CNC Controller Board offers a streamlined approach for makers who want a plug-and-play solution without extensive wiring. This specialized HAT sits directly on top of your Raspberry Pi, providing dedicated stepper motor drivers and connection points for up to four axes. What sets PiBot apart is its integrated cooling system and onboard limit switch inputs, eliminating the need for additional breakout boards.
The board supports common CNC software like GRBL and LinuxCNC, making it accessible for beginners while offering advanced features like spindle speed control and probe inputs. Its compact design reduces cable clutter significantly compared to traditional Arduino-based setups. The PiBot typically costs between $45-$65, positioning it as a mid-range option that balances affordability with convenience.
One standout advantage is the simplified troubleshooting process since everything operates through a single board. However, keep in mind that you’ll need a Raspberry Pi 3B or newer for optimal performance, and the board works best with NEMA 17 stepper motors for lighter cutting applications.
DIY Solutions Using GPIO Pins
For advanced users seeking complete control over their CNC setup, building a custom interface using the Raspberry Pi’s GPIO pins offers unmatched flexibility. This approach bypasses pre-built HATs and software, allowing you to design precisely what your project needs.
Start by selecting a motor driver board compatible with your stepper motors. Popular options include the A4988 or DRV8825 drivers, which connect directly to GPIO pins. You’ll need to establish proper GPIO pin configurations for step and direction signals, typically using pins like GPIO 2, 3, 4, and 17 for multi-axis control.
Python libraries such as RPi.GPIO or pigpio provide the foundation for generating step pulses. Create a custom script that translates G-code commands into GPIO signals, controlling motor rotation speed and direction. Remember to implement limit switches on additional GPIO pins for safety and homing functionality.
This DIY approach requires careful attention to electrical isolation and power management. Use optocouplers to protect your Raspberry Pi from voltage spikes, and ensure your power supply adequately supports both the Pi and motors separately. While challenging, this method rewards you with deep understanding and complete customization possibilities for unique CNC applications.
Setting Up Your Raspberry Pi CNC Controller: Step-by-Step
Installing and Configuring the Operating System
Setting up your Raspberry Pi for CNC control starts with installing the operating system. Begin by downloading Raspberry Pi OS Lite from the official website, as the lighter version provides better real-time performance. Flash the image to your microSD card using tools like Raspberry Pi Imager or Balena Etcher.
For LinuxCNC installation, you’ll need to add real-time kernel support. Boot your Pi, open the terminal, and update your system with standard apt-get commands. Then install LinuxCNC by adding the official repository and following the package installation process. The setup wizard will guide you through configuring your specific machine parameters, including axis counts, motor steps per unit, and limit switch positions.
Alternatively, GRBL offers a simpler approach. Install it by cloning the GRBL repository from GitHub and uploading the firmware to an Arduino board connected to your Pi via USB. Your Raspberry Pi then acts as the interface, running software like bCNC or Universal Gcode Sender to communicate with GRBL.
Test your configuration by jogging each axis manually before attempting actual cuts. This verification step prevents potential damage and ensures smooth operation during your first project.
Connecting Your CNC Hardware
Now it’s time to connect your CNC components to your Raspberry Pi. This step requires careful attention to ensure safe, reliable operation of your machine.
Start by connecting your stepper motor drivers to the Raspberry Pi’s GPIO pins. Most CNC setups use standard stepper drivers like the A4988 or DRV8825. You’ll need to connect the step, direction, and enable pins from each driver to designated GPIO pins on your Pi. For a typical three-axis machine, you’ll use six GPIO pins minimum (two per axis). Connect the motor driver’s step pins to GPIO pins like 2, 3, and 4, and direction pins to 14, 15, and 18. Don’t forget to connect the enable pins as well.
Next, wire your limit switches for each axis. These safety devices prevent your machine from traveling beyond its boundaries. Connect one side of each switch to a GPIO pin and the other to ground. Use GPIO pins 17, 27, and 22 for X, Y, and Z axis limit switches respectively. Enable the internal pull-up resistors in your control software to ensure stable readings.
Power distribution is critical. Your stepper motors require significantly more power than the Raspberry Pi can provide. Use an external power supply rated for your motors (typically 12-24V) connected to your motor drivers. Keep the Pi’s power supply separate to avoid voltage fluctuations that could cause crashes or corruption.
Always double-check your connections before powering up. Incorrect wiring can damage components or create safety hazards.
Calibration and Testing
Before making your first cut, proper calibration ensures your CNC machine moves precisely where you tell it to. Start by calibrating steps-per-millimeter for each axis. This tells your Raspberry Pi how many motor steps equal one millimeter of movement. Measure a known distance, command the machine to move that exact amount, then measure the actual movement. If there’s a discrepancy, adjust the steps-per-mm value in your controller software until movements match your commands perfectly.
Next, run test movements across all three axes. Begin with slow, short movements to verify direction and responsiveness. Gradually increase speed and distance while monitoring for vibrations, skipped steps, or unusual sounds. These issues often indicate loose belts, incorrect motor current settings, or mechanical binding.
Create a simple test pattern using G-code, such as a square or circle, on scrap material. Use a pen mounted in place of your cutting tool for risk-free testing. Compare the drawn shape to your design file dimensions. Minor discrepancies can be corrected through software calibration, while major errors might indicate mechanical problems requiring adjustment.
Document your calibration values and save them as a reference. Regular accuracy checks before important projects will save materials and prevent frustrating failures during actual cutting operations.
Popular CNC Software Options for Raspberry Pi
LinuxCNC: The Professional Standard
LinuxCNC stands as the industrial-grade option for serious CNC enthusiasts. This open-source software powers professional machines and offers unmatched precision and control capabilities. What makes it powerful is its real-time kernel support, extensive toolpath control, and compatibility with virtually any machine configuration you can imagine.
However, this power comes with complexity. LinuxCNC requires a steeper learning curve than beginner-friendly alternatives like GRBL. You’ll need to configure hardware abstraction layers, tune servo loops, and potentially edit configuration files. The interface can feel intimidating at first, especially if you’re new to CNC concepts.
Is it worth the effort? Absolutely, if you’re planning complex projects, need professional-level accuracy, or want to build a custom machine with unique requirements. For simple three-axis routing or basic milling operations, simpler solutions might serve you better. But when precision matters and you need advanced features like tool changers, spindle synchronization, or rigid tapping, LinuxCNC delivers professional results on your Raspberry Pi setup.
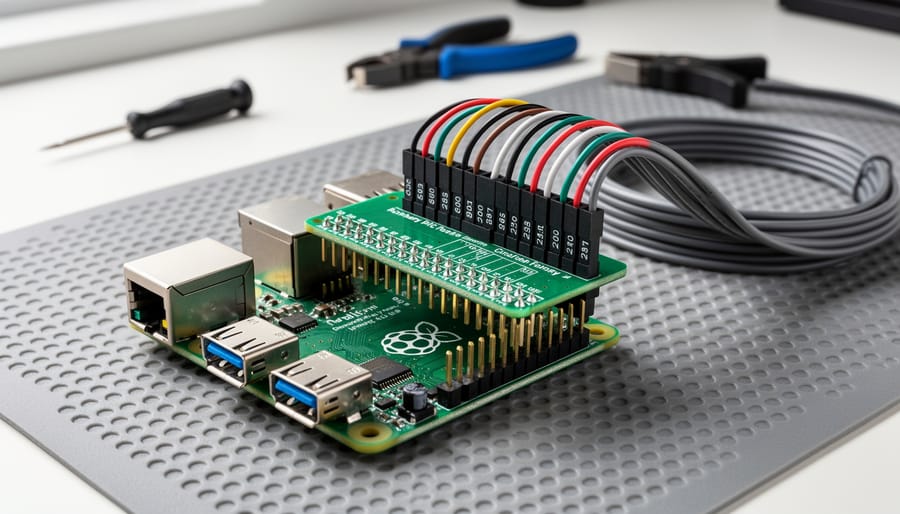
GRBL and Compatible Interfaces
If you’re just getting started or prefer a straightforward approach, GRBL firmware offers an excellent entry point for Raspberry Pi CNC control. GRBL runs on affordable Arduino boards that handle the real-time motion control, while your Pi manages the user interface through web-based software like CNCjs or bCNC. This division of labor simplifies setup considerably.
CNCjs stands out as a particularly beginner-friendly option. After installing it on your Raspberry Pi, you can access a clean web interface from any device on your network using just a browser. Upload your G-code files, visualize toolpaths in 3D, and control your machine through an intuitive dashboard. The software supports jogging controls, feed rate adjustments, and real-time position monitoring.
This GRBL-based approach costs less than dedicated CNC controllers and requires minimal configuration. Simply connect your Arduino running GRBL to the Pi via USB, install CNCjs through Node.js, and you’re ready to start cutting. The web interface means you can monitor jobs from your phone or tablet, making it perfect for workshop environments where mobility matters.
Web-Based Control Interfaces
Controlling your CNC machine doesn’t mean being chained to your workshop. Web-based control interfaces let you operate your Raspberry Pi CNC setup from any device with a browser, whether that’s your smartphone, tablet, or laptop across the room.
Popular options include CNCjs and bCNC, both offering intuitive dashboards where you can upload G-code files, jog the machine axes, and monitor cutting progress in real-time. CNCjs stands out with its clean interface and mobile-friendly design, making it perfect for quick adjustments while your workpiece is running. The software runs as a local web server on your Pi, so you simply navigate to its IP address from any connected device.
For beginners, these interfaces eliminate the learning curve of command-line operations. You get visual feedback with 3D toolpath previews, real-time position displays, and simple start/stop buttons. Most platforms also support webcam integration, letting you keep an eye on your cuts remotely. Setup typically involves installing the software via npm or apt-get and configuring it to communicate with your chosen CNC controller software.
Integrating CNC with 3D Printing and Laser Cutting
One of the most exciting aspects of using a Raspberry Pi as your controller is the ability to create a versatile, multi-functional maker tool that can switch between different operations. Instead of investing in separate machines for CNC milling, 3D printing, and laser engraving, you can build a single platform that handles all three tasks with interchangeable toolheads.
The key to this setup is designing a modular mounting system. Your base machine should have a sturdy frame with a reliable gantry system that can accommodate different toolheads. The Raspberry Pi acts as the central brain, running software like GRBL or LinuxCNC that can interpret G-code commands regardless of which tool is currently attached. You’ll need to configure tool offsets in your software so the Pi knows exactly where each toolhead sits relative to your workpiece.
For the CNC milling head, you’ll mount a spindle motor with your chosen bits. The 3D printing head requires a hotend, extruder, and filament feed system. The laser engraving attachment needs a laser diode module with appropriate safety housing. Each toolhead should have quick-release connectors for easy swapping, and you may want to include limit switches or sensors to help the Pi automatically detect which tool is currently installed.
This approach mirrors other creative Raspberry Pi DIY projects where versatility is key. You’ll need to create separate G-code profiles for each operation mode, adjusting parameters like feed rates, spindle speeds, and temperature controls. Consider adding a touchscreen display to your Pi for easy mode switching and job monitoring.
The beauty of this integrated system is workflow efficiency. You can design a project on your computer, mill a base plate with the CNC head, add detailed engravings with the laser, and even print custom mounting brackets with the 3D printer attachment, all from the same machine and controller setup.
Common Challenges and How to Solve Them
Dealing with Latency and Timing Issues
Timing precision is crucial for CNC operations because stepper motors require precise pulse signals to move accurately. A delay of even microseconds can result in missed steps, leading to dimensional errors or lost positioning in your workpiece.
The Raspberry Pi, running a standard Linux operating system, isn’t inherently designed for real-time control. The OS handles multiple tasks simultaneously, which can cause timing inconsistencies. However, you can optimize performance through several practical approaches.
First, consider using dedicated CNC controller boards like the Arduino-based GRBL shields that handle the real-time pulse generation, while your Raspberry Pi manages the higher-level functions like G-code interpretation and user interface. This hybrid approach leverages the Pi’s computing power without demanding impossible real-time performance.
For software optimization, disable unnecessary services and background processes to free up system resources. Running your CNC control software at higher priority levels can also improve responsiveness. Some users successfully implement the PREEMPT_RT kernel patch, which adds real-time capabilities to Linux, though this requires intermediate technical skills.
Finally, always perform test cuts with scrap material to verify your setup maintains accuracy before working on final projects.
Power Supply Problems and Solutions
Power-related issues are among the most common culprits behind unstable CNC operations with Raspberry Pi. The Pi itself requires a stable 5V supply at 2.5-3A minimum, but your CNC setup demands significantly more when factoring in stepper motors and controllers.
Start by using a quality power supply rated at least 5A for the Pi and a separate dedicated supply for your stepper motors. Never power motors and the Pi from the same source, as voltage drops from motor activity will cause unexpected resets and corrupted G-code execution.
Brown-out detection is your friend. Enable it in your config.txt file to prevent the Pi from operating during voltage sags. Consider adding a small uninterruptible power supply (UPS) or large capacitors near your motor drivers to smooth out power spikes.
Check all connections regularly, as vibrations from CNC operation can loosen wiring over time. Use ferrules on stranded wires and ensure proper gauge wire for current requirements. A multimeter becomes essential for diagnosing voltage drops across your system. These precautions will keep your projects running smoothly without frustrating mid-job failures.
Accuracy and Precision Improvements
Achieving professional-grade precision from your Raspberry Pi CNC setup requires attention to several key factors. Start by calibrating your stepper motors accurately—measure actual movement distances and adjust your steps-per-millimeter settings in your control software accordingly. Even small miscalculations compound over longer cuts.
Mechanical improvements make a significant difference. Upgrade to quality linear rails and ball screws if your budget allows, as these reduce backlash and improve repeatability. Ensure all components are properly tightened and squared, checking with precision measuring tools like dial indicators.
Software optimization matters too. Use slower feed rates for finishing passes and implement proper tool path optimization to minimize direction changes. Enable backlash compensation in your control software if your machine exhibits play in the mechanics.
Temperature affects precision more than most realize. Allow your machine to warm up before critical cuts, and keep your workspace at consistent temperatures. For the best results, run test cuts with scrap material first, measuring outcomes with calipers to verify accuracy before committing to final pieces.
Real-World Projects You Can Build
One of the most exciting aspects of building a Raspberry Pi CNC setup is the sheer variety of projects you can tackle. Whether you’re just starting out or ready for something more challenging, there’s a project that matches your skill level.
For beginners, a simple 2D plotter makes an excellent first project. Using basic stepper motors and readily available parts, you can create a machine that draws designs, plots graphs, or even writes greeting cards. This project teaches fundamental CNC concepts without overwhelming complexity.
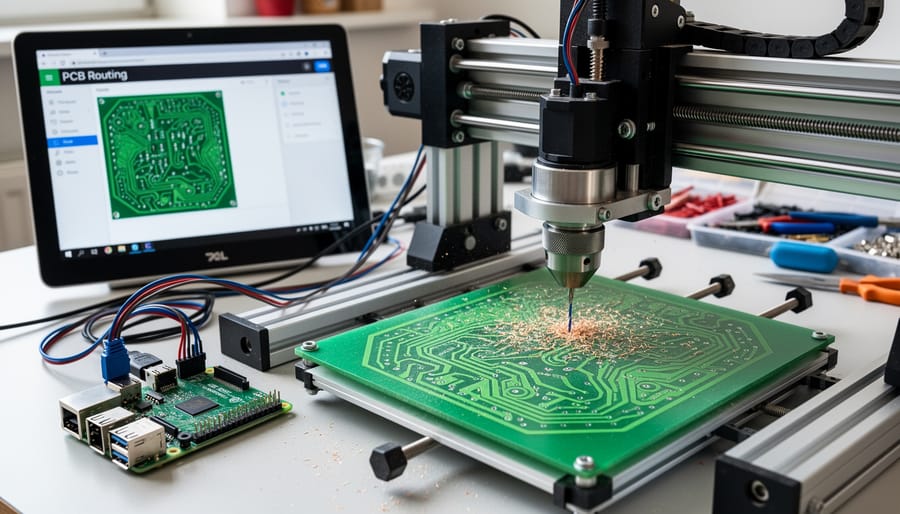
Moving to intermediate difficulty, PCB milling opens up possibilities for electronics enthusiasts. With proper tooling and careful setup, your Raspberry Pi CNC can mill circuit boards at home, eliminating the wait time for commercial fabrication. You’ll need to achieve accuracy within 0.1mm, but modern control software makes this achievable with patience and calibration.
Woodworking projects represent another popular category. Start with simple engraving on cutting boards or wooden signs, then progress to relief carving and intricate inlays. A properly configured machine can handle hardwoods and softwoods alike, creating everything from decorative panels to custom guitar bodies.
Advanced users often tackle aluminum machining, which requires rigid construction and precise control. Projects like custom enclosures, mounting brackets, or small mechanical parts become feasible with the right setup and cutting parameters.
For educators, 3D surface scanning combined with CNC reproduction offers fascinating classroom demonstrations. Students can scan objects, process the data on the Raspberry Pi, and mill reproductions in foam or wood.
The key is starting simple and gradually building your skills. Each successful project teaches valuable lessons about feeds, speeds, tooling, and material properties that prepare you for more ambitious creations.
Building your own CNC machine with a Raspberry Pi opens up a world of precision manufacturing right from your home workshop. This project proves that professional-grade capabilities don’t require an industrial budget. With just a small investment in hardware and some dedicated learning time, you can transform raw materials into intricate designs, custom parts, and creative projects limited only by your imagination.
The beauty of a Raspberry Pi-based CNC setup lies in its flexibility and scalability. Start simple with a basic three-axis router, then expand your capabilities as you gain confidence. The supportive maker community means you’re never troubleshooting alone. Countless forums, video tutorials, and open-source projects provide guidance at every step.
Whether you’re an educator introducing students to digital fabrication, a hobbyist expanding your workshop capabilities, or simply curious about modern manufacturing, the Raspberry Pi CNC path is remarkably accessible. The initial learning curve pays dividends in skills, understanding, and the satisfaction of creating precise physical objects from digital designs.
Ready to begin? Gather your components, download your preferred control software, and take that first step. Your journey into affordable, home-based precision manufacturing starts now.