

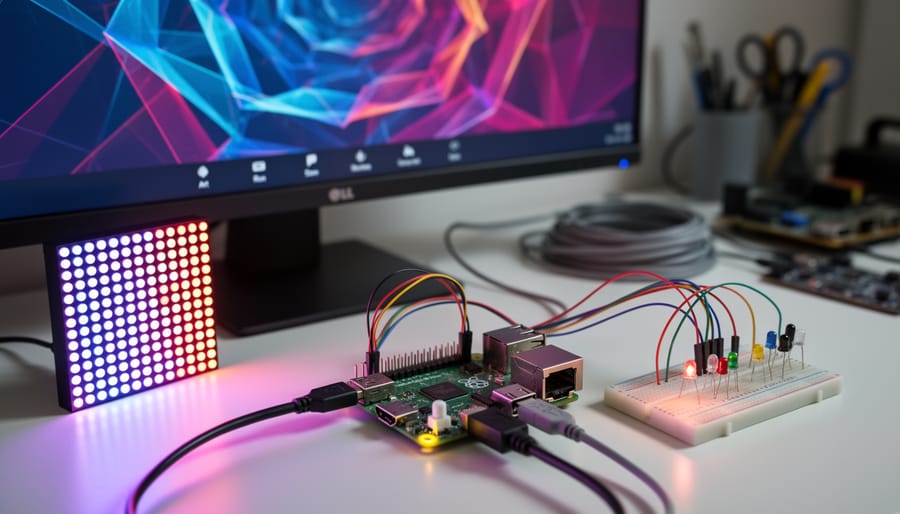
Transform your Raspberry Pi into a canvas by installing digital art software like Processing or openFrameworks to create generative visual displays that respond to sensor inputs or music. Connect LED matrices, e-ink displays, or old monitors to showcase animated patterns, data visualizations, or interactive installations that blur the line between technology and creativity.
Build pixel art displays using programmable RGB LED strips controlled through Python scripts, enabling you to create scrolling messages, weather visualizations, or retro-style animations. Start with simple 8×8 matrices before scaling up to larger installations—the GPIO pins provide direct control over individual LEDs, making complex light sculptures achievable even for beginners exploring learning with Raspberry Pi.
Configure your Raspberry Pi as a digital picture frame that cycles through algorithmic art, AI-generated images, or your own photo manipulations. Programs like feh or custom Python scripts using Pillow library can apply real-time filters, create collages, or generate fractal patterns that refresh hourly, turning any screen into dynamic artwork.
Experiment with physical computing art by connecting motors, servos, and sensors to create kinetic sculptures that move in response to environmental data like temperature, sound, or motion. The combination of affordable hardware and accessible programming languages makes the Raspberry Pi ideal for artists who want technology to enhance their creative expression without requiring advanced engineering knowledge. Whether you’re designing museum-quality installations or weekend hobby projects, this tiny computer opens endless possibilities for merging code with visual expression.
Why Artists and Creators Are Choosing Raspberry Pi
Artists and creators are discovering that Raspberry Pi offers a unique combination of affordability, flexibility, and power that makes it ideal for artistic exploration. Unlike traditional art technology that can cost thousands of dollars, a Raspberry Pi board starts at just $35, democratizing access to creative computing tools for artists at every budget level.
The portability factor cannot be overstated. These credit-card-sized computers can be embedded directly into sculptures, installations, or wearable art pieces without the bulk of traditional computers. This compact form factor opens up possibilities for interactive art displays in galleries, outdoor installations, and mobile exhibitions that would be impractical with conventional hardware.
What truly sets Raspberry Pi apart for physical art applications is the availability of GPIO pins for projects that bridge the digital and physical worlds. These programmable pins allow artists to connect sensors, LED strips, motors, and other electronic components directly to their creations. An artist can create a painting that responds to viewer proximity, a sculpture that changes color based on weather data, or interactive installations that react to sound and movement.
The software ecosystem further enhances its creative potential. Raspberry Pi runs a full Linux operating system, supporting popular creative tools like Processing for generative art, Pure Data for sound installations, and even lightweight versions of image editing software. Artists can code custom applications in Python or use visual programming environments like Node-RED to create unique interactive experiences.
For digital artists, Raspberry Pi serves as an affordable platform for displaying digital artwork, running animation loops, or creating custom media players for exhibitions. The ability to configure each unit specifically for artistic needs, combined with the supportive maker community sharing code and ideas, makes Raspberry Pi an increasingly essential tool in contemporary art practice. Whether you’re creating LED light shows, generative art displays, or interactive installations, the platform provides professional-grade capabilities without the professional-grade price tag.
Digital Art and Visualization Projects
Generative Art Installations
Generative art installations transform your Raspberry Pi into an autonomous creative machine that produces ever-evolving visual displays. These projects use algorithms to create artwork that changes over time, making each viewing experience unique.
Processing is an excellent starting point for generative art. This creative coding environment runs smoothly on Raspberry Pi and offers intuitive syntax for creating visual patterns. You can program animated fractals, particle systems, or geometric patterns that respond to random variables or sensor inputs. The Processing Development Environment includes countless examples to help you understand the fundamentals before customizing your own designs.
Python users have powerful libraries at their disposal, including Pygame for interactive graphics and PIL (Python Imaging Library) for image manipulation. The Matplotlib library can generate stunning data visualizations, while libraries like Turtle provide simple entry points for creating recursive patterns and geometric designs. For more advanced projects, combine OpenCV with NumPy to create responsive installations that react to camera input or motion detection.
Popular generative art projects include Conway’s Game of Life simulations, Perlin noise landscapes, and L-system fractal generators. You can display these creations on connected monitors, LED matrices, or even project them onto walls for larger installations. Adding sensors like microphones or temperature readers creates reactive art that responds to environmental changes, making your installation truly interactive.
Start with simple projects like animated spirals or color-shifting patterns, then gradually incorporate complexity as you gain confidence with the coding concepts involved.
LED Matrix Displays and Pixel Art
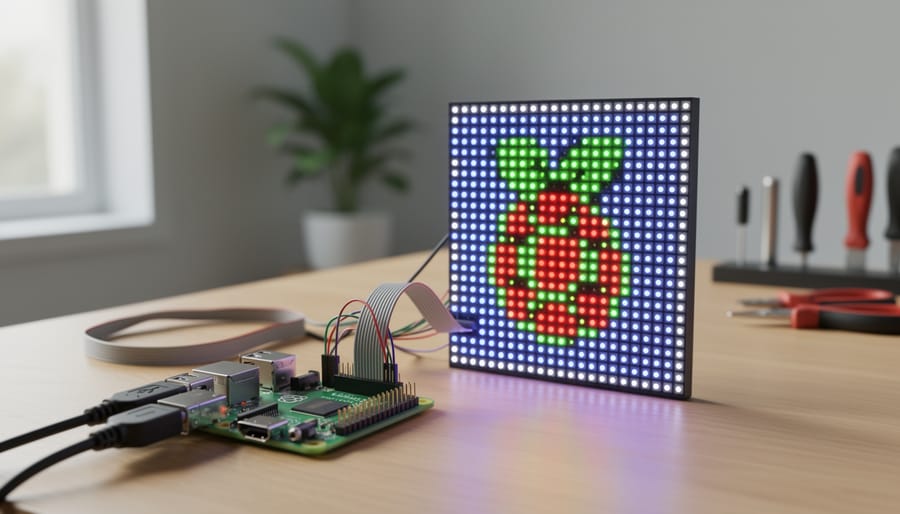
LED matrix displays offer an exciting canvas for creating retro-inspired pixel art and dynamic light installations with your Raspberry Pi. These grids of individually controllable LEDs range from compact 8×8 modules to massive wall-sized panels, making them perfect for both desktop decorations and eye-catching public displays.
The most popular option for beginners is the MAX7219-controlled 8×8 LED matrix, which connects easily via GPIO pins and costs under $5. For larger projects, WS2812B addressable LED strips can be arranged into custom matrix configurations, giving you full RGB color control. The Adafruit RGB Matrix HAT provides another excellent solution for driving larger panels with minimal wiring complexity.
Programming these displays is straightforward using Python libraries like Luma.LED and rpi-rgb-led-matrix. You can create scrolling text displays for announcements, animated sprites for gaming aesthetics, or reactive visualizations that respond to music and sensor inputs. Popular projects include retro game character animations, real-time weather displays with custom icons, and social media notification counters that light up with each new interaction.
For interactive installations, consider adding sensors like PIR motion detectors or ultrasonic distance sensors to trigger animations when viewers approach. This transforms static pixel art into engaging experiences. Community forums and GitHub repositories offer countless ready-made animations and templates you can customize, making it easy to get started even without extensive programming knowledge. The combination of nostalgic pixel aesthetics and modern programmability makes LED matrices an endlessly creative medium for Raspberry Pi artists.
Digital Picture Frames with Smart Features
Transform your Raspberry Pi into an intelligent digital art frame that does far more than display static images. Using a Pi Zero W or Pi 4 connected to an HDMI display, you can create a dynamic gallery that rotates through your favorite artworks, pulls fresh pieces from museum APIs like the Metropolitan Museum of Art or Rijksmuseum, or even generates displays based on real-time data.
Start by installing a lightweight image viewer like feh or building a custom Python script using the Pillow library. For advanced functionality, integrate weather sensors to change artwork based on temperature or time of day—imagine displaying sunny Van Gogh landscapes on bright mornings and moody Rothko pieces during rain. You can also connect to online galleries through their REST APIs, automatically refreshing your collection daily.
The beauty of this project lies in its flexibility. Add motion sensors to activate the display when someone approaches, or use voice commands through Google Assistant integration. For those interested in generative art, combine this setup with AI image generation tools to create ever-evolving displays. This project works perfectly in homes, offices, or educational spaces where rotating visual inspiration adds value.
Interactive Art and Physical Computing
Sensor-Responsive Installations
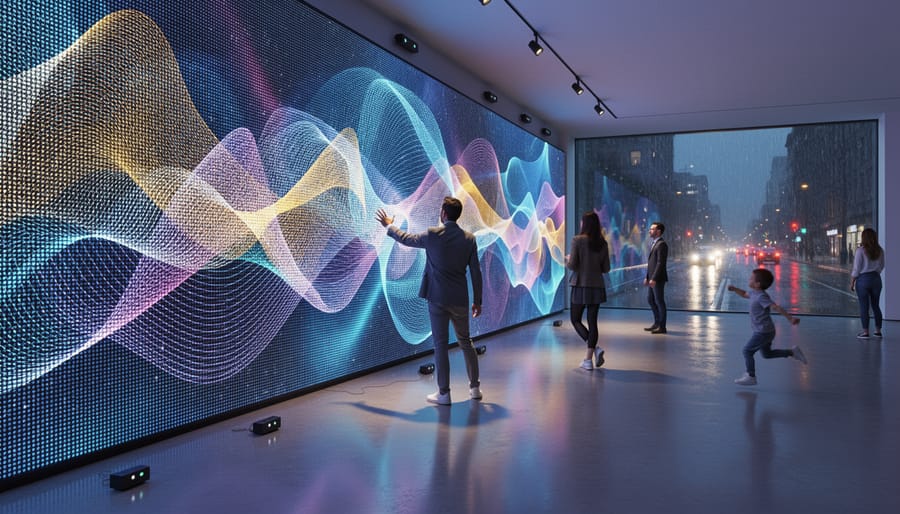
Sensor-responsive installations take Raspberry Pi art to the next level by creating pieces that actively interact with their environment and audience. These projects transform static displays into dynamic experiences that evolve based on real-time data and human presence.
Motion sensors like the PIR (Passive Infrared) module are perfect for triggering artistic responses when viewers approach. You can create installations that change LED patterns, display different images, or play sounds as people move through a space. These sensors cost just a few dollars and connect easily to your Pi’s GPIO pins.
The Raspberry Pi Camera Module opens up exciting possibilities for computer vision art. Using libraries like OpenCV and TensorFlow Lite, your installation can detect faces, recognize gestures, or track movement patterns. Imagine a digital canvas that paints itself based on how viewers position themselves, or a mirror that distorts reflections according to facial expressions.
Environmental sensors add another dimension by responding to temperature, humidity, light levels, or air quality. A temperature-sensitive installation might shift color palettes as the room warms or cools, while a light-dependent piece could adapt its brightness throughout the day.
Getting started is straightforward: choose your sensor type, connect it to your Raspberry Pi, and write Python code to interpret the sensor data and trigger your artistic output. Many sensor libraries include example code that you can modify for your creative vision. Start simple with a single sensor and gradually combine multiple inputs to create increasingly sophisticated responsive installations that blur the line between observer and participant.
Sound-Reactive Visual Art
Sound-reactive visual art transforms audio into mesmerizing light displays, making it perfect for parties, music studios, or interactive installations. Your Raspberry Pi’s real-time processing capabilities make it ideal for analyzing audio frequencies and triggering visual responses instantly.
Start by connecting a USB microphone or audio input module to capture sound. Popular Python libraries like PyAudio handle audio input, while NumPy and SciPy perform Fast Fourier Transform (FFT) analysis to break sound into frequency bands. This lets you detect bass, mids, and treble separately.
For visuals, connect LED strips (WS2812B works great), LCD screens, or projectors to your Pi. Map different frequency ranges to colors, brightness, or animation patterns. Bass frequencies might trigger red flashes, while high frequencies create blue ripples.
The programming logic is straightforward: continuously sample audio, analyze frequencies, and update your display accordingly. Many makers use the rpi_ws281x library for LED control combined with audio processing scripts.
Consider adding sensitivity adjustments and color scheme options to customize the experience. This project combines electronics, programming, and artistic expression, making it an excellent learning opportunity that produces genuinely impressive results.
Kinetic Sculptures and Motorized Art
Raspberry Pi brings mechanical art to life by controlling servo motors and stepper motors, enabling creators to build mesmerizing kinetic sculptures. The GPIO pins on your Pi can send precise signals to motors, creating coordinated movements that transform static artwork into dynamic installations.
Start with simple projects like a wave machine using multiple servo motors, or create robotic flowers that bloom and close throughout the day. The Python libraries like RPi.GPIO and gpiozero make motor control accessible even for beginners. Connect your servos to the GPIO pins, add a power supply suitable for your motors, and you’re ready to experiment.
For more complex pieces, stepper motors offer precise rotation control, perfect for creating rotating displays or intricate mechanical movements. Pair your motors with sensors to create reactive sculptures that respond to viewers’ presence or environmental changes like light and sound.
The beauty of Raspberry Pi-powered kinetic art lies in programmability. You can choreograph movements to music, create random patterns, or design time-based sequences that evolve throughout the day, making each viewing experience unique and engaging.
Photography and Video Art Applications
Automated Time-Lapse and Long-Exposure Projects
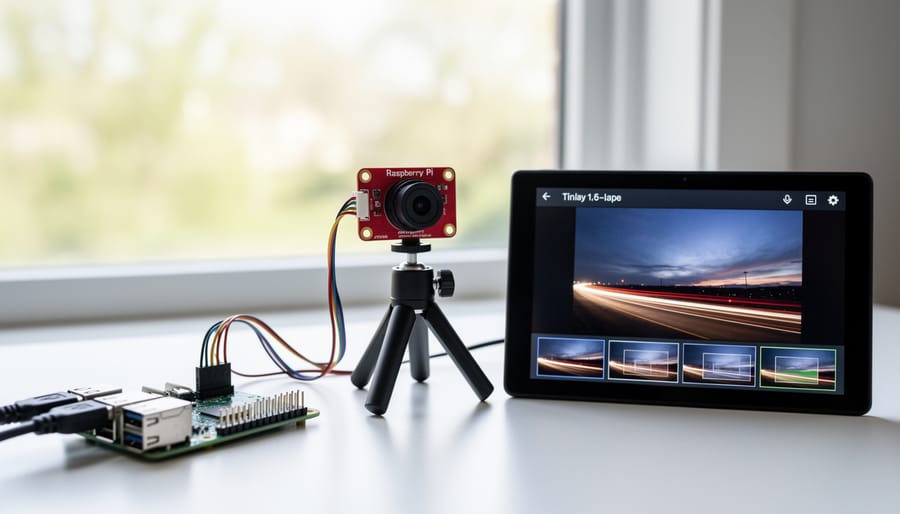
The Raspberry Pi Camera Module opens up exciting possibilities for artistic photography that would otherwise require expensive equipment. Time-lapse photography captures gradual changes over hours or days, perfect for documenting sunsets, cloud movements, or blooming flowers. To get started, connect your Pi Camera Module and install the picamera library using pip. Create a simple Python script that captures images at set intervals using the time.sleep() function between shots.
For long-exposure photography, you’ll need to adjust the camera’s shutter speed settings. The Pi Camera supports exposures up to several seconds, ideal for light painting, star trails, or capturing motion blur in waterfalls. Set your camera’s shutter_speed parameter in microseconds and adjust the ISO for optimal results in low-light conditions.
A practical project combines both techniques: create an automated day-to-night transition sequence by adjusting exposure settings throughout the capture period. Use cron jobs to schedule your scripts, ensuring your Pi continues shooting while you’re away. Mount your Raspberry Pi in a weatherproof case for outdoor projects, and power it with a portable battery pack for remote locations. The captured images can be compiled into stunning videos using free tools like FFmpeg, transforming hundreds of still frames into captivating motion sequences.
Interactive Photo Installations
Interactive photo installations bring a dynamic, participatory element to art exhibitions and events, and the Raspberry Pi makes these projects surprisingly accessible. Whether you’re building a photobooth for a community event or creating an art piece that responds to visitor presence, the compact size and camera compatibility of Raspberry Pi boards make them perfect for these applications.
A basic photobooth setup requires a Raspberry Pi, the official Camera Module or a USB webcam, and a simple interface for triggering captures. You can add a button connected to the GPIO pins or create a touchscreen interface using a small display. For instant gratification, connect a thermal printer or use a photo printer compatible with CUPS printing system on Raspberry Pi OS. Many makers use the picamera2 library in Python to handle image capture, which provides excellent control over camera settings and preview displays.
Take your installation further by adding real-time filters and effects. OpenCV libraries enable face detection, artistic filters, and even green screen replacement. You can create themed photobooths that add digital props, vintage effects, or artistic overlays before printing. Some installations display a live gallery wall by automatically uploading photos to a connected monitor or projector, creating a growing collage of visitor interactions throughout the event.
For makers interested in more experimental installations, consider motion-triggered photography that captures candid moments, time-lapse sequences compiled throughout the day, or collaborative projects where each visitor adds one piece to a larger photographic mosaic. These interactive experiences transform passive viewers into active participants, making your Raspberry Pi art installation memorable and engaging.
Essential Hardware and Software for Raspberry Pi Art Projects
Which Raspberry Pi Model to Choose
Choosing the right Raspberry Pi model for your art project depends on your specific needs and creative ambitions. For interactive installations, generative art, or projects requiring real-time image processing, the Raspberry Pi 4 (4GB or 8GB RAM) is your best bet. It handles multiple displays, processes complex animations smoothly, and manages processing power requirements for AI-driven art applications without breaking a sweat.
The Raspberry Pi Zero 2 W works wonderfully for portable, battery-powered art pieces like wearable LEDs or small-scale light sculptures. Its compact size and lower power consumption make it ideal for installations where space is limited, though you’ll need to keep projects relatively simple.
For beginners exploring basic LED projects or simple animations, the Raspberry Pi 3B+ offers a solid middle ground with adequate performance and affordability. It handles most introductory art projects comfortably while remaining budget-friendly.
Consider connectivity needs too. Built-in WiFi and Bluetooth in newer models simplify wireless art installations, while GPIO pin compatibility across all models ensures your sensors and displays work regardless of which Pi you choose.
Must-Have Components and Accessories
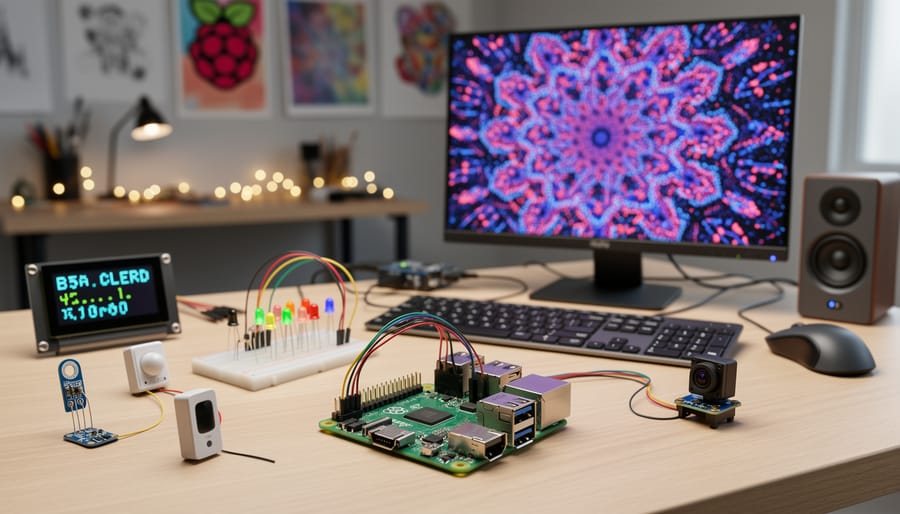
To bring your Raspberry Pi art projects to life, you’ll need the right hardware components. The official Raspberry Pi Camera Module or compatible USB webcams are essential for computer vision projects, enabling your Pi to detect motion, recognize faces, or capture time-lapse sequences. For projects involving light and color, addressable LED strips like WS2812B (NeoPixels) offer programmable illumination perfect for interactive installations and ambient lighting displays.
Sensors expand creative possibilities significantly. Ultrasonic distance sensors can trigger responses based on viewer proximity, while PIR motion sensors detect movement for interactive exhibits. Temperature and humidity sensors add environmental responsiveness to your artwork. For output, consider e-paper displays for low-power visual art, OLED screens for vibrant graphics, or LCD touchscreens for interactive experiences.
Audio components like USB microphones and speakers enable sound-reactive installations, while breadboards and GPIO extension boards simplify prototyping. Don’t forget a reliable power supply rated for your Pi model, plus microSD cards for storage. Jumper wires, resistors, and a basic electronics kit round out your toolkit. Start with fundamental components matching your project vision, then expand as your skills and creative ambitions grow. Many components are affordable and readily available from electronics retailers.
Software Tools and Creative Coding Environments
The Raspberry Pi supports a rich ecosystem of creative coding environments that make artistic projects accessible regardless of your programming background. Processing, a Java-based framework beloved by visual artists, runs smoothly on Raspberry Pi and excels at creating interactive graphics and generative art. For more advanced users, openFrameworks offers powerful C++ tools for real-time video processing and complex installations.
Python enthusiasts will find excellent libraries like Pygame for game-like interactive art and PIL (Python Imaging Library) for image manipulation and procedural graphics. Pure Data stands out as a visual programming environment perfect for audio-reactive installations and sound art, letting you patch together data flows without traditional coding.
Node-RED provides a browser-based flow editor ideal for connecting sensors to visual outputs, while TouchDesigner (though resource-intensive) can handle ambitious multimedia projects. Many artists also use web technologies like p5.js, leveraging the Pi’s ability to run local servers and display browser-based artwork.
Start with Python and Pygame if you’re new to creative coding—the combination offers immediate visual feedback and extensive documentation. As your skills grow, explore specialized tools that match your artistic vision.
Beginner-Friendly Project Tutorial: Building Your First LED Art Display
Ready to create your first mesmerizing LED art display? This project uses an 8×8 LED matrix to show animated patterns that will brighten any room. Don’t worry if you’re new to electronics—we’ll walk through everything step by step.
What You’ll Need:
For this project, gather a Raspberry Pi (any model with GPIO pins works), an 8×8 LED matrix with MAX7219 driver chip, five female-to-female jumper wires, a 5V 2A power supply for your Pi, and a breadboard (optional, for easier connections). The total cost should be around $30-40 if you already have a Raspberry Pi.
Setting Up the Hardware:
Start by powering off your Raspberry Pi completely. Connect the LED matrix to your Pi using the following wiring scheme: VCC on the matrix goes to Pin 2 (5V) on the Pi, GND to Pin 6 (Ground), DIN to Pin 19 (GPIO 10/MOSI), CS to Pin 24 (GPIO 8/CE0), and CLK to Pin 23 (GPIO 11/SCLK). Double-check each connection before powering on—incorrect wiring is the most common beginner mistake.
Installing the Software:
Once your hardware is connected, boot up your Raspberry Pi and open the terminal. First, enable SPI communication by running “sudo raspi-config”, navigating to Interface Options, and enabling SPI. Reboot when prompted.
Next, install the necessary library by typing: sudo pip3 install luma.led-matrix
This library makes controlling LED matrices incredibly simple, handling all the low-level communication for you.
Creating Your First Animation:
Create a new Python file called led_art.py and add this code:
from luma.core.interface.serial import spi, noop
from luma.led_matrix.device import max7219
from luma.core.render import canvas
import time
serial = spi(port=0, device=0, gpio=noop())
device = max7219(serial)
while True:
with canvas(device) as draw:
draw.rectangle((0, 0, 7, 7), outline=”white”, fill=”black”)
time.sleep(0.5)
with canvas(device) as draw:
draw.rectangle((2, 2, 5, 5), outline=”white”, fill=”white”)
time.sleep(0.5)
Run your program with “python3 led_art.py” and watch your LED matrix come alive with pulsing squares!
Troubleshooting Common Issues:
If nothing lights up, verify your wiring connections match exactly as described. Check that SPI is enabled in raspi-config. If you see random flickering, your power supply might be insufficient—try using a dedicated 5V supply for the matrix. Import errors usually mean the library didn’t install correctly; try reinstalling with sudo pip3 install –upgrade luma.led-matrix.
Taking It Further:
Once you’ve mastered the basics, experiment with different patterns. Try creating scrolling text, bouncing balls, or even a simple Pong game. The luma.led-matrix library documentation offers excellent examples for inspiration. You can also chain multiple matrices together for larger displays, opening up even more creative possibilities.
This foundational project teaches you GPIO control, library usage, and basic animation concepts that apply to countless other Raspberry Pi art projects.
Taking Your Art Projects Further: Tips and Resources
Once you’ve completed your Raspberry Pi art project, the journey doesn’t have to end there. Documenting your work is essential for sharing knowledge and inspiring others. Take clear photos throughout the build process, write detailed notes about your code and circuits, and create a project write-up on platforms like Instructables or Hackster.io. These documentation efforts help the community learn from your experience and can serve as a portfolio piece for future opportunities.
Joining Raspberry Pi communities opens doors to collaboration and inspiration. The official Raspberry Pi Forums and subreddit r/raspberry_pi are excellent starting points where artists and makers share projects and troubleshoot together. For creative-focused discussions, check out communities like Creative Applications Network and Processing Foundation forums, where digital artists frequently showcase their work.
Finding inspiration is easier when you explore existing installations. Browse galleries like rhizome.org for net art and digital installations, or visit openprocessing.org to see interactive sketches that could translate to physical installations. Many artists share their code on GitHub, providing valuable learning resources for your next project.
If you’re considering exhibiting your work, start locally with maker faires, art galleries that feature digital art, or tech meetups. Document your project’s evolution from breadboard prototype to finished installation, as this narrative adds depth to exhibitions.
For scaling projects from prototype to gallery-ready installation, consider reliability and presentation. Replace jumper wires with soldered connections, design custom enclosures, and test extensively. If you’re creating portable installations, ensure your power solutions can run continuously. Remember that gallery environments require professional presentation, so invest time in cable management, mounting solutions, and user-friendly interfaces that don’t require technical knowledge to operate.
You don’t need a computer science degree or years of coding experience to create beautiful, meaningful art with a Raspberry Pi. The most important ingredient is curiosity and a willingness to experiment. Whether you want to build an LED light installation for your living room, create an interactive display for your local community center, or simply explore generative art on a small screen, the barrier to entry has never been lower.
Start small and don’t be intimidated by what seems complex at first glance. Many artists working with Raspberry Pi today began with zero technical background. They learned by doing, making mistakes, and building on small successes. The beauty of this platform lies in its forgiving nature – you can always restart, reload, or try a different approach without any real consequences.
The thriving community around Raspberry Pi art means you’re never alone in your creative journey. Forums, social media groups, and maker spaces are filled with people eager to share knowledge, troubleshoot problems, and celebrate your achievements. Documentation and tutorials abound for nearly every type of project imaginable.
So pick a project that excites you, gather the basic components, and take that first step. Your first creation might be simple, but it will be yours. The intersection of art and technology is waiting for your unique vision, and a Raspberry Pi is one of the most accessible ways to bring it to life.