

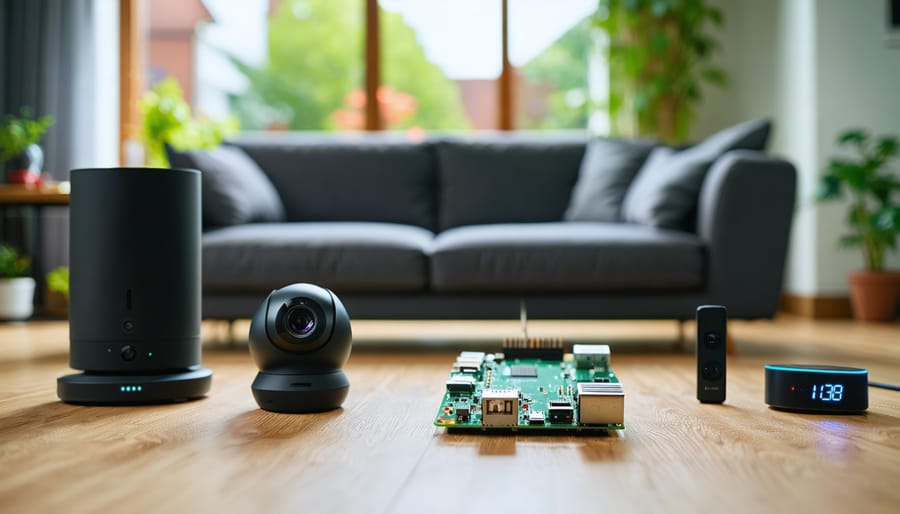
Transform your home into a sophisticated smart hub using a Raspberry Pi’s powerful automation capabilities. This compact, affordable computer serves as the perfect central controller for managing lights, security cameras, thermostats, and countless other smart devices through a single, customizable interface. By leveraging its edge computing capabilities, your Pi can process home automation tasks locally, ensuring faster response times and enhanced privacy compared to cloud-based solutions.
Modern home automation doesn’t require expensive, proprietary systems. With basic programming knowledge, a $35 Raspberry Pi, and common sensors, you can build a secure, expandable smart home platform that rivals commercial solutions costing thousands. Whether you’re automating routine tasks like temperature control and lighting schedules, or implementing advanced features such as facial recognition for security cameras, the Raspberry Pi provides the perfect foundation for bringing your smart home vision to life.
This guide will walk you through selecting the right hardware, setting up your first automation projects, and scaling your system to handle complex home control scenarios – all while maintaining complete control over your data and devices.
Essential Hardware for Your Smart Home Hub
Core Components
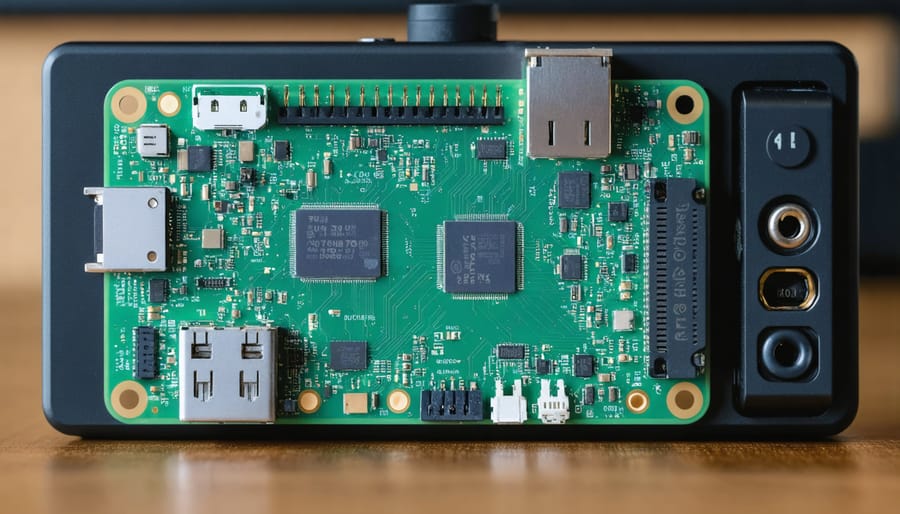
To build an effective home automation system with Raspberry Pi, you’ll need several essential components. The heart of your system will be the Raspberry Pi itself, with the Raspberry Pi 4 Model B being the recommended choice due to its powerful processor and ample RAM options (2GB, 4GB, or 8GB). This latest model offers superior performance for running multiple automation tasks simultaneously.
For reliable operation, invest in a quality power supply rated at 5V/3A with USB-C connectivity. The official Raspberry Pi power supply is recommended to prevent voltage-related issues that could affect system stability. Avoid generic phone chargers, as they may not provide consistent power delivery.
Storage is another crucial component. A high-quality microSD card with at least 32GB capacity serves as your system’s primary storage. Choose cards from reputable manufacturers with Class 10 or UHS-I ratings for optimal performance. Consider a larger capacity (64GB or 128GB) if you plan to store automation logs or camera footage.
Additional essential components include:
– A protective case for the Raspberry Pi
– A cooling solution (heatsinks or fan)
– Ethernet cable for reliable network connectivity
– microHDMI cable for initial setup
– USB keyboard and mouse
These core components provide the foundation for your home automation system, ensuring stable performance and reliability for your automated home projects.
Sensors and Actuators
A successful home automation system relies heavily on the right combination of sensors and actuators working with your Raspberry Pi. For effective IoT device integration, you’ll need to select components that match your specific automation needs.
Popular sensors for home automation include:
– Motion sensors (PIR) for automated lighting and security
– Temperature and humidity sensors for climate control
– Light sensors (LDR) for smart blinds and lighting
– Door/window contact sensors for security monitoring
– Water leak detectors for safety
For control and actuation, consider these essential components:
– Relay modules for controlling high-voltage appliances
– Servo motors for automated blinds and doors
– LED strips for ambient lighting
– Smart plugs for power management
– Infrared emitters for controlling TV and AC units
Most sensors connect to the Raspberry Pi through GPIO pins, using either digital or analog signals (through an ADC). For wireless sensors, options include WiFi-enabled modules or sensors that communicate via Zigbee or Z-Wave protocols through USB dongles. When selecting components, ensure they’re compatible with the Pi’s 3.3V logic level to prevent damage to your board.
Remember to consider power requirements and physical placement when planning your sensor network. For optimal performance, position sensors away from interference sources and within their specified range limits.

Setting Up Your Automation Platform
Operating System Installation
To get started with your home automation hub, you’ll need to install the operating system on your Raspberry Pi. The recommended choice is Raspberry Pi OS (formerly called Raspbian), which is specifically optimized for the Pi and includes all necessary drivers and utilities.
Begin by downloading the Raspberry Pi Imager tool from the official Raspberry Pi website. This user-friendly application streamlines the OS installation process. After installing the Imager on your computer, insert a microSD card (minimum 8GB) into your computer using an appropriate adapter.
Launch the Raspberry Pi Imager and select “Raspberry Pi OS (32-bit)” as your operating system. Choose your microSD card as the target storage device, then click “Write” to begin the installation process. The tool will download, format, and write the OS to your card automatically.
Once complete, insert the microSD card into your powered-off Raspberry Pi. Connect a keyboard, mouse, and display, then power on the device. The first-boot configuration wizard will guide you through essential setup steps, including:
– Setting your location and timezone
– Creating a password
– Configuring Wi-Fi
– Enabling SSH (recommended for remote access)
– Updating the system
After completing these steps, your Raspberry Pi will be ready for installing home automation software and connecting smart devices. Remember to regularly update your system using the terminal commands ‘sudo apt update’ and ‘sudo apt upgrade’ to ensure optimal performance and security.
Home Assistant Installation
Home Assistant is the go-to software for creating a powerful home automation system on your Raspberry Pi. The installation process is straightforward and can be completed in about 30 minutes. First, download the Home Assistant Operating System image specifically designed for Raspberry Pi from the official website. Using a tool like Balena Etcher, flash this image onto your microSD card.
Once the flashing is complete, insert the microSD card into your Raspberry Pi and power it on. The initial boot may take up to 20 minutes as Home Assistant sets up its environment. During this time, it’s configuring its database and preparing for processing sensor data and device connections.
Connect to your Home Assistant instance by typing “homeassistant.local:8123” in your web browser. If this doesn’t work, you can find your Pi’s IP address through your router and use that instead. Follow the on-screen setup wizard to create your admin account and begin configuring your system.
Home Assistant automatically discovers many smart devices on your network, but you may need to manually add some components through the integration menu. The interface is user-friendly, featuring a dashboard where you can monitor devices, create automation rules, and customize your setup according to your needs.
For advanced users, Home Assistant offers additional features like add-ons, custom components, and API access for enhanced functionality.
Network Configuration
Proper network configuration is crucial for a secure and reliable home automation system. Start by setting a static IP address for your Raspberry Pi to ensure consistent connectivity with your automation devices. Access your Pi’s network configuration file by entering ‘sudo nano /etc/dhcpcd.conf’ in the terminal, then add the following lines:
interface eth0
static ip_address=192.168.1.XX/24
static routers=192.168.1.1
static domain_name_servers=192.168.1.1
Replace “XX” with your desired number between 2-254, ensuring it doesn’t conflict with other devices on your network.
For enhanced security, change the default password using the ‘passwd’ command. Enable SSH only if remote access is necessary, and configure your router’s firewall to limit incoming connections to known IP addresses.
Consider setting up a separate VLAN for your IoT devices to isolate them from your main network. This adds an extra layer of security by preventing potential vulnerabilities in smart devices from affecting your personal computers and data.
Install and configure UFW (Uncomplicated Firewall) with:
sudo apt-get install ufw
sudo ufw default deny incoming
sudo ufw default allow outgoing
sudo ufw allow ssh
sudo ufw enable
Remember to regularly update your system with ‘sudo apt update’ and ‘sudo apt upgrade’ to patch security vulnerabilities.
Creating Your First Automation Projects
Smart Lighting Control
Automating your home lighting with a Raspberry Pi can significantly enhance your living space while reducing energy consumption. To get started, you’ll need a Raspberry Pi (any recent model will work), relay modules, and compatible LED bulbs or traditional lights.
Begin by connecting your relay module to the Raspberry Pi’s GPIO pins. For a basic setup, connect the VCC to 5V, GND to ground, and the input pins to your chosen GPIO pins (such as GPIO17, GPIO18). The relay’s output terminals will connect to your light fixtures, but ensure all high-voltage connections are handled by a qualified electrician for safety.
Install the required software by opening the terminal and running:
“`
sudo apt-get update
sudo apt-get install python3-pip
pip3 install RPi.GPIO
“`
Create a simple Python script to control your lights:
“`python
import RPi.GPIO as GPIO
import time
GPIO.setmode(GPIO.BCM)
GPIO.setup(17, GPIO.OUT)
def toggle_light(state):
GPIO.output(17, state)
“`
Enhance your setup by implementing scheduling using cron jobs or creating a web interface with Flask for remote control. Motion sensors can be added by connecting a PIR sensor to another GPIO pin, enabling automatic lighting when movement is detected.
For more advanced functionality, consider integrating your system with Home Assistant or Node-RED. These platforms provide user-friendly interfaces and additional automation options, such as light intensity adjustment based on time of day or weather conditions.
Remember to implement proper error handling and backup systems to ensure your lights remain functional even if the Raspberry Pi encounters issues. Regular maintenance and updates will keep your smart lighting system running smoothly.

Temperature Monitoring
Temperature monitoring is a fundamental aspect of home automation that can help you maintain comfort and energy efficiency. Using a Raspberry Pi with temperature sensors, you can create a sophisticated system that not only monitors but also controls your home’s climate.
To get started, you’ll need a DHT22 or BME280 temperature sensor, which connects to your Raspberry Pi’s GPIO pins. These sensors are affordable and provide accurate readings with minimal setup. Connect the sensor’s VCC pin to the 3.3V output, the ground pin to GND, and the data pin to GPIO4 (or any available GPIO pin).
Install the necessary Python libraries using pip:
“`
pip install Adafruit_DHT
“`
Create a Python script that reads temperature data at regular intervals. Your script can perform real-time data analysis to trigger actions based on temperature thresholds. For example, you can activate fans when it’s too warm or send alerts to your smartphone when temperatures fall outside acceptable ranges.
Consider implementing a web interface using Flask or Django to visualize temperature data through graphs and charts. This makes it easy to monitor trends and adjust settings remotely. You can also integrate your temperature monitoring system with other home automation components, such as smart thermostats or HVAC controls.
Store your temperature data in a database like SQLite or MySQL for historical analysis and pattern recognition. This helps you optimize your home’s energy usage by identifying peak heating and cooling periods.
Remember to position your sensors strategically throughout your home for accurate readings, avoiding direct sunlight and heat sources that could skew the data.
Security Camera Integration
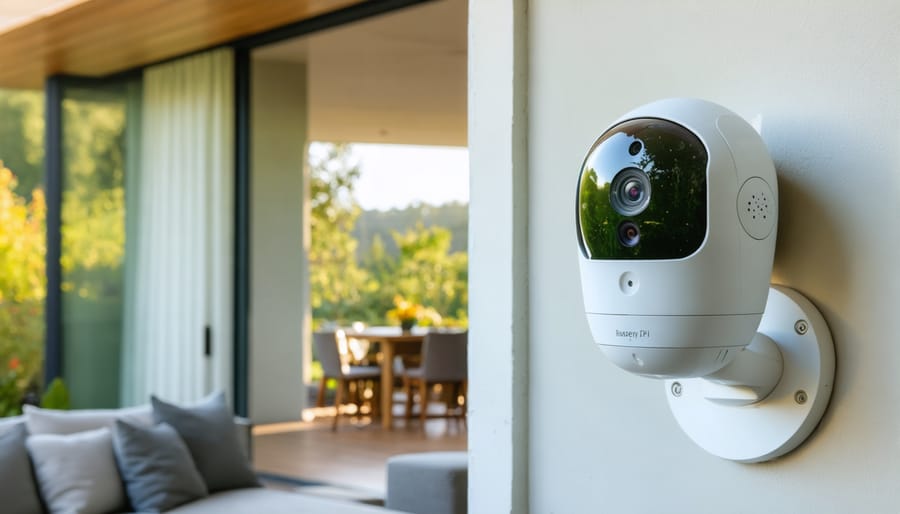
A security camera system is one of the most practical applications for your Raspberry Pi home automation setup. Using the Pi’s camera module or USB cameras, you can create a sophisticated surveillance system that monitors your home 24/7.
To get started, you’ll need a Raspberry Pi (preferably Model 3B+ or newer), a Pi Camera Module or USB webcam, and appropriate mounting hardware. The Pi Camera Module offers better integration and performance, but USB cameras provide more flexibility in placement and selection.
First, install Motion, a powerful motion detection software, using the terminal command:
“`
sudo apt-get install motion
“`
Configure the motion detection settings in the motion.conf file to adjust sensitivity, frame rate, and recording options. Key parameters to consider include:
– threshold: determines how much pixel change triggers detection
– framerate: affects video smoothness and storage requirements
– target_dir: specifies where recorded footage is saved
For real-time monitoring, you can set up a web interface that streams camera footage to any device on your network. Enable this by modifying the following settings:
“`
webcam_localhost off
webcam_port 8081
“`
To enhance your security system, implement push notifications when motion is detected. Using Python scripts with libraries like pushbullet or telegram-bot, you can receive instant alerts on your phone. Consider adding timestamp overlays to recordings and implementing a rotation system to manage storage space effectively.
For outdoor cameras, ensure proper weatherproofing of your setup and consider using infrared-capable cameras for night vision. You can also integrate your camera system with other home automation features, such as automatically turning on lights when motion is detected or recording specific zones during certain hours.
To access your camera feed remotely, set up port forwarding on your router or use a VPN connection to your home network. Always implement strong security measures, including unique passwords and encryption, to protect your surveillance system from unauthorized access.
Troubleshooting and Maintenance
When running a Raspberry Pi-based home automation system, you may encounter various challenges. Here’s how to address common issues and maintain your setup effectively.
Network connectivity problems often top the list of troubleshooting needs. If your Pi loses connection, first check your router settings and ensure your Pi has a static IP address. Rebooting both devices usually resolves temporary connection issues. For persistent problems, consider using a Wi-Fi signal booster or relocating your Pi closer to the router.
Memory management is crucial for optimizing Pi performance. Regular monitoring of CPU usage and available RAM helps prevent system slowdowns. Use commands like ‘top’ or ‘htop’ to identify resource-heavy processes, and consider disabling unnecessary services.
Storage issues can arise as logs and temporary files accumulate. Implement automatic log rotation and regularly clear cached data using ‘sudo apt-get clean’ and ‘sudo apt-get autoremove’. Monitor your SD card’s health using tools like F3 or badblocks to prevent data corruption.
For reliable operation, establish these maintenance routines:
– Weekly system updates using ‘sudo apt-get update’ and ‘sudo apt-get upgrade’
– Monthly backup of your configuration files and automation scripts
– Regular checking of sensor batteries and connections
– Periodic testing of all automated functions and triggers
– Monitoring system temperatures, especially in enclosed spaces
If your automation scripts stop working, check the logs for error messages and verify that all dependencies are up to date. Keep a backup of working configurations before making changes, and document any modifications for future reference.
Temperature management is vital for longevity. Install a small cooling fan if your Pi consistently runs hot, and ensure proper ventilation in its mounting location. Consider using a UPS to prevent data corruption during power outages and protect your setup from sudden shutdowns.
Embarking on a Raspberry Pi home automation journey opens up endless possibilities for creating a smarter, more efficient living space. Throughout this guide, we’ve explored the essential components, setup procedures, and various automation projects that can transform your home into a connected hub of convenience and innovation.
Remember that successful home automation with Raspberry Pi builds upon a solid foundation of basic setup, careful planning, and gradual expansion. Start with simple projects like automated lighting or temperature monitoring, then progress to more complex integrations as your confidence grows. The modular nature of Raspberry Pi makes it easy to add new features and capabilities over time.
To expand your home automation system, consider exploring additional sensors, implementing voice control, or creating custom interfaces for your specific needs. The vibrant Raspberry Pi community offers countless resources, tutorials, and support for troubleshooting and inspiration. Don’t hesitate to share your projects and learn from others’ experiences.
Keep security in mind as you develop your system, regularly update your software, and maintain proper documentation of your setup. With dedication and creativity, your Raspberry Pi home automation system can evolve into a sophisticated, personalized solution that perfectly matches your lifestyle and preferences.
Take the first step today, and remember that every expert started as a beginner. The journey of automating your home with Raspberry Pi is as rewarding as the destination itself.