

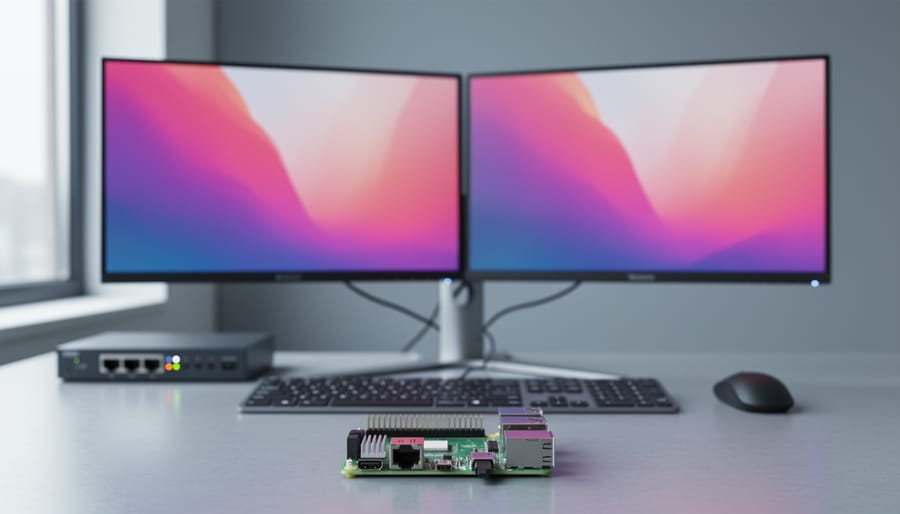
Transform any Raspberry Pi model into a fully functional thin client by installing lightweight remote desktop protocols like RDP, VNC, or Citrix Workspace. Configure your Pi to automatically boot into a remote desktop session, eliminating the need for local processing power while maintaining responsive performance for everyday business applications.
Select hardware components strategically to match your deployment needs. Pair a Raspberry Pi 4 with 4GB RAM for standard office workloads, add passive cooling heatsinks for silent operation in professional environments, and choose PoE HATs to eliminate separate power cables in clean desk setups. For multi-monitor configurations, leverage the dual micro-HDMI ports available on newer models or integrate USB-to-HDMI adapters for legacy display systems.
Optimize your thin client deployment by creating custom SD card images that automatically connect to your terminal server on startup. This approach reduces setup time from hours to minutes when rolling out multiple units across small businesses or educational institutions. Configure read-only file systems to prevent SD card corruption and extend hardware lifespan in 24/7 operational environments.
The cost advantages become immediately apparent: a complete Raspberry Pi thin client setup runs between $50-100 per workstation compared to $300-600 for commercial alternatives. This makes it ideal for budget-conscious organizations needing to extend their virtual desktop infrastructure without sacrificing reliability. The open-source ecosystem provides continuous updates and community support, ensuring your investment remains viable for years while offering complete customization control over every aspect of the user experience.
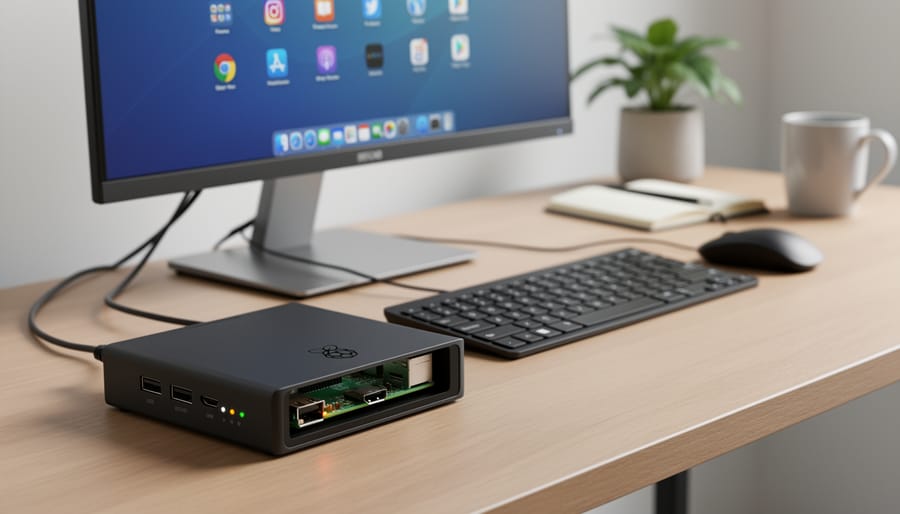
Why Raspberry Pi Excels as a Thin Client Platform
Cost Comparison: Raspberry Pi vs Traditional Thin Clients
When deciding between Raspberry Pi and traditional thin clients, the cost difference is substantial and worth examining closely. A commercial thin client typically ranges from $200 to $500 per unit, while a complete Raspberry Pi 4 setup costs between $75 and $120, including the board, case, power supply, and microSD card. That’s a savings of 60-75% per device right from the start.
The ongoing costs favor Raspberry Pi even more dramatically. Power consumption tells an impressive story: a Raspberry Pi 4 draws roughly 3-7 watts under typical workloads, compared to 15-30 watts for standard commercial thin clients. Over a year of continuous operation, this translates to approximately $3-8 in electricity costs for a Pi versus $15-35 for traditional alternatives. For organizations deploying dozens or hundreds of devices, these savings multiply significantly.
Scalability further enhances the value proposition. Need to expand your deployment? Each additional Raspberry Pi costs the same low price, while commercial thin client purchases rarely offer meaningful volume discounts unless you’re ordering in the hundreds. Plus, if you already have peripherals like keyboards, mice, and monitors, your incremental cost per new workstation drops even lower.
The maintenance picture is equally favorable. Raspberry Pi units use standard components and run open-source software, eliminating licensing fees that often accompany proprietary thin client solutions. While commercial options may include warranties and support contracts, the active Raspberry Pi community provides extensive free resources, troubleshooting guides, and solutions that often rival professional support channels.
Performance Capabilities and Limitations
When configured as a thin client, the Raspberry Pi excels at specific workloads while having clear limitations you should understand before deployment. The good news is that for most remote desktop scenarios, these affordable single-board computers deliver surprisingly capable performance.
The Raspberry Pi handles web-based applications remarkably well, including Google Workspace, Microsoft 365 online, and cloud-based CRM systems. Remote desktop protocols like RDP, VNC, and Citrix run smoothly, allowing users to access Windows or Linux servers without noticeable lag in typical office environments. Video conferencing through platforms like Zoom or Microsoft Teams works adequately at 720p resolution, though you might experience occasional frame drops during screen sharing with multiple participants.
Where the Raspberry Pi truly shines is in dedicated remote desktop environments. When connecting to a powerful server, users can run resource-intensive applications like AutoCAD or video editing software through the remote session, with the Pi serving purely as a display and input interface.
However, limitations exist. Local multitasking with multiple browser tabs and heavy web applications can cause slowdowns, particularly on older Raspberry Pi 3 models. 4K video playback locally may stutter, and running multiple high-resolution displays demands careful performance optimization. The Raspberry Pi 4 with 4GB or 8GB RAM significantly improves these scenarios, but expectations should remain realistic for standalone computing tasks. For thin client purposes where processing happens remotely, these limitations become largely irrelevant, making the Pi an excellent cost-effective solution.
Choosing the Right Raspberry Pi Model for Your Thin Client
Essential Hardware Components and Accessories
Building a reliable Raspberry Pi thin client starts with selecting the right hardware components. Let’s break down what you’ll need to get your setup running smoothly.
At the core, you’ll need a Raspberry Pi board. The Raspberry Pi 4 Model B (4GB or 8GB RAM) is ideal for thin client applications, offering excellent performance for remote desktop connections. For tighter budgets, the Raspberry Pi 3 Model B+ works well for basic tasks.
Power is critical for stability. Invest in an official Raspberry Pi power supply (5V/3A for Pi 4) to avoid random shutdowns and performance issues. Cheap adapters often cause problems that can be frustrating to troubleshoot.
Storage requires a quality microSD card, minimum 16GB Class 10 or UHS-I rated. Brands like SanDisk and Samsung offer reliable options. For enterprise environments, consider a USB boot setup with an SSD for improved longevity and speed.
Cooling becomes essential during extended use. A simple heatsink kit handles light workloads, but active cooling fans are recommended for 8-hour work sessions to prevent thermal throttling.
A protective case keeps your hardware safe. Options range from basic plastic enclosures to aluminum cases with integrated cooling. Choose based on your environment and cooling needs.
Essential peripherals include a keyboard, mouse, and monitor with HDMI input. For multiple displays, the Pi 4 supports dual monitors through its micro-HDMI ports, requiring appropriate adapters.
Network connectivity matters too. While built-in WiFi works for testing, wired Ethernet connections provide more stable performance for production thin client deployments. Consider a powered USB hub if you need additional ports for peripherals.
Tailored Hardware Integration Options
Custom Enclosures and VESA Mounting Solutions
Transforming your Raspberry Pi into a professional-looking thin client is easier than you might think. The compact size of the Pi opens up creative mounting possibilities that help create a cleaner, more organized workspace.
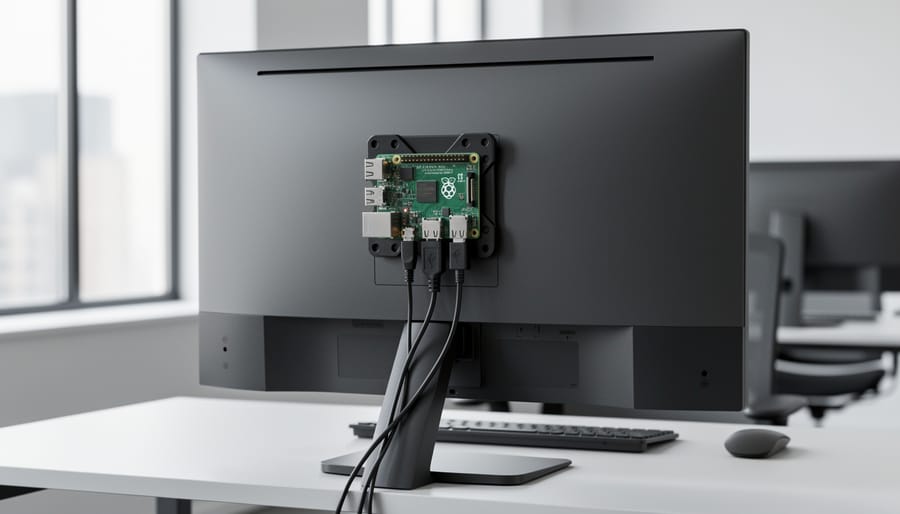
VESA mounting is perhaps the most popular option for workspace integration. The Raspberry Pi’s small form factor makes it perfect for attaching directly to the back of your monitor using VESA-compatible brackets. Several manufacturers offer affordable VESA mount enclosures designed specifically for the Pi, allowing you to hide the device completely behind your display. This eliminates cable clutter and frees up valuable desk space.
For under-desk installations, simple adhesive mounts or small metal brackets work exceptionally well. This approach keeps your Pi accessible for maintenance while keeping it out of sight. Just make sure to position it where air can circulate freely around the case to prevent overheating.
When it comes to enclosures, you have numerous choices beyond the basic plastic case. Professional aluminum cases provide better heat dissipation and give your setup a polished appearance. Some enclosures even include built-in fans, GPIO access panels, and convenient mounting holes for various installation scenarios. For those seeking ultra-professional aesthetics, several companies offer DIN rail mounts, making the Raspberry Pi suitable for server room deployments or industrial environments.
Network and Connectivity Enhancements
Enterprise thin client deployments demand reliable networking and flexible connectivity options. The Raspberry Pi ecosystem offers several hardware additions that transform a basic setup into a professional-grade solution.
Power over Ethernet (PoE) HATs eliminate the need for separate power adapters, streamlining cable management and reducing desk clutter. These HATs draw power directly through the Ethernet cable, making installations cleaner and more reliable. This is particularly valuable in office environments where power outlets are limited or where centralized power management is essential.
For users requiring multiple monitors, the Raspberry Pi 4 natively supports dual 4K displays through its micro-HDMI ports. This capability matches many traditional thin client offerings while maintaining the cost advantage. Proper network configuration ensures smooth performance across both displays.
USB hubs expand connectivity options for peripherals like keyboards, mice, scanners, and card readers. Powered USB 3.0 hubs prevent power draw issues while maintaining fast data transfer speeds. For enterprise deployments, consider hubs with individual port switches for better device management.
Additional upgrades include gigabit Ethernet adapters for older Pi models, WiFi dongles for dual-band connectivity, and Bluetooth adapters for wireless peripherals. These enhancements create a versatile thin client solution that adapts to various workplace requirements without breaking the budget.
Security Hardware Add-ons
Enhancing your Raspberry Pi thin client with hardware-based security features can significantly strengthen your multi-user environment. While the Pi doesn’t include built-in Trusted Platform Module (TPM) functionality, you can add TPM 2.0 modules through the GPIO header or I2C interface. These modules provide cryptographic key storage and help verify system integrity during boot, making them ideal for business deployments where data protection is critical.
For secure boot implementation, consider using the Raspberry Pi 4 or newer models that support bootloader security features. You can configure the bootloader to only run signed operating systems, preventing unauthorized modifications. This process requires some technical knowledge but provides enterprise-grade protection against tampering.
Physical security matters too, especially in shared spaces. Invest in lockable cases that restrict access to SD cards and USB ports, preventing unauthorized data extraction or system modifications. Some cases include Kensington lock slots for anchoring devices to desks. Additionally, consider disabling unused ports through software configuration and implementing USB port blockers for added protection.
For organizations handling sensitive data, combining these hardware solutions with encrypted storage and strong authentication creates a robust security framework that rivals traditional thin client appliances at a fraction of the cost.
Best Operating Systems and Software for Raspberry Pi Thin Clients
Setting Up Remote Desktop Protocols
Configuring your Raspberry Pi to connect with remote desktop protocols is straightforward, with multiple options to suit different environments. Let’s explore the most popular choices and how to set them up.
Remote Desktop Protocol (RDP) works brilliantly for Windows-based servers. Install Remmina, which comes pre-loaded on most Raspberry Pi OS installations. Simply open Remmina, click the plus icon, select RDP as your protocol, and enter your server’s IP address and credentials. RDP offers excellent performance and seamless Windows integration, though it’s limited primarily to Microsoft environments.
For VNC connections, RealVNC Viewer provides exceptional compatibility. Download it from RealVNC’s website or install via terminal with “sudo apt install realvnc-vnc-viewer”. VNC shines with its cross-platform support and works well even on older Raspberry Pi models. The main drawback is higher bandwidth usage compared to RDP, which can affect performance on slower networks.
Citrix Workspace requires downloading the ARM-compatible client from Citrix’s website. After installation, launch the application and add your Citrix server details. This protocol excels in enterprise environments with robust security features and application virtualization, but setup complexity is higher and requires proper licensing.
VMware Horizon Client installation involves downloading the Linux ARM version from VMware’s portal. Once installed, configure your connection server details and authenticate. VMware delivers outstanding performance and extensive management features, making it ideal for business deployments. However, it demands more resources from your Raspberry Pi and typically requires a 4GB model for optimal performance.
Each protocol serves distinct needs, so choose based on your server infrastructure and performance requirements.
Step-by-Step Setup Guide: Building Your First Raspberry Pi Thin Client
Hardware Assembly and Initial Setup
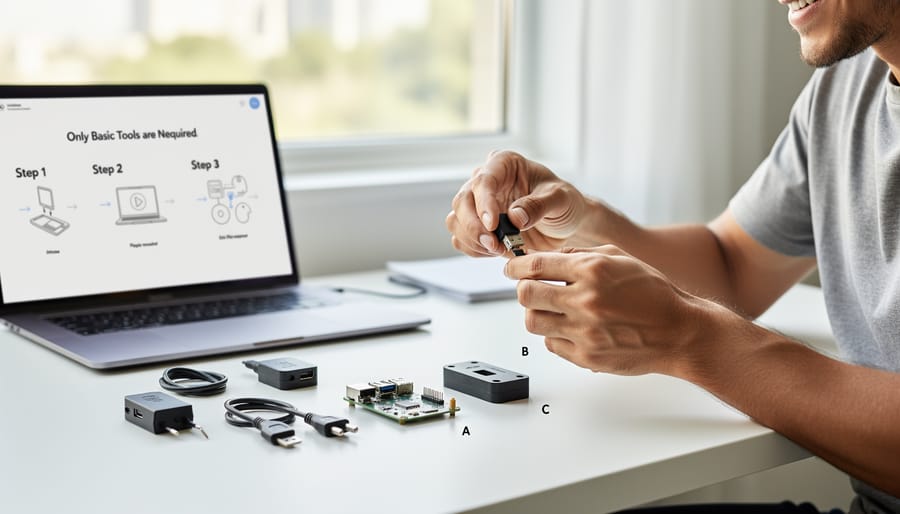
Getting your Raspberry Pi ready for thin client duty is straightforward and rewarding. Start by installing your Pi into a protective case, preferably one with ventilation or a small fan to prevent thermal throttling during extended use. The compact form factor makes it easy to mount behind a monitor using VESA mounts or adhesive solutions, keeping your workspace clutter-free.
Connect your peripherals before powering up. Plug in a USB keyboard and mouse, attach your monitor via HDMI (or use a micro-HDMI adapter for Pi 4 models), and insert your Ethernet cable for the most stable network connection. While Wi-Fi works, wired connections deliver better performance for remote desktop sessions. If you’re using USB dongles for additional functionality like Bluetooth adapters, connect those now.
Insert your microSD card containing your chosen thin client operating system, whether that’s Raspberry Pi OS, DietPi, or a specialized distribution like ThinStation. Connect the official Raspberry Pi power supply to ensure stable operation under load.
On first boot, you’ll typically see configuration screens for language, timezone, and network settings. Take time to update the system immediately using the package manager. This ensures you have the latest security patches and drivers. Configure your screen resolution to match your monitor’s native settings for optimal display quality.
For business environments, consider labeling your hardware and documenting MAC addresses for network management. This initial setup typically takes 15-20 minutes and creates a solid foundation for your thin client deployment.
Software Installation and Configuration
Getting your Raspberry Pi ready to function as a thin client requires a systematic approach to software setup. Let’s walk through each step to ensure a smooth installation process.
Start by downloading Raspberry Pi OS Lite from the official Raspberry Pi website. This lightweight version is perfect for thin client applications since it consumes fewer resources than the full desktop version. Use the Raspberry Pi Imager tool to write the image to your microSD card. During this process, you can preconfigure WiFi credentials and enable SSH through the advanced options menu, which saves time later.
Once your Pi boots up, connect it to your network and access it via SSH or connect a monitor and keyboard directly. Update the system immediately by running the standard update commands to ensure you have the latest security patches and software versions.
For network configuration, the default DHCP settings work well for most setups, but if you need a static IP address for easier access, edit the dhcpcd configuration file accordingly. This is particularly useful in business environments where consistent network addressing matters.
Next, install your preferred remote desktop protocol software. For Windows environments, install an RDP client like Remmina or FreeRDP. If connecting to Linux systems, consider using VNC or X2Go. Each protocol has its strengths, so choose based on your server infrastructure and performance requirements.
Performance optimization is crucial for a responsive thin client experience. Allocate minimal GPU memory since you won’t need extensive graphics processing. Disable unnecessary services to free up system resources. Configure your remote desktop client to use appropriate compression settings and color depth based on your network bandwidth. Lower settings work better on slower connections while maintaining usability.
Finally, set up auto-login and configure your remote desktop client to launch automatically at startup, creating a seamless thin client experience that feels like a dedicated appliance.
Connecting to Your Remote Server or VDI Environment
Now that your Raspberry Pi is configured with thin client software, it’s time to establish the connection to your remote server or VDI environment. Start by launching your chosen remote desktop application and entering your server’s IP address or hostname. You’ll typically need credentials provided by your system administrator, including username, password, and possibly a domain name.
For connecting to remote systems, most protocols like RDP or VNC require specific port configurations. Default RDP uses port 3389, while VNC commonly uses 5900. Ensure these ports are open on your network and that your remote server is configured to accept connections.
Test your setup by attempting a connection and verifying that keyboard, mouse, and display outputs work correctly. If you encounter issues, check your network connectivity first using the ping command. Common problems include incorrect credentials, firewall blockages, or network configuration errors. Enable logging in your thin client software to identify specific connection failures.
For optimal performance, adjust display resolution and color depth settings to match your network bandwidth. Lower settings reduce lag on slower connections while maintaining usability for most business applications.
Real-World Use Cases and Deployment Scenarios
Raspberry Pi thin clients have found their way into diverse environments, proving their versatility and cost-effectiveness across various sectors. Let’s explore how real organizations and individuals are putting these compact devices to work.
In home offices, remote workers are leveraging Raspberry Pi thin clients to connect securely to their company’s virtual desktop infrastructure (VDI). A typical setup involves a Raspberry Pi 4 running RDP or VNC clients, providing access to Windows or Linux desktops hosted in the cloud. This approach keeps sensitive company data off personal networks while maintaining a professional workspace at minimal cost.
Small businesses are finding creative ways to deploy these devices. Retail stores use them as point-of-sale terminals connected to cloud-based inventory systems, reducing hardware costs by up to 80% compared to traditional POS systems. Accounting firms have deployed Raspberry Pi thin clients at each workstation, connecting employees to centralized servers running specialized financial software. This centralized approach simplifies software updates and enhances data security.
Educational institutions have embraced Raspberry Pi thin clients enthusiastically. Computer labs in schools and universities use them to provide students with access to powerful applications without investing in expensive desktop computers. A single server can support dozens of Raspberry Pi terminals, making it perfect for budget-conscious educational settings. Libraries are implementing similar solutions for public internet access terminals.
Call centers represent another successful deployment scenario. Companies have outfitted entire call center floors with Raspberry Pi thin clients connected to cloud-based customer relationship management (CRM) systems. The low power consumption translates to significant savings on electricity bills, while the compact form factor maximizes desk space. When units fail, replacement is quick and inexpensive, minimizing downtime.
Healthcare clinics are also adopting these solutions for patient check-in kiosks and administrative workstations, where staff need access to electronic health records without requiring high-performance local hardware. The simplified maintenance and enhanced security of thin client architecture make this particularly appealing in regulated industries.

Troubleshooting Common Issues
Even the most carefully configured Raspberry Pi thin client can encounter hiccups. Let’s walk through the most common issues and their straightforward solutions.
Performance bottlenecks often manifest as sluggish response times or choppy video playback. Start by checking your network connection—thin clients rely heavily on stable, fast connectivity. Use ethernet instead of Wi-Fi whenever possible, as wired connections provide more consistent throughput. If performance issues persist, consider reducing the display resolution on your remote session or disabling visual effects in your remote desktop protocol settings. The Pi 4 with 4GB or 8GB RAM handles most thin client tasks smoothly, but older models may struggle with resource-intensive applications.
Display problems typically involve incorrect resolutions or no signal to the monitor. Edit your config.txt file located in the boot partition to force specific HDMI settings. Add lines like hdmi_group=2 and hdmi_mode=82 for 1080p output at 60Hz. If you’re experiencing black borders or overscan issues, adjust the disable_overscan setting to eliminate them.
Connectivity issues with your remote desktop server require verifying that ports are properly forwarded and firewalls aren’t blocking your connection protocol. For RDP connections, ensure port 3389 is accessible. VNC users should check port 5900. Test connectivity from another device on the same network to isolate whether the problem lies with your Pi or the server configuration.
Peripheral compatibility problems, particularly with USB devices, can usually be resolved by checking power supply adequacy. The Raspberry Pi 4 requires a quality 3A power adapter, especially when multiple USB devices are connected. Using a powered USB hub eliminates most keyboard, mouse, or webcam recognition issues. Update your Raspberry Pi OS regularly to ensure you have the latest driver support for peripherals.
Transforming a Raspberry Pi into a thin client offers an impressive blend of affordability, customization, and performance that traditional solutions simply can’t match. Throughout this guide, you’ve discovered how to select the right hardware components, configure your system for optimal remote desktop performance, and tailor the setup to meet your specific needs. Whether you’re managing a small office environment, creating a dedicated workstation at home, or exploring cost-effective solutions for educational settings, the Raspberry Pi delivers remarkable flexibility without breaking the bank.
The beauty of this approach lies in its scalability and adaptability. You can start with a basic configuration and expand as your requirements grow, adding peripherals and fine-tuning settings along the way. The active Raspberry Pi community means you’ll never be short of troubleshooting tips, creative ideas, or helpful tutorials to enhance your thin client deployment.
Ready to get started? Gather your components, follow the step-by-step instructions we’ve outlined, and don’t be afraid to experiment with different configurations. Remember, every expert was once a beginner, and the hands-on experience you’ll gain from building your own thin client solution is invaluable. For continued learning, explore the official Raspberry Pi documentation, join online forums, and stay curious about emerging software options that can further optimize your setup.