

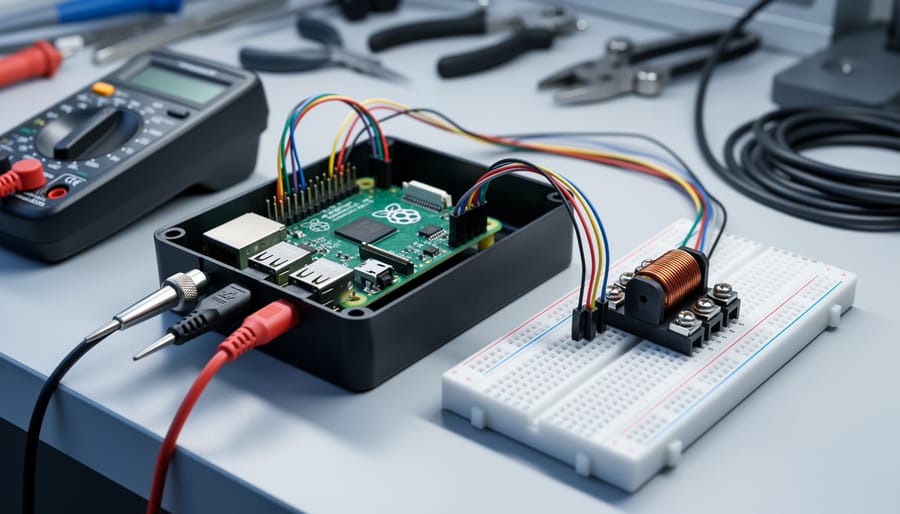
You can reinforce power engineering exam concepts by building hands-on circuits and measurement systems with a Raspberry Pi as embedded controller, turning abstract theory into tangible experiments. For students practicing for engineering exams in 2026, the Pi offers an affordable alternative to expensive lab equipment while helping you visualize voltage drops, three-phase systems, motor control, and protection schemes that dominate certification tests.
Traditional power engineering study methods rely heavily on memorizing formulas and solving paper-based problems. While calculation skills matter, exam success increasingly depends on understanding how electrical systems behave in real conditions. A Raspberry Pi bridges this gap. You can wire actual circuits, measure real voltages and currents through GPIO pins and ADC modules, and watch how transformers respond to varying loads.
The beauty of this approach is cost and accessibility. A complete Pi-based study kit runs under $150, including sensors and components. Compare that to institutional lab access or commercial training modules costing thousands. You control the pace, repeat experiments until concepts click, and build a portfolio of working projects that demonstrate practical knowledge to employers.
This guide maps core power engineering exam topics to specific Raspberry Pi projects you can build this weekend. Each project reinforces calculation methods, system behavior, and safety principles tested on Fourth Class through First Class certifications. Whether you’re tackling transformer theory or wrestling with protective relay coordination, turning theory into working hardware makes the difference between memorizing answers and truly understanding power systems.
Why Raspberry Pi Matters for Power Engineering Students
Power engineering certification exams test your ability to understand and apply principles that govern real-world industrial systems. Reading about control loops, data acquisition, and process automation in a textbook is one thing, seeing those concepts work in front of you is entirely different. That’s where the Raspberry Pi becomes invaluable.
The Pi gives you a miniature industrial control platform right on your desk. Fourth Class candidates spend hours memorizing boiler sequences and safety interlock logic. With a Raspberry Pi, you can wire up actual sensors, program the same sequential logic you’ll see on exam questions, and watch LEDs light up when conditions are met. When you physically build a system that monitors temperature and triggers an alarm at a setpoint, you’re not just memorizing, you’re internalizing how these systems actually behave.
Modern power engineering is increasingly digital. SCADA systems, programmable logic controllers, and distributed control systems all rely on the same fundamental concepts that Raspberry Pi projects teach: reading sensor inputs, processing data, making decisions based on logic, and controlling outputs. The microcontroller work you do with Pi directly mirrors what happens inside industrial control panels, just at a smaller scale and lower voltage.
The practical advantages of incorporating Raspberry Pi into your study routine include:
- Reinforces theoretical concepts through hands-on experimentation and immediate visual feedback
- Creates an affordable home lab setup for under $150 compared to thousands for industrial training equipment
- Simulates real-world control scenarios and failure conditions that appear frequently on certification exams
- Develops troubleshooting skills by working through actual wiring, coding, and system integration challenges
Third Class exams introduce more complex control theory and multi-variable systems. Building a PID temperature controller with a Pi forces you to understand proportional-integral-derivative action in a way that reading formulas never will. You’ll adjust gain values, watch the system respond, and finally grasp why tuning matters in industrial applications.
The connection between your Pi projects and exam success is direct. When an exam question asks about the sequence of events in a boiler startup or how a high-temperature alarm should function, you won’t be guessing, you’ll be remembering the system you built and tested yourself.
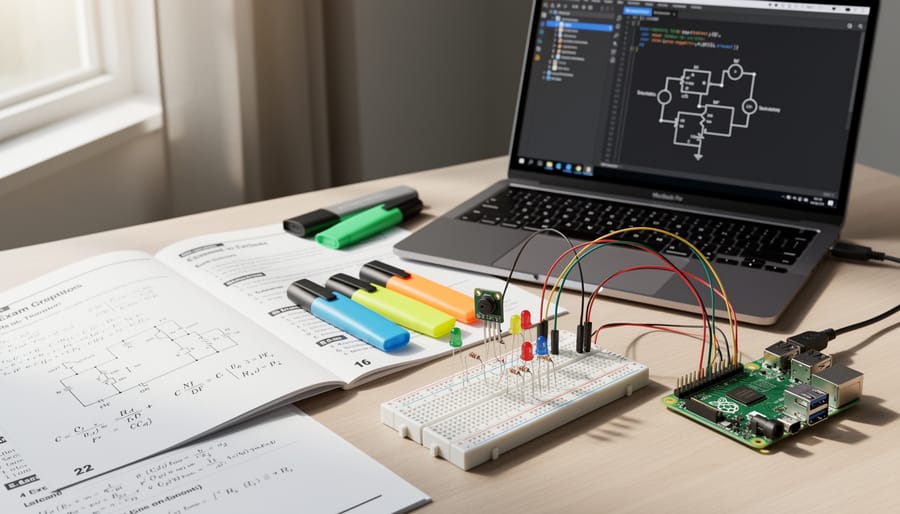
Essential Power Engineering Concepts You Can Practice With Raspberry Pi
Data Acquisition and Monitoring Systems
Power engineering exams test your understanding of data acquisition systems, SCADA fundamentals, and real-time monitoring, concepts that come alive when you build them yourself. The Raspberry Pi excels at simulating the monitoring systems you’ll encounter in power plants because it connects directly to sensors and converts analog signals through ADCs (analog-to-digital converters).
Start with temperature and pressure sensors, the backbone of boiler monitoring questions on Fourth Class exams. An MCP3008 ADC chip paired with thermocouples or RTD sensors lets you measure multiple parameters simultaneously, just like industrial control systems. Connect these to your Pi’s SPI interface and you’ve created a miniature SCADA data collection point. You’ll quickly grasp why sampling rates matter, how sensor calibration affects accuracy, and why redundant measurements prevent false alarms, all exam-critical concepts.
For system health monitoring basics, lm-sensors monitoring provides a foundation for understanding sensor integration before you tackle external industrial sensors. Once comfortable, build a simple data acquisition loop:
import spidev
import time

spi = spidev.SpiDev()
spi.open(0, 0)
spi.max_speed_hz = 1350000

def read_adc(channel):
    adc = spi.xfer2([1, (8 + channel) << 4, 0])
    return ((adc[1] & 3) << 8) + adc[2]

while True:
    temp_raw = read_adc(0)
    pressure_raw = read_adc(1)
    temp_c = (temp_raw * 3.3 / 1023) * 100
    pressure_psi = (pressure_raw * 3.3 / 1023) * 150
    print(f"Temp: {temp_c:.1f}C | Pressure: {pressure_psi:.1f} PSI")
    time.sleep(2)
This basic loop teaches you about polling rates, data conversion, and engineering units, exactly what exam questions probe. Real SCADA systems operate on these principles at scale. When you physically wire sensors and watch values change in response to heat or pressure, the exam concepts of setpoints, alarm thresholds, and trending shift from abstract theory to practical knowledge you won’t forget under exam pressure.
Control Systems and Automation
Control theory is a cornerstone of power engineering certification, and the Raspberry Pi offers a perfect platform to move beyond memorizing equations to actually implementing working control systems. When you build your own PID controller or automation sequence, the abstract concepts from your study materials suddenly click into place.
Start with a simple relay control circuit using Raspberry Pi GPIO pins to switch a 120V relay on and off based on sensor input. This basic on-off control mirrors many industrial applications you’ll encounter on Fourth Class exams, think about how a boiler’s low-water cutoff works or how a pump starts when pressure drops below a setpoint. Configure one GPIO pin as an output to trigger the relay coil through a transistor driver circuit, and use an input pin to read a float switch or pressure sensor. The practical wiring teaches you about isolation, voltage levels, and fail-safe design in ways no textbook diagram can match.
For Third Class preparation, step up to PID control implementation. Use Python to code a temperature controller that reads a DS18B20 sensor, calculates proportional-integral-derivative corrections, and adjusts PWM output to a heating element. You’ll grasp why integral action eliminates offset and how derivative action dampens oscillation when you see your controller overshoot and then tune the gains to smooth out the response. Log your process variable and controller output to CSV files, then graph the results to analyze system behaviour, exactly the kind of trending analysis examiners ask about.
Sequence control projects cement your understanding of automation logic. Program a multi-step startup sequence with permissive checks and timers: verify all conditions are met, energize equipment in the correct order with delays between steps, and monitor for fault conditions that trigger shutdown.
Electrical Fundamentals and Calculations
Your Raspberry Pi transforms into a powerful calculation platform for drilling electrical fundamentals that appear repeatedly on power engineering exams. Rather than relying solely on memorizing formulas, you’ll build interactive tools that cement these concepts through hands-on creation.
Start with a Python script for Ohm’s Law calculations that accepts any two variables (voltage, current, resistance) and solves for the third. Add power calculations (P=VI, P=I²R, P=V²/R) to the same program. This simple tool becomes invaluable during study sessions when you’re working through practice problems, you verify your manual calculations instantly and spot patterns in how the variables interact.
Power factor correction calculations present a bigger challenge for most candidates. Create a script that takes real power, apparent power, and reactive power as inputs, then calculates power factor, displacement angle, and the required capacitance for correction. Include a visualization using matplotlib that displays the power triangle graphically. Seeing these relationships plotted strengthens your intuitive understanding far beyond rote formulas.
Three-phase system calculations deserve their own program. Build a calculator that handles both wye and delta configurations, computing line voltages, phase voltages, line currents, and total power. Add a mode that converts between the two connection types. The act of programming these relationships forces you to truly understand the √3 factors and phase relationships that confuse many exam candidates.
Safety Interlocks and Alarm Systems
Safety interlocks and emergency shutdown logic appear on every power engineering exam because they’re fundamental to preventing equipment damage and protecting personnel. The Raspberry Pi’s GPIO pins let you build working models of these critical systems, helping you truly understand the “why” behind interlock sequences rather than just memorizing them.
Start by wiring a simple two-relay interlock where relay A must activate before relay B can energize, mimicking how a fuel valve won’t open until a purge cycle completes. Use GPIO outputs to control relays and inputs to read their states, then write Python code enforcing the sequence logic. Add an emergency stop button that immediately de-energizes everything regardless of current state.
Expand this to simulate alarm conditions: connect LED indicators representing different alarm priorities (critical, warning, advisory) and program escalation logic. For instance, if a simulated temperature sensor exceeds 80°C, trigger a yellow warning LED; above 95°C, sound a buzzer and light a red critical alarm; at 100°C, execute an automatic shutdown sequence. This hands-on approach makes abstract flowchart logic tangible and memorable when exam questions test your understanding of alarm response priorities and shutdown procedures.
Best Raspberry Pi Models for Exam Prep Projects in 2026
The Raspberry Pi lineup offers several models that work well for power engineering study projects, but you don’t need the most expensive option to get started. Your choice depends on which exam topics you plan to tackle and how complex your monitoring or control projects will be.
The Raspberry Pi 5 (starting at $60 for the 4GB version) delivers the most processing power with its quad-core 2.4GHz processor and up to 8GB RAM. This model excels when you’re running multiple data logging tasks simultaneously, building web-based dashboards to visualize boiler parameters, or simulating complex control loops. The enhanced GPIO capabilities and dual 4K display support make it ideal for Third and Second Class exam prep where you’ll work with more sophisticated monitoring systems. If you’re planning to build a complete SCADA-style interface or run Python simulations alongside real-time data collection, the Pi 5 justifies its higher cost.
For most Fourth Class exam preparation projects, the Raspberry Pi 4 hits the sweet spot between capability and price. At around $35-55 depending on RAM configuration, it handles temperature monitoring, basic PID controllers, and multi-sensor data logging without breaking a sweat. The 40-pin GPIO header gives you plenty of connections for sensors, relays, and ADCs. You can run Node-RED for control system visualization, log data to CSV files, and even host a simple web interface to check your projects remotely, all tasks that directly reinforce exam concepts.
| Model | Key Specs | Best For | Price (2026) |
|---|---|---|---|
| Raspberry Pi 5 | Quad-core 2.4GHz, 4-8GB RAM, enhanced GPIO | Complex dashboards, multi-system simulations, advanced control loops | $60-80 |
| Raspberry Pi 4 | Quad-core 1.8GHz, 2-8GB RAM, 40-pin GPIO | Most exam prep projects, data logging, PID controllers | $35-55 |
| Pi Zero 2 W | Quad-core 1GHz, 512MB RAM, 40-pin GPIO | Single-purpose sensors, portable practice projects, budget builds | $15 |
The Raspberry Pi Zero 2 W deserves consideration if you’re on a tight budget or want to build dedicated single-purpose projects. At just $15, it runs basic temperature monitoring, simple relay control, and calculation tools perfectly fine. The smaller form factor works well for portable study projects you can demonstrate during exam preparation sessions. However, the 512MB RAM limits multitasking, so skip this model if you plan to run heavy visualization software or complex simulations.
One practical approach: start with a Pi 4 for your main study workbench, then add a Zero 2 W later for specific dedicated projects like a standalone boiler temperature simulator or a portable three-phase calculator. The GPIO pinout stays consistent across models, so your wiring knowledge transfers directly between boards.
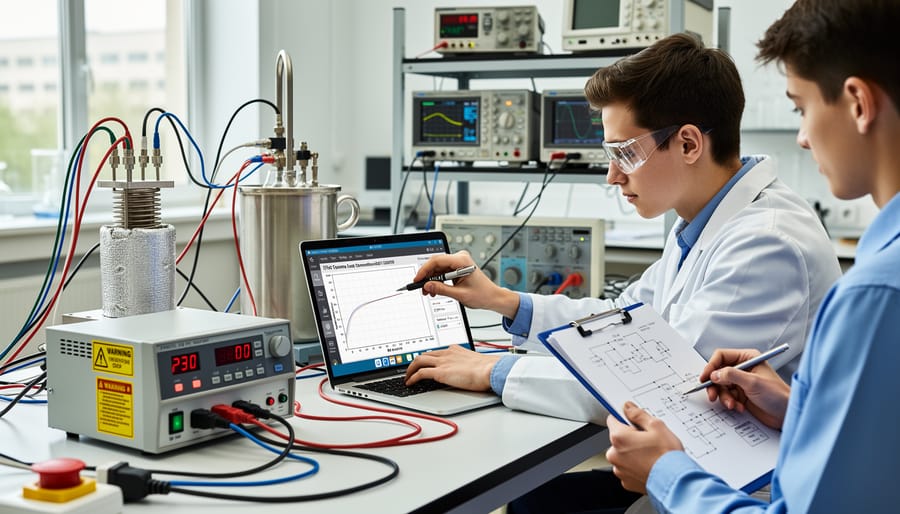
5 Hands-On Raspberry Pi Projects That Reinforce Exam Topics
Build a Boiler Parameter Monitoring Dashboard
This project simulates the temperature and pressure monitoring systems you’ll encounter on Fourth Class exams, giving you hands-on experience with the concepts you’ll be tested on.
Start with a DS18B20 waterproof temperature sensor connected to GPIO pin 4 and a BMP280 pressure sensor wired via I2C. Install the required Python libraries (w1thermostat for DS18B20 and Adafruit_CircuitPython_BMP280 for pressure readings). Create a simple Python script that polls both sensors every five seconds and displays readings on your terminal or a connected LCD screen.
Build a basic dashboard using Flask or Grafana to visualize the data. Set threshold alarms that trigger when temperature exceeds 100°C or pressure drops below 50 psi, mimicking the low water cutoff and high temperature scenarios covered in boiler safety chapters. This hands-on setup helps you internalize normal operating ranges and alarm conditions far better than memorizing tables.
Create a Three-Phase Power Calculator
Build a Python-based calculator on your Pi that instantly computes three-phase power values, real power, reactive power, apparent power, and power factor, from voltage and current inputs. This interactive tool lets you verify your hand calculations during study sessions and explore how changing variables affects the system.
Start with a simple command-line interface that prompts for line voltage, line current, and phase angle. Your script should calculate both wye and delta configurations simultaneously, showing the relationships between phase and line values. Add input validation to catch common mistakes like reversed angle signs or mixing phase-to-phase with phase-to-neutral voltages.
Expand the calculator to include efficiency calculations, voltage drop formulas, and transformer sizing equations. Create multiple preset scenarios matching typical exam questions, motor starting calculations, transformer loading, and capacitor bank sizing. The instant feedback helps you spot calculation errors immediately and builds confidence with the formulas you’ll need to recall under exam pressure.
Simulate a Safety Interlock System
Safety interlocks are crucial exam topics across all power engineering certifications, yet they’re difficult to truly understand from diagrams alone. Building a physical interlock system with your Raspberry Pi transforms abstract logic into tangible cause-and-effect relationships you’ll remember during the exam.
Start with a simple two-condition interlock: use two pushbuttons connected to GPIO pins as your safety conditions, perhaps simulating a door closed switch and a pressure within limits switch. Wire a relay module to another GPIO pin representing your equipment start signal. Write Python code that only energizes the relay when both safety conditions are satisfied simultaneously.
Expand your system by adding a third condition, implementing a manual reset requirement after a safety trip, or creating a latching circuit that requires acknowledgment before restart. This hands-on approach helps you internalize series versus parallel interlock logic, normally open versus normally closed contact functions, and fail-safe design principles, all frequently tested concepts that many candidates struggle with on paper.
Design a PID Temperature Controller
A PID temperature controller demonstrates proportional-integral-derivative control theory that appears on Third and Second Class power engineering exams. Wire a DS18B20 temperature sensor to your Pi’s GPIO pins and connect a relay to control a small heating element (like a resistive coil or lamp). The goal: maintain a target temperature by calculating error, adjusting output based on the proportional gain, eliminating steady-state error through integration, and damping oscillations with derivative action.
Start with proportional-only control and watch the system overshoot your setpoint. Add the integral term to eliminate offset, then introduce derivative action to reduce oscillation. You’ll quickly understand why boiler controls use PID loops and how poorly-tuned parameters cause hunting or instability.
Implement the control algorithm in Python, logging temperature readings and controller outputs every second. Experiment with different Kp, Ki, and Kd values to see their effects. This hands-on tuning process cements control theory concepts far better than memorizing formulas alone, and directly applies to exam questions about feedback control and process stability.
Construct a Data Logging System for Study Sessions
A data logging system transforms your Raspberry Pi into a powerful tool for understanding trending and historical analysis, skills tested in Third and Second Class exams. Start by connecting multiple sensors (temperature, pressure, humidity) to your Pi’s GPIO pins and ADC modules. Write a Python script that samples these inputs every few seconds and writes timestamped readings to a CSV file.
The real learning happens when you analyze the logged data. Import your CSV into a spreadsheet or use Python’s matplotlib to create trend graphs. You’ll see how parameters change over time, identify patterns, and practice spotting the gradual drift that indicates system degradation, exactly what exam questions ask you to interpret from log sheets.
This project mirrors industrial data historians used in power plants. You’re building the same fundamental system that operators use to track boiler efficiency or detect bearing temperature trends before failures occur.
Required Components and Tools for Your Study Setup
Setting up an effective Raspberry Pi study station for power engineering exam prep doesn’t require a massive budget, but choosing the right components makes all the difference. Here’s what you’ll need to get started with practical, exam-focused projects.
Core Hardware Foundation
Start with a Raspberry Pi 4 (4GB or 8GB model recommended) for handling multiple sensors and running data logging applications smoothly. You’ll need a quality microSD card (32GB minimum, Class 10 or better) for your operating system and project files. Don’t overlook getting the right power supply, underpowering your Pi leads to unstable readings and corrupted data, which defeats the learning purpose.
Essential Sensing and Measurement Tools
For temperature monitoring projects, DS18B20 digital sensors ($3-5 each) provide accurate readings and simple one-wire interfacing. An ADS1115 analog-to-digital converter ($8-12) lets you read analog sensors, crucial for simulating pressure transmitters and 4-20mA current loops common in industrial settings. A DHT22 humidity and temperature sensor ($5-8) works well for environmental monitoring projects.
Control and Interface Components
Pick up a relay module kit (4-channel or 8-channel, $8-15) to practice control logic and interlock systems. A breadboard with jumper wires ($10-15) allows for quick circuit prototyping. GPIO extension boards with labeled pins ($5-8) prevent wiring mistakes and speed up project assembly.
Display and Monitoring Options
A 7-inch touchscreen display ($60-80) transforms your Pi into an interactive dashboard, though you can start with SSH access using your laptop to save money initially. For portable projects, a 16×2 LCD display ($8-12) provides basic parameter readouts.
Budget Planning
A starter setup runs $150-200 for essential components, while a comprehensive kit supporting all five project types costs $300-400. Buy components as you tackle each project rather than purchasing everything upfront, this spreads costs and ensures you’re buying what you’ll actually use for your exam preparation timeline.
Study Schedule Integration: Combining Theory With Pi Projects
Effective exam preparation balances passive learning with active practice, and Raspberry Pi projects give you that active component. The key is treating your Pi work as applied study time, not a separate hobby that competes with textbook review.
Start by mapping exam topics from your study guide to specific Pi capabilities. When you cover boiler controls in your textbook, schedule a weekend session to wire up temperature sensors and build a simple monitoring script. When practice questions ask about PID loops, spend an evening implementing one on your Pi to see how proportional, integral, and derivative terms actually affect system response. This immediate application transforms abstract formulas into concrete understanding that sticks during exams.
For maximum efficiency, build projects incrementally rather than attempting complete systems. A 90-minute session adding one sensor to an existing setup teaches more than an abandoned eight-hour marathon. Keep your Pi workspace ready so you can pivot from textbook to breadboard without friction. When you encounter a confusing exam topic, treat it as your next project prompt.
Track which concepts feel shaky after practice exams, then prioritize those for Pi implementation. Building a real-time control system will clarify control theory faster than rereading the same chapter three times. Your hands teach your brain what passive reading cannot, and exam questions become easier when you’ve actually built the systems they describe.
Using Raspberry Pi for your power engineering exam prep gives you something most study guides can’t: the chance to actually build and test the concepts you’re memorizing. When you wire up a temperature sensor and watch real-time data scroll across your screen, Ohm’s Law stops being an abstract formula. It becomes something you see working. That hands-on experience sticks with you during exams in ways that highlighting textbook passages never will.
You don’t need to tackle complex automation systems right away. Start simple. Build that boiler monitoring dashboard with a single temperature sensor. Get comfortable reading GPIO pins. Once you see your first project come alive, you’ll naturally want to add more sensors, implement control logic, or simulate safety interlocks. Each small project reinforces another exam topic while building your confidence with both the material and the technology.
The real advantage isn’t just better exam scores, though those matter. It’s understanding how power systems actually work in the field. When you’ve programmed a PID controller yourself, you grasp why setpoints and tuning parameters matter. That knowledge carries beyond certification into your career.
Pick one project from this guide that aligns with your current study focus. Grab the components, follow a tutorial, and give yourself permission to experiment. The combination of traditional study methods and practical Pi projects creates a preparation strategy that addresses both the theoretical knowledge and applied thinking your exams demand. Your certification is worth the investment in hands-on learning.