

The raspberrypi-kernel is the official Linux kernel source code maintained specifically for Raspberry Pi hardware, and compiling it yourself unlocks the ability to develop custom drivers, enable experimental hardware features, and optimize system performance for specialized applications. Unlike installing prebuilt kernels through package managers, building from source gives you complete control over kernel modules, hardware support, and system behavior on your embedded system. The entire process, from downloading the source to booting your custom kernel, takes between 2 and 4 hours depending on your build machine and chosen configuration.
Most developers compile custom kernels for three main reasons. First, you need a modified kernel to develop and test new device drivers before submitting them upstream. Second, enabling experimental features or backporting patches requires building from source. Third, stripping unnecessary modules and tailoring the kernel to specific workloads can reduce boot times and memory footprint on resource-constrained projects.
The Raspberry Pi Foundation maintains separate kernel branches for different hardware generations, so you’ll be working with version-specific source trees. Cross-compilation from a more powerful Linux machine dramatically speeds up the build process compared to compiling natively on the Pi itself. You can compile on the target device if needed, but expect significantly longer build times.
This guide walks you through the complete workflow: setting up your build environment, configuring kernel options, compiling the source, and safely installing your custom kernel while preserving the ability to roll back. You’ll also learn how to verify your build succeeded and troubleshoot common compilation failures that trip up first-time kernel builders.
What You’ll Need: Prerequisites and Tools
Native vs. Cross-Compilation: Choosing Your Build Environment
You have two main paths for building a custom kernel: compiling natively on your Raspberry Pi or setting up a cross compile environment on a separate Linux machine.
Native compilation means building directly on your Pi after completing your Raspberry Pi OS setup. The upside? Minimal configuration headaches. You clone the repository, install dependencies with a single apt command, and start building. No toolchain setup, no architecture mismatches to debug. The downside is speed. A full kernel build on a Raspberry Pi 4 takes 2-4 hours, while older models like the Pi 3 can stretch past 6 hours. Your Pi will also run hot and remain unusable during compilation.
Cross-compilation flips this equation. A modern Linux PC with a quad-core processor completes the same build in 15-30 minutes. You’ll need to install the ARM cross-compiler toolchain and specify the correct architecture flags, which adds setup complexity. First-time configuration might take an hour of troubleshooting environment variables and paths.
Choose native compilation if you’re new to kernel builds, don’t have a Linux PC available, or prefer straightforward instructions over speed. Go with cross-compilation when you’re building repeatedly during driver development, have Linux experience, or simply can’t wait hours per build cycle. For learning purposes, native compilation removes enough variables that troubleshooting becomes significantly easier.
Important Warnings and Considerations
Before you run a single build command, understand that compiling and installing a custom kernel carries real risk. A misconfigured or corrupted kernel won’t boot, and without proper preparation, you could find yourself locked out of your Raspberry Pi entirely.
The most serious risk is a non-booting system. If your compiled kernel has errors, missing drivers, or incompatible settings, the Pi will fail to start, leaving you staring at a blank screen or an endless reboot loop. Unlike software installation failures, kernel problems prevent the operating system from loading at all. You can’t simply SSH in to fix it.
Keep your original kernel files as a fallback. Before overwriting kernel8.img or kernel7l.img in your /boot partition, copy the existing file to a name like kernel8-original.img. If the new kernel fails, you can quickly rename the backup and reboot into your working system. This five-second precaution has saved countless projects from turning into multi-hour recovery sessions.
Never attempt this process on a production Raspberry Pi running critical applications, home automation controllers, network infrastructure, security cameras, or anything you depend on daily. Build and test custom kernels on a dedicated development board with a spare SD card. The same goes for systems without physical access: if your Pi is mounted in a wall, deployed remotely, or embedded in a finished project, stick with proven, stable kernels.
Data loss is possible if the compilation process fills your SD card or if a bad kernel corrupts the filesystem during a failed boot. Work with at least 8GB of free space and avoid running other intensive tasks during compilation.
If you’re new to Linux kernel work, start with a completely disposable test setup. Use an old SD card, back up nothing important to the Pi, and accept that you might need to reformat and start fresh. That’s not pessimism, it’s the reality of low-level system work.
Step 1: Clone the raspberrypi-kernel Repository
Getting the Raspberry Pi kernel source code onto your development machine is straightforward, but choosing the right branch matters for compatibility with your hardware.
Start by opening a terminal on your build machine (either your Raspberry Pi or Linux PC for cross-compilation). Navigate to a directory where you want to store the kernel source, your home directory or a dedicated development folder works well. Execute this command:
“`
git clone –depth=1
“`
The `–depth=1` flag performs a shallow clone, downloading only the most recent commit rather than the entire repository history. This saves significant time and disk space, reducing the download from several gigabytes to under 200MB. For kernel compilation purposes, you rarely need the full Git history.
Once the clone completes, navigate into the new directory with `cd linux`. Now you need to select the correct branch for your Raspberry Pi model and desired kernel version.
List available branches by running `git branch -r | grep rpi`. You’ll see branches named like rpi-6.6.y, rpi-6.1.y, and rpi-5.15.y. The naming convention is simple: “rpi” indicates Raspberry Pi specific patches, the numbers represent the upstream Linux kernel version (6.6, 6.1, etc.), and the “.y” suffix denotes stable updates within that version series.
For most current Raspberry Pi models (Pi 4, Pi 5, Pi Zero 2 W), the rpi-6.6.y branch offers the best hardware support as of 2026. Older models like Pi 3 work fine with rpi-6.1.y or even rpi-5.15.y. Check the Raspberry Pi kernel repository documentation or your current kernel version with `uname -r` to match appropriately.
Switch to your chosen branch:
“`
git checkout rpi-6.6.y
“`
Verify the checkout succeeded by running `git branch` (the active branch appears with an asterisk) and `ls` to confirm you see kernel source directories like “drivers,” “arch,” and “kernel.” If these directories contain files, you’ve successfully obtained the raspberrypi-kernel source and you’re ready to proceed with installation.
Step 2: Install Build Dependencies
Before you can compile the kernel, you need to install the build tools and libraries that make the compilation process possible. The exact dependencies vary depending on whether you’re building directly on your Raspberry Pi or cross-compiling from a separate Linux machine.
For native compilation on Raspberry Pi, open a terminal and run:
“`
sudo apt update
sudo apt install git bc bison flex libssl-dev make libncurses5-dev
“`
This command installs the essential compilation tools. The `bc` package handles mathematical calculations during the build process, while `bison` and `flex` parse configuration files. The `libssl-dev` library enables cryptographic functions, and `libncurses5-dev` provides the text-based interface for kernel configuration menus. You’ll also need `make` to orchestrate the build process itself.
If you’re cross-compiling on an x86 Linux PC (Ubuntu or Debian-based), install these packages instead:
“`
sudo apt update
sudo apt install git bc bison flex libssl-dev make libncurses5-dev crossbuild-essential-armhf crossbuild-essential-arm64
“`
The `crossbuild-essential` packages contain the ARM cross-compiler toolchains. Install `crossbuild-essential-armhf` for 32-bit Raspberry Pi models (Pi Zero, Pi 1, Pi 2, Pi 3) and `crossbuild-essential-arm64` for 64-bit builds on Pi 3, Pi 4, or Pi 5. You can install both if you plan to compile kernels for different models.
Verify the installation by checking the compiler version:
“`
gcc –version
“`
For cross-compilation, use `arm-linux-gnueabihf-gcc –version` or `aarch64-linux-gnu-gcc –version` depending on your target architecture. If these commands return version information without errors, your build environment is ready.
Step 3: Configure Your Kernel Build
Essential Configuration Options for Driver Development
When developing custom drivers, you’ll want to enable several critical kernel options that make development and debugging significantly easier. Start with the basics: under “Enable loadable module support” (CONFIG_MODULES), ensure “Module unloading” (CONFIG_MODULE_UNLOAD) and “Forced module unloading” (CONFIG_MODULE_FORCE_UNLOAD) are enabled. These let you reload driver modules during testing without rebooting.
For debugging, navigate to “Kernel hacking” and enable “Kernel debugging” (CONFIG_DEBUG_KERNEL) and “Debug filesystem” (CONFIG_DEBUG_FS). Turn on “Verbose kernel error messages” (CONFIG_PRINTK) if it isn’t already, you’ll rely heavily on dmesg output. Consider enabling “Magic SysRq key” (CONFIG_MAGIC_SYSRQ) as a recovery tool when drivers misbehave.
Device tree support is non-negotiable for Raspberry Pi. Verify that “Device Tree and Open Firmware support” (CONFIG_OF) is enabled, along with “Device Tree overlays” (CONFIG_OF_OVERLAY). This allows you to load custom hardware configurations without recompiling the kernel.
For hardware-specific work, enable the frameworks your driver will use. GPIO drivers need “GPIO Support” (CONFIG_GPIOLIB) with “Debug GPIO calls” (CONFIG_DEBUG_GPIO) during development. USB driver work requires the full USB subsystem under “Device Drivers → USB support”, including “USB announce new devices” (CONFIG_USB_ANNOUNCE_NEW_DEVICES) for easier hardware detection. SPI and I2C subsystems should be enabled if you’re working with those protocols, most Raspberry Pi sensor projects rely on them.
Step 4: Compile the Kernel
With your configuration saved, you’re ready to start the actual kernel compilation. This step transforms thousands of source files into a bootable kernel image, a process that’s computationally intensive and time-consuming, especially on Raspberry Pi hardware.
Start the build with the basic make command, but optimize it using parallel compilation. The -j flag tells make how many jobs to run simultaneously, dramatically reducing build time. A good rule: use the number of CPU cores plus one. On a Raspberry Pi 4 with four cores, run:
“`
make -j5 zImage modules dtbs
“`
For Raspberry Pi 3 (four cores): `make -j5`. For Raspberry Pi Zero or older single-core models: `make -j2` still helps by overlapping I/O with compilation.
The command builds three components simultaneously: zImage (the compressed kernel), modules (loadable drivers), and dtbs (device tree blobs for hardware configuration). You’ll see a continuous stream of compilation messages scrolling past. This is normal, the kernel contains millions of lines of code.
Build times vary wildly by hardware. A Raspberry Pi 4 typically completes in 45-90 minutes. Raspberry Pi 3 needs 2-3 hours. On a Pi Zero, expect 6-8 hours or more. Cross-compiling on a modern Linux PC cuts this to 10-20 minutes, which is why many developers prefer that route for iterative work.
Monitor progress by watching the percentage counter that appears periodically, or check how many object files have been created with `find . -name “*.o” | wc -l` in another terminal. The count should steadily increase.
If compilation stops with an error, read the message carefully. Missing dependencies typically show “command not found” errors, install the named package and restart with the same make command (it’ll resume where it stopped). Syntax errors in custom configuration changes mean you need to revisit menuconfig and fix your selections. Out-of-memory errors on older Pi models might require reducing the -j value or adding swap space.
The build succeeds when you see “Kernel: arch/arm/boot/zImage is ready” without error messages.
Step 5: Compile and Install Kernel Modules
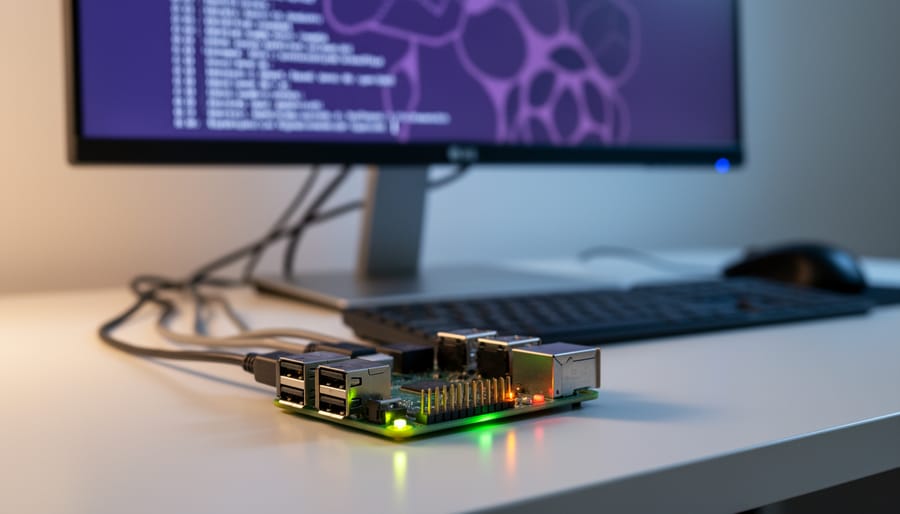
After the kernel compiles, you must build and install the kernel modules separately. Modules are loadable components that extend kernel functionality, drivers, filesystems, and protocol handlers, without requiring a full kernel rebuild. Skipping this step leaves your custom kernel unable to load essential hardware support.
Run the modules compilation and installation with:
“`bash
sudo make modules_install
“`
This command builds all enabled modules and copies them to `/lib/modules/[kernel-version]/`. The installation process creates a new directory matching your kernel version string, keeping modules isolated from the stock kernel’s modules. If you’re cross-compiling, specify the target path:
“`bash
sudo make INSTALL_MOD_PATH=/path/to/sd-card modules_install
“`
The modules_install target automatically runs `depmod`, which generates module dependency maps (modules.dep and related files). These maps tell the kernel which modules depend on others, ensuring correct load order. Without proper dependencies, modules fail to load with “unknown symbol” errors.
Verify installation by checking the new directory exists:
“`bash
ls /lib/modules/
“`
You should see your custom kernel version listed alongside the original. If you’ve set up a development server for C programming and driver work, maintain separate module directories for each kernel build to simplify testing different configurations. This organization prevents version conflicts when switching between kernels during development.
Step 6: Install the New Kernel
With your kernel and modules compiled, you’re ready to install the new kernel image to the boot partition. This step replaces your current kernel with the custom version you’ve built, making it critical to preserve backups before proceeding.
The installation process varies slightly depending on whether you compiled natively on your Raspberry Pi or cross-compiled on another machine. For native compilation, your new kernel resides in the arch/arm/boot or arch/arm64/boot directory of your kernel source tree. Cross-compilation places it in the same relative path but on your development PC.
First, identify which kernel image file you need. Raspberry Pi uses different kernel filenames based on the model and architecture. The Raspberry Pi 4 and newer 64-bit systems use kernel8.img, while the Raspberry Pi 2, 3, and 4 running 32-bit use kernel7l.img or kernel7.img. The original Raspberry Pi and Pi Zero use kernel.img. Your compiled image will typically be named Image (for 64-bit) or zImage (for 32-bit).
- Back up your current kernel by copying the existing kernel file from /boot to a safe location:
sudo cp /boot/kernel8.img /boot/kernel8-backup.img(adjust the filename for your model). - Mount the boot partition if it isn’t already mounted:
sudo mount /dev/mmcblk0p1 /boot. - Copy your compiled kernel to /boot with the correct name. For 64-bit:
sudo cp arch/arm64/boot/Image /boot/kernel8.img. For 32-bit Raspberry Pi 2/3/4:sudo cp arch/arm/boot/zImage /boot/kernel7l.img. - Copy the device tree blobs:
sudo cp arch/arm64/boot/dts/broadcom/*.dtb /boot/(or arch/arm/boot/dts/ for 32-bit). - Copy the overlays:
sudo cp arch/arm64/boot/dts/overlays/*.dtb* /boot/overlays/.
Most standard Raspberry Pi configurations don’t require changes to config.txt or cmdline.txt for kernel installation, as the firmware automatically loads the appropriately named kernel file. However, if you’ve customized your boot configuration or want to specify a non-standard kernel filename, you can add a kernel parameter to config.txt. For example, kernel=my-custom-kernel.img directs the bootloader to use that specific file.
Before rebooting, double-check that your backup kernel exists and that file permissions on the new kernel match the original (typically readable by all). If something goes wrong during boot, you can recover by renaming the backup file back to the original kernel name from another system or using a rescue SD card.
Verifying Your Custom Kernel Installation
After your Raspberry Pi reboots with the new kernel, the first thing you’ll want to check is whether it actually loaded. Open a terminal and type:
“`
uname -r
“`
This displays the running kernel version. You should see your custom kernel’s version string, typically something like `6.6.31-v8+` with a build date or custom suffix if you added one during configuration. If you see your old kernel version instead, the system fell back to the previous kernel, meaning something went wrong during installation.
Next, examine the boot messages for errors:
“`
dmesg | less
“`
Scroll through the output looking for red flags: failed module loads, hardware initialization errors, or warnings about missing firmware. Pay particular attention to the first few hundred lines where hardware detection happens. If you enabled custom drivers or modules, search for their names specifically, `dmesg | grep your_module_name` works well for this.
Verify your custom modules loaded correctly with `lsmod`. Cross-reference this list against what you compiled in Step 5. If a module you built isn’t listed, try loading it manually with `sudo modprobe module_name` to see if it produces error messages that explain why it didn’t auto-load.
Test actual hardware functionality next. If you compiled the kernel for GPIO work, run a simple GPIO test. For USB devices, check `lsusb` output and try connecting hardware. Don’t assume everything works just because the system booted, kernel changes can break specific subsystems while leaving the rest functional.
If the boot failed completely and you can’t access the system, power down and swap your SD card to another computer. Mount the boot partition, rename your new kernel file (like `kernel8.img` to `kernel8.img.broken`), and rename your backup kernel back to the original name. This gets you booting again so you can diagnose what went wrong.
Next Steps: Developing and Testing Custom Drivers
Keeping Your Custom Kernel Updated
Maintaining your custom kernel requires regular synchronization with the raspberrypi-kernel repository to receive security patches, hardware support improvements, and bug fixes. Navigate to your kernel source directory and run `git fetch origin` to download the latest changes without applying them immediately. Review the commit log with `git log origin/rpi-6.6.y` to understand what’s changed before merging.
For simple configuration changes, `git pull origin rpi-6.6.y` merges updates directly. If you’ve modified kernel source files, use `git rebase origin/rpi-6.6.y` instead to replay your changes on top of the latest code. This keeps your modifications cleanly separated and easier to track.
Save your custom .config file outside the kernel tree before updating. After pulling changes, copy it back and run `make oldconfig` to apply your settings to the new kernel version. This command prompts only for newly-added configuration options, preserving your existing choices.
Document your modifications in a separate text file or version control branch. List which drivers you’ve enabled, any source code patches applied, and reasons for specific configuration choices. This reference proves invaluable when troubleshooting issues after updates or rebuilding kernels months later.
Common Issues and Troubleshooting
Building a custom kernel occasionally hits roadblocks, but most issues follow predictable patterns with straightforward fixes. The key is methodical diagnosis rather than starting from scratch at the first error.
Compilation failures typically stem from missing dependencies or incorrect toolchain versions. If you encounter errors about missing headers during `make`, verify that all build-essential packages installed correctly and match your kernel version requirements. The error messages usually specify which header file is missing, making it easy to identify the needed package. For cross-compilation failures, confirm your compiler architecture matches your target Raspberry Pi model, using an ARMv7 toolchain for a Raspberry Pi 4 (which requires ARMv8/aarch64) will fail cryptically.
Boot failures are more serious but recoverable. If your Pi doesn’t boot after kernel installation, remove the SD card and mount it on another computer. Rename your custom kernel image in the boot partition (kernel8.img or kernel7l.img) and restore the backup copy of the original kernel you should have saved before installation. This gets you booting again immediately. Then investigate what went wrong, often it’s a misconfigured device tree or a critical driver accidentally disabled during menuconfig.
Module loading problems usually appear as missing functionality after an otherwise successful boot. Run `dmesg | grep -i error` to see which modules failed to load and why. The most common cause is forgetting to run `make modules_install` or installing modules to the wrong path. Verify that your modules exist in `/lib/modules/$(uname -r)/` and that depmod ran successfully to build module dependencies.
Why won’t my Raspberry Pi boot after installing the custom kernel?
The most common causes are incompatible kernel configuration (disabled critical drivers), wrong kernel image name for your Pi model, or corrupted kernel file. Boot from the original kernel backup to verify the SD card and hardware still work, then review your build configuration.
How do I fix “make: * No rule to make target” errors during compilation?
This indicates missing source files or incorrect repository state. Run `make mrproper` to clean everything, verify your git clone completed fully, and ensure you’re on the correct branch for your Pi model before running make again.
What should I do if compiled modules won’t load?
Check that module versions match your running kernel with `uname -r` and verify the module file exists in `/lib/modules/$(uname -r)/`. Running `sudo depmod -a` rebuilds module dependencies and often resolves loading issues.
How can I revert to the stock Raspberry Pi kernel?
Restore your backup kernel image from the boot partition, or run `sudo apt install –reinstall raspberrypi-kernel` if connected to the internet. Always keep a working SD card as emergency backup.
Performance degradation after kernel installation points to suboptimal configuration choices. If your custom kernel runs noticeably slower, you likely disabled hardware acceleration features or enabled excessive debugging options that add runtime overhead. Compare your .config against the default Raspberry Pi configuration to spot differences in critical areas like CPU frequency scaling, DMA support, or GPU drivers.
Memory errors during compilation suggest insufficient RAM for the build process, particularly on older Pi models. Increase swap space temporarily (`sudo dphys-swapfile swapoff`, edit `/etc/dphys-swapfile` to set CONF_SWAPSIZE=2048, then `sudo dphys-swapfile setup && sudo dphys-swapfile swapon`) or reduce parallel build jobs with `make -j2` instead of higher values. Cross-compilation on a PC avoids this entirely.
When troubleshooting, save your kernel build logs with `make 2>&1 | tee build.log` so you can review errors carefully. The raspberrypi-kernel GitHub issues page often has solutions for specific error messages, and the Raspberry Pi Forums maintain active kernel development discussions where experienced developers help diagnose unusual problems.
Building your own kernel from the raspberrypi-kernel source isn’t just a technical exercise, it’s unlocking the full potential of your Raspberry Pi hardware. You’ve gained complete control over kernel configuration, the ability to enable experimental features, and direct access to the latest hardware support before it reaches stable releases.
This process opens doors to serious driver development work. You can now modify existing drivers, create custom hardware interfaces, and test bleeding-edge features that production kernels don’t include. For robotics projects, industrial automation, or specialized sensing equipment, this level of control becomes essential rather than optional.
Start small if you’re new to kernel development. Make minor configuration changes first, test thoroughly, then gradually tackle more complex modifications. Each successful build teaches you more about how Linux interacts with Raspberry Pi hardware at the lowest level.
The skills you’ve developed, navigating kernel source code, understanding build dependencies, managing boot configurations, transfer directly to other embedded Linux platforms. You’re not just customizing one board; you’re learning fundamental embedded systems engineering that applies across the entire ARM ecosystem. Keep your development environment organized, document your changes, and don’t hesitate to experiment. Your custom kernel is a powerful foundation for innovation.