

Transform a $35 Raspberry Pi into a complete home security system that monitors entrances, detects motion, sends instant alerts, and streams live footage to your smartphone. Whether you’re protecting your home office, monitoring a side entrance, or creating a full-perimeter security network, this single-board computer delivers professional-grade surveillance capabilities at a fraction of commercial system costs.
Start by connecting a Pi Camera Module or USB webcam to capture high-definition video, then install motion detection software like MotionEyeOS or ZoneMinder to automatically record when activity occurs. Configure email or push notifications to receive immediate alerts wherever you are, and set up secure remote access through VPN or port forwarding to view live feeds from any device.
The real power emerges when you combine multiple sensors with your camera setup. Add PIR motion sensors for more reliable detection, magnetic door/window sensors to track entry points, and integrate everything through a central dashboard you control completely. Unlike subscription-based commercial systems, you own your data, customize every feature, and expand capabilities as your needs grow.
This guide walks you through building a working security system from scratch, starting with basic motion-activated recording and progressing to advanced features like facial recognition, cloud backups, and multi-camera networks. You’ll learn practical implementation steps suitable for beginners while discovering customization options that appeal to experienced makers. By the end, you’ll have a fully functional, expandable security solution that costs less than two months of typical monitoring fees.
Why Choose Raspberry Pi for Home Security?
Building a home security system with Raspberry Pi offers compelling advantages that make it an attractive alternative to traditional commercial solutions. Let’s explore why this tiny computer might be the perfect foundation for your security setup.
The most immediate benefit is affordability. A basic Raspberry Pi board costs between $35-$75, significantly less than proprietary security systems that can run into hundreds or even thousands of dollars. When you factor in that you can add cameras, sensors, and other components incrementally, you’re looking at a budget-friendly solution that grows with your needs. This pay-as-you-go approach means you’re not locked into expensive monthly subscription fees that commercial systems often require.
Customization is where Raspberry Pi truly shines. Unlike off-the-shelf systems with predetermined features, you have complete control over every aspect of your security setup. Want to integrate facial recognition? Add it. Need specific motion detection zones? Configure them exactly how you want. Prefer notifications via Telegram instead of email? You decide. This flexibility extends to hardware choices too, from camera types to sensor placements, giving you a truly personalized security solution.
The open-source nature of Raspberry Pi projects means you’re joining a vibrant community of developers and enthusiasts who continuously share improvements, code, and troubleshooting tips. You’re not dependent on a single manufacturer for updates or support, though the Raspberry Pi Foundation provides extensive official documentation and resources. If a feature doesn’t exist, you can often find community-developed solutions or create your own.
Beyond security, building your own system offers invaluable learning opportunities in programming, networking, and electronics. It’s hands-on education that develops practical skills applicable to countless other projects.
Regarding reliability concerns, modern Raspberry Pi models have proven surprisingly robust for 24/7 operation. While they may require more initial setup than plug-and-play commercial systems, proper configuration with automatic restart capabilities and redundant power supplies can create a dependable security platform. The key difference is that you maintain control and ownership of your data, unlike cloud-dependent commercial alternatives that may compromise privacy or become unusable if the company discontinues support.
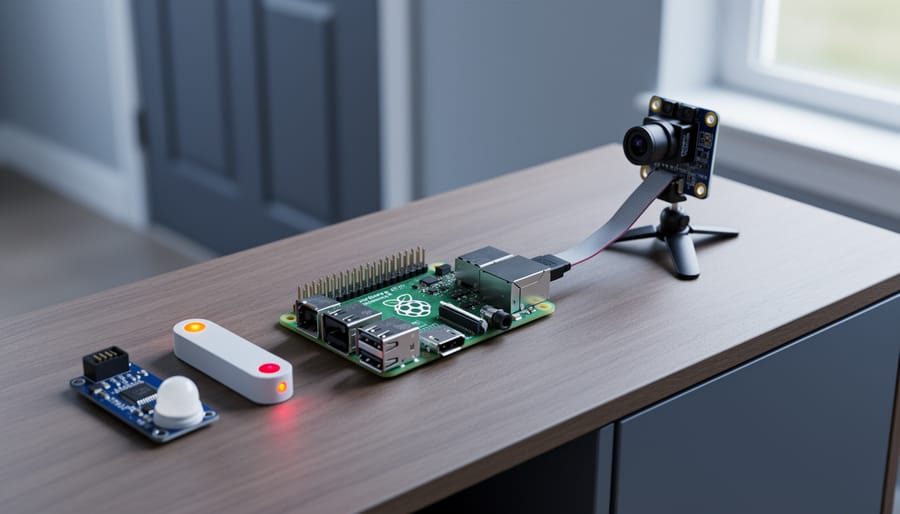
A complete Raspberry Pi security setup includes the main board, camera module, and motion sensors working together.
Essential Hardware Components You’ll Need
Choosing the Right Raspberry Pi Model
Selecting the right Raspberry Pi model depends on your security system’s complexity and features. For basic single-camera setups with simple motion detection, the Raspberry Pi Zero 2 W offers an affordable entry point at around $15. Its compact size makes it easy to conceal, though processing power limits advanced features according to official Raspberry Pi product specifications.
If you’re planning a multi-camera system or want AI-powered facial recognition, the Raspberry Pi 4 (4GB or 8GB RAM) is your best bet. The additional processing power handles multiple video streams simultaneously and runs machine learning models without lag. This model excels when processing video locally, especially with higher resolution cameras.
The Raspberry Pi 3 B+ strikes a middle ground for those needing moderate capabilities. It manages two cameras comfortably and supports basic object detection algorithms while remaining budget-friendly at around $35.
For cloud storage systems, any model works since processing happens remotely. However, local storage demands more resources. Plan for continuous recording? Choose the Pi 4 with external SSD support for reliable performance and faster write speeds.
Budget-conscious builders should start with what they have. A Pi 3 handles most home security needs adequately, including 1080p video recording and motion-triggered alerts. You can always upgrade later as your project evolves, making this a flexible, scalable solution for any skill level.
Camera Options and Considerations
When building your Raspberry Pi security system, choosing the right camera is crucial for capturing clear footage. You’ll primarily choose between official Pi Camera modules and third-party USB cameras, each with distinct advantages.
The official Raspberry Pi Camera Module v2 offers 8MP resolution and connects directly to the camera port via ribbon cable, making it compact and power-efficient (see official Camera Module specifications). The newer Pi Camera Module 3 bumps resolution to 12MP with improved low-light performance. For night surveillance, the Pi NoIR camera variants remove the infrared filter, enabling night vision when paired with IR illuminators. These modules typically offer a 62-75 degree field of view, suitable for monitoring specific areas like doorways or small rooms.
Third-party USB cameras provide more flexibility, especially for beginners who find USB plug-and-play simpler than ribbon cables. Many USB options include built-in microphones and wider fields of view (up to 120 degrees). However, they consume more power and may require additional configuration.
For outdoor deployment, weatherproofing becomes essential. Most camera modules need separate protective housings rated IP65 or higher to withstand rain and dust. Some USB cameras come pre-weatherproofed, though you’ll sacrifice the compact profile of Pi modules.
Consider your specific needs: tight spaces favor official modules, while multi-camera setups might benefit from USB hubs. Budget typically ranges from $15-50 per camera depending on features selected.
Additional Sensors and Accessories
Expanding your Raspberry Pi security system with additional sensors and accessories transforms it from a basic setup into a comprehensive monitoring solution. PIR (Passive Infrared) motion sensors are essential components that detect movement by measuring infrared radiation changes, making them perfect for triggering alerts or camera recordings when someone enters a room. These affordable sensors connect easily to your Pi’s GPIO pins and work reliably in various lighting conditions.
Door and window sensors, typically magnetic reed switches, provide perimeter security by alerting you when entry points are opened. They’re incredibly simple to install and can be strategically placed throughout your home to create multiple detection zones. For audio alerts, piezo buzzers or electronic sirens add an audible deterrent that activates when threats are detected. These range from quiet notification tones to loud alarm sounds that can scare off intruders.
Other valuable additions include ultrasonic distance sensors for detecting objects in specific zones, temperature and humidity sensors for environmental monitoring, and LED indicators for visual status updates. Many beginners start with a basic PIR and camera combination, then gradually add more sensors as they become comfortable with the system’s capabilities and programming requirements.
Software Solutions for Raspberry Pi Security Systems
Choosing the right software platform for your Raspberry Pi security system can make the difference between a frustrating setup experience and a smooth, functional surveillance solution. Let’s explore the most popular options available, each offering different strengths depending on your technical comfort level and specific needs.
MotionEyeOS stands out as the most beginner-friendly option available. This standalone operating system transforms your Raspberry Pi into a dedicated surveillance hub with minimal configuration. Simply flash the image to your SD card, boot up your Pi, and access the web interface to start adding cameras. The streamlined approach means you won’t need to wrestle with command-line installations or dependency issues. However, this simplicity comes with trade-offs in customization options compared to other platforms.
For users comfortable with Raspbian or Raspberry Pi OS, motionEye offers a more flexible alternative. Available through the motionEye GitHub repository, this web-based frontend provides similar functionality to MotionEyeOS but runs as an application on your existing system. This approach lets you use your Raspberry Pi for multiple purposes while still maintaining a robust security setup. The interface remains clean and intuitive, making camera management and motion detection configuration straightforward even for newcomers.
| Software | Difficulty Level | Key Features | Best Suited For |
|---|---|---|---|
| MotionEyeOS | Beginner | Standalone OS, web UI, auto-upload | Dedicated security projects |
| motionEye | Beginner-Intermediate | Web-based, multi-camera, notifications | Dual-purpose Pi setups |
| Kerberos.io | Intermediate | Machine learning, cloud storage, API | Smart detection needs |
| ZoneMinder | Advanced | Enterprise features, extensive customization | Large-scale installations |
| Custom Python | Advanced | Complete control, integration possibilities | Unique requirements |
Kerberos.io brings machine learning capabilities to the table, offering smarter motion detection that reduces false alerts from shadows, pets, or swaying trees. The platform includes both open-source and commercial options, with cloud storage integration and mobile apps available. Setup requires more technical knowledge but rewards you with sophisticated features like region-based detection and detailed analytics.
ZoneMinder caters to advanced users planning larger deployments. Available from the ZoneMinder official website, this enterprise-grade platform supports numerous cameras simultaneously and offers professional features like zone-based monitoring and complex event triggering. Installation on Raspberry Pi requires patience and Linux knowledge, making it better suited for experienced tinkerers or those stepping up from simpler solutions.
Custom Python solutions provide ultimate flexibility for programmers wanting complete control. Using libraries like OpenCV and picamera, along with motion detection tools from the Motion project documentation, you can build exactly what you need, integrate with home automation systems, or implement unique detection algorithms. This path demands programming expertise but opens endless possibilities for innovation and personalization.
Step-by-Step Setup: Building Your First Raspberry Pi Security Camera
Installing the Operating System
Getting your Raspberry Pi ready starts with installing MotionEyeOS, a specialized operating system designed specifically for video surveillance applications. This lightweight OS makes setting up your security system remarkably straightforward.
First, download the latest MotionEyeOS image from the MotionEyeOS official repository. Choose the version that matches your Raspberry Pi model. You’ll also need to download and install balenaEtcher, a user-friendly tool for flashing operating systems to SD cards.
Insert your microSD card (minimum 8GB recommended) into your computer using a card reader. Launch balenaEtcher and follow these simple steps: select the downloaded MotionEyeOS image file, choose your SD card as the target, and click Flash. The process typically takes 3-5 minutes.
Once flashing completes, insert the SD card into your Raspberry Pi and power it on. MotionEyeOS will automatically expand to fill your SD card and perform initial configuration. After about two minutes, you can access the web interface by navigating to the Pi’s IP address in your browser.
For advanced users who prefer command-line installation, you can use the dd utility:
sudo dd if=motioneyeos-raspberrypi4.img of=/dev/sdX bs=4M status=progress
sudo sync
Replace /dev/sdX with your actual SD card device identifier. This method offers more control but requires careful attention to avoid overwriting the wrong drive. The default login credentials are admin with a blank password, which you should change immediately for security purposes.
Connecting and Configuring Your Camera
Connecting your camera to the Raspberry Pi is straightforward and sets the foundation for your security system. For the official Raspberry Pi Camera Module, locate the CSI port between the HDMI and audio jack. Gently lift the plastic clip, insert the ribbon cable with the blue side facing the audio jack, then push the clip down to secure it. If you’re using a USB webcam instead, simply plug it into any available USB port.
Once connected, power on your Raspberry Pi and enable the camera interface through the Raspberry Pi Configuration tool or by running sudo raspi-config in the terminal. Navigate to Interface Options and enable the camera. The Raspberry Pi camera documentation provides detailed guidance on camera configuration and troubleshooting common connection issues.
To verify your camera works, test it with raspistill -o test.jpg for the CSI camera or fswebcam test.jpg for USB webcams. You should see a captured image in your home directory.
For optimal performance, adjust resolution and frame rate based on your needs. Security monitoring typically works well at 1280×720 resolution with 15-20 frames per second, balancing quality with storage requirements. Higher settings consume more processing power and storage space. Access these settings through your chosen security software’s configuration file, where you can fine-tune motion sensitivity, recording triggers, and video compression settings to match your specific surveillance requirements.
A strategically positioned Raspberry Pi camera provides comprehensive coverage of interior spaces.
Setting Up Motion Detection and Alerts
With your camera operational, it’s time to configure motion detection to transform your Raspberry Pi into an intelligent security system. Motion, a popular motion detection software for Linux, works seamlessly with Raspberry Pi and offers extensive customization options.
Start by installing Motion using the command `sudo apt-get install motion`. Once installed, edit the configuration file at `/etc/motion/motion.conf` to adjust sensitivity settings. The Motion configuration guide provides detailed documentation for all available parameters. The `threshold` parameter controls how much pixel change triggers detection—begin with a value around 1500 and fine-tune based on your environment. For outdoor setups with moving trees or changing light, increase this value to reduce false alerts.
To enable email notifications, integrate Motion with a Python script using the `smtplib` library. Configure the `on_event_start` parameter in motion.conf to execute your notification script when motion is detected. For push notifications, consider services like Pushbullet or Telegram bots, which offer free APIs and simple Python integration.
Recording schedules prevent unnecessary footage during specific hours. Set Motion to run only during desired times using cron jobs, or configure the `auto_brightness` parameter to adapt to lighting changes throughout the day. You can also specify target directories for organizing recordings by date, making footage review much easier.
Test your configuration thoroughly in various lighting conditions to ensure reliable performance without overwhelming yourself with false alerts.
Remote access allows you to monitor your Raspberry Pi security cameras from anywhere using a smartphone or computer.
Enabling Remote Access
To access your security system remotely, you’ll need to set up secure external connections. The simplest approach uses port forwarding on your router, directing external traffic to your Raspberry Pi’s local IP address. However, this requires proper firewall configuration and strong authentication to prevent unauthorized access.
For a more reliable solution, configure Dynamic DNS (DDNS) through services like No-IP or DuckDNS, which assigns a memorable hostname to your changing IP address. After connecting to WiFi, install the DDNS client on your Pi to maintain the connection.
The most secure option is implementing a VPN using WireGuard or OpenVPN. This creates an encrypted tunnel to your home network, eliminating exposed ports while providing complete access to your security system from anywhere. Choose the method that matches your technical comfort level and security requirements.
Advanced Features and Customizations
Once you’ve got your basic Raspberry Pi security system up and running, you can explore advanced features that transform it from a simple camera setup into a sophisticated surveillance platform. These enhancements not only boost security capabilities but also integrate seamlessly with your broader smart home ecosystem.
Facial recognition is one of the most powerful upgrades you can implement. Using the OpenCV library, an open-source computer vision toolkit, your Raspberry Pi can identify familiar faces and alert you only when strangers appear. The setup involves training a model with photos of household members, then running real-time detection on your camera feed. While this requires more processing power (consider upgrading to a Raspberry Pi 4 with 4GB RAM), the results are impressive and practical for distinguishing between family members and potential intruders.
License plate detection offers similar benefits for monitoring driveways and parking areas. Using automated number plate recognition (ANPR) software, your system can log vehicle arrivals, create allowed lists for regular visitors, and flag unknown vehicles. This works particularly well when combined with infrared cameras for nighttime clarity.
Integration with home automation platforms takes your security system to the next level. Home Assistant integration allows your cameras to trigger smart lights when motion is detected or lock doors automatically when you arm the system. Home Assistant provides a unified interface for managing all your connected devices. You can even combine it with voice-controlled home automation for hands-free operation. Building a comprehensive smart home command center means all your devices work together intelligently.
For cloud storage, services like Dropbox, Google Drive, or dedicated security platforms can automatically backup footage. This ensures evidence remains safe even if hardware is damaged or stolen. Configure your system to upload clips triggered by motion rather than continuous footage to manage storage costs effectively.
Multi-camera setups require careful planning but dramatically improve coverage. Your Raspberry Pi can handle multiple USB cameras or network cameras simultaneously, creating a comprehensive surveillance network. Use Motion or ZoneMinder software to manage feeds from different locations, each with customized detection zones and sensitivity settings.
Security Best Practices and System Hardening
Building a Raspberry Pi security system is only valuable if the system itself remains secure. Without proper hardening, your surveillance solution could become a vulnerability in your home network. The Raspberry Pi security documentation provides comprehensive guidance on protecting your device from common threats.
Start by changing all default credentials immediately. The Raspberry Pi’s default username (pi) and password (raspberry) are widely known, making your system an easy target. Create a strong, unique password or consider creating a new user account entirely and disabling the default pi user. This simple step prevents the most common attack vector.
Secure your SSH access, which is critical for remote management. Disable password authentication in favor of SSH key-based authentication, which is significantly more secure. Edit the SSH configuration file (/etc/ssh/sshd_config) to change the default port from 22 to a non-standard port, reducing automated attacks. Consider implementing fail2ban, a tool that automatically blocks IP addresses showing malicious behavior after repeated failed login attempts.
Network segmentation adds another protection layer. Place your Raspberry Pi security system on a separate VLAN or subnet from your primary home network. This isolation ensures that even if the device is compromised, attackers cannot easily access your other devices. Implementing network security measures creates robust barriers against unauthorized access.
Regular software updates are non-negotiable. Run sudo apt update and sudo apt upgrade weekly to patch security vulnerabilities. Enable automatic security updates for critical packages using unattended-upgrades to ensure your system stays protected even when you forget manual updates.
Encrypt stored footage using tools like LUKS for full-disk encryption or encrypt specific directories containing sensitive recordings. This prevents unauthorized access to footage if someone physically steals your SD card or gains file system access.
Finally, install a firewall using ufw (Uncomplicated Firewall) to restrict incoming connections, allowing only necessary ports for camera feeds and remote access. A basic configuration might look like:
sudo ufw default deny incoming
sudo ufw default allow outgoing
sudo ufw allow [your-ssh-port]
sudo ufw allow 8081  # Motion web interface
sudo ufw enable
Troubleshooting Common Issues
Even the most carefully built Raspberry Pi security system can encounter hiccups, but most issues have straightforward solutions. Let’s walk through the most common problems you might face and how to resolve them quickly.
Camera connection issues often stem from loose ribbon cables or improperly enabled camera modules. If your camera isn’t detected, first ensure the ribbon cable is firmly seated in both the camera and Raspberry Pi ports with the metal contacts facing the right direction. Then, run sudo raspi-config and verify the camera interface is enabled under Interface Options. After making changes, always reboot your Pi to apply the settings.
Poor video quality typically relates to inadequate lighting or incorrect camera settings. If your footage appears grainy or pixelated, try adjusting the camera resolution and bitrate in your software configuration. For Motion, edit the configuration file to increase the quality parameter from 75 to 85 or higher. Adding external lighting, especially infrared LEDs for nighttime recording, can dramatically improve image clarity without requiring expensive camera upgrades.
Motion detection false positives can be frustrating, triggering alerts from shadows, moving branches, or changing light conditions. Reduce these by adjusting your motion detection sensitivity threshold downward and implementing minimum motion frames settings. Many users find success setting Motion to require movement in at least 3-5 consecutive frames before triggering an alert. You can also define detection zones to ignore problem areas like swaying trees or busy streets.
Why does my security system keep running out of storage space?
This usually happens when you’re recording continuously or saving too many motion-triggered clips. Configure your system to overwrite old footage automatically or upload files to cloud storage, then delete local copies after a set period.
What should I do if my Pi keeps disconnecting from WiFi?
Weak WiFi signals are a common culprit. Try moving your Pi closer to the router, using a USB WiFi adapter with an external antenna, or switching to a wired Ethernet connection for more reliable performance.
How can I improve my system’s sluggish performance?
Start by reducing video resolution and frame rates, as processing high-definition streams taxes the Pi’s CPU. Ensure you’re using a quality power supply and consider upgrading to a Raspberry Pi 4 with more RAM if you’re running multiple cameras.
Network connectivity problems often improve by assigning your Pi a static IP address through your router settings, preventing it from changing addresses and becoming inaccessible. If remote access fails, double-check your port forwarding configuration and firewall rules.
Storage problems arise quickly with continuous recording. Implement automatic deletion of footage older than 7-30 days, or set up rsync to transfer files to network storage. A 128GB microSD card typically provides several days of motion-triggered recording, but external USB drives offer more economical expansion for long-term storage needs.
System performance optimization becomes critical when running multiple cameras or processor-intensive features. Disable unnecessary services, reduce recording resolution during low-priority hours, and ensure adequate cooling with heatsinks or small fans to prevent thermal throttling that degrades performance.
Real-World Project Ideas and Inspirations
Ready to see your Raspberry Pi security system in action? Here are some inspiring real-world implementations that demonstrate the versatility of this platform.
For parents, a baby monitor setup offers an affordable alternative to commercial options. Using a Pi Zero with a camera module and motion detection software, you can stream live video to your smartphone while receiving alerts when your little one wakes up. Add night vision capabilities with an infrared camera for complete peace of mind.
Pet owners love using Raspberry Pi cameras to check on their furry friends throughout the day. Mount a camera near your pet’s favorite spot, enable two-way audio communication, and even integrate treat dispensers triggered remotely. Motion detection helps capture those adorable moments when you’re away.
Garage security systems are particularly popular since they protect valuable tools and vehicles. A simple setup with door sensors and a camera can send instant notifications when the garage opens unexpectedly. Pair this with automatic lighting controls for added deterrence.
Multi-room surveillance systems scale easily with Raspberry Pi. Deploy multiple units throughout your home, each streaming to a central dashboard. This distributed approach costs significantly less than traditional systems while offering comparable functionality.
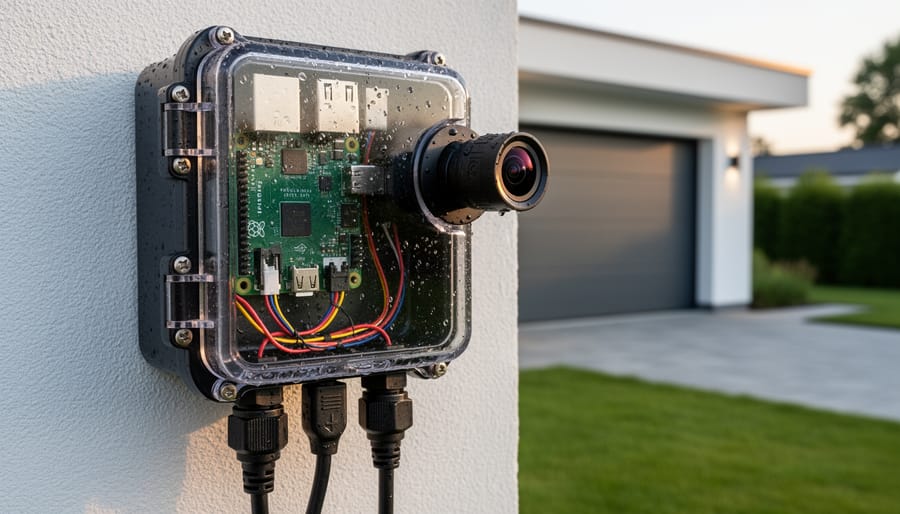
Outdoor wildlife cameras transform your Pi into a nature observatory. Weatherproof enclosures protect the hardware while capturing fascinating footage of backyard visitors. Time-lapse features document seasonal changes beautifully.
Finally, integrate your Raspberry Pi system with smart doorbells for comprehensive front-door monitoring. Combine facial recognition with existing doorbell alerts to identify visitors automatically, creating a seamless security experience that rivals professional installations.
Building your own Raspberry Pi security system offers an unbeatable combination of affordability, flexibility, and hands-on learning that commercial systems simply can’t match. For less than the cost of a single branded security camera, you can create a functional surveillance solution tailored to your specific needs while gaining valuable skills in Linux, Python programming, networking, and hardware integration.
The beauty of this approach lies in its scalability. Start simple with a single camera setup using MotionEyeOS or Motion software. Get comfortable with the basics of camera positioning, motion detection sensitivity, and video storage management. As your confidence grows, gradually expand your system by adding multiple cameras, incorporating PIR sensors for better motion detection, or implementing facial recognition features. There’s no pressure to build everything at once.
Beyond the practical security benefits, the real value comes from understanding how these systems work from the ground up. You’ll troubleshoot issues, optimize performance, and customize features in ways that pre-built systems never allow. Whether you’re a student learning about IoT, a hobbyist exploring new projects, or simply someone who values privacy and control over their data, a DIY Raspberry Pi security system represents an investment in both home security and personal skill development. The knowledge you gain here transfers to countless other projects and applications.