

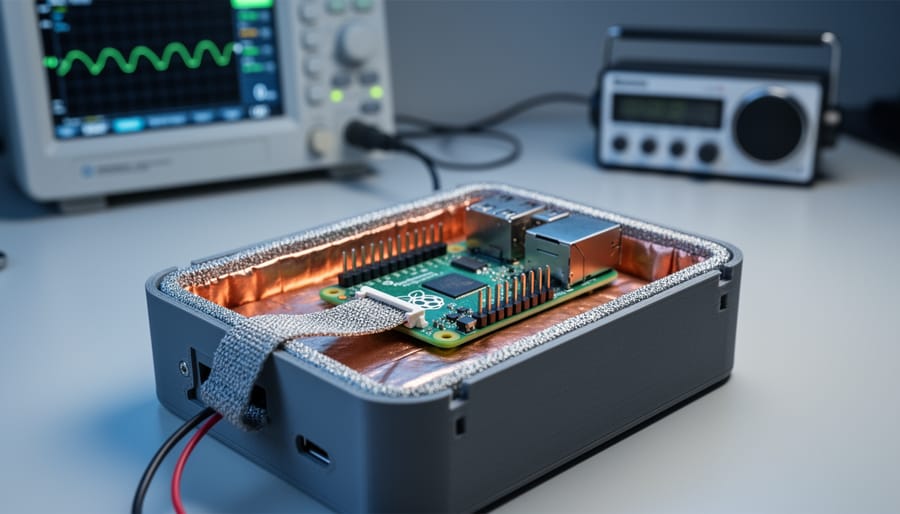
Identify interference sources in your Raspberry Pi project by running it near AM radios or oscilloscopes—crackling sounds or display noise indicate EMI problems requiring immediate attention. Test shielding effectiveness by wrapping your Pi in aluminum foil as a quick diagnostic, then measure whether radio interference decreases to determine if proper shielding materials will solve your issue.
Choose conductive fabric tape for flexible applications where you need to shield GPIO cables or create custom enclosure linings, achieving 60-80dB attenuation in the critical 100MHz-1GHz range where Raspberry Pi processors generate most interference. Copper tape works exceptionally well for flat surfaces and costs less than specialized EMI materials while providing superior conductivity, making it ideal for shielding specific circuit board sections or creating grounded enclosure seams.
Apply conductive paint to 3D-printed cases when you need complete coverage on complex geometries—this approach lets you maintain custom enclosure designs while achieving 40-60dB shielding effectiveness across common interference frequencies. Layer nickel-coated polyester fabric between enclosure halves to create effective gaskets that prevent EMI leakage through case joints, addressing the most common failure point in DIY shielding projects.
Ground every shielding material properly using dedicated ground pins or creating star ground points on your enclosure, since ungrounded shields can actually amplify interference rather than reduce it. Test your shielded setup with a spectrum analyzer app on your smartphone or use nearby wireless devices to verify reduced interference—successful shielding should eliminate WiFi dropouts, reduce static in nearby audio equipment, and prevent disruption of radio-controlled devices.
Understanding these practical material options transforms EMI/RFI challenges from project-stopping obstacles into manageable engineering decisions, whether you’re building a portable RetroPie console, industrial sensor array, or amateur radio project alongside your Raspberry Pi.
Why Your Raspberry Pi Needs EMI/RFI Shielding
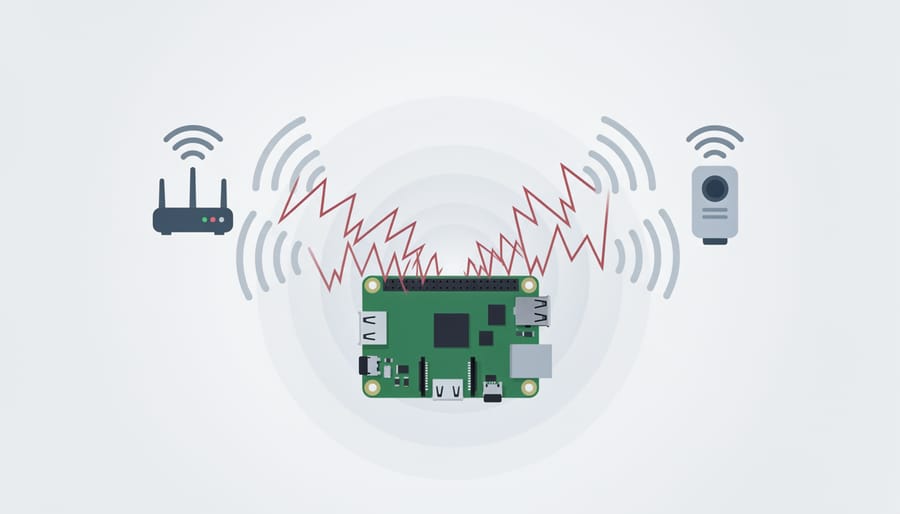
Common Interference Problems You Might Be Experiencing
If your Raspberry Pi project is acting strangely, electromagnetic interference might be the culprit. Here are common symptoms that suggest you need EMI/RFI shielding:
GPS modules are particularly sensitive to interference. You might notice erratic position readings, difficulty acquiring satellite locks, or complete signal loss when your GPS module sits near switching power supplies or high-frequency circuits.
Audio projects often reveal interference through annoying buzzing, humming, or clicking sounds in speakers and headphones. This noise typically syncs with processor activity or display refreshes.
USB devices may disconnect randomly or fail to enumerate properly when EMI disrupts communication signals. External hard drives, cameras, and wireless adapters are especially vulnerable to these disruptions.
Wireless connectivity issues manifest as dropped Wi-Fi connections, reduced Bluetooth range, or poor signal strength even when the router is nearby. Your Raspberry Pi’s onboard wireless modules can both generate and suffer from electromagnetic interference.
Display problems like screen flickering, horizontal lines, or color artifacts often indicate EMI affecting HDMI or DSI connections. Nearby devices might also experience interference—radios producing static, or neighboring electronics behaving unpredictably when your project powers on. Recognizing these symptoms helps you identify when shielding materials become necessary for reliable operation.
When Shielding Becomes Mandatory
While many Raspberry Pi projects work fine without shielding, certain situations make EMI/RFI protection essential rather than optional. If you’re planning to sell or distribute your product commercially, you’ll need to meet regulatory standards. In the United States, the FCC requires electronic devices to comply with Part 15 regulations, which limit electromagnetic emissions. Similarly, the CE marking in Europe demands conformity with EMC directives before products can enter the market.
Beyond legal requirements, shielding becomes functionally necessary in sensitive applications. Medical devices, industrial control systems, and aerospace projects simply can’t tolerate interference that might cause malfunctions or data corruption. If your Raspberry Pi project involves precision measurement equipment, audio recording, or radio communications, proper shielding protects both your device and surrounding electronics from mutual interference.
Educational institutions developing STEM projects should also consider shielding when teaching students about professional electronics design practices. Even hobbyists working with high-frequency applications like software-defined radio, GPS modules, or wireless communications will find that adequate EMI protection dramatically improves performance and reliability. When interference causes your project to behave unpredictably or fail certification testing, shielding transforms from optional enhancement to absolute necessity.
Understanding EMI/RFI Shielding Materials
Conductive Fabrics and Tapes
When you need flexible shielding solutions for your Raspberry Pi projects, conductive fabrics and tapes offer excellent versatility. These materials conform to irregular surfaces and work perfectly for custom enclosures or tight spaces where rigid shields won’t fit.
Copper tape is a popular choice among hobbyists, typically providing 85-100 dB of shielding effectiveness across a wide frequency range. It features conductive adhesive backing, making installation straightforward on plastic cases or PCB edges. You’ll find it particularly useful for creating ground planes or sealing gaps in enclosures. Aluminum tape offers similar benefits at a lower cost, though with slightly reduced effectiveness around 60-80 dB.
Conductive fabrics, often made from nickel-copper or silver-plated nylon, provide 60-90 dB shielding and excel in applications requiring repeated flexing or irregular shapes. These fabrics work great for lining 3D-printed cases or creating flexible cable wraps. Some varieties include adhesive backing for easy application, while others require sewing or bonding.
For Raspberry Pi projects dealing with moderate interference issues, these flexible materials offer practical advantages. They’re easier to work with than metal sheets, require no special tools for cutting, and adapt to your specific design constraints. Remember to ensure proper grounding connections for optimal performance.
Conductive Paints and Coatings
Conductive paints and coatings offer an accessible solution for adding EMI/RFI shielding to 3D printed Raspberry Pi cases and custom fabricated enclosures. These specialized paints contain conductive particles that create a protective barrier against electromagnetic interference once applied to non-conductive surfaces.
Nickel-based paints deliver excellent shielding effectiveness across a broad frequency range, typically providing 40-60 dB of attenuation. They’re durable and work well on various plastics, making them ideal for 3D printed projects. Copper-based options offer similar performance at a lower cost and apply smoothly with standard brushes or spray equipment. For budget-conscious makers, graphene-based paints are emerging as an innovative alternative, though they generally provide moderate shielding suitable for less demanding applications.
Application technique matters significantly for performance. Start by cleaning your enclosure thoroughly with isopropyl alcohol. Apply thin, even coats using a foam brush or airbrush, allowing each layer to dry completely before adding the next. Two to three coats typically achieve optimal shielding. For best results, ensure continuous coverage without gaps, paying special attention to seams and corners. You can verify conductivity between coats using a multimeter set to resistance mode. Remember that proper grounding remains essential—connect your painted shield to your Raspberry Pi’s ground pin for maximum effectiveness.
Metal Meshes and Perforated Shields
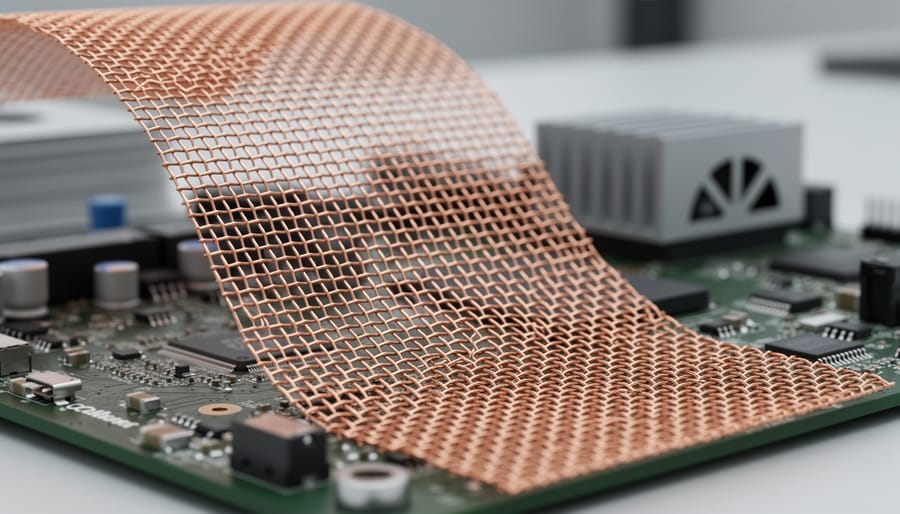
Metal meshes and perforated shields offer an excellent compromise when your Raspberry Pi project needs both electromagnetic shielding and airflow for cooling. Copper mesh provides superior conductivity and typically delivers 40-70 dB of attenuation, making it ideal for projects requiring strong protection against interference. Aluminum screening presents a more budget-friendly alternative with slightly reduced effectiveness around 30-50 dB, but still handles most hobbyist applications effectively. Perforated metal sheets with hole patterns between 30-60% open area maintain adequate shielding while preventing heat buildup in enclosed projects. These materials excel in custom enclosure designs since you can easily cut them with basic tools and attach them using conductive adhesive or screws. For ventilation-critical applications like overclocked Pi setups or projects with multiple components, consider positioning mesh panels on opposite sides of your enclosure to establish proper airflow while maintaining electromagnetic protection around sensitive circuitry.
Absorptive Materials vs. Reflective Materials
EMI shielding materials work through two primary mechanisms: absorption and reflection. Understanding which approach suits your Raspberry Pi project helps you choose the right solution.
Reflective materials, like copper and aluminum foils, create a conductive barrier that bounces electromagnetic waves away from sensitive components. These work best for high-frequency interference and are ideal for most hobbyist applications. They’re lightweight, cost-effective, and easy to apply using conductive tape or adhesive-backed sheets.
Absorptive materials, such as ferrite composites and carbon-loaded foam, convert electromagnetic energy into heat. These excel at lower frequencies and are particularly useful when you can’t risk reflecting interference back into nearby circuits. Think of them as a sponge soaking up electromagnetic noise rather than bouncing it around.
For Raspberry Pi projects, reflective materials typically provide sufficient protection for general use. However, consider absorptive options when working with multiple boards in close proximity, audio applications sensitive to reflected signals, or when you need shielding across a broad frequency range. Many commercial solutions combine both approaches for maximum effectiveness.
Digital Fabrication Techniques for Custom Shielding
3D Printing Enclosures for Conductive Coating
Designing custom 3D printed cases for conductive coating requires thoughtful planning to maximize EMI/RFI protection. Start by modeling your enclosure with adequate wall thickness, aiming for 2-3mm minimum to provide structural support for the coating. Include ventilation slots if needed, but keep them narrow and perpendicular to circuit boards to minimize interference leakage.
Design tolerance is crucial. Add 0.5-1mm clearance around your Raspberry Pi to accommodate the conductive coating thickness. Create recessed areas or channels for grounding connections, ensuring direct contact between the coating and any grounding points on your board. Consider adding mounting posts with metal inserts that can serve dual purposes: securing components and establishing electrical continuity.
Before printing, select materials carefully. PLA and PETG work well as base materials for conductive coatings. Print with higher infill percentages (40-60%) to create a more rigid structure that prevents coating cracks during handling.
After printing, sand surfaces lightly with 220-grit sandpaper to improve coating adhesion. Install a copper tape ground path connecting your coating to the Pi’s GPIO ground pin, completing your shielding system. This connection is essential for directing interference safely away from sensitive components.
CNC Milling Metal Shields
Desktop CNC machines offer an excellent way to fabricate custom EMI/RFI shields with precision and repeatability. For Raspberry Pi projects, aluminum and copper are the go-to materials due to their superior conductivity and workability.
Start by designing your shield in CAD software, ensuring proper dimensions for your specific board. Export your design as G-code compatible with your CNC machine. When selecting materials, 0.8mm to 1.6mm thick aluminum sheets work well for most applications, while copper provides better shielding effectiveness at slightly higher cost.
Key fabrication tips: Use sharp carbide endmills to prevent material deformation, set feed rates between 500-800mm/min for clean cuts, and apply cutting fluid to reduce heat buildup. Design your shields with mounting tabs and ventilation slots where needed.
The beauty of CNC milling is reproducibility. Once you’ve perfected your design, you can manufacture multiple shields with identical specifications. This approach is particularly valuable for prototype testing or small production runs where commercial shielding solutions don’t fit your unique requirements.
Remember to deburr all edges thoroughly and consider adding grounding points to maximize shielding effectiveness.
Laser Cutting Custom Gaskets and Panels
Laser cutters offer exceptional precision when fabricating custom EMI/RFI shielding components for your Raspberry Pi projects. This method works particularly well for creating conductive gaskets from copper or aluminum tape-backed materials, allowing you to achieve tolerances within 0.1mm for perfect fitment around enclosure seams.
For ventilation panels, laser cutting enables you to integrate conductive mesh directly into your design. Simply sandwich the mesh between two thin layers of conductive material before cutting, creating effective honeycomb or slot patterns that maintain airflow while blocking interference. The laser’s precision ensures mesh alignment stays consistent throughout the panel.
Multi-layer shield assemblies benefit significantly from this approach. You can stack different shielding materials, like copper foil over foam gaskets, and cut them simultaneously for perfectly aligned layers. This technique proves invaluable when creating complex shield geometries around GPIO headers or camera modules where traditional fabrication methods fall short.
Start with vector files of your Raspberry Pi’s dimensions, adding 1-2mm clearance for gasket compression. Test cuts on scrap material first to dial in settings, as different conductive materials require specific power and speed combinations to avoid burning or incomplete cuts.
Hands-On Project: Building a Digitally Fabricated EMI Shield for Raspberry Pi 4/5
Materials and Tools You’ll Need
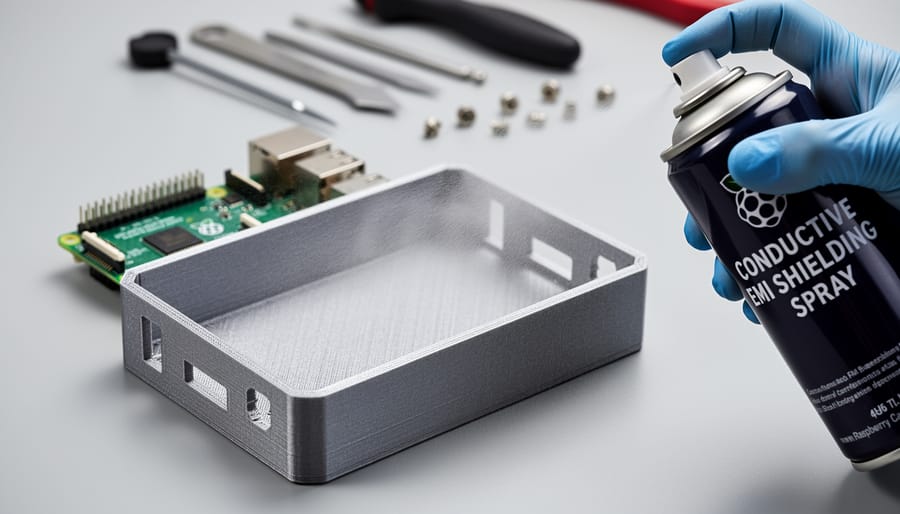
Before diving into your EMI/RFI shielding project, gather these essential materials and tools. For shielding materials, you’ll need copper or aluminum tape with conductive adhesive, copper mesh or fabric, and conductive paint or spray coating. These form the backbone of your interference protection. Consider purchasing pre-cut shielding gaskets or foam if you’re working with enclosures.
Your toolkit should include basic fabrication equipment: precision scissors or utility knife for cutting tape and mesh, soldering iron with rosin-core solder for electrical connections, and a multimeter with continuity testing capability to verify proper grounding. Wire strippers and electrical tape will help secure connections.
For testing effectiveness, an RF spectrum analyzer or EMI detector proves invaluable, though budget-friendly alternatives include smartphone apps with limited functionality. You’ll also want grounding wire (braided copper works best) and various connectors to establish proper earth connections.
Safety gear matters too. Wear protective gloves when handling conductive materials with sharp edges, and safety glasses during soldering. Keep isopropyl alcohol and lint-free cloths handy for surface preparation, ensuring maximum adhesion of shielding materials. Optional but helpful items include calipers for precise measurements and a heat gun for shrink tubing applications.
Designing the Shielded Enclosure
When creating your shielded enclosure design, whether using FreeCAD or Fusion 360, start by considering the complete EMI/RFI protection path. Your design should treat the enclosure as a continuous conductive surface where every opening becomes a potential leak point for interference.
Begin by establishing dedicated grounding points in your CAD model. Position mounting holes near board grounding pads, ensuring metal-to-metal contact between your Raspberry Pi’s ground plane and the enclosure. Design these contact points with spring-loaded pins or conductive gaskets to maintain consistent electrical connection even with thermal expansion.
Seam management deserves careful attention during the design phase. EMI leaks most commonly through gaps where panels meet. Use overlapping joints rather than butt joints, designing tabs that create at least 10mm of overlap. Add finger stock or conductive foam gasket channels to your model where panels join. For projects requiring frequent access, incorporate EMI gasket grooves directly into the panel edges.
Ventilation presents the biggest design challenge since airflow holes can act as slot antennas. If your Raspberry Pi generates significant heat, design honeycomb patterns with hole diameters below one-tenth the wavelength of your highest interference frequency. For most applications, 3mm holes work well. Space them densely enough for adequate cooling while maintaining shielding integrity.
Consider hybrid case fabrication approaches that combine conductive materials with standard plastics. Design your enclosure with separate shielding and structural layers, making assembly easier while maintaining effectiveness. Export your final design as STL files for 3D printing or DXF files for sheet metal fabrication.
Fabrication and Assembly Process
Creating an effective EMI/RFI shield for your Raspberry Pi project doesn’t require specialized equipment. Start by measuring your device and designing a shield enclosure using free software like Fusion 360 or TinkerCAD. Export your design as an STL file for 3D printing or as a template for cutting sheet metal.
For 3D printed shields, use standard PLA or PETG filament to create the base structure. Once printed, the critical step is applying conductive material. Conductive spray paint offers the easiest application method – work in thin, even coats in a well-ventilated area, allowing 15-20 minutes between layers. Apply at least three coats for effective shielding. Alternatively, you can line the interior with copper tape, ensuring each strip overlaps by at least 5mm to maintain conductivity throughout the shield.
If you’re working with pre-cut conductive fabric or copper mesh, secure it to your enclosure using conductive adhesive. Press firmly to eliminate air gaps that could compromise shielding effectiveness.
The assembly process requires careful attention to grounding. Create a grounding connection by attaching a grounding strap from your shield to the Raspberry Pi’s ground pin (physical pin 6, 9, 14, 20, 25, 30, 34, or 39). Use conductive copper tape to create this pathway if your shield design doesn’t include integrated grounding points.
Before final assembly, test continuity across all conductive surfaces using a multimeter set to resistance mode. Any reading above 1 ohm indicates poor contact that needs addressing. Finally, ensure all seams and openings have conductive gaskets to prevent electromagnetic leakage.
Testing Your Shield’s Effectiveness
Testing your shielding’s effectiveness doesn’t require expensive lab equipment. Start with an AM radio tuned between stations—bring it close to your Raspberry Pi before and after adding shielding. You should notice a significant reduction in static and crackling sounds if your shield is working properly.
For more precise measurements, an affordable SDR dongle (like the RTL-SDR) paired with free software such as GQRX lets you visualize the radio frequency spectrum. Capture a baseline reading of your unshielded project, then compare it after applying your shielding material. Look for reduced noise peaks across different frequency bands.
If you have access to an oscilloscope, connect it to sensitive input lines on your project. Monitor for high-frequency noise on signal lines—effective shielding should show cleaner waveforms with less jitter. For GPIO pins, you can write simple test scripts that measure timing accuracy, as EMI often causes unexpected glitches in digital signals. These practical tests help confirm your shielding solution works before deploying your project in real-world environments.
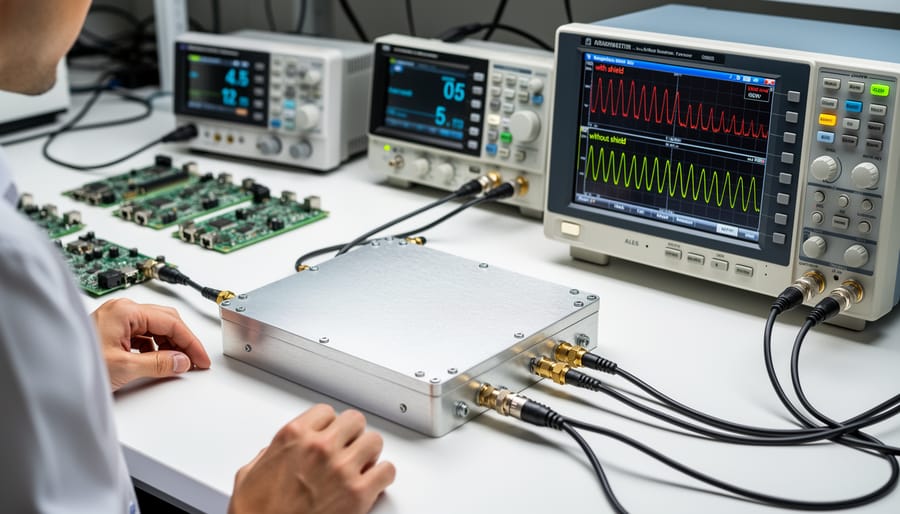
Material Comparison: Which Shielding Solution Works Best?
Performance vs. Cost Analysis
When choosing EMI/RFI shielding for your Raspberry Pi projects, balancing performance with cost is essential. Here’s how common DIY materials stack up:
Copper tape offers excellent shielding effectiveness at 70-90 dB reduction for around $12-20 per 50-foot roll, making it the gold standard for hobbyist applications. Aluminum foil provides surprisingly decent performance at 50-70 dB reduction and costs mere pennies, perfect for quick prototypes or budget-conscious builds. Conductive fabric meshes deliver 40-60 dB reduction at $8-15 per yard, offering flexibility for irregular surfaces.
For comparison, specialized metal enclosures achieve 80-100 dB reduction but cost $25-60 depending on size. Conductive paint provides 30-50 dB reduction at $15-30 per small tin, suitable for custom applications where tape won’t work.
Most Raspberry Pi interference issues require only 40-60 dB reduction, meaning aluminum foil or copper tape handles typical scenarios effectively. Unless you’re building sensitive measurement equipment or working in harsh electromagnetic environments, mid-range solutions offer the best value. Start with affordable options like aluminum foil for testing, then upgrade to copper tape for permanent installations. This approach lets you verify effectiveness before investing in premium materials.
Best Materials for Different Use Cases
For portable projects like Raspberry Pi-based robots or weather stations, conductive fabric tape offers the perfect balance of flexibility and effectiveness. It’s lightweight, easy to cut, and can wrap around irregular shapes without adding bulk. You can shield individual cables or create quick enclosures that won’t interfere with your project’s mobility.
When building permanent installations such as home automation hubs or media centers, copper or aluminum tape provides superior long-term protection. These materials create reliable, continuous shields that won’t degrade over time. For professional-looking results, consider precise aluminum shields machined to fit your specific enclosure dimensions.
High-frequency applications, including SDR projects or RF communication systems, demand specialized materials. Nickel-copper-nickel fabric delivers excellent performance across broad frequency ranges, particularly above 1 GHz. Pair this with conductive gaskets around enclosure seams to prevent signal leakage at critical junction points.
Budget-conscious builders should start with aluminum foil tape, which costs just a few dollars per roll and handles most basic interference issues effectively. While it’s less durable than premium options, it’s perfect for experimenting and learning shielding techniques. For slightly better performance without breaking the bank, EMI copper tape offers improved conductivity at reasonable prices. Remember that proper grounding matters more than expensive materials, so focus on creating continuous connections to your ground plane before upgrading to premium shielding solutions.
Troubleshooting Common Shielding Mistakes
Grounding Issues That Ruin Your Shield
Even the best shielding material fails without proper grounding. Think of grounding as creating a clear path for unwanted electromagnetic energy to safely dissipate. The most common mistake is relying on single-point connections that create high impedance paths. Your Raspberry Pi shield needs multiple low-impedance ground connections, ideally spaced no more than one-tenth of a wavelength apart for the frequencies you’re blocking.
Connection failures often stem from paint, oxidation, or adhesive residues preventing metal-to-metal contact. Before applying copper tape or conductive fabric, clean surfaces with isopropyl alcohol. Use conductive adhesive rather than standard tape backing, and overlap seams by at least half an inch with solder connections for critical applications.
Establishing an effective ground plane starts with connecting your shielding material directly to your Raspberry Pi’s ground pins. For 3D-printed enclosures, integrate copper mesh into the design and create dedicated grounding tabs. Test continuity with a multimeter between different shield sections, aiming for resistance below 2.5 milliohms. Remember, a poorly grounded shield can actually worsen EMI by creating resonant cavities that amplify interference at specific frequencies.
Gaps, Seams, and Ventilation Holes
Even the best shielding material loses effectiveness if your enclosure has gaps or unsealed openings. Think of it like waterproofing—one small hole can compromise everything. For Raspberry Pi projects, ventilation is often necessary to prevent overheating, but each opening creates a potential pathway for electromagnetic interference.
The solution is managing these openings strategically. Conductive gaskets form essential seals where panels meet or removable covers attach. These compressed foam or fabric gaskets with metallic coatings maintain electrical continuity around doors and access panels. For cable entry points, use EMI gaskets specifically designed for wires, creating a tight seal around each cable.
Ventilation presents a unique challenge. Standard holes act like antennas, letting interference escape or enter. Honeycomb vents solve this problem elegantly—their small hexagonal cells allow airflow while blocking electromagnetic waves. The cell size determines which frequencies get blocked; smaller cells provide better high-frequency shielding but may restrict airflow slightly.
For DIY applications, conductive mesh works similarly to honeycomb vents and costs less. Mount it securely behind ventilation openings, ensuring good electrical contact with your main shield. Remember: any opening longer than one-tenth the wavelength of your problem frequency significantly reduces shielding effectiveness.
Effective EMI/RFI shielding shouldn’t be reserved for commercial electronics alone. As you’ve seen throughout this guide, protecting your Raspberry Pi projects from electromagnetic interference is entirely achievable with accessible materials and straightforward techniques. Whether you’re building a sensitive sensor array, designing a robust industrial controller, or simply want your projects to perform reliably in challenging environments, proper shielding makes a tangible difference.
The beauty of modern digital fabrication tools is that they’ve democratized what was once a specialized manufacturing process. With a laser cutter, 3D printer, or even basic hand tools, you can create custom EMI shields tailored to your specific project requirements. Copper tape, conductive fabric, and metal enclosures are all readily available at reasonable prices, making experimentation both practical and affordable.
Don’t let interference issues derail your next build. Start simple by testing copper tape on smaller components, then graduate to more comprehensive shielding solutions as your projects become more complex. Remember that good shielding design combines multiple approaches: proper grounding, strategic material placement, and thoughtful enclosure design all work together.
We’d love to hear about your shielding experiments and solutions. Have you discovered an innovative way to protect your Raspberry Pi from interference? Share your projects, challenges, and successes in the comments below. Your experiences help build a knowledge base that benefits the entire maker community, and you might inspire someone else to tackle their own EMI challenges with confidence.