

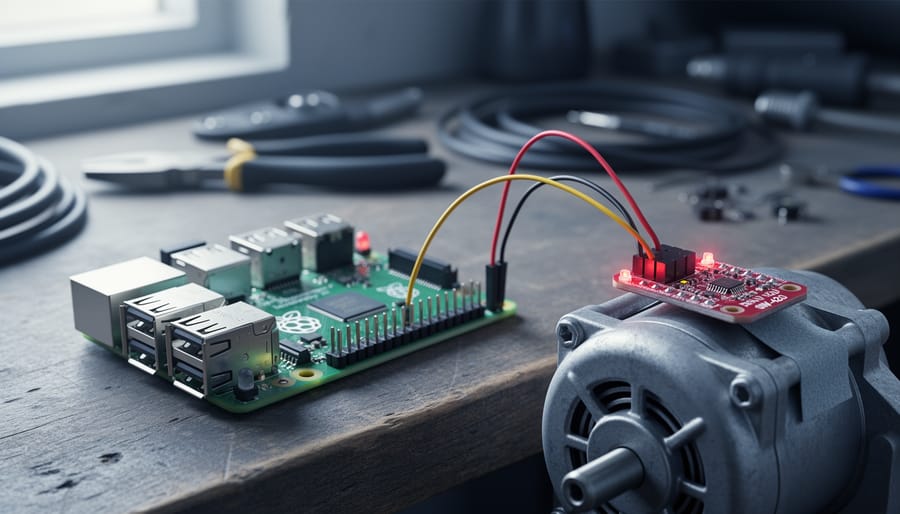
Connect a vibration sensor to your Raspberry Pi’s GPIO pins to detect movement, shock, or mechanical vibrations in real-time. These sensors transform physical vibrations into electrical signals your Pi can read, enabling projects from earthquake monitors to security systems that alert you when someone tampers with your equipment.
Choose between SW-420 modules for simple digital detection or piezoelectric sensors for analog sensitivity measurements. The SW-420 costs under $5 and connects with just three wires—VCC to 3.3V, GND to ground, and DO to any GPIO pin. You’ll receive HIGH or LOW signals depending on whether vibration exceeds your preset threshold, which you adjust using the onboard potentiometer.
Set up your hardware by securing the sensor to your test surface with double-sided tape or mounting screws. Position it perpendicular to the vibration source for maximum sensitivity. Write a basic Python script using the RPi.GPIO library to read the digital output pin, implementing edge detection to trigger actions only when vibrations start or stop rather than continuously polling.
Calibrate sensitivity by rotating the potentiometer clockwise to reduce false triggers from ambient noise or counterclockwise to detect subtle movements. Test with controlled vibrations—tap the mounting surface progressively harder until you find the sweet spot between responsiveness and stability.
Deploy your completed sensor in practical applications like washing machine cycle monitors that send notifications when laundry finishes, intrusion detection systems for safes or doors, or predictive maintenance monitors that identify unusual equipment vibrations before failures occur.
Understanding Vibration Sensors: The Basics
Types of Vibration Sensors Compatible with Raspberry Pi
When choosing a vibration sensor for your Raspberry Pi project, you’ll encounter three main types, each with distinct characteristics that make them suitable for different applications.
Piezoelectric sensors are the simplest and most affordable option. These sensors generate a small electrical charge when subjected to mechanical stress or vibration. They’re incredibly sensitive to impact and sudden movements, making them perfect for knock detection, basic security alarms, or musical instrument triggers. The main advantage is their low cost (often under $2) and straightforward analog output. However, they’re less effective at measuring constant vibrations or determining vibration intensity accurately. You’ll need an analog-to-digital converter like the MCP3008 to interface them with your Raspberry Pi since the Pi lacks built-in analog inputs.
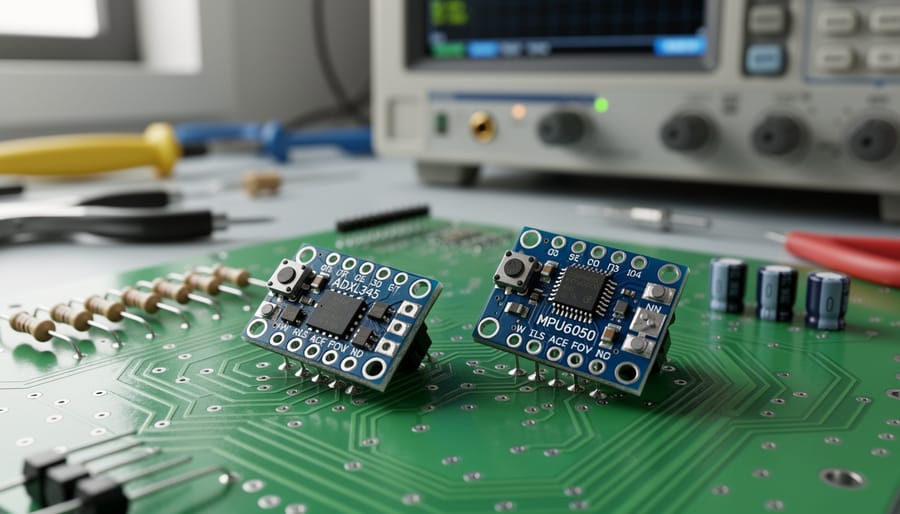
MEMS accelerometers represent a significant step up in capability and precision. Popular modules like the ADXL345 and MPU6050 communicate via I2C or SPI protocols, which the Raspberry Pi natively supports. These sensors measure acceleration across three axes, allowing you to detect not just vibration but also orientation and movement patterns. The ADXL345 offers excellent sensitivity for detecting subtle vibrations and is ideal for earthquake detection systems or machine health monitoring. The MPU6050 combines a 3-axis accelerometer with a gyroscope, making it perfect for robotics and motion tracking projects. While more expensive (typically $5-15), they provide rich data and programmable sensitivity ranges.
Vibration switches (also called shake sensors) are the most basic option. These mechanical switches simply close a circuit when shaken, outputting a digital signal. They’re incredibly easy to use with GPIO pins and require minimal coding knowledge. Perfect for beginner projects like simple alarm systems or interactive toys, they cost less than a dollar but offer no information about vibration intensity or direction.
How Vibration Sensors Communicate with Raspberry Pi
Understanding how vibration sensors talk to your Raspberry Pi is key to successful connecting sensors to Raspberry Pi. Let’s break down the main communication methods you’ll encounter.
Digital GPIO sensors are the simplest option. Basic vibration switches like the SW-420 connect directly to GPIO pins and send HIGH or LOW signals when vibration is detected. Think of them as on/off switches that are incredibly easy for beginners to implement with just a few lines of Python code.
Analog sensors require an analog-to-digital converter (ADC) since Raspberry Pi lacks built-in analog inputs. These sensors provide variable voltage readings that reflect vibration intensity, giving you more nuanced data than simple digital signals.
For advanced piezoelectric and MEMS sensors, you’ll likely use I2C or SPI protocols. I2C uses two wires for communication and is perfect when connecting multiple sensors to one Pi. SPI is faster and uses more wires but offers superior performance for high-frequency vibration monitoring.
Most hobbyist projects start with digital GPIO sensors due to their simplicity, then graduate to I2C-based accelerometers when more detailed vibration analysis is needed.
Choosing the Right Vibration Sensor for Your Project
Budget-Friendly Options: SW-420 and Simple Vibration Switches
If you’re just starting with vibration sensing on Raspberry Pi, the SW-420 and similar simple vibration switches are perfect entry points. These budget-friendly sensors typically cost between $2-5, making them incredibly accessible for beginners and classroom environments.
These digital sensors work on a straightforward principle: they output a simple HIGH or LOW signal when vibration exceeds a preset threshold. Inside, a spring-based mechanism detects movement and closes an electrical contact. Most models include an onboard potentiometer for sensitivity adjustment, letting you fine-tune detection levels for different applications.
The main limitation is their binary nature. Unlike analog sensors, they can’t measure vibration intensity or frequency, only whether vibration is present or absent. This makes them unsuitable for projects requiring detailed vibration analysis or precise measurements.
However, they excel in simple detection scenarios. Popular beginner projects include door knock detectors, basic security alarms, earthquake alert systems, and interactive art installations. Their straightforward two-wire connection (power and signal) means minimal wiring complexity, perfect for learning GPIO basics.
For educational settings and simple monitoring tasks, these sensors offer unbeatable value. They’re robust, require no calibration beyond sensitivity adjustment, and provide instant gratification for newcomers exploring physical computing with Raspberry Pi.
Professional-Grade: ADXL345 and MPU6050 Accelerometers
When you need precision vibration measurement for robotics, drone stabilization, or industrial monitoring, the ADXL345 and MPU6050 deliver professional-grade performance at hobbyist prices. These 3-axis accelerometers capture vibration data across X, Y, and Z axes simultaneously, providing a complete picture of motion in three-dimensional space.
The ADXL345 stands out with its impressive 13-bit resolution and measurement range up to ±16g, making it ideal for detecting subtle vibrations in mechanical systems. It communicates via I2C or SPI protocols and can sample data at rates up to 3200Hz, perfect for analyzing high-frequency vibrations in motors or machinery.
The MPU6050 combines a 3-axis accelerometer with a 3-axis gyroscope, offering enhanced motion tracking capabilities. This dual functionality makes it particularly valuable for projects requiring both vibration sensing and orientation tracking, like self-balancing robots or gesture-controlled devices.
Both sensors output digital data directly to your Raspberry Pi, eliminating the need for analog-to-digital conversion and providing cleaner, more accurate readings. They typically cost between $8-15, representing excellent value when your project demands precise measurements, data logging capabilities, or real-time vibration analysis. For beginners mastering basic vibration detection, these might be overkill, but they’re worthwhile investments for intermediate projects requiring detailed motion analytics.
Key Specifications to Consider
When shopping for a vibration sensor for your Raspberry Pi project, understanding a few key specifications will help you make the right choice without getting overwhelmed by technical jargon.
Sensitivity determines how well your sensor detects vibrations. Think of it like a microphone’s volume setting – higher sensitivity picks up even gentle vibrations, while lower sensitivity only responds to stronger movements. For projects like earthquake detectors or security alarms, you’ll want higher sensitivity. Packaging monitoring might need lower sensitivity to avoid false triggers.
Frequency range tells you which vibration speeds the sensor can detect, measured in Hertz (Hz). Most hobbyist projects work well with sensors covering 10-1000 Hz, which captures everything from slow mechanical movements to rapid vibrations.
Voltage requirements matter because Raspberry Pi outputs 3.3V or 5V through its GPIO pins. Always verify your sensor matches these voltages to avoid damaging your Pi or getting unreliable readings. Some sensors need additional power supplies for industrial applications.
Interface compatibility is crucial for easy setup. Digital sensors with simple HIGH/LOW outputs are beginner-friendly and connect directly to GPIO pins. Analog sensors provide more detailed data but require an ADC (Analog-to-Digital Converter) chip since Raspberry Pi lacks built-in analog inputs. I2C and SPI interfaces offer advanced features and work great once you’re comfortable with basic connections.
Hardware Setup: Connecting Your Vibration Sensor
What You’ll Need
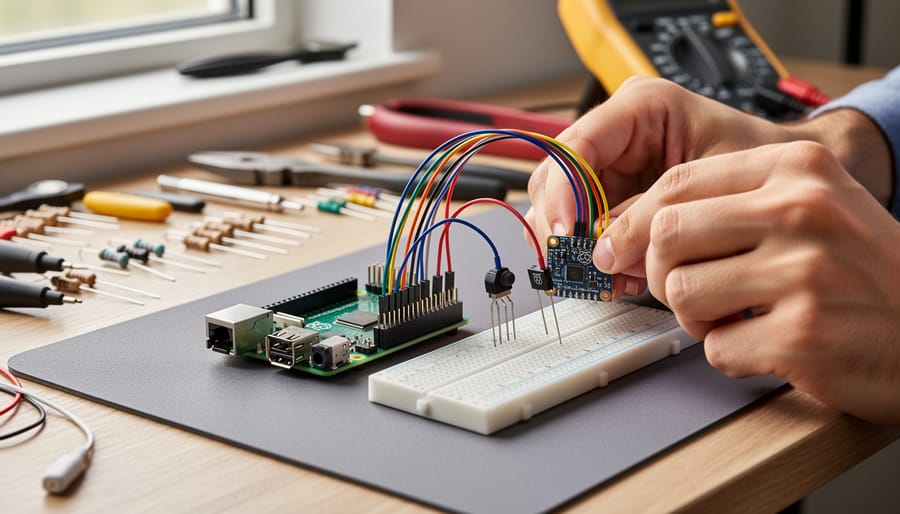
Before diving into your vibration sensor project, gather these essential components. You’ll need a Raspberry Pi (Model 3B+ or 4 recommended for better processing power), though the Zero W works for simpler applications. Pick up a vibration sensor module like the SW-420 or 801S, which are beginner-friendly and inexpensive. A solderless breadboard makes prototyping easier, along with female-to-female jumper wires for clean connections. If you’re new to working with sensors, check out our guide on sensor integration basics to get comfortable with the fundamentals. For power supply considerations, use an official 5V adapter rated at least 2.5A for Pi 3 or 3A for Pi 4. Optional but helpful items include resistors for voltage protection and an LED for visual feedback during testing.
Wiring a Simple Digital Vibration Sensor (SW-420)
The SW-420 is an excellent starter vibration sensor for Raspberry Pi projects thanks to its straightforward digital output and beginner-friendly design. This sensor features three pins: VCC (power), GND (ground), and DO (digital output), making the wiring process remarkably simple.
Start by connecting the VCC pin to a 3.3V pin on your Raspberry Pi. While the SW-420 can handle 5V, using 3.3V ensures safer operation with the Pi’s GPIO pins, which are not 5V tolerant. Next, connect the GND pin to any available ground pin on your Raspberry Pi. Finally, wire the DO (digital output) pin to any available GPIO pin, such as GPIO 17 (physical pin 11).
The SW-420 outputs a HIGH signal when no vibration is detected and switches to LOW when vibration exceeds the threshold set by the onboard potentiometer. This potentiometer is your friend for fine-tuning sensitivity. Turn it clockwise to decrease sensitivity (detecting only stronger vibrations) or counterclockwise to increase it.
Common pitfalls to avoid include accidentally connecting VCC to a 5V pin and then feeding that voltage back into GPIO pins, which can damage your Raspberry Pi. Also, ensure solid connections, as loose wiring can cause false triggers. The sensor’s LED indicator is helpful for testing, it illuminates when vibration is detected, allowing you to verify functionality before diving into code. Always double-check your pin connections against your specific Raspberry Pi model’s pinout diagram, as physical pin positions vary between versions.
Connecting an I2C Accelerometer (ADXL345/MPU6050)
I2C accelerometers like the ADXL345 and MPU6050 are excellent choices for detecting vibrations with your Raspberry Pi. These sensors communicate through the I2C protocol, making them easy to connect with just four wires.
Start by gathering your materials: an ADXL345 or MPU6050 breakout board, female-to-female jumper wires, and your Raspberry Pi. Power off your Pi before making any connections to prevent damage.
Connect the sensor to your Raspberry Pi’s GPIO pins following this wiring scheme: VCC to 3.3V (Pin 1), GND to Ground (Pin 6), SDA to GPIO 2 (Pin 3), and SCL to GPIO 3 (Pin 5). The SDA and SCL pins handle data transmission between the sensor and Pi. Double-check your connections, as incorrect wiring can damage components.
Once wired, power on your Raspberry Pi and enable I2C communication. Open a terminal and type “sudo raspi-config”, navigate to Interface Options, select I2C, and choose Yes to enable it. Reboot your Pi to apply the changes.
After rebooting, verify your sensor connection by installing the I2C tools. Run “sudo apt-get install i2c-tools” in the terminal. Then execute “sudo i2cdetect -y 1” to scan for connected I2C devices. You should see a hexadecimal address appear in the grid, typically 0x53 for ADXL345 or 0x68 for MPU6050. If the address appears, congratulations! Your accelerometer is successfully connected and ready for programming.
Software Configuration and Data Collection
Setting Up Your Raspberry Pi Environment
Before diving into your vibration sensor project, you’ll need to prepare your Raspberry Pi with the right software tools. Start by updating your system packages to ensure everything runs smoothly. Open a terminal and run:
sudo apt-get update && sudo apt-get upgrade
This process might take a few minutes, but it’s essential for system stability.
Next, install Python 3 if it’s not already present (most recent Raspberry Pi OS versions include it). You’ll need pip, Python’s package manager, to install the necessary libraries:
sudo apt-get install python3-pip
Now for the fun part—installing the libraries that will help you communicate with your vibration sensor. The RPi.GPIO library is your go-to for controlling GPIO pins:
sudo pip3 install RPi.GPIO
If you’re working with I2C-based sensors, install smbus2:
sudo pip3 install smbus2
For sensors that use Adafruit’s ecosystem, grab their CircuitPython libraries:
sudo pip3 install adafruit-circuitpython-lis3dh adafruit-circuitpython-mpu6050
Don’t forget to enable I2C or SPI interfaces through raspi-config if your sensor requires them. Navigate to Interfacing Options and enable the appropriate protocol. Reboot your Pi, and you’re ready to start building!
Reading Data from Digital Vibration Sensors
Now let’s dive into the practical part: reading vibration data from your SW-420 sensor! The good news is that this sensor works as a simple digital input, making it perfect for beginners.
Here’s a complete Python script to get you started:
“`python
import RPi.GPIO as GPIO
import time
from datetime import datetime
# Set up GPIO mode
GPIO.setmode(GPIO.BCM)
# Define the GPIO pin connected to sensor’s DO pin
SENSOR_PIN = 17
# Configure the pin as input with pull-down resistor
GPIO.setup(SENSOR_PIN, GPIO.IN, pull_up_down=GPIO.PUD_DOWN)
# Open a log file to record vibration events
log_file = open(“vibration_log.txt”, “a”)
print(“Vibration sensor monitoring started. Press Ctrl+C to exit.”)
try:
while True:
# Read the sensor state
sensor_state = GPIO.input(SENSOR_PIN)
if sensor_state == GPIO.HIGH:
# Vibration detected
timestamp = datetime.now().strftime(“%Y-%m-%d %H:%M:%S”)
message = f”Vibration detected at {timestamp}”
print(message)
log_file.write(message + “\n”)
log_file.flush()
time.sleep(0.5) # Debounce delay
time.sleep(0.1) # Small delay to reduce CPU usage
except KeyboardInterrupt:
print(“\nMonitoring stopped by user”)
finally:
log_file.close()
GPIO.cleanup()
“`
Let’s break down what’s happening here. We start by importing necessary libraries and setting GPIO mode to BCM numbering. The sensor pin is configured as an input with a pull-down resistor to ensure clean readings. Inside the main loop, we continuously check the sensor state. When vibration occurs, the sensor outputs HIGH, triggering our logging function that records both the console output and writes timestamps to a file. The 0.5-second delay prevents multiple triggers from a single vibration event, while the 0.1-second sleep reduces processor load. Finally, the cleanup section ensures proper shutdown and releases GPIO resources safely.
Working with I2C Accelerometer Data
Reading data from an I2C accelerometer like the ADXL345 or MPU-6050 requires establishing communication through Python’s SMBus library. Let’s walk through how to capture and interpret vibration data effectively.
First, install the necessary library with `sudo apt-get install python3-smbus`. For the ADXL345, you’ll need to initialize the sensor by writing to its power control register. Here’s a basic example:
“`python
import smbus
import time
bus = smbus.SMBus(1)
address = 0x53 # ADXL345 default address
# Wake up the sensor
bus.write_byte_data(address, 0x2D, 0x08)
while True:
# Read 6 bytes starting from register 0x32
data = bus.read_i2c_block_data(address, 0x32, 6)
# Convert to 10-bit values
x = ((data[1] << 8) | data[0])
y = ((data[3] << 8) | data[2])
z = ((data[5] << 8) | data[4])
# Handle negative values
if x > 32767: x -= 65536
if y > 32767: y -= 65536
if z > 32767: z -= 65536
# Convert to g-force (default sensitivity 4mg/LSB)
x_g = x * 0.004
y_g = y * 0.004
z_g = z * 0.004
print(f”X: {x_g:.2f}g Y: {y_g:.2f}g Z: {z_g:.2f}g”)
time.sleep(0.1)
“`
This code continuously reads accelerometer values and converts raw data into g-force measurements. The conversion factor depends on your sensor’s sensitivity settings—consult your datasheet for precise values. For vibration detection, monitor sudden changes in these values or calculate the magnitude using the formula: `sqrt(x² + y² + z²)`.
Data Handling and Processing Techniques
Local Data Storage Options
Once you’ve captured vibration data from your sensor, you’ll need a reliable way to store it locally. Let’s explore three popular options that work great with Raspberry Pi projects.
CSV files offer the simplest approach for beginners. They’re human-readable and work seamlessly with spreadsheet software. Here’s a quick example:
“`python
import csv
from datetime import datetime
with open(‘vibration_data.csv’, ‘a’, newline=”) as file:
writer = csv.writer(file)
writer.writerow([datetime.now(), vibration_value, threshold_status])
“`
For more structured data management, SQLite databases provide powerful querying capabilities without requiring a separate server. This method shines when you need to analyze historical patterns:
“`python
import sqlite3
conn = sqlite3.connect(‘sensor_data.db’)
cursor = conn.cursor()
cursor.execute(”’CREATE TABLE IF NOT EXISTS readings
(timestamp TEXT, value REAL, status TEXT)”’)
cursor.execute(“INSERT INTO readings VALUES (?, ?, ?)”,
(datetime.now(), vibration_value, status))
conn.commit()
“`
JSON files strike a balance between simplicity and flexibility, making them ideal for nested data structures:
“`python
import json
data = {‘timestamp’: str(datetime.now()),
‘reading’: vibration_value,
‘metadata’: {‘sensor_id’: 1, ‘location’: ‘motor’}}
with open(‘data.json’, ‘a’) as file:
json.dump(data, file)
file.write(‘\n’)
“`
Choose CSV for basic logging, SQLite for complex queries, and JSON when working with APIs or web dashboards.
Real-Time Data Visualization
Visualizing vibration data in real-time helps you understand patterns and detect anomalies as they happen. Python’s matplotlib library makes it straightforward to create dynamic graphs that update with incoming sensor readings.
Here’s a simple example that creates a live updating plot of vibration data:
“`python
import matplotlib.pyplot as plt
import matplotlib.animation as animation
from collections import deque
import random # Replace with actual sensor reading
fig, ax = plt.subplots()
max_points = 100
data_queue = deque(maxlen=max_points)
def animate(frame):
# Replace with actual sensor.read() call
vibration_value = random.uniform(0, 10)
data_queue.append(vibration_value)
ax.clear()
ax.plot(data_queue)
ax.set_ylim(0, 10)
ax.set_xlabel(‘Time’)
ax.set_ylabel(‘Vibration Intensity’)
ax.set_title(‘Real-Time Vibration Monitoring’)
ani = animation.FuncAnimation(fig, animate, interval=100)
plt.show()
“`
This code creates a scrolling graph that displays the last 100 readings. The deque data structure efficiently manages your data buffer, automatically removing old values as new ones arrive. You can adjust the interval parameter to control update speed—lower values mean faster updates but higher CPU usage. For more polished dashboards, consider exploring libraries like Plotly Dash for web-based interfaces.
Cloud Integration and Remote Monitoring
Once you’ve got your vibration sensor collecting data locally, the next step is sending it to the cloud for remote monitoring and long-term analysis. Cloud platforms make it easy to track vibrations from anywhere and store historical data without filling up your Raspberry Pi’s SD card.
ThingSpeak is an excellent starting point for beginners. It’s free, requires minimal setup, and lets you visualize sensor data in real-time charts. Simply send your vibration readings via HTTP requests using Python’s requests library, and you can monitor your project from any web browser or mobile device.
For more robust applications, AWS IoT Core offers enterprise-grade features like device authentication, message routing, and integration with other Amazon services. While it has a steeper learning curve, AWS provides powerful analytics tools and can handle millions of data points.
Google Sheets presents another user-friendly option through the Google Sheets API. This approach is perfect for educators and hobbyists who want to analyze data using familiar spreadsheet tools. You can write simple Python scripts that append vibration readings directly to a spreadsheet, making data sharing and collaboration straightforward.
Each platform has its strengths, so choose based on your project needs, technical comfort level, and whether you need advanced features like machine learning integration or simple data logging.
Practical Project Ideas and Applications
DIY Security and Knock Detection System
Building a knock detection system is an excellent beginner-friendly project that demonstrates the practical security applications of vibration sensors. Connect an SW-420 or similar vibration sensor to your Raspberry Pi’s GPIO pins, then write a simple Python script that monitors the sensor’s digital output. When the sensor detects vibrations from a door knock or forced entry attempt, your code can trigger immediate actions like sending email alerts, activating a camera, or logging events with timestamps. For enhanced reliability, implement debouncing in your code to filter out false triggers from ambient vibrations. You can customize sensitivity by adjusting the sensor’s onboard potentiometer to distinguish between gentle knocks and forceful impacts. This project serves as a foundation for more sophisticated security system implementations, teaching essential concepts like GPIO programming, event handling, and real-time monitoring while creating something genuinely useful for protecting your home or workshop.
Washing Machine/Appliance Monitor
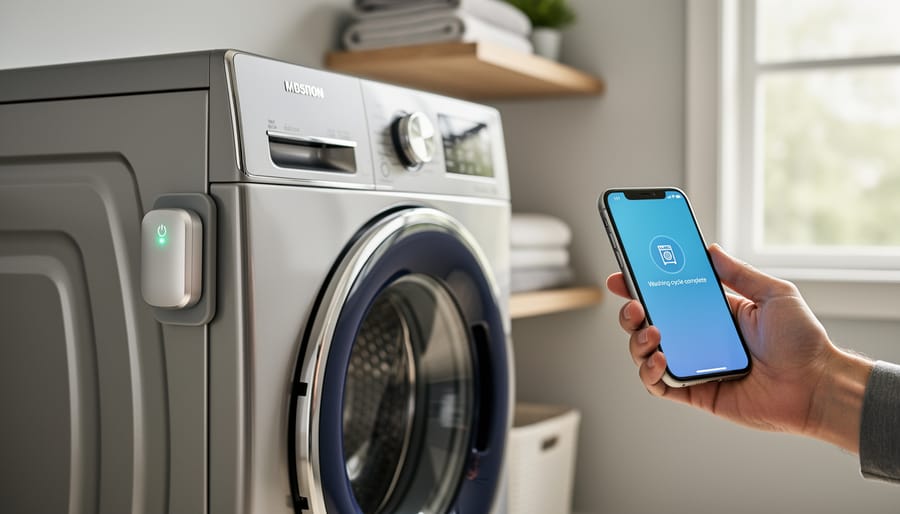
Never miss another laundry cycle again! By attaching a vibration sensor to your washing machine or dryer, you can create a smart appliance monitor that sends notifications when the cycle completes. The sensor detects the distinct vibration patterns during operation and recognizes when the appliance stops moving. Using Python on your Raspberry Pi, you can set up automated alerts through email, SMS, or push notifications to your smartphone. This project works by establishing a baseline vibration threshold during normal operation, then triggering an event when vibrations drop below that level for a sustained period. You can mount the sensor using adhesive or a magnetic base, depending on your appliance surface. The same concept extends to dishwashers, HVAC systems, or any equipment where monitoring operational status saves time and energy. This practical smart home addition typically requires minimal coding and can be completed in an afternoon.
Basic Predictive Maintenance Monitor
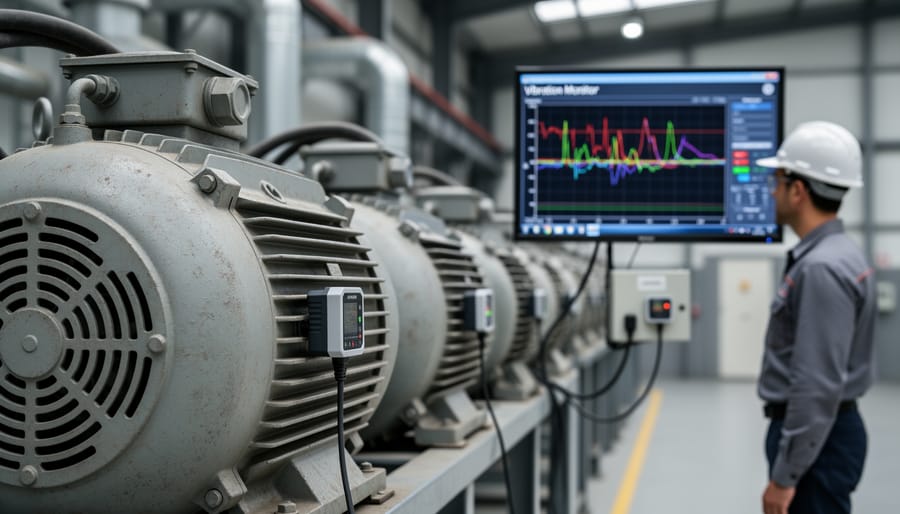
Vibration sensors paired with Raspberry Pi create powerful predictive maintenance systems for motors, pumps, and machinery. By continuously monitoring vibration patterns, you can detect early warning signs like bearing wear, misalignment, or imbalance before catastrophic failure occurs.
Start by mounting an MPU-6050 or ADXL345 accelerometer directly to your machine’s housing. Position it near bearings or rotating components where vibrations are most pronounced. Your Python script should log baseline vibration data during normal operation, establishing what “healthy” looks like for your specific equipment.
Set threshold alerts that trigger when vibration amplitude exceeds normal ranges or when frequency patterns shift unexpectedly. For example, increasing high-frequency vibrations often indicate bearing problems, while low-frequency changes suggest alignment issues.
This approach works brilliantly in home workshops for monitoring 3D printers, lathes, or HVAC systems. Industrial makers have successfully implemented similar setups to reduce downtime and extend equipment lifespan. The beauty lies in its simplicity—you’re transforming a basic sensor and affordable single-board computer into a maintenance assistant that works 24/7, potentially saving hundreds in repair costs.
Earthquake or Seismic Activity Detector
Build an earthquake or seismic activity detector as an educational project that demonstrates real-world monitoring applications. Connect a sensitive vibration sensor like the SW-420 or piezoelectric sensor to your Raspberry Pi and configure it to detect ground movements. Set up a Python script that continuously monitors vibration levels and logs data with timestamps to a CSV file for later analysis. Implement threshold-based alerts that trigger when vibrations exceed normal levels, sending notifications through email or displaying warnings on an LCD screen. This project teaches valuable concepts about sensor calibration, data persistence, and event-driven programming. You can enhance it by adding a web dashboard to visualize seismic activity patterns over time or compare readings from multiple sensors placed in different locations. While this won’t replace professional seismographs, it provides hands-on learning about how detection systems work and creates a functional early warning system for your area.
Troubleshooting Common Issues
Sensor Not Responding or No Data
When your vibration sensor isn’t responding, don’t panic! Start by checking your physical connections. Loose jumper wires are the most common culprit, so gently tug each wire to ensure it’s firmly seated in both the sensor and GPIO pins. Double-check that you’ve connected VCC to 3.3V (not 5V for most sensors), GND to ground, and your data pin to the correct GPIO number specified in your code.
Power supply issues can also cause problems. If you’re running multiple sensors or peripherals, your Raspberry Pi might not provide enough current. Try using a powered USB hub or a dedicated power supply rated at least 2.5A for Pi 3 models and 3A for Pi 4.
For I2C-based sensors, address conflicts can prevent communication. Run the command “i2cdetect -y 1” in your terminal to scan for connected devices and verify your sensor appears at the expected address. If nothing shows up, ensure I2C is enabled in raspi-config under Interface Options.
Finally, check GPIO permissions. Your Python script needs proper access rights, which you can grant by running your code with sudo or adding your user to the gpio group using “sudo usermod -a -G gpio username”. Restart your Pi after making permission changes for them to take effect.
False Positives and Sensitivity Adjustment
False positives can frustrate your vibration sensor projects, but proper calibration makes all the difference. Start by testing your sensor in its actual operating environment to establish baseline readings. Physical vibrations from nearby equipment, temperature changes, or electrical noise can trigger unwanted detections.
Software debouncing is your first line of defense against false triggers. Implement a simple time-based debounce by requiring the sensor to remain in the triggered state for a specific duration, typically 50-200 milliseconds, before registering an event. In Python, use time.sleep() or track timestamps between readings to filter out momentary spikes.
Adjusting threshold values requires experimentation. Begin with conservative thresholds that ignore minor vibrations, then gradually increase sensitivity while monitoring results. For analog sensors, you might set a voltage threshold that distinguishes between ambient noise and genuine events. Digital sensors often have built-in potentiometers for physical threshold adjustment.
Consider implementing a rolling average of sensor readings to smooth out data fluctuations. Calculate the mean of the last 5-10 readings and compare new values against this average rather than absolute thresholds. This technique significantly reduces false positives while maintaining detection reliability.
Document your calibration values for different scenarios, as optimal settings may vary based on mounting location, surface material, and expected vibration intensity.
You’ve now explored everything from sensor selection and hardware connections to coding and practical applications for vibration sensors with Raspberry Pi. Whether you’re interested in building a security system, monitoring industrial equipment, or detecting seismic activity, you have the foundational knowledge to get started. The beauty of these projects is their scalability—you can begin with a simple alert system and gradually expand into more sophisticated implementations.
Don’t hesitate to experiment with your first project. Start small, perhaps with a basic knock detector or simple alarm system, and build your confidence from there. As you become more comfortable, consider exploring advanced implementations like machine learning pattern recognition, which can help your system distinguish between different vibration patterns and reduce false alarms. You could train models to recognize specific signatures like footsteps versus vehicle movements or normal machinery operation versus concerning anomalies.
The vibration sensor community is active and helpful, so share your projects and learn from others. Remember, every expert started as a beginner. Your journey into vibration sensing opens doors to countless possibilities in automation, safety, and monitoring applications.