

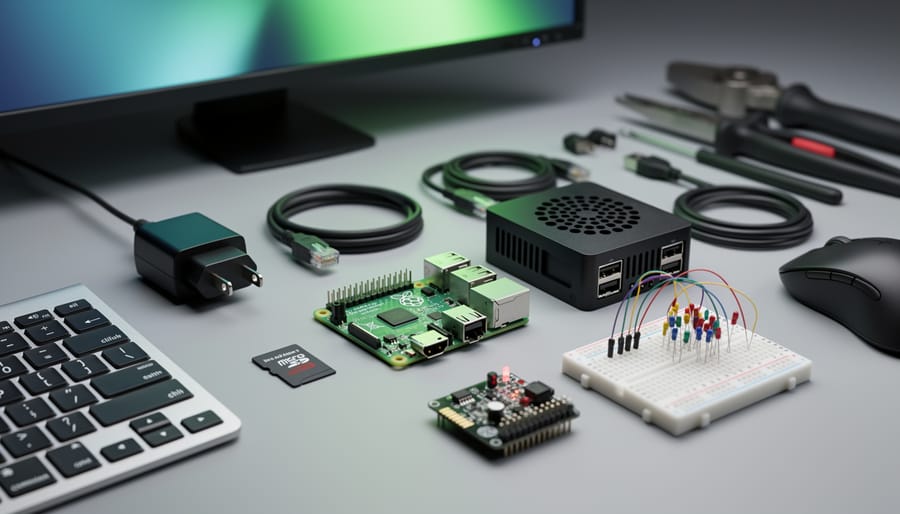
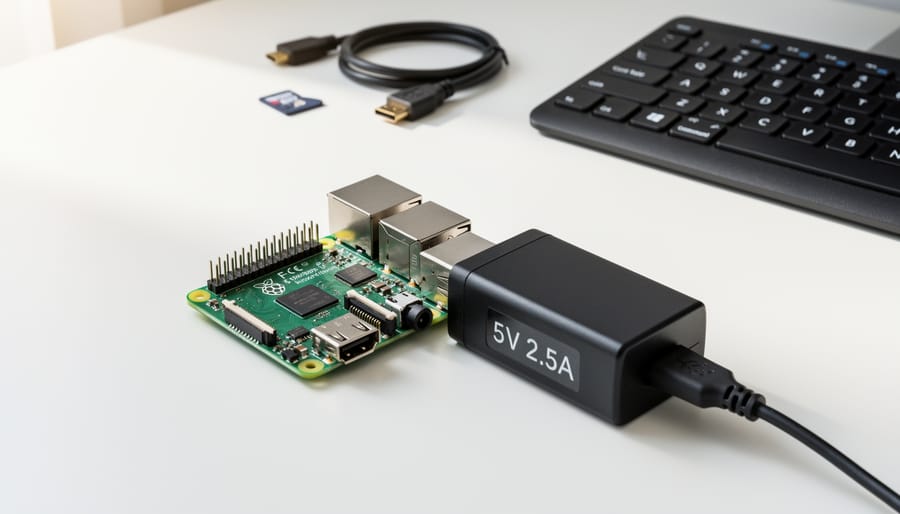
Start by securing a quality power supply rated at 5V/2.5A minimum—the official Raspberry Pi adapter prevents the undervoltage issues that plague cheaper alternatives and cause frustrating random crashes. Pair this with a microSD card of at least 32GB from reputable brands like SanDisk or Samsung, ensuring Class 10 or UHS-I speed ratings for smooth operating system performance. Invest in a protective case with adequate ventilation or built-in heat sinks, since the Pi 3 Model B runs warmer during intensive tasks like video playback or extended computation.
Beyond these fundamental requirements, your project needs will determine which essential peripherals deserve your budget. A dedicated HDMI cable, USB keyboard, and mouse transform your Pi into a functional desktop computer for programming and web browsing. For headless server projects, a reliable Ethernet cable or compatible WiFi dongle ensures stable network connectivity. Consider adding a GPIO expansion board or breadboard kit if you’re diving into electronics projects, along with jumper wires and basic sensors to unlock the Pi’s physical computing potential.
The accessory ecosystem can feel overwhelming for newcomers, but focusing on immediate project requirements prevents unnecessary spending. This guide breaks down each accessory category by use case, helping you distinguish between must-have components and nice-to-have upgrades. Whether you’re building a retro gaming console, home automation hub, or learning platform, the right accessories transform your Raspberry Pi 3 Model B from a bare circuit board into a capable, project-ready system.
Power Supply: The Foundation of Stability
Your Raspberry Pi 3 Model B is only as reliable as the power supply feeding it. Unlike computers with internal power management systems, the Pi 3 depends entirely on receiving a consistent 5V at 2.5A through its micro USB port. Skimp on this component, and you’ll encounter frustrating issues that can derail even the simplest projects.
The official Raspberry Pi power supply remains the gold standard for good reason. It delivers stable, regulated power and has been thoroughly tested to prevent voltage drops that plague cheaper alternatives. If you’re planning processor-intensive tasks or connecting multiple USB peripherals, this consistent power delivery becomes even more critical.
Underpowering your Pi 3 triggers a cascade of problems. The most obvious warning sign is the rainbow square icon appearing in the top-right corner of your screen, indicating voltage drops below acceptable levels. You might also experience random reboots, USB devices disconnecting unexpectedly, SD card corruption, or sluggish performance that makes your Pi feel frustratingly unresponsive. These aren’t just annoyances; insufficient power can actually damage your board over time or corrupt your projects.
When selecting third-party options, look for power supplies explicitly rated for 5V 2.5A output with proper voltage regulation. Avoid repurposing old phone chargers, as most only deliver 1A or 2A, which falls short of the Pi 3’s requirements. Check for positive reviews specifically mentioning Raspberry Pi compatibility, and ensure the supply includes adequate cable gauge to minimize voltage loss during transmission.
For those considering future upgrades, the Raspberry Pi 4 Model B requires USB-C power delivery at 5V 3A, so your current power supply won’t transfer to newer models. However, investing in quality power now establishes good habits and protects your current investment. Remember, a few extra dollars spent on reliable power saves countless hours troubleshooting mysterious issues later.
Protective Cases That Actually Work
Basic Enclosures for General Use
When you first unbox your Raspberry Pi 3 Model B, you’ll quickly realize it needs protection from dust, accidental bumps, and static electricity. Basic enclosures offer an affordable and practical solution without compromising functionality.
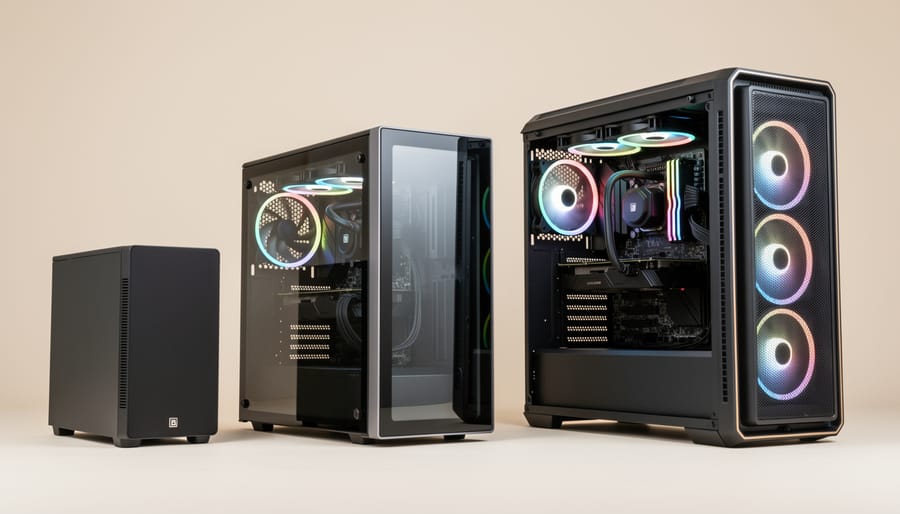
Standard plastic cases are the most budget-friendly option, typically ranging from $5 to $10. These snap-together designs usually come in two or three pieces and provide adequate protection for everyday projects. Most feature cutouts for all essential ports, including HDMI, USB, and Ethernet connections, ensuring easy access without removing the case.
Acrylic cases offer a more premium feel at slightly higher prices, usually between $8 and $15. The transparent design allows you to showcase your Pi while monitoring LED indicators and enjoying better visibility of internal components. Many tech enthusiasts appreciate this aesthetic, especially when displaying projects at maker fairs or educational demonstrations.
Both plastic and acrylic cases typically provide GPIO pin accessibility through either an open top design or a removable lid. This feature is essential for breadboard connections and HAT installations, making these enclosures suitable for most beginner to intermediate projects. Look for cases with proper ventilation slots or fan mounting options to prevent overheating during intensive tasks. These basic enclosures strike the perfect balance between protection and accessibility for general-purpose Pi usage.
Cases with Active Cooling
When you’re planning processor-intensive tasks like video streaming, gaming emulators, or continuous data processing, active cooling becomes essential for your Raspberry Pi 3 Model B. While the Pi 3 is designed to throttle performance when temperatures exceed 80°C, this can frustrate users running demanding applications.
Fan-equipped cases offer the most effective cooling solution. These typically combine a protective enclosure with a small 5V fan that connects directly to the GPIO pins. Popular options include cases with dual-fan configurations and adjustable fan speeds, though many beginners opt for simple always-on fans for reliability.
Heat sink integration works alongside fans to maximize cooling efficiency. Most active cooling cases come with aluminum or copper heat sinks that attach to the processor, RAM, and USB controller chips using thermal adhesive. The fan then disperses the heat these sinks absorb, creating a comprehensive cooling system.
You’ll know you need active cooling if your Pi frequently displays the temperature warning icon (a colorful thermometer) during use, or if you’re running projects like RetroPie gaming, media servers, or machine learning applications. Even 24/7 home automation setups benefit from active cooling to ensure longevity and consistent performance. Budget-friendly fan cases start around ten dollars, making them an accessible upgrade for serious projects.
Specialty Cases for Specific Projects
Your Raspberry Pi 3 Model B can tackle unique challenges with specialized cases designed for specific applications. If you’re building interactive displays or control panels, touchscreen-compatible cases feature cutouts and mounting options for the official 7-inch touchscreen, keeping everything in a compact, portable package. These work wonderfully for home automation interfaces or portable gaming consoles.
For media enthusiasts transforming their Pi into a home theater PC, dedicated media center cases offer VESA mounting brackets, improved ventilation for extended playback sessions, and aesthetic designs that blend with entertainment centers. Many include built-in IR receiver cutouts for remote control functionality.
Planning outdoor monitoring stations or industrial automation projects? Ruggedized cases provide weatherproof protection with IP65 or IP67 ratings, DIN rail mounting options, and temperature-resistant materials. These heavy-duty enclosures safeguard your Pi from dust, moisture, and physical impacts while maintaining access to GPIO pins and ports.
When selecting specialty cases, verify compatibility with your other accessories like cooling solutions and HATs. While these cases cost more than standard options, they’re essential investments when your project demands specific environmental protection or mounting requirements.
Storage Solutions Beyond the MicroSD Card
Choosing the Right MicroSD Card
Your microSD card serves as your Pi 3 Model B’s hard drive, so choosing wisely matters for both performance and reliability. Let’s break down what you need to know.
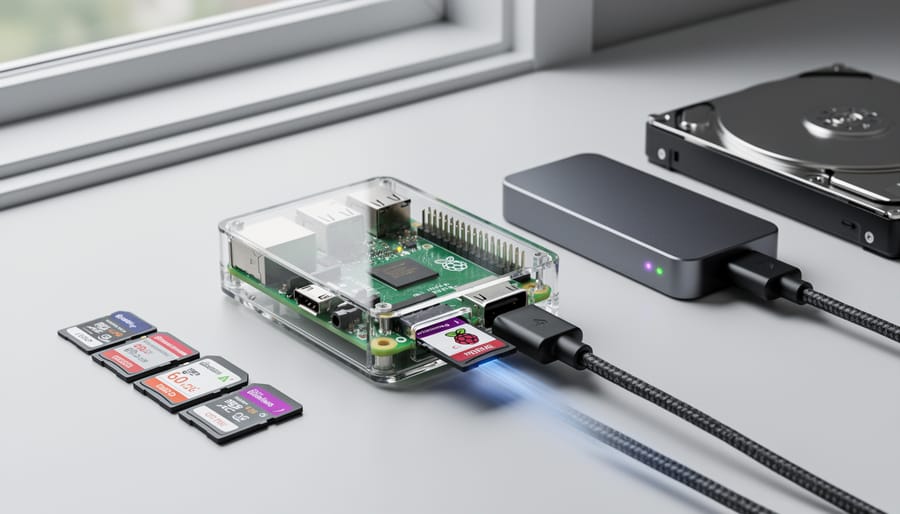
For speed classes, look for cards labeled Class 10, U1, or higher. These ensure your Pi boots quickly and runs smoothly. Even better, choose cards rated A1 or A2, which handle the random read/write operations that operating systems love. The difference between a budget card and a quality one becomes obvious when launching applications or updating software.
Capacity-wise, 16GB is the absolute minimum for most projects, but 32GB hits the sweet spot for Pi 3 Model B users. This gives you room for the operating system, several projects, and plenty of data without breaking the bank. Power users running media centers or storing lots of files might want 64GB or 128GB cards instead.
Reliability separates frustration from fun. Stick with reputable brands like SanDisk, Samsung, or Kingston rather than unknown manufacturers offering suspiciously cheap prices. Counterfeit cards flood the market and often fail at the worst moments, potentially corrupting your entire project.
One practical tip: buy from trusted retailers with good return policies. If your card arrives and seems slower than advertised, test it with benchmarking tools before committing to a major project.
External Storage Expansion
The Raspberry Pi 3 Model B’s microSD card provides basic storage, but external storage options can significantly boost your project’s capabilities. Let’s explore how USB drives and external storage devices can enhance your Pi experience.
USB flash drives offer the simplest expansion solution. They’re perfect for backing up project files, transferring data between devices, or running lightweight applications. Look for USB 2.0 or 3.0 drives with at least 32GB capacity, though USB 3.0 drives will run at USB 2.0 speeds on the Pi 3 Model B.
External hard drives provide substantial storage for media centers, file servers, or data-intensive projects. A powered external HDD (1TB or larger) works reliably with the Pi, especially when connected through a powered USB hub to avoid power draw issues. This setup is ideal for Plex servers or network-attached storage projects.
Solid-state drives deliver the best performance upgrade. An external SSD connected via USB offers faster read/write speeds compared to microSD cards, improving boot times and overall system responsiveness. You can even configure your Pi to boot directly from an SSD, though this requires some technical setup.
When choosing external storage, consider your project’s power requirements. Self-powered drives or those connected through powered hubs prevent stability issues caused by insufficient power from the Pi’s USB ports.
Display Options for Every Budget and Purpose
Choosing the right display for your Raspberry Pi 3 Model B depends on your project needs and budget. Let’s explore the options that work best for different scenarios.
The official Raspberry Pi 7-inch touchscreen remains a popular choice for good reason. It connects directly to the DSI port, leaving your HDMI port free for dual-display setups. This 800×480 capacitive touchscreen draws power through the GPIO pins and provides an integrated solution perfect for tabletop projects, custom control panels, or educational demonstrations. While it sits at the higher end of the price spectrum, typically around $60-80, the plug-and-play compatibility and quality construction justify the investment for serious projects.
For those on a tighter budget, standard HDMI monitors offer excellent value. Any HDMI-compatible display will work with your Pi 3 Model B, from old computer monitors to modern TVs. This flexibility means you can repurpose existing equipment or find affordable options at thrift stores. Just remember that you’ll need an HDMI cable, and some older monitors might require an HDMI-to-DVI adapter.
Small LCD displays provide another versatile option, particularly for portable or embedded projects. These compact screens, ranging from 3.5 to 5 inches, connect through either GPIO pins or HDMI. GPIO-connected displays are incredibly affordable, often under $20, though they require some configuration and consume GPIO pins you might need for other components. HDMI versions cost slightly more but remain more straightforward to set up.
For headless projects where you’ll access your Pi remotely, you might not need a dedicated display at all. Using VNC or SSH, you can control your Pi from another computer, saving both money and desk space. This approach works wonderfully for servers, network-attached storage, or background automation tasks.
Consider your project’s portability, touch input requirements, and available workspace when selecting a display. Budget-conscious beginners should start with an existing HDMI monitor, while those building interactive kiosks or control interfaces will appreciate the touchscreen’s capabilities.
Connectivity Upgrades That Matter
Improving Wireless Performance
The Raspberry Pi 3 Model B’s built-in WiFi and Bluetooth are adequate for basic tasks, but you might encounter connectivity challenges in certain situations. If your Pi is located far from your router or surrounded by interference-heavy environments, a USB WiFi dongle can significantly boost your wireless range and stability.
Popular options include the Edimax EW-7811Un for compact setups and the TP-Link Archer T2U Plus for dual-band performance. These dongles typically offer better antennas than the onboard chip, translating to stronger signal reception and faster data transfers. When selecting a WiFi adapter, ensure it has Linux driver support—most modern dongles work out-of-the-box with Raspberry Pi OS, but checking compatibility forums beforehand saves frustration.
For Bluetooth improvements, external USB adapters like the ASUS USB-BT400 provide enhanced range for wireless peripherals and IoT projects. While the Pi 3’s integrated Bluetooth 4.1 handles keyboards and mice well, external adapters excel when connecting multiple devices simultaneously or working with newer Bluetooth 5.0 accessories.
Some advanced users even explore antenna modifications, though this requires technical knowledge. For most hobbyists, a quality USB dongle offers the perfect balance between improved performance and ease of installation—simply plug it in and enjoy better connectivity.
USB Hubs and Port Expansion
The Raspberry Pi 3 Model B comes with four USB 2.0 ports, but you’ll likely need more when connecting keyboards, mice, storage devices, and other peripherals simultaneously. This is where USB hubs become essential companions for your Pi projects.
Understanding the difference between powered and unpowered hubs is crucial. Powered hubs connect to an external power source, allowing them to supply adequate current to demanding devices like external hard drives, webcams, or wireless adapters. Unpowered hubs draw power directly from your Pi, which can strain its limited USB output and potentially cause instability or unexpected shutdowns. For the Raspberry Pi 3 Model B, a powered hub is strongly recommended when connecting more than two peripherals.
When selecting a hub, ensure it provides at least 2A per port for power-hungry devices. Look for hubs specifically marketed as Raspberry Pi compatible to avoid common issues like voltage drops or data transfer problems. Some hubs can cause interference with the Pi’s wireless capabilities, so check user reviews before purchasing.
A quality 7-port powered USB hub typically costs between $15-30 and provides reliable expansion for most projects. This investment protects your Pi from power-related damage while giving you flexibility to connect multiple devices simultaneously.
HATs and GPIO Expansion Boards
HATs (Hardware Attached on Top) are add-on boards that stack directly onto your Raspberry Pi 3 Model B’s 40-pin GPIO header, instantly expanding its functionality without messy wiring. These purpose-built expansion boards follow a standardized design, ensuring perfect compatibility and professional-looking projects.
Popular HATs cater to diverse needs. The Sense HAT features environmental sensors, an LED matrix, and a joystick—perfect for weather stations and educational projects. For automation enthusiasts, relay HATs control high-voltage devices safely. Audio lovers appreciate DAC HATs that deliver studio-quality sound, while camera modules and display HATs enhance multimedia capabilities.
Beyond official HATs, GPIO expansion boards offer similar GPIO expansion capabilities with varying form factors. Breadboard-friendly breakout boards simplify prototyping, while motor controller boards enable robotics projects. When selecting expansion hardware, verify 3.3V compatibility and check that your chosen HAT doesn’t block access to essential ports you’ll need for other accessories.
Essential Input Devices and Controls
Getting started with your Raspberry Pi 3 Model B means choosing the right input devices to match your project needs. For desktop-style setups, a standard USB keyboard and mouse are essential basics. Any USB keyboard will work, though compact wireless combinations save desk space and reduce cable clutter. Logitech’s K400 Plus with its built-in touchpad is particularly popular among Pi users for its convenience and reliability.
If you’re on a tight budget, basic wired USB keyboards start around $10 and get the job done perfectly well. The Pi 3 Model B has four USB 2.0 ports, giving you plenty of room for peripherals. For wireless options, remember that Bluetooth keyboards can connect directly to the Pi’s built-in Bluetooth, freeing up USB ports for other accessories.
Alternative input methods shine in specialized projects. Media center builds benefit from compact infrared remote controls that let you navigate from your couch. These typically use a small USB IR receiver that responds to standard TV remotes. For headless setups where you’ll primarily access your Pi remotely via SSH, you might skip traditional input devices entirely and rely on GPIO buttons for basic controls like safe shutdown or script triggering.
Touch screens also integrate input directly into the display, creating compact all-in-one systems perfect for smart home controllers or information dashboards. The key is matching your input method to your project’s purpose, whether that’s a traditional desktop experience or something more creative and hands-off.
Building Your Perfect Accessory Kit
Building your perfect Raspberry Pi 3 Model B accessory kit depends on your budget and intended use. Let’s break down three tiers to help you make smart purchasing decisions.
For beginners starting with a Starter Kit ($50-75), you’ll need the essentials to get your Pi powered up and running. This includes a quality 5V 2.5A power supply with a micro USB connector, a 16GB or 32GB microSD card with adapter (Class 10 minimum), and a basic HDMI cable to connect to your monitor. Add a simple protective case to prevent accidental damage, and you’re ready to explore basic projects like learning Python programming or setting up a simple web server. This tier works perfectly for educational purposes and getting familiar with the Raspberry Pi ecosystem.
The Intermediate Setup ($100-150) expands your capabilities significantly. Build on the starter essentials by adding a wireless keyboard and mouse combo to reduce cable clutter, a dedicated cooling solution like a fan or heatsink, and upgrade to a 64GB microSD card for more storage. Consider adding a USB hub for connecting multiple peripherals simultaneously. This setup excels for media center applications using software like Kodi, where you can stream content to your TV. It’s also ideal for programming workstations where you’ll run multiple applications and need reliable performance during longer sessions.
The Advanced Configuration ($200-300+) unlocks the full potential of your Pi. Include everything from the intermediate tier, then add specialized components: an official Raspberry Pi touchscreen display for portable projects, a high-quality USB microphone for voice-controlled IoT hub applications, a camera module for computer vision experiments, and a robust power supply with sufficient amperage for powering additional USB devices. Add GPIO expansion boards, sensors, and a sturdy metal case with built-in cooling. This tier suits demanding applications like retro gaming stations with multiple controllers, game server projects, or home automation hubs managing multiple smart devices.
Choose your tier based on your immediate needs, knowing you can always upgrade incrementally as your skills and project ambitions grow.
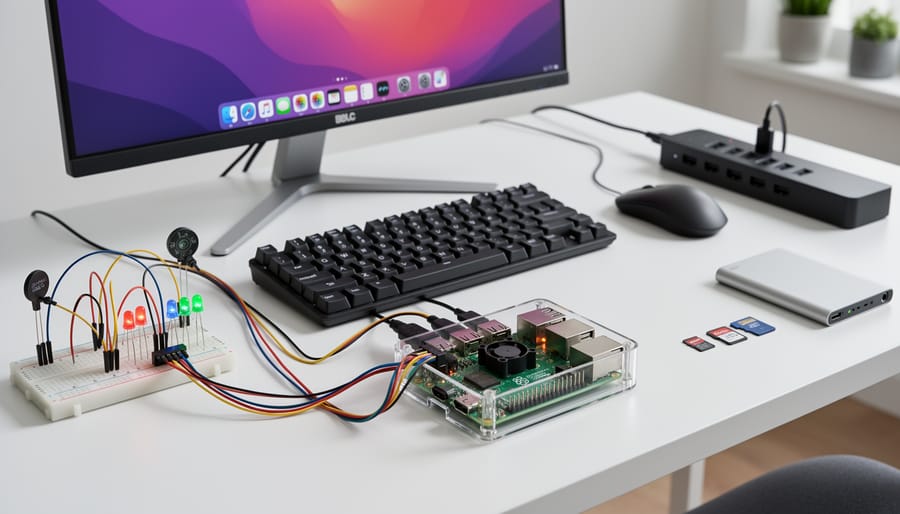
Choosing the right accessories for your Raspberry Pi 3 Model B can truly make or break your project experience. While the Pi itself is incredibly versatile, it relies on quality peripherals to unlock its full potential. Throughout this guide, we’ve explored everything from essential components to specialized add-ons that can transform your single-board computer into virtually anything you imagine.
If there’s one takeaway to remember, it’s this: start with the fundamentals. Invest in a reliable power supply and a quality microSD card before anything else. These two components form the foundation of every Pi project, and cutting corners here often leads to frustrating troubleshooting sessions down the road. Once you’ve secured these basics, you can confidently expand your setup based on your specific project requirements.
Whether you’re building a retro gaming console, setting up a home automation hub, or diving into programming education, the accessories you choose should align with your goals. Don’t feel pressured to purchase everything at once. The beauty of the Raspberry Pi ecosystem lies in its modularity and the ability to grow your toolkit over time.
Ready to put your new accessories to work? Check out our configuration tutorials to get your Pi up and running smoothly. Happy building, and remember that every expert started exactly where you are now!