

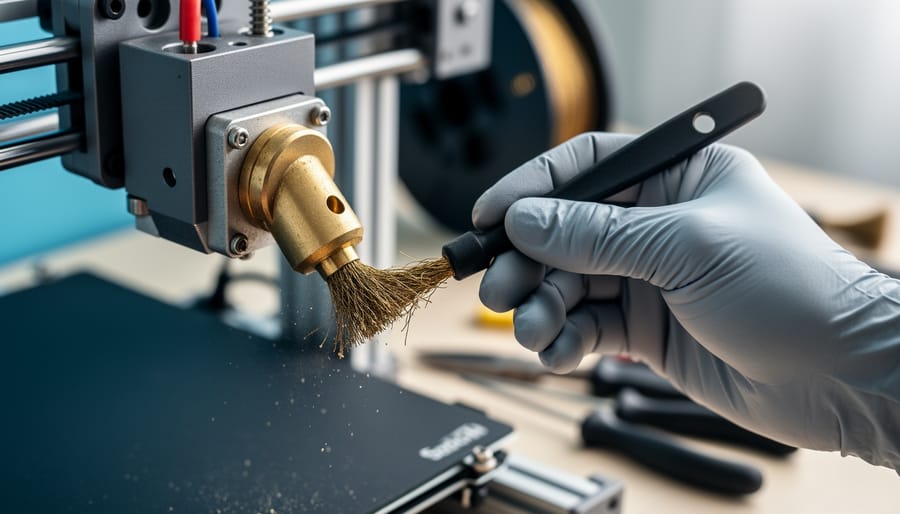
Inspect your nozzle daily for filament buildup and wipe it clean with a brass brush while heated to 200°C—this 30-second habit prevents failed prints and clogs that cost hours of troubleshooting. Your FDM 3D printer is a precision machine with moving parts that accumulate dust, debris, and wear over time, but a comprehensive maintenance plan doesn’t require expensive tools or expert knowledge to keep everything running smoothly.
Tighten your belt tension weekly by pressing down on the center of each belt—it should deflect no more than 5mm and produce a low guitar-string sound when plucked, ensuring accurate layer placement and dimensional accuracy. Clean your build plate with isopropyl alcohol before every print to remove oils and residue that cause poor first-layer adhesion, the leading cause of print failures that waste filament and time.
Lubricate your linear rods and lead screws monthly with PTFE-based grease, applying a thin layer and running the axis through its full range to distribute evenly—this reduces friction, minimizes layer artifacts, and extends component life by years. Most printer failures stem from neglect rather than defects, yet these simple tasks take less than 15 minutes weekly and can save hundreds in replacement parts and failed prints. Whether you’re running a budget Ender or a premium Prusa, consistent maintenance transforms frustrating troubleshooting sessions into predictable, successful prints while maximizing your investment.
Why FDM Printers Need Regular Maintenance (And What Happens When You Skip It)
FDM printers are fascinating machines, but they’re essentially a collection of moving parts working in precise harmony. Unlike their resin-based cousins that cure liquid into solid forms, FDM printers rely on motors, belts, bearings, and hotends that physically move in three dimensions thousands of times per print. This mechanical complexity makes them inherently maintenance-intensive, similar to how a car needs regular oil changes and tire rotations.
Think about what’s actually happening during a typical print job. Your printer’s stepper motors make microscopic movements, belts stretch and contract under tension, the hotend heats plastic to over 200°C repeatedly, and the print bed expands and contracts with temperature changes. Over time, belts loosen, nozzles accumulate carbonized plastic residue, bearings wear down, and screws gradually work themselves loose from constant vibration. When you’re working on multi-material printing projects, these components face even more stress from frequent temperature changes and material swaps.
Skip maintenance, and the consequences stack up quickly. That first skipped cleaning might result in minor stringing or layer inconsistencies. Keep ignoring it, and you’ll face failed prints halfway through 12-hour jobs, wasting both filament and your time. A neglected nozzle can completely clog, requiring replacement at $20-40 per hotend. Worn bearings cause layer shifting, ruining prints and potentially damaging the printer frame. The most painful scenario? Complete extruder failure or motherboard damage from accumulated debris and heat stress, potentially costing $100-300 to repair.
Real-world example: one hobbyist reported spending $450 replacing a damaged hotend assembly and mainboard after months of neglecting basic cleaning. The irony? Fifteen minutes of weekly maintenance would have prevented it entirely. Regular maintenance isn’t just about print quality; it’s about protecting your investment and avoiding expensive emergency repairs that could have been prevented with simple, proactive care.
Daily Maintenance Tasks That Take Less Than 5 Minutes
Quick Visual Inspection
Before firing up your next print, spend just 60 seconds doing a quick visual sweep of your FDM printer. This simple habit catches most problems before they ruin your print and waste filament.
Start with the print bed. Look for leftover filament, glue residue, or fingerprints that could prevent adhesion. Even tiny plastic fragments can create bumps that throw off your first layer. A quick wipe with isopropyl alcohol keeps the surface clean and ready.
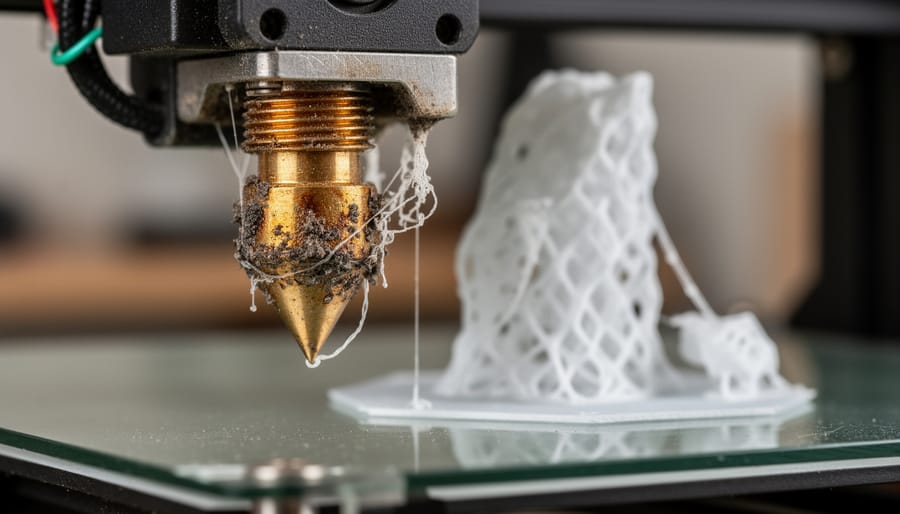
Next, check your nozzle. Inspect it for any burnt filament buildup or blobs hanging from the tip. These can drag across your print and create defects. If you spot buildup, heat the nozzle and gently clean it with a brass brush before starting.
Finally, give your belts a once-over. They should sit snug on the pulleys without sagging or visible damage. Press gently on each belt—it should have slight tension, like a guitar string. Loose belts cause layer shifting, while frayed belts can snap mid-print.
These three quick checks take minimal time but prevent hours of failed prints and wasted material.
Nozzle Cleaning Between Prints
Keeping your nozzle clean between prints is one of the simplest yet most effective ways to prevent frustrating clogs and ensure consistent print quality. The good news is you don’t need expensive tools to maintain a clean nozzle.
Start by wiping the nozzle with a brass wire brush while it’s heated to operating temperature. Brass won’t scratch or damage the nozzle like steel brushes might. Keep a brush mounted near your printer for quick cleaning between prints. You can also use a silicone sock on your hotend to prevent plastic from sticking to the exterior nozzle surfaces in the first place.
For stubborn residue, heat the nozzle to about 10-20 degrees above your normal printing temperature and carefully wipe it with a damp cloth or paper towel using tweezers. Never touch the hot nozzle directly. Some users keep a small brass sponge on their print bed for the nozzle to push through during automated bed leveling routines.
Performing a cold pull is another effective technique when you notice reduced flow. Heat the nozzle to around 90-100°C, manually push filament through, then quickly cool and pull firmly to extract any internal debris. This takes just minutes and can save you from complete nozzle blockages that require more intensive intervention.
Print Bed Preparation
A clean, level print bed is the foundation of successful 3D printing. Start each print session by wiping down your bed with isopropyl alcohol (70% or higher) to remove oils, dust, and filament residue. This simple habit prevents adhesion failures that waste filament and printing time.
Check your bed level regularly using the paper test method. Slide a piece of standard printer paper between the nozzle and bed at each corner, adjusting until you feel slight resistance. Modern printers with auto-bed leveling still benefit from manual checks, as physical wear affects sensor accuracy over time.
Different bed surfaces require specific care. Glass beds need occasional deep cleaning with warm soapy water, while PEI sheets benefit from light sanding with fine-grit sandpaper every few months to restore grip. Magnetic flexible beds should be checked for warping or damage that could affect print quality and your post-processing techniques.
Weekly Maintenance Routine for Optimal Performance
Belt Tension and Alignment Check
Properly tensioned belts are crucial for print accuracy, yet many users overlook this simple maintenance task. To check belt tension without special tools, pluck each belt like a guitar string. You’re looking for a low-pitched twang with minimal slack, not a loose wobble or overly tight ping. The belt should deflect about 5-10mm when pressed gently at its midpoint.
Start by powering off your printer and manually moving the print head and bed to access all belt sections. Check the X and Y axis belts individually, feeling for consistent tension along their entire length. If adjustment is needed, locate the tensioner screws or idler pulleys, typically found at the ends of each axis. Tighten incrementally, testing after each adjustment to avoid over-tensioning, which can strain motors and bearings.
Watch for these warning signs: visible fraying or shiny spots on belt teeth indicate wear, horizontal lines or layer shifts in prints suggest loose belts, and unusual grinding noises during movement point to misalignment. Inspect belt teeth regularly under good lighting. Replace belts showing more than 10% tooth damage or any cracking. Most belts last 1-2 years with regular use, making this an inexpensive yet impactful maintenance task that prevents costly print failures.
Lubrication Points and Best Practices
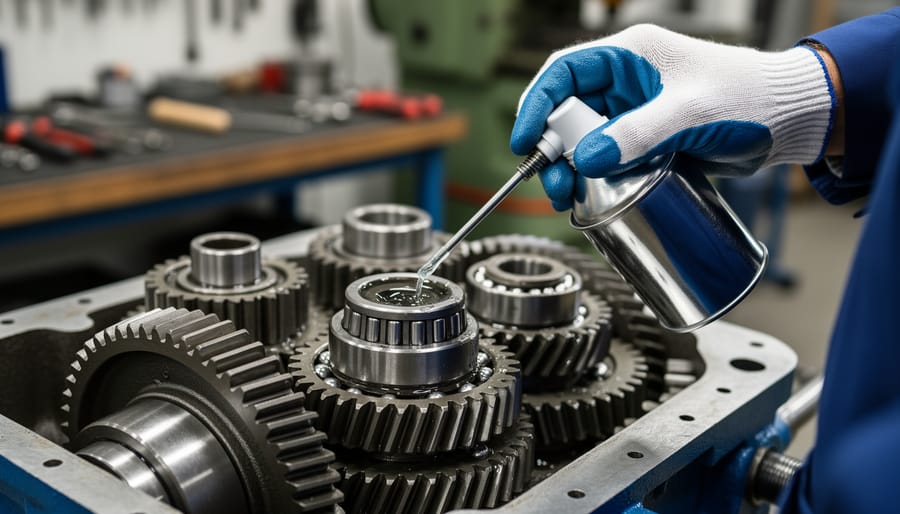
Proper lubrication keeps your FDM printer running smoothly without breaking the bank. Focus on three key areas: linear rods, lead screws, and bearings. For linear rods where the print head glides, apply a thin layer of light machine oil or PTFE-based lubricant every 2-3 months. Think “less is more” – a single drop per rod is plenty. Wipe away excess with a lint-free cloth to prevent dust accumulation.
Lead screws (the vertical threaded rods) need heavier grease. Use white lithium grease or specialized PTFE grease sparingly, applying a small amount every 3-4 months. Run the Z-axis up and down several times to distribute it evenly, then wipe off any excess that squeezes out.
Avoid over-lubricating, which attracts dust and debris that can cause premature wear. Never use WD-40 or cooking oils, as these break down quickly and gum up moving parts. If you notice squeaking or resistance during movement, that’s your cue to lubricate. For bearings, most are pre-sealed and maintenance-free, but if you have open bearings, a tiny drop of sewing machine oil works wonders. Always clean surfaces before applying fresh lubricant for best results.
Hotend and Cooling Fan Inspection
Your hotend and cooling fans work tirelessly during every print, making regular inspection essential for preventing failed prints and costly repairs. Start by powering off and cooling down your printer completely before examining these critical components.
Inspect the hotend for any plastic buildup or debris around the nozzle and heater block. Even small accumulations can cause heat creep, where heat travels up the filament path prematurely, leading to jams and inconsistent extrusion. Use a brass brush to gently remove any residue while the hotend is still slightly warm but safe to touch.
Next, examine both your part cooling fan and hotend cooling fan. Dust and filament particles can accumulate on fan blades, reducing airflow efficiency by up to 40 percent. Clean the blades with compressed air or a soft brush, ensuring you hold the fan steady to prevent damage to the bearings.
Test fan operation by running a quick print or using your printer’s control menu. Listen for unusual noises like grinding or rattling, which indicate bearing wear. Check that airflow feels strong and consistent. If you notice reduced performance, explore cooling fan solutions before complete failure occurs.
Regular cleaning every 20-30 print hours prevents most hotend and cooling issues, saving you from expensive replacements down the line.
Monthly Deep Maintenance Tasks
Complete Extruder Cleaning and Calibration
A clogged or poorly calibrated extruder is often the culprit behind inconsistent prints and wasted filament. Let’s tackle this maintenance task step-by-step to get your printer performing like new.
Start by heating your hotend to your typical printing temperature, then carefully remove any filament. Once cool, disassemble the extruder assembly by removing the fan shroud and unscrewing the heater block. Use a brass wire brush to clean the nozzle exterior and a thin acupuncture needle or nozzle cleaning kit to clear the interior passage. Don’t force it; gentle persistence works best. Check the PTFE tube for charring or gaps where it meets the nozzle, as these create weak points for clogs. Replace if necessary.
For the extruder gear, remove accumulated filament dust with a stiff brush, as this debris reduces grip and causes under-extrusion. Reassemble everything, ensuring the nozzle is tightened while hot to prevent leaks.
Now calibrate your e-steps. Mark your filament 120mm above the extruder, then command your printer to extrude 100mm. Measure the remaining distance and use this formula: New E-steps = Current E-steps x 100 / Actual Extruded Amount. Update your firmware with the new value. This ensures accurate material flow, which works hand-in-hand with how you optimize slicer settings for best results.
Full Bed Leveling and Tramming
Proper bed leveling is essential for consistent first-layer adhesion and successful prints. Start by heating your bed and nozzle to your typical printing temperatures, as thermal expansion affects the distance between them. Use the paper test method: slide a piece of standard printer paper between the nozzle and bed at each leveling point. Adjust until you feel slight resistance when moving the paper.
Most printers have four corner adjustment knobs. Begin at one corner, then move to the opposite diagonal corner, repeating this pattern until all points are level. Check the center of the bed too, as some beds can warp or sag. For printers with manual mesh leveling or automatic bed leveling sensors, run the leveling routine after mechanical adjustments.
Verify your work by printing a single-layer test square that covers the entire bed area. The lines should be uniform in width and properly squished into the surface. If you notice inconsistencies, make small adjustments and test again. Regular leveling every few prints prevents adhesion headaches and saves filament from failed prints.
Wiring and Connection Inspection
Electrical issues can stop your FDM printer dead in its tracks, but they’re often preventable with regular inspections. Start by powering down and unplugging your printer completely before any examination. Check the main power cable and connector for any signs of damage, including cracks in the insulation or exposed wiring.
Move on to inspect internal wiring, particularly around high-movement areas like the print head and heated bed connections. Gently wiggle connectors to identify loose connections that could cause intermittent failures. Look for frayed wires near cable chains or areas where cables bend repeatedly during printing. These stress points are prime candidates for wear and eventual failure.
Pay special attention to thermistor and heating element wires, as these carry temperature-critical signals. Even minor damage here can lead to thermal runaway situations or failed prints. Check that all connectors are firmly seated and show no signs of melting or discoloration, which indicates overheating. Tighten any loose terminal screws on your power supply unit and motherboard connections. This simple ten-minute inspection every month can save you from frustrating electrical gremlins and potential safety hazards.
Building a Cost-Effective Maintenance Kit
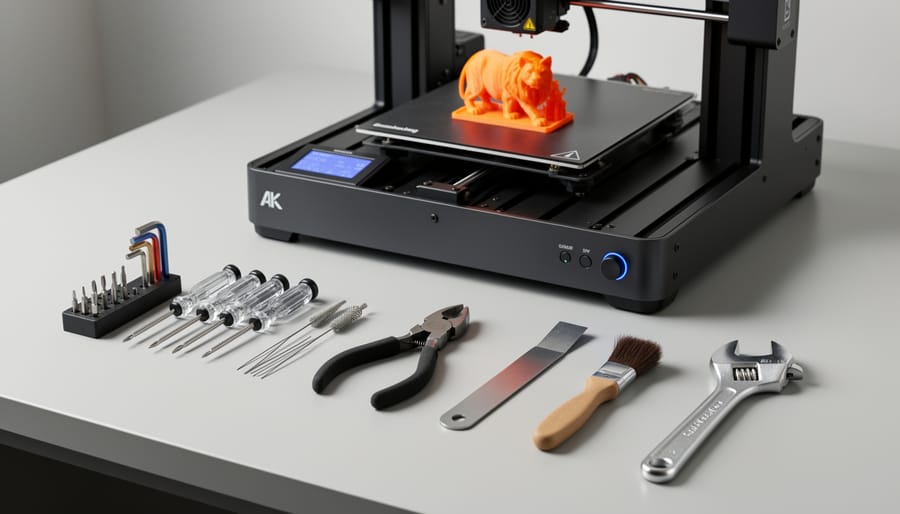
Good news: you don’t need to break the bank to maintain your FDM printer effectively. Most essential maintenance tasks require only basic tools you might already have around the house.
Let’s start with the essentials, which should cost under $30 total. First up is isopropyl alcohol (90% or higher, around $5) for cleaning the build plate and removing residue. Grab a set of precision screwdrivers ($8-12) for tightening loose components and adjusting various parts. You’ll also want needle-nose tweezers ($3-5) for removing failed prints and cleaning the nozzle area, plus microfiber cloths ($5 for a pack) that won’t leave lint behind during cleaning.
Next, the helpful additions that cost another $20-30. A digital caliper ($15-20) helps verify filament diameter and check for wear on parts. Spare nozzles ($5-10 for a set) are invaluable when clogs become stubborn, and PTFE tube cutters ($8-12) ensure clean cuts if you need to replace bowden tubes. Don’t forget spare build surface material if your printer uses removable sheets.
For sourcing these items, online marketplaces offer excellent deals on tool sets, while local hardware stores work great for alcohol and basic tools. Many 3D printing suppliers bundle maintenance kits, though buying individually often saves money.
The nice-to-haves include a small wire brush set for nozzle cleaning, spare belts, and extra fans, but these aren’t immediately necessary. Most beginners can handle 90% of maintenance tasks with just the essentials list. As you gain experience, you’ll naturally identify which additional tools match your specific needs and printing habits.
Tracking Maintenance to Prevent Costly Surprises
Keeping a maintenance log might sound tedious, but it’s one of the smartest habits you can develop as a 3D printer owner. A simple record-keeping system helps you track when parts were last serviced and predict when they’ll need attention again, preventing those frustrating mid-print failures.
Start with a basic spreadsheet or even a notebook. Create columns for the date, component serviced, action taken, and notes about performance. For example, log when you lubricate the Z-axis rods, replace nozzles, or tighten belts. This creates a timeline that reveals patterns—maybe your nozzle clogs every 50 hours of printing, or your belts need tensioning monthly.
Several free tools make tracking even easier. PrinterLog and OctoPrint’s plugins can automatically log print hours, while Google Sheets templates designed specifically for FDM printers are available online. These often include built-in calculators that estimate component lifespan based on your usage patterns.
The real value appears when troubleshooting. If you’re suddenly getting layer shifts, checking your log might reveal you haven’t cleaned the linear rails in three months. Inconsistent extrusion? Your notes show the PTFE tube is due for replacement. This historical data transforms guesswork into informed decision-making.
Set reminders based on your maintenance schedule. Most smartphones can notify you when it’s time to clean hotends or check belt tension. By staying ahead of component wear, you’ll spend less time fixing problems and more time creating successful prints. Your future self will thank you when parts fail gracefully on schedule rather than catastrophically mid-project.
When to DIY vs. When to Seek Professional Help
Understanding which maintenance tasks you can tackle yourself versus when to call in a professional will save you both time and money. The good news? Most FDM maintenance falls squarely in the DIY-friendly category.
Safe for beginners to handle include bed leveling, nozzle cleaning with cold pulls, lubrication of linear rails and lead screws, belt tensioning, and replacing worn pneumatic fittings. These tasks require basic tools and carry minimal risk of causing damage. If you can follow step-by-step instructions and work methodically, you’re fully capable of managing routine maintenance. Start with simple tasks like cleaning and gradually build your skills toward more complex procedures.
However, some situations warrant professional intervention. If you’re dealing with mainboard failures, broken thermistors requiring soldering skills you don’t possess, stripped lead screws needing replacement, significant mechanical misalignment you can’t diagnose, or persistent print quality issues despite troubleshooting, it’s time to seek help. Attempting repairs beyond your skill level can transform a minor issue into an expensive problem.
Warning signs that scream “get professional help” include unusual grinding noises that persist after basic maintenance, error messages you can’t resolve through online resources, electrical issues like intermittent power failures, or damage from a catastrophic print failure. Additionally, if your printer is still under warranty, professional service protects your coverage.
The key is honesty about your abilities. There’s no shame in asking for help, and every expert started as a beginner. Build your confidence gradually, document what works, and don’t hesitate to reach out to community forums or manufacturer support when you’re uncertain.
Consistent FDM maintenance isn’t just about keeping your printer running—it’s about protecting your investment and maximizing your printing success. By establishing a regular maintenance routine, you’ll avoid costly repairs, reduce failed prints, and extend your machine’s lifespan by years. The connection is simple: a few minutes of preventive care today saves hours of frustration and potentially hundreds of dollars tomorrow.
If you’re new to 3D printer maintenance, don’t feel overwhelmed by the prospect of a comprehensive routine. Start small. Pick one daily task—perhaps a quick visual inspection or cleaning the build plate before each print. Once that becomes habit, add a weekly task like checking belt tension or lubricating linear rods. Gradually build your routine until maintenance becomes second nature.
Remember, every maintenance task you perform is an investment in uninterrupted printing and consistent results. Those five minutes spent cleaning your nozzle could prevent a clogged hotend replacement costing $50 or more. The ten minutes checking your belts could save an entire day troubleshooting layer shifting issues.
Ready to take action? Choose one maintenance task from this guide and commit to performing it this week. Your future self—and your FDM printer—will thank you.