


Transform rough 3D prints into professional-quality parts through strategic post-processing techniques that elevate your 3D design prototyping from basic to exceptional. Sand layer lines systematically using progressively finer grits, starting at 120 and working up to 1000 for glass-like smoothness. Apply specialized filler primers to conceal remaining surface imperfections, building thin layers between light sanding sessions for optimal results. Master advanced finishing methods like vapor smoothing for ABS prints or heat treatment for PLA to achieve factory-quality surface texture without compromising structural integrity.
Post-processing bridges the gap between acceptable prints and professional results, turning basic maker projects into showcase pieces. Whether you’re creating functional prototypes or display models, proper finishing transforms standard prints into parts that rival injection-molded quality. From basic cleanup to advanced surface treatments, each technique builds upon the last to create increasingly refined results that meet specific project requirements and material properties.
Basic Surface Preparation Techniques
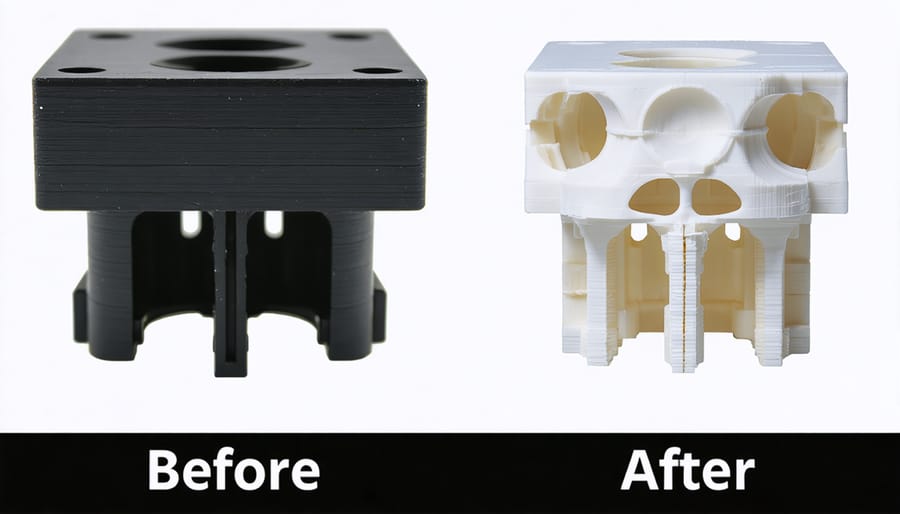
Removing Support Structures
Support removal is a crucial step that requires patience and the right tools to avoid damaging your print. For basic PLA and PETG prints, start by removing large support sections using needle-nose pliers, working from the edges inward. Gently twist and pull the supports away from the model, being careful not to apply excessive force that could break delicate features.
For more intricate supports, use flush cutters to carefully snip away smaller sections. A craft knife or precision blade can help clean up stubborn bits, but always cut away from yourself and the model to prevent accidents. If supports are particularly difficult to remove, try using support removal pliers specifically designed for 3D printing – these often have specialized tips that can get into tight spaces.
For prints with water-soluble supports, submerge the model in warm water and let the supports dissolve naturally. This method is particularly effective for complex geometries where mechanical removal might be risky. Some materials may benefit from specific support removal solutions available from filament manufacturers.
Remember to wear safety glasses during support removal, as pieces can sometimes snap off unexpectedly. Take your time with this process – rushing support removal is a common cause of print damage.
Initial Clean-up and Inspection
Once your print is complete, the first step is to carefully remove it from the build plate using appropriate tools like a spatula or scraper. Inspect the print for any obvious defects such as layer shifts, stringing, or support structure remnants. Clean the print thoroughly with a soft brush to remove loose debris and dust.
For prints with support structures, use needle-nose pliers to carefully remove the bulk of the supports, followed by fine detail work with precision tools. Pay special attention to areas where supports meet the model, as these often need extra cleanup. Look for any stringing between parts and remove it with flush cutters or a hobby knife.
Check for layer lines and surface irregularities that might need addressing in later finishing steps. For functional parts, test fit any mechanical features like holes, threads, or connecting points. If your print has overhangs or bridges, examine these areas for sagging or imperfections that might affect the part’s functionality.
Document any areas that need special attention during subsequent finishing steps, such as spots requiring filling or surfaces that need smoothing.
Smoothing Techniques for Different Materials
Sanding Methods
Progressive sanding is essential for achieving smooth, professional-looking 3D prints. Start with coarse-grit sandpaper (80-120 grit) to remove visible layer lines and major imperfections. Work in straight lines rather than circular motions to maintain even surfaces, and always sand in the same direction as the layer lines.
Move to medium-grit sandpaper (150-220 grit) once the larger imperfections are gone. This step helps eliminate the scratches left by the coarse grit while further smoothing the surface. Be thorough but gentle to avoid creating deep scratches or damaging fine details.
For the final stages, use fine-grit sandpaper (320-400 grit) followed by extra-fine grits (600-800). These finer grits create an increasingly smooth surface that’s ready for painting or other finishing techniques. Consider using wet sanding for these final stages, as it helps prevent dust and achieves better results.
Between sanding stages, clean the piece thoroughly with compressed air or a soft brush to remove debris. Feel the surface with your fingertips to identify rough spots that need more attention. For intricate areas or hard-to-reach spots, consider using sanding sticks or flexible sanding pads.
Remember to wear appropriate safety gear, including a dust mask and eye protection, especially when dry sanding. Work in a well-ventilated area and take breaks to check your progress regularly.
Chemical Smoothing
Chemical smoothing offers a powerful way to achieve professional-quality finishes on 3D printed parts, particularly useful for jewelry design prototypes and display pieces. The most well-known method is acetone vapor smoothing for ABS plastic, which can transform rough layer lines into a glossy, smooth surface.
To perform acetone vapor smoothing safely, you’ll need a well-ventilated area and proper safety equipment, including chemical-resistant gloves and a respirator mask. Create a smoothing chamber using a large glass container with an airtight lid. Place a small amount of acetone in the bottom of the container, and suspend your ABS print above it using a wire or platform. The acetone vapor will gradually soften the surface of the print, allowing the layers to flow together.
For PLA prints, which don’t respond to acetone, ethyl acetate can be used as an alternative, though it requires more careful handling and typically produces more subtle results. PETG can be smoothed using dichloromethane, but this should only be attempted with proper safety measures and ventilation systems in place.
When working with any chemical smoothing method, timing is crucial. Over-exposure can lead to warping or loss of detail, while insufficient exposure won’t achieve the desired smoothness. Start with short exposure times (2-5 minutes) and inspect your print frequently until you achieve the desired finish.
Remember to always:
– Work in a well-ventilated area
– Keep chemicals away from heat sources
– Use appropriate protective equipment
– Store chemicals properly in labeled containers
– Dispose of chemicals according to local regulations
Chemical smoothing can dramatically improve the appearance of your prints, but it’s important to practice on test pieces before treating important projects. Different plastics and print geometries may require adjustments to exposure times and methods.
Surface Finishing and Enhancement
Priming and Painting
Achieving a professional finish starts with proper priming and painting techniques. Begin by selecting a primer suitable for your print material – PLA, ABS, and PETG each respond differently to various primers. For most plastics, a plastic-specific primer provides the best adhesion and surface preparation.
Before priming, ensure your surface is clean and free from dust or oils. Apply thin, even coats of primer in a well-ventilated area, keeping the spray can about 8-12 inches from the surface. Multiple light coats are better than one heavy coat, which can obscure detail or create drips. Allow each coat to dry completely before applying the next.
For paint selection, acrylic-based paints work well with most 3D printed materials. Model paints from brands like Tamiya or Vallejo offer excellent coverage and durability. When painting, use thin coats and build up color gradually. This prevents pooling and maintains surface detail. For metallic finishes, consider using specialized paints with metal flakes or chrome effects.
If you’re working with transparent filaments, use specific clear primers to maintain translucency. For functional parts that need durability, automotive primers and paints can provide excellent protection and wear resistance.
Remember to seal your paint job with a clear coat appropriate for your paint type. Matte, satin, or glossy finishes can dramatically change the final appearance of your print. Apply the clear coat in thin layers, allowing proper drying time between coats to prevent clouding or yellowing.
Clear Coating
Clear coating is a crucial final step that not only enhances the appearance of your 3D printed parts but also provides essential protection against wear, UV damage, and environmental factors. The most popular clear coating options include polyurethane, epoxy resin, and acrylic clear coats, each offering different levels of durability and finish qualities.
For beginners, spray-on acrylic clear coats are an excellent starting point. They’re easy to apply, dry quickly, and provide good protection for indoor use. Apply thin, even coats in a well-ventilated area, allowing each layer to dry completely before adding the next. Two to three coats typically provide sufficient protection while maintaining detail clarity.
Polyurethane coatings offer superior durability and are available in both brush-on and spray formats. They’re particularly effective for parts that will be handled frequently or exposed to outdoor conditions. When applying polyurethane, use long, smooth strokes if brushing, or maintain consistent distance and movement if spraying.
For the highest level of protection and a glass-like finish, epoxy resin is unmatched. While it requires more careful preparation and mixing, the results can be spectacular. Pour the mixed resin slowly over your part, ensuring even coverage. Use a heat gun or torch to remove any air bubbles that form during curing.
Remember to always test your chosen clear coat on a small test print first, as some coatings may react differently with various printing materials.
Special Effects
Special effects finishing can transform ordinary 3D prints into stunning showpieces that mimic metallic, weathered, or textured surfaces. For a metallic finish, start by applying a smooth base coat followed by metallic spray paint or rub-on metallic powders. You can achieve convincing bronze, copper, or silver effects by carefully layering these materials and using patina solutions for added authenticity.
Creating weathered effects involves techniques like dry brushing with acrylic paints, using washes to create depth in recessed areas, and strategically applying weathering powders. For a rusted metal look, combine orange and brown pigments with texture medium, then carefully stipple the mixture onto your print’s surface.
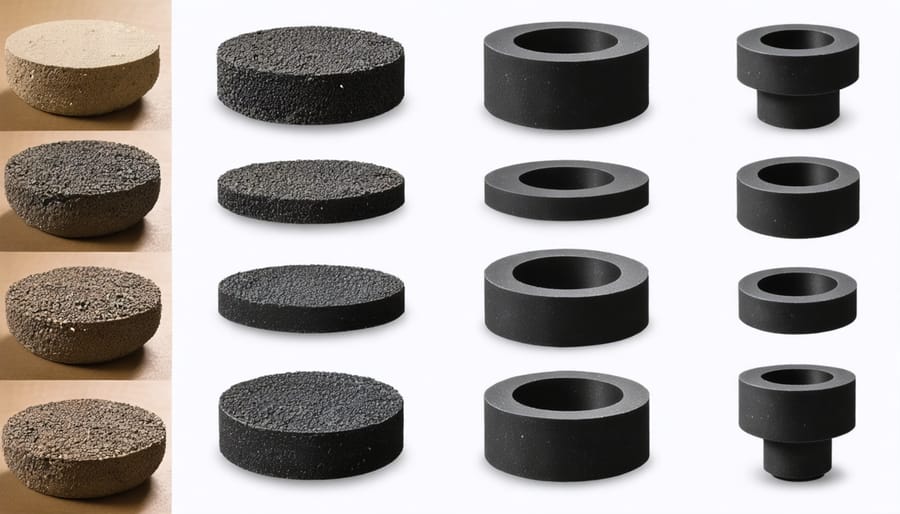
Textured finishes can be achieved through various methods, including stippling with textured paint, applying craft stone effects, or using specialized coating materials. Sand-textured spray paints work particularly well for creating a rough, industrial appearance. For more specific textures, consider using modeling pastes or texture mediums that can be manipulated while wet to create patterns like leather grain, wood grain, or concrete surfaces.
Remember to seal your special effects with an appropriate clear coat to protect the finish and enhance its durability.
Post-Processing Tools for Your Raspberry Pi Workshop
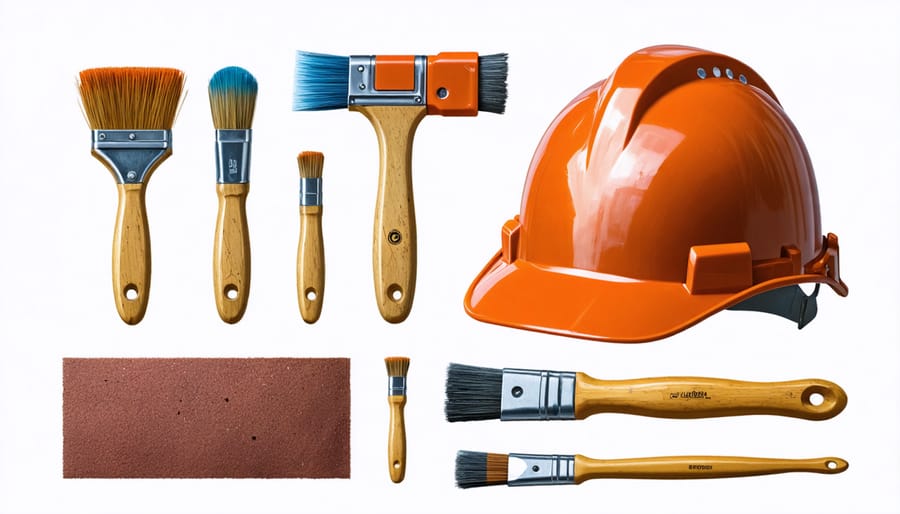
Setting up your post-processing workspace for 3D printed parts requires careful consideration of both safety and efficiency. Start with essential protective gear: safety goggles, a respirator mask rated for fine particles, and chemical-resistant gloves. These items are non-negotiable when working with sanding dust and chemical treatments.
For basic post-processing, gather these fundamental tools: a set of graduated sandpaper (from 80 to 2000 grit), needle files for detailed work, and a well-lit workspace with proper ventilation. A dust collection system or vacuum attachment is highly recommended to keep your area clean and safe.
Advanced finishing requires additional tools: a rotary tool with various attachments, flush cutters for support removal, and a heat gun for smoothing PLA prints. Consider adding a spray booth if you plan to paint your pieces, which can be built using your Raspberry Pi to control ventilation fans and LED lighting.
Keep these supplies organized and accessible: isopropyl alcohol for cleaning, putty filler for gaps, and microfiber cloths that won’t scratch your prints. A set of precision measuring tools helps ensure post-processed parts maintain their intended dimensions.
Storage solutions are crucial – use clear containers labeled with contents and safety information. Keep chemical products in a separate, well-ventilated cabinet, and maintain a dedicated space for works in progress.
For optimal results, create a checklist system to track each print through various finishing stages. This methodical approach ensures consistent quality and helps you develop efficient workflows for different types of prints and materials.
Post-processing your 3D prints is an essential skill that can transform ordinary prints into professional-looking masterpieces. Throughout this guide, we’ve explored various techniques, from basic sanding and priming to advanced finishing methods that can enhance your prototyping workflow and final results. Remember that each material responds differently to post-processing techniques, so it’s crucial to experiment and find what works best for your specific projects.
Start with simple techniques like sanding and progress to more advanced methods as you gain confidence. Keep safety in mind by working in well-ventilated areas and using appropriate protective equipment. Don’t be afraid to make mistakes – they’re valuable learning opportunities that will help you develop your skills.
Consider keeping a project log to track which techniques work best for different materials and applications. This documentation can prove invaluable as you tackle more complex projects. Whether you’re creating functional prototypes or decorative pieces, the right post-processing techniques can make the difference between a good print and a great one. Happy printing, and remember that practice makes perfect!