


Mastering cooling techniques in 3D printing unlocks the key to achieving professional-looking 3D prints with crisp details and minimal defects. Proper cooling prevents common issues like stringing, warping, and layer separation while enabling faster print speeds and more complex geometries. From basic part cooling fans to advanced liquid cooling systems, temperature management dramatically impacts print quality across all materials. Whether you’re printing basic PLA or tackling high-temperature materials like PETG and ABS, optimizing your cooling setup can transform mediocre prints into exceptional results. This guide explores proven cooling strategies, from essential hardware modifications to advanced slicer settings, helping you achieve consistent, high-quality prints every time.
Why Proper Cooling Makes or Breaks Your 3D Prints
Common Cooling-Related Print Problems
Proper cooling is essential to improve print quality, but when cooling isn’t optimized, several common issues can arise. Warping occurs when printed layers cool too quickly and contract, causing the corners of the print to lift from the build plate. This is particularly common with materials like ABS and can be identified by curved or lifted edges.
Stringing is another cooling-related problem, appearing as thin plastic threads between separate parts of the print. This happens when the filament doesn’t cool quickly enough during travel moves, allowing molten plastic to ooze and create unwanted strings. Poor bridging performance, where horizontal layers spanning gaps sag or droop, often results from insufficient cooling of the filament as it’s laid down.
Layer separation can also occur when cooling is too aggressive, causing subsequent layers to not bond properly. Conversely, inadequate cooling can lead to blob formation and poor detail definition, especially in small features or overhangs. Understanding these common issues is the first step in implementing effective cooling solutions.
Temperature Management Fundamentals
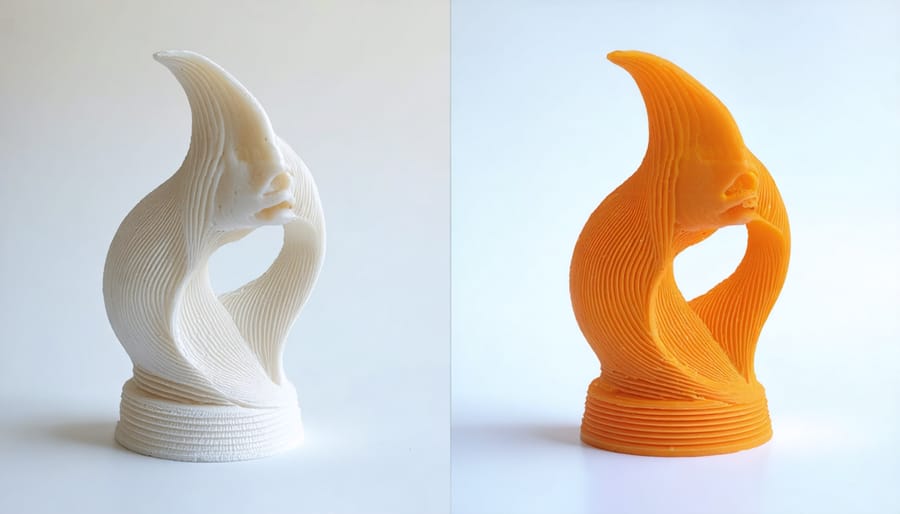
Temperature management is crucial for successful 3D printing, as it directly affects print quality, material behavior, and overall results. The fundamental principle involves controlling two key thermal zones: the heated bed and the extruded filament. When plastic filament is heated and extruded, it needs to cool at a controlled rate to maintain dimensional accuracy and prevent issues like warping or layer separation.
The cooling process must be balanced carefully – too much cooling can lead to poor layer adhesion and weak prints, while insufficient cooling can result in drooping, stringing, or detail loss, especially in areas with overhangs or bridges. This is why most 3D printers come equipped with both part cooling fans and hot-end cooling systems.
For optimal results, different materials require different cooling approaches. PLA typically needs aggressive cooling to prevent sagging, while ABS benefits from minimal cooling and a controlled environment to prevent warping. Understanding these basic thermal requirements helps makers choose appropriate cooling solutions and adjust their printing parameters effectively.
Advanced Cooling Hardware Solutions
Part Cooling Fans and Ducting
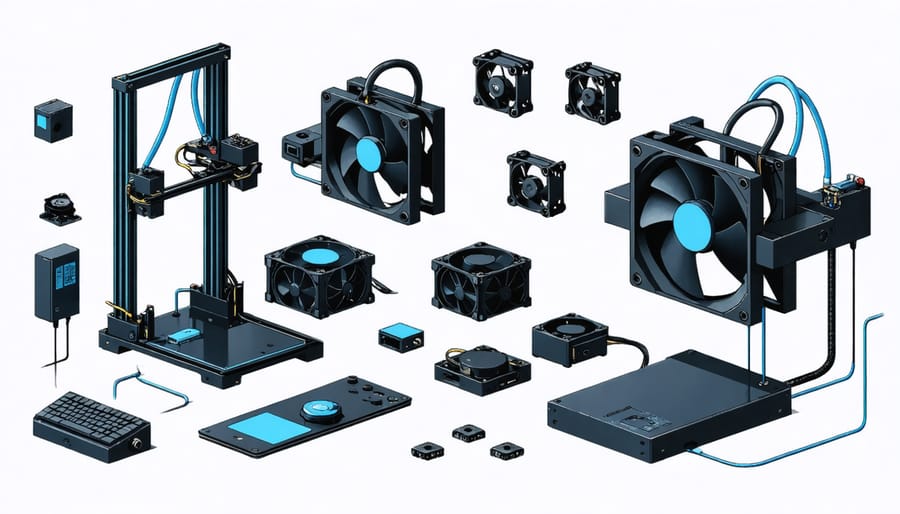
Part cooling fans are essential components in 3D printing, with the two most common types being axial and radial (blower) fans. Axial fans push air straight ahead and are typically used for hotend cooling, while radial fans create concentrated airflow perfect for part cooling.
Most 3D printers come equipped with a standard 40mm or 50mm radial fan, but upgrading to a more powerful fan can significantly improve print quality, especially when working with materials that require rapid cooling like PLA. When selecting a fan, look for ones rated at 24V (or 12V depending on your printer) with CFM ratings between 4-7 for optimal performance.
The effectiveness of cooling fans largely depends on their ducting system. A well-designed duct directs airflow precisely where it’s needed – at the plastic as it exits the nozzle. Popular ducting designs include the Hero Me, Petsfang, and Bullseye, all offering different approaches to air distribution. Dual-fan setups have become increasingly popular, providing even cooling from multiple angles.
For the best results, position your cooling ducts about 1-2mm below the nozzle tip and aim them slightly behind the point where filament exits. This ensures proper cooling without interfering with the extrusion process. Remember that different materials require different cooling intensities – PLA needs maximum cooling, while ABS might need minimal or no part cooling.
Custom Cooling Shrouds
Custom cooling shrouds are game-changers for 3D printing enthusiasts looking to improve print quality. These user-designed and printed components direct airflow more efficiently than stock cooling solutions, often resulting in better bridging, overhangs, and overall print quality.
Popular designs include the Petsfang Duct for Creality printers and the Bullseye fan duct, which provide 360-degree part cooling coverage. These shrouds typically use existing printer fans but optimize their performance through better air direction and flow patterns. Some advanced designs incorporate dual fan setups or split the airflow to multiple outlets for even cooling distribution.
When printing cooling shrouds, it’s recommended to use heat-resistant materials like PETG or ABS, as these parts will be exposed to higher temperatures near the hotend. TPU can also be used for flexible sections that help prevent vibration transfer.
The effectiveness of custom shrouds varies by design, but users often report 15-30% improvements in bridging performance and significantly cleaner overhangs compared to stock cooling solutions. For best results, ensure your chosen design matches your specific printer model and hotend configuration.
Advanced Cooling Technologies
Advanced cooling solutions have revolutionized 3D printing, particularly when prototyping complex designs that require precise temperature control. Liquid cooling systems represent a significant leap forward, using circulating coolant to maintain optimal temperatures throughout the printing process. These systems typically employ a combination of water blocks, radiators, and precision pumps to efficiently dissipate heat from critical components.
One innovative approach gaining traction is phase-change cooling, which utilizes the heat absorption properties of transitioning materials. This method can maintain exceptionally stable temperatures, crucial for printing with high-temperature materials like PEEK or Ultem.
Peltier cooling elements offer another sophisticated solution, using thermoelectric effects to create precise temperature differentials. While more energy-intensive than traditional methods, they provide unparalleled control over localized cooling.
For enclosed printing environments, advanced air management systems combine filtered intake and exhaust mechanisms with computerized temperature monitoring. These systems can automatically adjust airflow patterns to maintain optimal printing conditions while managing potentially harmful fumes and particles.
Software-Based Cooling Optimization
Essential Slicer Settings
Proper cooling settings in your slicer software play a crucial role in achieving high-quality prints. The most important setting to consider is the fan speed, which typically ranges from 0% to 100%. For most PLA prints, running your cooling fan at 100% after the first few layers yields the best results. However, when printing with ABS or PETG, you’ll want to reduce this to 30-50% or even disable it completely.
Layer time settings are equally important. Most slicers include a minimum layer time setting, typically set between 5-10 seconds. This ensures each layer has sufficient time to cool before the next one is deposited. If a layer would print faster than this minimum time, your slicer will automatically slow down the print speed to allow proper cooling.
The lift head (Z-hop) setting can also improve cooling performance by raising the nozzle slightly between moves, giving more time for the plastic to solidify. For small, detailed prints, enabling the “print one at a time” option can significantly improve cooling as each part gets more time to cool between layers.
Many slicers also offer bridging-specific fan settings, where you can set higher cooling rates for overhangs and bridges. This targeted approach helps achieve better print quality in challenging areas while maintaining appropriate cooling elsewhere in your print.
Custom Cooling G-code
Custom G-code commands offer precise control over your 3D printer’s cooling behavior, allowing you to fine-tune fan speeds and cooling strategies for different parts of your print. The most commonly used command is M106, which controls fan speed, followed by a value between 0 (off) and 255 (full speed). For example, M106 S128 sets the fan to 50% speed.
You can create dynamic cooling profiles by incorporating fan speed changes at specific layer heights. Start by using M106 S0 at the first layer to ensure better bed adhesion, then gradually increase fan speed over the next few layers with commands like M106 S128 at layer 2 and M106 S255 at layer 3.
For more advanced control, you can use G-code conditional statements in supported firmware. These allow you to adjust cooling based on layer print time or part geometry. The M106 command can also target specific fans when your printer has multiple cooling fans, using the P parameter to specify the fan number.
Consider implementing progressive fan speeds for bridging sections using temporary speed increases. For example:
M106 S255 ; Full fan speed for bridge
G4 P5000 ; Wait 5 seconds
M106 S192 ; Return to 75% speed
Remember to test these custom cooling profiles with small test prints before applying them to larger projects, as optimal settings can vary depending on your filament and printer configuration.
Real-World Cooling Solutions
Budget-Friendly Improvements
Improving your 3D printer’s cooling doesn’t always require expensive upgrades. One of the most cost-effective solutions is printing a better fan duct design, which can significantly improve airflow around your prints. Many free designs are available on platforms like Thingiverse and PrintableModels, requiring only the filament cost to produce.
For enhanced cooling performance on a budget, consider adding a second 4010 fan, which typically costs under $10. These fans can be wired in parallel with your existing setup and provide additional cooling capacity without requiring complex modifications. Some makers even repurpose old computer fans, though you’ll need to ensure proper voltage compatibility.
Another affordable upgrade is installing fan finger guards ($2-3 each) to protect both the fans and your fingers while maintaining optimal airflow. For those printing with materials requiring higher temperatures, aluminum foil tape ($5-10 per roll) can be used to create heat shields around the hot end, directing cooling air more effectively to your prints.
Cable management solutions like mesh sleeves or spiral wrap ($5-8) can help organize cooling system wiring while preventing interference with moving parts. Additionally, printing temperature towers (using existing filament) can help calibrate optimal cooling settings without any additional hardware costs.
These budget-friendly improvements can deliver professional-level cooling performance without breaking the bank, making them perfect starting points for enhancing print quality.
High-Performance Setups
For demanding prints that require exceptional cooling performance, dual-fan setups have become the gold standard in the 3D printing community. These configurations typically employ two or more cooling fans strategically positioned to provide comprehensive part cooling from multiple angles. A popular arrangement involves mounting 5015 blower fans on opposite sides of the print head, creating a symmetrical cooling pattern that ensures uniform material solidification.
Advanced cooling ducts, often designed through computational fluid dynamics (CFD) analysis, can dramatically improve airflow efficiency. The Hero Me Gen7 and Hydra Fan System are excellent examples of high-performance cooling solutions that support multiple fan configurations and are compatible with various hotend setups. These systems often incorporate features like adjustable airflow direction and modular design for easy customization.
For ultra-high-temperature materials like PEEK or ULTEM, specialized enclosed chambers with temperature control and filtered ventilation become essential. These setups not only manage part cooling but also maintain optimal ambient conditions for consistent layer adhesion. When combined with proper post-processing techniques, these advanced cooling configurations can produce professional-grade parts with exceptional surface finish and mechanical properties.
Remember to consider your printer’s firmware settings when implementing high-performance cooling, as proper fan speed control and temperature management are crucial for achieving optimal results with advanced cooling setups.
Effective cooling in 3D printing is crucial for achieving high-quality prints and ensuring consistent results. Throughout this guide, we’ve explored various cooling solutions and strategies that can significantly improve your printing outcomes. The key takeaway is that proper cooling isn’t just an optional enhancement – it’s a fundamental requirement for successful 3D printing.
For beginners, we recommend starting with the stock cooling fan and gradually upgrading to a more efficient solution as you gain experience. The dual-fan setup offers an excellent balance of performance and cost-effectiveness for most users. Remember to regularly maintain your cooling system by checking fan operations and cleaning dust buildup to ensure optimal performance.
When implementing cooling solutions, focus first on proper part cooling fan positioning and airflow direction. Start with a fan speed of 100% for PLA and adjust based on your specific needs. For advanced materials like PETG or ABS, remember to reduce fan speeds and consider using an enclosure to maintain stable printing temperatures.
Software optimization is equally important – take time to experiment with cooling settings in your slicer software. Monitor your first few layers closely and adjust fan speeds accordingly. For best results, create material-specific cooling profiles and document what works best for your particular setup.
By implementing these cooling strategies and maintaining your system properly, you’ll significantly reduce common printing issues like stringing, warping, and poor bridging performance.