

Transform your Raspberry Pi projects into virtual environments using VirtualBox, enabling risk-free development and testing without physical hardware constraints. This powerful combination lets developers simulate Pi environments for interactive art installations, software testing, and educational purposes—all from the comfort of their main computer.
VirtualBox emulation offers a cost-effective solution for experimenting with different Raspberry Pi OS distributions, testing configurations, and prototyping applications before deployment to actual hardware. While virtual environments can’t perfectly replicate GPIO functionality or real-time hardware interactions, they provide an invaluable platform for code development, system configuration, and initial debugging phases.
By leveraging VirtualBox’s snapshot feature, developers can create multiple system states, test various scenarios, and rapidly iterate through development cycles without risking physical hardware damage. This approach particularly benefits teams working on distributed projects, enabling standardized development environments and simplified collaboration workflows.
The virtual setup serves as an excellent learning tool for newcomers to the Raspberry Pi ecosystem, allowing risk-free experimentation with system configurations and software installations. Whether you’re developing applications, testing deployment scenarios, or exploring Pi OS features, VirtualBox provides a reliable foundation for your Raspberry Pi development journey.
Setting Up VirtualBox for Raspberry Pi Emulation
Required Software and System Specifications
To successfully run Raspberry Pi in VirtualBox, you’ll need to ensure your system meets specific requirements and has the necessary software installed. First, download VirtualBox (version 6.1 or higher) from the official Oracle website. Your host computer should have at least 4GB of RAM, though 8GB is recommended for smooth operation. Allocate a minimum of 2GB RAM and 8GB storage space for the virtual machine.
You’ll also need to download a compatible Raspberry Pi operating system image, such as Raspberry Pi OS (formerly Raspbian). For the best experience, ensure your computer has a 64-bit processor with virtualization technology enabled in BIOS/UEFI settings. Intel VT-x or AMD-V support is essential for running ARM-based systems.
Additional requirements include:
– A modern CPU (dual-core or better)
– At least 20GB free disk space
– Updated graphics drivers
– Internet connection for downloading updates
– Administrator privileges on your host system
These specifications represent the minimum requirements. For development work or running multiple virtual machines, consider using more powerful hardware configurations.
Installing and Configuring VirtualBox
To get started with VirtualBox for your Raspberry Pi projects, you’ll need to follow a systematic installation and configuration process. First, download the latest version of VirtualBox from the official Oracle website. The installation process is straightforward – simply run the installer and follow the on-screen prompts, accepting the default options unless you have specific requirements.
After installation, launch VirtualBox and click the “New” button to create a virtual machine. Name your VM something descriptive like “RaspberryPi_VM” and select “Linux” as the type. For the version, choose “Other Linux (32-bit)” or “Other Linux (64-bit)” depending on your Raspberry Pi OS image.
Configure your virtual machine with appropriate resources: allocate at least 2GB of RAM and create a virtual hard disk with a minimum of 8GB storage. For optimal performance, enable PAE/NX in the processor settings and activate 3D acceleration in the display settings if you plan to run a desktop environment.
Before starting your VM, you’ll need to configure networking. In the VM settings, under the “Network” tab, set the adapter to “Bridged” mode to allow your virtual Raspberry Pi to connect to your local network. This setting enables easier access to your VM from other devices.
Important settings to check include:
– USB Controller: Enable USB 2.0 or 3.0 support
– Display: Set video memory to at least 128MB
– Storage: Attach your Raspberry Pi OS image to the virtual optical drive
– System: Enable I/O APIC for better hardware support
With these configurations in place, your VirtualBox environment will be ready to run Raspberry Pi OS or other compatible Linux distributions.
Creating Interactive Visual Projects in Virtual Environment
Graphics and Display Configuration
Configuring graphics settings in VirtualBox for your Raspberry Pi virtual machine is crucial for optimal performance and usability. Start by allocating sufficient video memory in the VM settings – a minimum of 16MB is recommended, but 32MB or higher will provide better performance for graphical applications.
To enable hardware acceleration, check the “Enable 3D Acceleration” option in the Display settings of your virtual machine. However, note that 3D acceleration support may be limited compared to a physical Raspberry Pi. For the best display experience, set the display resolution to match your host machine’s resolution or choose a standard resolution like 1920×1080.
If you encounter screen scaling issues, adjust the “Scale Factor” setting in VirtualBox’s Display settings. A scale factor of 100% usually works best for most setups, but you can adjust this based on your monitor’s resolution and personal preference.
For remote desktop access, consider enabling the VirtualBox Remote Desktop (VRDP) feature. This allows you to access your virtual Raspberry Pi’s desktop from other devices on your network, which can be particularly useful for headless setups or remote development.
Remember that graphics performance in a virtualized environment may not match that of physical hardware, especially for GPU-intensive applications or high-resolution displays. For graphics-heavy projects, testing on actual Raspberry Pi hardware is recommended.
Installing Visual Software Tools
To create visual installations in your VirtualBox Raspberry Pi environment, you’ll need to install several essential software tools. Start by installing Processing, a flexible visual development environment perfect for creating Processing text art projects and interactive displays. Access the terminal and use the command “sudo apt-get install processing” to install it.
Next, install Python’s visual libraries, particularly pygame and PIL (Python Imaging Library), which are crucial for image manipulation and display. These can be installed using pip: “pip install pygame pillow”. For more advanced audio-visual projects, consider installing OpenCV using “sudo apt-get install python3-opencv”.
Don’t forget to install a reliable IDE for coding. Visual Studio Code is highly recommended due to its extensive support for Python and Processing. Install it through the command “sudo apt-get install code”. For testing your visual installations, make sure to enable 3D acceleration in VirtualBox settings and allocate sufficient video memory to your virtual machine.
Finally, install Git to manage your project versions effectively: “sudo apt-get install git”. This will help you track changes and collaborate with others on visual projects.
Testing and Debugging Tips
When testing your Raspberry Pi projects in VirtualBox, following systematic debugging strategies can save you considerable time and frustration. Start by enabling detailed logging in VirtualBox through Machine > Settings > Display > Recording. This helps track visual glitches or performance issues that might affect your kinetic art installations and other visual projects.
Keep a close eye on CPU and memory usage through VirtualBox’s performance monitors. If you notice sluggish performance, consider allocating more resources to your virtual machine or reducing the display resolution. For graphics-intensive projects, enabling 3D acceleration can significantly improve performance, though be aware this might not perfectly mirror real Raspberry Pi hardware behavior.
Use VirtualBox’s snapshot feature before making significant changes to your configuration. This allows you to quickly revert to a working state if something goes wrong. When debugging, start with the simplest possible configuration and add complexity gradually. This makes it easier to identify exactly where issues arise.
Remember to test your projects under different screen resolutions and color depths, as these can vary significantly between virtual and physical environments. Finally, maintain a debugging log to track what works and what doesn’t – this documentation will prove invaluable when transitioning your project to actual Raspberry Pi hardware.
Limitations and Solutions
Performance Considerations
When running Raspberry Pi OS in VirtualBox, performance optimization is crucial for a smooth experience. The virtual machine typically requires at least 2GB of RAM and 2 CPU cores to run effectively, though allocating more resources will yield better results. Keep in mind that the emulated ARM architecture on x86 systems naturally results in slower performance compared to native hardware.
To maximize performance, consider these key adjustments: Enable 3D acceleration in VirtualBox settings when available, allocate at least 64MB of video memory, and ensure virtualization technology (VT-x/AMD-V) is enabled in your system’s BIOS. Using fixed-size virtual hard drives instead of dynamically allocated ones can also improve disk performance.
Network performance may be affected when using VirtualBox’s default NAT adapter. Switching to Bridged Adapter mode often provides better network throughput, especially for network-intensive applications. If you experience sluggish graphics, reducing the display resolution within the virtual machine can help maintain smoother operation.
Remember that certain CPU-intensive tasks, like video processing or complex calculations, may run significantly slower in the virtual environment. For development and testing purposes, this performance difference is usually acceptable, but for production deployments, using physical Raspberry Pi hardware is recommended.
Hardware Integration Challenges
While VirtualBox offers a convenient way to experiment with Raspberry Pi OS, it’s important to understand its hardware emulation limitations. One of the main challenges is the lack of GPIO pin support, which means you can’t directly test hardware projects that require physical pin connections. This limitation affects projects involving sensors, LED displays, or other hardware components that typically connect to the Raspberry Pi’s GPIO pins.
USB device passthrough can also be problematic. While VirtualBox supports USB device forwarding, some Raspberry Pi-specific hardware might not be recognized properly or may require additional configuration. This includes certain HATs, cameras, and specialized USB peripherals designed for the Pi.
Network emulation presents another hurdle. While basic networking works well, some network-dependent projects might behave differently in the virtual environment compared to physical hardware. This is particularly noticeable in projects requiring specific network interfaces or wireless capabilities.
Performance differences should also be considered. The virtual environment may run slower or faster than actual Pi hardware, depending on your host system’s capabilities. This can affect timing-sensitive applications and real-time processing tasks.
To work around these limitations, consider using VirtualBox for initial development and testing, then moving to physical hardware for final implementation and hardware-specific features. This hybrid approach allows you to leverage the convenience of virtualization while ensuring your project works as intended on actual Raspberry Pi hardware.
Moving from Virtual to Physical Setup
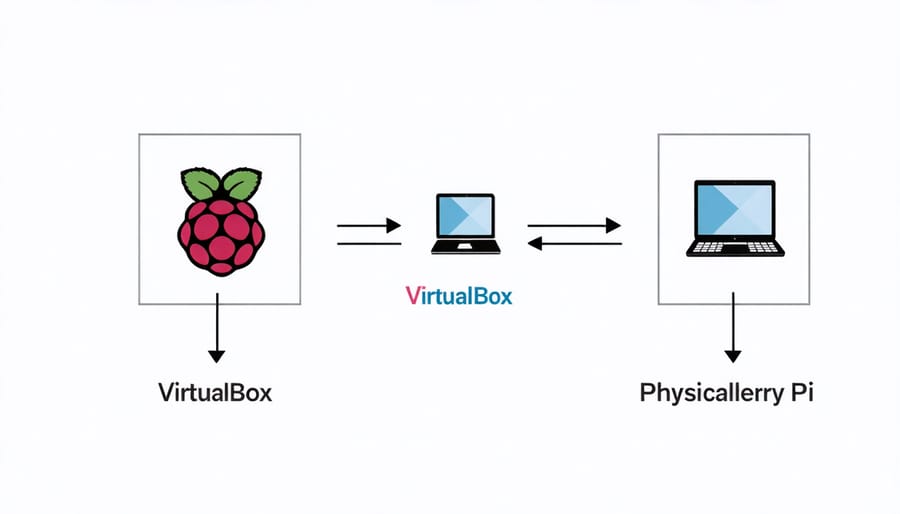
After testing and perfecting your Raspberry Pi project in VirtualBox, transitioning to physical hardware requires careful planning and execution. This move from virtual to real hardware is crucial for achieving the full potential of your physical installation setup.
Start by documenting your virtual environment’s configuration, including all installed packages, dependencies, and custom settings. Create a comprehensive list of these components to ensure nothing is overlooked during the transfer. Export your project files and configurations to an external storage device or cloud service for easy access.
When setting up your physical Raspberry Pi, begin with a fresh installation of the same operating system version you used in VirtualBox. This ensures compatibility and minimizes potential conflicts. Install all required packages and dependencies in the same order as your virtual setup, referring to your documentation.
Consider these key transition steps:
– Verify hardware requirements match your virtual configuration
– Test network configurations and port mappings
– Update file paths to reflect the physical system
– Check for hardware-specific drivers and requirements
– Validate peripheral connections and interfaces
Remember that some aspects of your project might behave differently on physical hardware. Performance could vary, and you may need to optimize your code for the actual Raspberry Pi’s capabilities. Monitor resource usage carefully during the initial deployment and make necessary adjustments.
Test each component thoroughly after migration, paying special attention to timing-sensitive operations and hardware interactions. If issues arise, consult your virtual environment for comparison and troubleshooting. Keep both environments running parallel initially until you’re confident in the physical setup’s stability.
VirtualBox offers a practical and cost-effective solution for developing and testing Raspberry Pi visual installations, providing developers and enthusiasts with a flexible environment to experiment without physical hardware constraints. By virtualizing Raspberry Pi systems, users can rapidly prototype their projects, test different configurations, and debug potential issues before deploying to actual hardware.
The ability to create multiple virtual instances simultaneously enables parallel testing of different OS versions and project variations, significantly speeding up the development process. This approach is particularly valuable for educational settings, where students can safely experiment without the risk of damaging physical equipment, and for developers working on complex visual installations that require extensive testing.
While virtual environments can’t completely replace physical Raspberry Pi hardware, especially for projects requiring specific GPIO interactions or real-world sensor data, they serve as an excellent platform for initial development, software testing, and learning. The combination of VirtualBox’s snapshot feature and the ability to easily share virtual machines makes it an invaluable tool for collaboration and documentation in team projects.
Looking ahead, as virtualization technology continues to evolve, we can expect even better performance and compatibility for Raspberry Pi emulation in VirtualBox, making it an increasingly powerful tool for visual installation development. For beginners and experienced developers alike, mastering VirtualBox for Raspberry Pi development opens up new possibilities for creative and technical exploration.