


Transform ordinary materials into mesmerizing interactive art installations using simple electronics and creative engineering. Combine servo motors, Arduino boards, and recycled materials to create sculptures that respond to motion, light, or sound. Master fundamental kinetic mechanisms like cranks, cams, and linkages to bring your artistic vision to life through mechanical movement.
Kinetic art merges engineering precision with artistic expression, enabling makers to craft dynamic sculptures that captivate viewers through perpetual motion. Whether you’re building wind-powered garden sculptures or sophisticated motorized installations, the DIY approach puts professional-grade kinetic art within reach. This guide walks through essential components, proven construction techniques, and programming basics to help you create stunning moving artworks that blur the line between technology and creativity.
From selecting the right motors and power sources to designing balanced mechanical systems, we’ll explore practical solutions that transform static ideas into dynamic realities. Learn how to prototype effectively, troubleshoot common issues, and scale your projects from tabletop pieces to gallery-worthy installations.
Essential Components for Your Kinetic Art Project
Hardware Setup
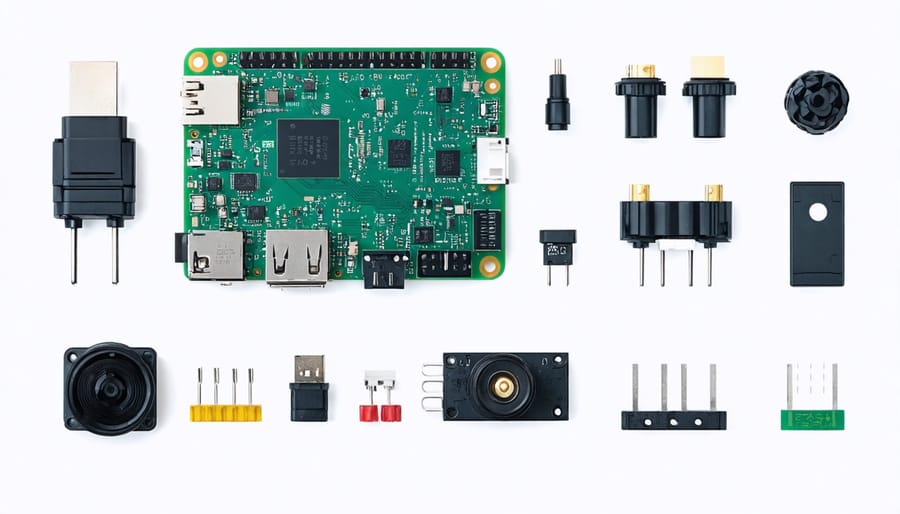
To bring your kinetic art project to life, you’ll need several key components. Start with the motion elements: a stepper motor (NEMA 17 recommended) for precise movements, and standard servo motors (SG90) for simpler rotations. For mounting, gather aluminum brackets, M3 screws and nuts, and a sturdy base plate (acrylic or wood, minimum 30x30cm).
Essential electronics include a Raspberry Pi (3B+ or newer), a motor driver board (L298N or DRV8825), and a 12V power supply rated at 2A minimum. For interactive features, add a PIR motion sensor and an optional ultrasonic distance sensor (HC-SR04).
Connection materials needed: jumper wires (male-to-male and female-to-male), a breadboard for prototyping, and heat shrink tubing for wire protection. Don’t forget basic tools like a screwdriver set, wire strippers, and a soldering iron with lead-free solder.
For the artistic elements, collect lightweight materials such as balsa wood, thin aluminum sheets, or 3D-printed parts. These will form your moving sculptures while minimizing motor strain. Optional but recommended items include cable management solutions and rubber feet for stability.
Software Requirements
To create interactive kinetic art with your Raspberry Pi, you’ll need several key software components. The primary requirement is the Processing programming environment, which offers an intuitive platform for creating visual and interactive artworks. You’ll also need Python 3.x installed on your Raspberry Pi, as many motor control libraries depend on it.
Essential libraries include RPi.GPIO for basic GPIO control, and either the Adafruit_MotorHAT or the PCA9685 library for servo and stepper motor control. If you’re working with LED elements, the rpi_ws281x library is recommended for controlling addressable LED strips.
For creating more complex motion patterns, consider installing NumPy for mathematical calculations and OpenCV if you plan to incorporate computer vision elements. The PIGPIOd daemon is also helpful for precise timing control of your kinetic elements.
Make sure to update your Raspberry Pi OS to the latest version before installing these components, as newer versions often include important compatibility improvements and security updates.
Building Your First Motion-Responsive Sculpture
Physical Assembly
Begin by mounting your motor to a sturdy base plate using the mounting brackets and screws. Ensure the motor shaft is perfectly vertical by using a small level tool. Next, attach your chosen gear or pulley to the motor shaft, securing it with the set screw provided. If your design includes multiple moving parts, now’s the time to assemble your gear train or linkage system.
Connect your structural elements – rods, arms, or panels – to create the moving components of your sculpture. Use bearings at pivot points to reduce friction and ensure smooth movement. If you’re incorporating counterweights, attach them now to balance your mechanism. Remember to leave enough clearance between moving parts to prevent binding.
For mounting artwork elements, use lightweight materials like acrylic or thin aluminum that won’t strain your motor. Secure all connections with lock washers or thread-locking compound to prevent loosening from vibration. Test the mechanism by hand before connecting power to verify free movement throughout the full range of motion.
Finally, create a protective enclosure or frame that allows visibility while keeping fingers away from moving parts. Use clear acrylic panels or wire mesh as needed. Double-check all fasteners are tight and add cable management solutions to keep wires organized and away from moving components.
Wiring and Electronics
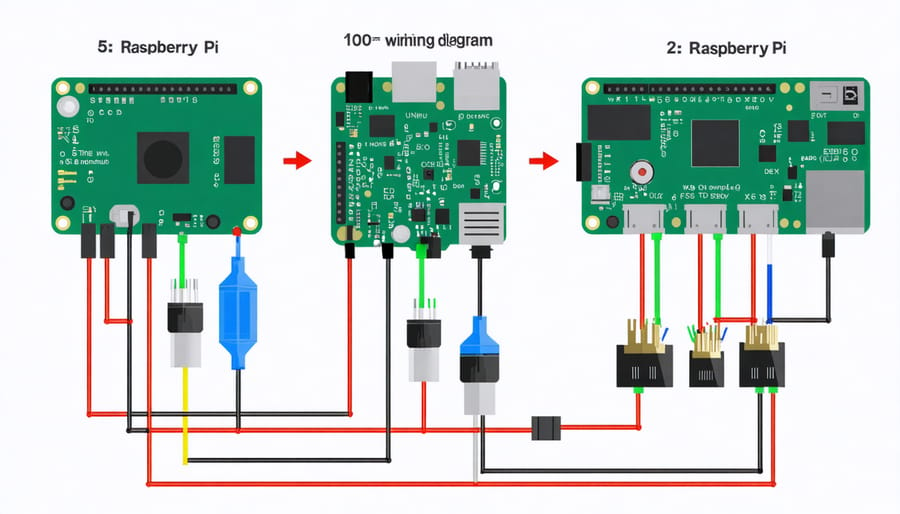
The heart of your kinetic art project lies in properly connecting your motors and sensors to the Raspberry Pi. Start by connecting your stepper or servo motors to the GPIO pins using a motor driver board – this prevents damage to your Pi by managing the higher power requirements of the motors. For basic setups, the L298N motor driver works well and connects to pins 17, 18, 22, and 23 on your Pi.
For motion detection, connect a PIR sensor to GPIO pin 4 and ground, adding a pull-up resistor between the signal and power pins. Light sensors (photoresistors) can be integrated using an analog-to-digital converter (ADC) like the MCP3008, as the Pi doesn’t have built-in analog inputs.
Power management is crucial – use a dedicated 5V power supply for your motors, keeping them separate from the Pi’s power source to prevent interference. Connect all ground pins together to ensure proper circuit completion.
For safety, add a 100μF capacitor across your motor power supply to smooth out voltage spikes, and include diodes across each motor to protect against back-EMF. Double-check all connections before powering up, and use heat shrink tubing or electrical tape to insulate exposed wires.
Remember to test each component individually before final assembly, using simple Python scripts to verify proper functionality. This methodical approach helps isolate and fix any issues early in the build process.
Programming Motion Patterns
Programming motion patterns for your kinetic art project starts with understanding basic movement scripts. Begin with simple patterns like oscillation, where your elements move back and forth in a steady rhythm. Using Python, you can create this effect with a few lines of code that control your servo motors:
“`python
while True:
angle = math.sin(time.time()) * 45 + 90
servo.angle = angle
time.sleep(0.01)
“`
For more complex movements, consider implementing wave patterns, circular motions, or random movements. A popular approach is to combine multiple motion types:
“`python
def wave_pattern():
for pos in range(0, 180, 5):
servo.angle = pos
time.sleep(0.1)
for pos in range(180, 0, -5):
servo.angle = pos
time.sleep(0.1)
“`
You can create more engaging patterns by coordinating multiple servos. Try programming different timing delays between movements or implementing acceleration/deceleration effects. Remember to include error handling in your code to prevent motor strain:
“`python
try:
while True:
wave_pattern()
except KeyboardInterrupt:
servo.angle = 90 # Return to neutral position
“`
Start with these basic patterns and gradually experiment with more complex combinations as you become comfortable with the programming concepts.
Advanced Features and Interactions
Motion Sensors and Triggers
Adding motion sensors to your kinetic art installation transforms it from a static display into an engaging, interactive experience. Through proper interactive sensor integration, your creation can respond dynamically to viewer presence and movement.
The PIR (Passive Infrared) sensor is an excellent starting point, detecting body heat and motion within a configurable range. Connect it to your Raspberry Pi’s GPIO pins and use simple Python code to trigger your artwork’s movements. For more precise interaction, ultrasonic sensors like the HC-SR04 can measure exact distances, allowing your sculpture to respond differently based on how close viewers are.
Accelerometers and gyroscopes offer another dimension of interaction, enabling your art to react to tilting or orientation changes. The MPU-6050 sensor is particularly versatile, combining both functions in a single component that’s easy to interface with the Pi.
For advanced installations, consider incorporating multiple sensor types:
– IR break-beam sensors for targeted activation points
– Light-dependent resistors (LDRs) for ambient light response
– Sound sensors for audio-reactive movements
– Capacitive touch sensors for direct interaction
When positioning sensors, consider both practical and artistic aspects. Hide them discretely within your installation while maintaining optimal detection angles. Use weatherproof sensors for outdoor installations, and implement debouncing in your code to prevent false triggers that could make your artwork’s movements appear erratic.
Remember to include status LEDs or subtle indicators so viewers understand how to interact with your piece, making the experience more intuitive and engaging.
Light and Sound Integration
Elevating your kinetic art project with light and sound elements can transform it from a purely mechanical display into an immersive sensory experience. LED strips are particularly effective for adding dynamic lighting effects, with addressable RGB strips offering precise control over individual pixels. Consider using the WS2812B LED strips, which are easily programmable through the Raspberry Pi’s GPIO pins using libraries like rpi_ws281x.
For sound integration, the Raspberry Pi’s built-in audio output can be enhanced with small amplifiers and speakers. USB audio adapters provide better sound quality and additional output options. Popular choices include the MAX98357 I2S amplifier breakout board, which delivers clear audio while maintaining a compact form factor.
Synchronizing movement with light and sound creates compelling advanced installation techniques that respond to various triggers. Motion sensors like the PIR HC-SR501 can detect viewer presence, while microphones can make your creation react to ambient sounds. The Raspberry Pi’s processing power allows you to implement complex patterns and responses using Python scripts.
Consider incorporating distance sensors (HC-SR04) to create proximity-based interactions, where lights and sounds change as viewers approach or move around your piece. For weather-resistant outdoor installations, ensure all electronic components are properly sealed in waterproof enclosures, and use IP65-rated LED strips and weatherproof speakers.
Remember to balance the visual and auditory elements – subtle changes often create more engaging experiences than overwhelming displays. Start with simple effects and gradually build complexity as you become more comfortable with the integration process.
Troubleshooting and Optimization
When creating kinetic art, you may encounter several common challenges that can affect your project’s performance. Here’s how to identify and resolve these issues effectively.
If your sculpture’s movements appear jerky or inconsistent, first check all mechanical connections. Loose screws, misaligned gears, or friction points can disrupt smooth motion. Apply appropriate lubricant to moving parts and ensure all joints are properly tightened without being overly rigid.
Balance issues often plague kinetic sculptures. If your piece wobbles or seems unstable, redistribute weight by adjusting counterweights or repositioning components. Remember that even small imbalances can become magnified during movement, so take time to fine-tune the equilibrium.
Motor problems frequently arise in motorized pieces. If your motor runs hot or makes unusual sounds, verify it’s not overtaxed by the weight load. Consider upgrading to a higher-torque motor or reducing the resistance in your mechanism. Always ensure proper voltage supply and clean electrical connections.
For weather-resistant outdoor installations, protect electrical components with waterproof housings and use rust-resistant materials for moving parts. Regular maintenance with appropriate protective coatings will extend your artwork’s lifespan.
To optimize performance, start with low speeds and gradually increase them while monitoring for vibrations or strain. Document successful settings and configurations for future reference. Consider adding shock absorbers or dampeners if movements are too harsh.
Sound issues can be addressed by checking for loose components, applying felt padding at contact points, or adjusting the timing of moving parts. Sometimes, incorporating the sound into your design can enhance the artistic experience rather than trying to eliminate it completely.
If using electronic controls, ensure all sensors are properly calibrated and protected from interference. Regular software updates and backup systems can prevent unexpected behavior and protect your work from malfunctions.
Remember that kinetic art often requires ongoing adjustments and maintenance. Keep spare parts on hand and establish a regular maintenance schedule to preserve your piece’s optimal performance.
The world of kinetic art DIY offers endless possibilities for creativity and innovation. As you continue your journey, consider exploring advanced projects like sound-reactive sculptures, wind-powered installations, or light-interactive pieces. Join online maker communities on platforms like Instructables and Hackster.io to share your creations and learn from fellow artists. Local makerspaces and art collectives often host workshops and collaborative events where you can expand your skills and network with other kinetic artists. Remember to document your projects and experiments – your journey might inspire others to start their own kinetic art adventures. Whether you’re building simple mobiles or complex motorized sculptures, the maker community is here to support your creative exploration. Keep experimenting, learning, and pushing the boundaries of what’s possible with motion and art.