


Transform your Raspberry Pi into a powerful home automation controller using free, open-source software that rivals commercial smart home systems. Whether you want to build a smart home hub from scratch or enhance your existing setup, modern Raspberry Pi automation platforms like Home Assistant, OpenHAB, and Domoticz offer enterprise-grade features without monthly fees or cloud dependencies.
These versatile solutions enable seamless integration with popular smart devices, custom sensor networks, and automated routines – all managed through an intuitive web interface accessible from anywhere. With just a Raspberry Pi, power supply, and microSD card, you can create a centralized command center that handles everything from lighting and climate control to security cameras and energy monitoring.
The real power comes from the vibrant open-source community constantly developing new integrations and sharing innovative automation recipes. Whether you’re a beginner looking to automate basic tasks or an advanced user seeking complete home control, Raspberry Pi provides the perfect foundation for building a truly customized smart home system that puts you in complete control of your living space.
Popular Home Automation Software Platforms
Home Assistant
Home Assistant stands out as one of the most powerful and versatile home automation platforms available for Raspberry Pi. This open-source solution offers comprehensive IoT integration capabilities, supporting over 1,000 different devices and services right out of the box.
Setting up Home Assistant on your Raspberry Pi is straightforward. You can choose between Home Assistant Operating System (recommended for beginners) or the Docker container installation method. The OS version provides a complete, ready-to-use system that automatically handles updates and maintenance tasks.
The platform’s intuitive web interface allows you to create automation rules through a simple point-and-click interface, while more advanced users can leverage YAML configuration files for complex scenarios. Home Assistant excels at device discovery, automatically detecting compatible smart devices on your network and suggesting appropriate integrations.
Key features include customizable dashboards, energy monitoring, presence detection, and robust security options. The built-in automation engine supports conditional logic, time-based triggers, and device state changes, making it possible to create sophisticated home automation scenarios without programming knowledge.
The active community contributes regular updates and custom integrations, ensuring compatibility with the latest smart home devices. For those looking to expand functionality, Home Assistant supports add-ons like Node-RED for visual automation programming and AppDaemon for Python-based automation scripts.

OpenHAB
OpenHAB (Open Home Automation Bus) stands out as a powerful and flexible home automation platform that works exceptionally well with Raspberry Pi. This open-source solution supports over 2,000 devices and protocols, making it a versatile choice for creating a comprehensive smart home system.
Setting up OpenHAB on your Raspberry Pi begins with installing the OpenHABian image, a pre-configured distribution specifically designed for Raspberry Pi. Once installed, you can access the web-based interface to start configuring your smart devices and creating automation rules.
One of OpenHAB’s greatest strengths is its vendor-neutral approach, allowing you to integrate devices from different manufacturers seamlessly. The platform uses “bindings” to connect with various smart devices, from lighting and thermostats to security cameras and media players.
The rule engine in OpenHAB enables complex automation scenarios using simple “if-this-then-that” logic or more advanced scripting options. You can create custom dashboards to monitor and control your devices, and even access your system remotely through the OpenHAB Cloud connector.
For beginners, OpenHAB offers a paper UI that simplifies the initial setup process, while advanced users can leverage text-based configuration files for more precise control.
Node-RED
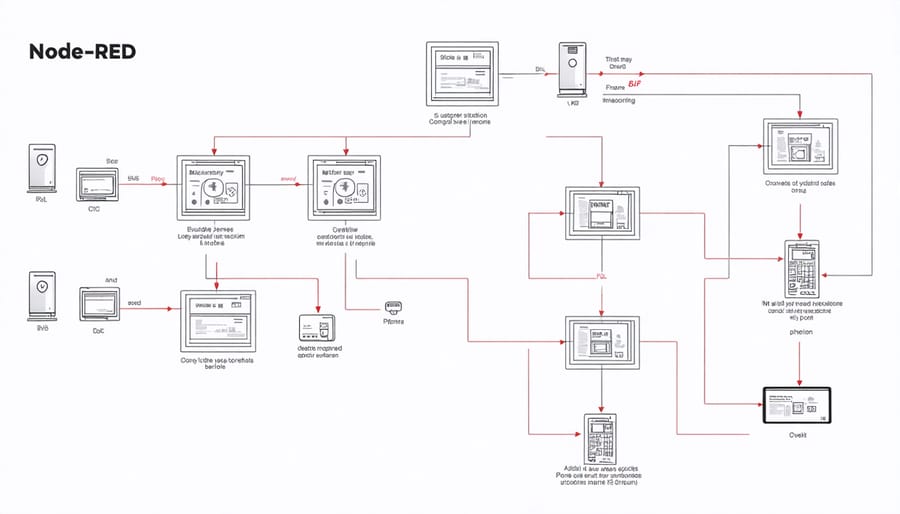
Node-RED offers a refreshingly visual approach to home automation programming, making it an excellent choice for both beginners and experienced users. Using a flow-based programming interface, you can create automation rules by simply dragging and connecting nodes on a canvas, similar to building with digital building blocks.
The platform’s strength lies in its extensive library of pre-built nodes that handle everything from basic GPIO control to complex IoT protocols. You can easily integrate smart devices, create time-based triggers, and establish conditional logic without writing traditional code. For instance, you might create a flow that turns on your lights when motion is detected, or send push notifications when your garden’s soil moisture drops below a certain level.
What makes Node-RED particularly valuable for Raspberry Pi home automation is its ability to interface with various protocols and services. Whether you’re working with MQTT, HTTP requests, or WebSocket connections, Node-RED can handle it all through its intuitive interface. The platform also supports custom JavaScript functions for more advanced implementations, allowing your automation system to grow alongside your skills and needs.
Setting Up Your First Automation Project
Hardware Requirements
To get started with Raspberry Pi home automation, you’ll need several essential components. At the core, you’ll require a Raspberry Pi board (preferably Model 3B+ or newer) for optimal performance. A reliable power supply rated at 5V/2.5A and a microSD card (16GB minimum) are crucial for stable operation.
For connectivity, ensure you have an Ethernet cable or built-in Wi-Fi capability. A case for your Raspberry Pi is recommended to protect the board and improve heat dissipation. Basic peripherals like a USB keyboard, mouse, and HDMI monitor are needed for initial setup, though they can be removed once your automation system is running.
Optional but highly useful accessories include:
– GPIO breakout board and jumper wires
– USB flash drive for backup
– Compatible sensors (temperature, motion, humidity)
– Smart plugs or relay modules
– Camera module for surveillance
– Real-time clock module
– UPS HAT for power backup
Remember to choose high-quality components from reputable manufacturers to ensure system reliability and longevity. Most components are readily available and relatively affordable, making Raspberry Pi home automation an accessible project for most enthusiasts.

Software Installation and Configuration
Before diving into home automation with your Raspberry Pi, you’ll need to set up the basic software foundation. Start by downloading the latest version of Raspberry Pi OS (formerly Raspbian) from the official website. Using the Raspberry Pi Imager tool, flash the OS onto your microSD card – this process typically takes about 10-15 minutes.
Once your Pi boots up, connect it to your network and run the following commands in the terminal to ensure your system is up to date:
“`
sudo apt update
sudo apt upgrade
“`
Next, you’ll want to install the core home automation platform. Home Assistant is a popular choice and can be installed using Docker. First, install Docker by running:
“`
curl -fsSL https://get.docker.com -o get-docker.sh
sudo sh get-docker.sh
“`
Then, create a Home Assistant container:
“`
docker run -d \
–name homeassistant \
–privileged \
–restart=unless-stopped \
-v /home/pi/homeassistant:/config \
-p 8123:8123 \
ghcr.io/home-assistant/home-assistant:stable
“`
After installation, access the Home Assistant interface by navigating to http://[your-pi-ip]:8123 in your web browser. Complete the initial setup wizard to create your admin account and begin adding devices.
For enhanced security, enable SSH with a strong password or key-based authentication, and consider setting up a static IP address for your Raspberry Pi to ensure consistent access to your home automation system.
Advanced Integration Tips
Adding Smart Devices
Integrating smart devices with your Raspberry Pi home automation system requires careful planning and proper configuration. Start by connecting smart sensors that match your automation goals, such as temperature sensors, motion detectors, or light sensors. Most devices communicate through standard protocols like Z-Wave, Zigbee, or Wi-Fi, so ensure you have the appropriate USB dongles or HAT extensions installed.
When adding new devices, always check compatibility with your chosen automation software. Popular options like Home Assistant and OpenHAB maintain extensive databases of supported devices. Start with one device type and test thoroughly before expanding your setup. This approach helps troubleshoot issues more effectively and ensures stable operation.
Remember to secure your devices by changing default passwords and regularly updating firmware. For Wi-Fi devices, create a separate network segment to isolate them from your main network. Consider using MQTT brokers for efficient device communication and reduced network traffic.
Document each device’s configuration settings, including IP addresses, authentication credentials, and communication protocols. This documentation proves invaluable when maintaining or expanding your system later. For optimal performance, position devices within recommended range of your Raspberry Pi or network repeaters, and monitor their connection stability through your automation software’s dashboard.
Creating Custom Automations
Creating custom automations on your Raspberry Pi allows you to tailor your home automation system to your specific needs. Start by learning basic Python scripting, as it’s the most commonly used language for Raspberry Pi automation. Focus on simple tasks first, like controlling LED lights or reading sensor data, before moving on to more complex projects.
To develop effective automation scripts, break down your desired automation into smaller, manageable components. For example, if you want to create a smart lighting system, separate the tasks into motion detection, time-based scheduling, and light control functions. This modular approach makes your code easier to maintain and troubleshoot.
Consider using existing libraries like GPIO Zero for hardware control and Schedule for time-based operations. These libraries simplify common tasks and provide reliable foundations for your custom automations. Store your automation scripts in a version control system like Git to track changes and maintain backups.
Test your automations thoroughly in a controlled environment before implementing them in your daily routine. Create conditional statements to handle potential errors and edge cases. For instance, include fail-safes in your heating automation to prevent overheating if sensors malfunction.
Document your code well with comments explaining the purpose of each function and any specific requirements. This documentation will prove invaluable when you need to modify or debug your automations later. Share your successful automation scripts with the Raspberry Pi community to help others and gather feedback for improvements.
Security Considerations
When implementing home automation with a Raspberry Pi, security should be your top priority. Your system potentially controls various aspects of your home, making it crucial to protect against unauthorized access and potential threats. Start by implementing strong password policies and regularly updating them. Avoid using default credentials, and ensure all passwords are complex, combining uppercase and lowercase letters, numbers, and special characters.
Enable two-factor authentication whenever possible, particularly for remote access to your system. When setting up secure IoT protocols, always use encrypted communications like HTTPS, SSL/TLS, or SSH. This prevents attackers from intercepting commands or sensitive data transmitted between devices.
Keep your Raspberry Pi’s operating system and all installed software up to date. Regular updates patch security vulnerabilities and protect against known exploits. Consider setting up automatic updates, but schedule them during off-peak hours to avoid disrupting your automation routines.
Network security is equally important. Place your home automation system behind a firewall and consider creating a separate VLAN for your IoT devices. This segregation helps contain potential security breaches and protects your main network. If remote access is necessary, use a VPN rather than exposing your system directly to the internet.
Regularly backup your configuration files and automation scripts. Store these backups securely, preferably encrypted and off-site. This ensures quick recovery in case of system failure or security incidents.
Monitor your system’s logs for unusual activity and set up alerts for suspicious behavior. Consider implementing rate limiting for login attempts and maintaining a whitelist of approved IP addresses for remote access. Finally, conduct periodic security audits to identify and address potential vulnerabilities in your setup.
Embarking on your Raspberry Pi home automation journey opens up a world of possibilities for creating a smarter, more efficient living space. Throughout this guide, we’ve explored various software options that can transform your humble Pi into a powerful home automation hub. From user-friendly platforms like Home Assistant and OpenHAB to versatile solutions like Node-RED and Domoticz, there’s a perfect fit for every skill level and requirement.
Remember that successful home automation isn’t just about choosing the right software—it’s about starting small, learning through experimentation, and gradually expanding your system as your confidence grows. Whether you’re looking to control lights, monitor temperature, enhance security, or create complex automation scenarios, the Raspberry Pi provides an affordable and flexible foundation for your smart home aspirations.
Don’t be intimidated by the learning curve. The home automation community is incredibly supportive, with extensive documentation, forums, and resources available to help you overcome challenges. Start with simple projects, like controlling a single smart bulb or monitoring room temperature, then build upon your successes to create more sophisticated automation systems.
Take the first step today by selecting a software platform that matches your technical comfort level and desired features. With dedication and creativity, you’ll soon discover the satisfaction of crafting personalized solutions that make your home work smarter, not harder.