


Updating your Raspberry Pi’s kernel unlocks enhanced system stability, improved hardware compatibility, and the latest security patches – essential steps to optimize Raspberry Pi performance. The kernel upgrade process requires careful attention to detail but delivers significant benefits for both everyday users and advanced developers. Whether you’re running a home media server, educational projects, or IoT applications, a current kernel ensures your Pi operates at peak efficiency while maintaining robust security protocols. This guide walks through the complete kernel update process, from basic command-line operations to advanced configuration options, helping you maximize your Raspberry Pi’s potential without risking system stability.
Modern kernels introduce critical features like improved USB handling, enhanced GPIO performance, and better power management – capabilities that transform your Pi from a basic single-board computer into a powerful, versatile computing platform. Follow our detailed instructions to safely navigate the update process and unlock your device’s full capabilities.
Why Update Your Raspberry Pi Kernel?
Performance Benefits
Updating your Raspberry Pi’s kernel can lead to significant performance improvements across various aspects of your system. Users typically experience faster boot times, with some reporting up to 20% reduction in startup duration. The updated kernel optimizes CPU scheduling and memory management, resulting in smoother multitasking capabilities and reduced lag during resource-intensive operations.
Modern kernel versions introduce better power management features, which can be particularly beneficial when combined with advanced cooling solutions. This translates to more stable overclocking potential and improved thermal management. Users often notice enhanced USB device handling, faster network throughput, and better compatibility with newer hardware peripherals.
Graphics performance also sees improvement through updated GPU drivers and better hardware acceleration support. For example, video playback becomes smoother, and applications utilizing the GPU run more efficiently. Additionally, newer kernels often include security patches and bug fixes that not only protect your system but also contribute to overall stability and responsiveness.
Security Enhancements
Keeping your Raspberry Pi’s kernel up-to-date is crucial for maintaining a secure operating system. Recent kernel updates have introduced several important security enhancements, including improved memory protection mechanisms and patch mitigations for known vulnerabilities. The latest updates incorporate fixes for common exploit vectors and strengthen the system’s resistance to potential security threats.
Key security improvements include enhanced USB device validation, strengthened network stack protection, and better handling of system permissions. These updates also address critical vulnerabilities like buffer overflow issues and potential privilege escalation exploits that could compromise your Pi’s security.
The kernel now features improved firewall capabilities and better isolation between processes, making it more difficult for malicious code to affect your system. Additionally, recent updates have implemented stronger encryption protocols and patched several CVE (Common Vulnerabilities and Exposures) issues reported by the security community.
For those running IoT projects or network-connected devices, these security enhancements are particularly important as they help protect against emerging threats and unauthorized access attempts. Regular kernel updates ensure your Raspberry Pi remains protected against the latest security challenges.
Preparing for the Kernel Update
Backup Your System
Before proceeding with any kernel updates, it’s crucial to create a complete backup of your system. This safety measure ensures you can restore your Raspberry Pi to its previous state if anything goes wrong during the update process.
Start by shutting down your Raspberry Pi properly. Once powered off, remove the microSD card and insert it into your computer using a card reader. For Windows users, download and use Win32 Disk Imager to create an exact copy of your SD card. Linux and Mac users can use the ‘dd’ command in terminal to accomplish the same task.
Create a new image file with a descriptive name like “raspberrypi_backup_date.img” and select your SD card as the source. The backup process might take 15-30 minutes depending on your card size. Store this backup file in a safe location on your computer.
If you regularly upgrade your Raspberry Pi OS, maintaining current backups is especially important. Consider also backing up your essential configuration files and personal data separately for added security.
Check Current Kernel Version
Before proceeding with any kernel updates, it’s essential to know your current kernel version. There are several simple commands you can use in the terminal to check this information.
The quickest way is to open a terminal window and type:
“`
uname -r
“`
This command displays your current kernel version number. For a more detailed view of your kernel information, you can use:
“`
cat /proc/version
“`
This shows additional details about your kernel, including the compiler version used to build it.
For a comprehensive system overview, including kernel information, use:
“`
hostnamectl
“`
If you want to see all installed kernel versions on your Raspberry Pi, enter:
“`
dpkg –list | grep linux-image
“`
It’s good practice to note down your current kernel version before attempting any updates. This information becomes invaluable if you need to troubleshoot or revert changes later. Remember that different Raspberry Pi models may run different kernel versions, so ensure you’re comparing against the correct reference when checking for updates.

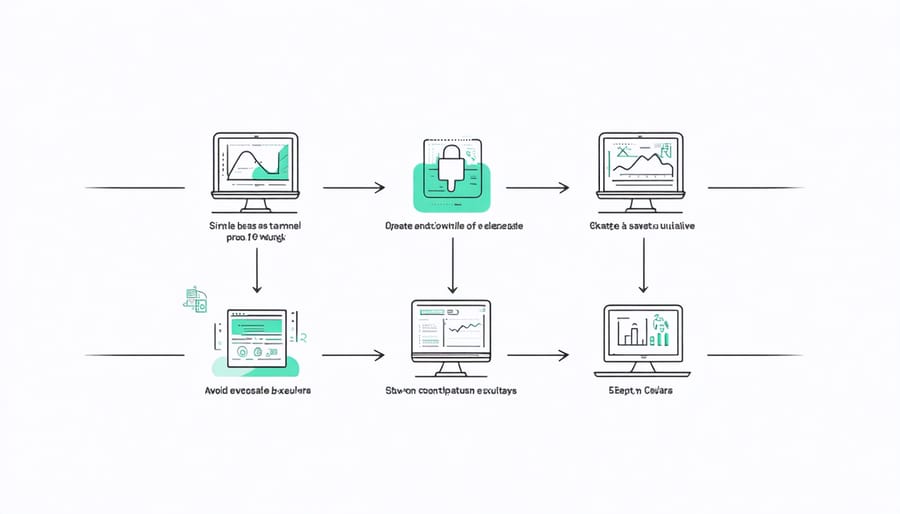
Step-by-Step Kernel Update Process
Using rpi-update
The rpi-update tool is the official method provided by the Raspberry Pi Foundation for updating your device’s kernel and firmware. Before proceeding, it’s important to note that this tool should only be used when specifically recommended, as it installs testing firmware that might not be fully stable.
To use rpi-update, first ensure your Raspberry Pi is connected to the internet. Open the terminal and run:
sudo rpi-update
The system will prompt you to confirm the update. Type ‘Y’ and press Enter to proceed. The update process typically takes 5-10 minutes, depending on your internet speed and the size of the update.
During the update, you’ll see progress information displayed in the terminal. Don’t interrupt the process, as this could leave your system in an unstable state. Once complete, you’ll need to reboot your Raspberry Pi:
sudo reboot
After rebooting, your Raspberry Pi will be running the latest kernel version. To verify the update, you can check your kernel version by running:
uname -r
Keep in mind that rpi-update pulls the latest firmware directly from GitHub, which means you’re getting the newest – but potentially experimental – versions. For most users, the standard apt update and upgrade process is recommended unless you specifically need the latest kernel features.
Manual Kernel Compilation
For users seeking complete control over their Raspberry Pi’s kernel, manual compilation offers the most flexibility. This advanced method allows you to customize kernel features and optimize performance for specific use cases. Before starting, ensure you have at least 10GB of free space and the necessary build tools installed.
Begin by cloning the Raspberry Pi kernel repository:
“`bash
git clone –depth=1 https://github.com/raspberrypi/linux
cd linux
“`
Next, install the required dependencies:
“`bash
sudo apt-get install build-essential bc bison flex libssl-dev
“`
Configure your kernel by running:
“`bash
make bcm2711_defconfig # For Pi 4
# Or
make bcmrpi3_defconfig # For Pi 3
“`
You can further customize the kernel configuration using:
“`bash
make menuconfig
“`
Compile the kernel and modules:
“`bash
make -j4 zImage modules dtbs
sudo make modules_install
sudo cp arch/arm/boot/dts/*.dtb /boot/
“`
This process is particularly useful when you want to create a custom Raspberry Pi image with specific kernel features. While time-consuming, manual compilation provides the highest level of customization and control over your system’s performance.
Verifying the Update
After completing the kernel update, it’s crucial to verify that the process was successful. Open a terminal window and enter the command `uname -r` to display your current kernel version. The output should match the version number of the kernel you just installed.
You can also use `cat /proc/version` for more detailed information about your kernel, including compilation date and version specifics. Compare this information with your previous kernel version to confirm the update.
To ensure the new kernel is functioning properly, perform these quick checks:
1. Reboot your Raspberry Pi and verify it starts up normally
2. Check that all your essential services are running with `systemctl status`
3. Test any critical applications or hardware components
4. Monitor the system logs for any unusual errors using `dmesg`
5. Verify that your network connections are working correctly
If you notice any performance improvements or changes in system behavior, make a note of them. This information can be valuable for future reference or troubleshooting.
For additional verification, you can use the command `dpkg -l | grep linux-image` to list all installed kernel versions on your system. The most recent version should appear at the top of the list with “ii” status, indicating it’s properly installed.
Troubleshooting Common Issues
Boot Problems
After updating your Raspberry Pi’s kernel, you might encounter some boot-related issues. Don’t worry – these are usually straightforward to resolve. If your Pi fails to boot after the update, start by checking the power supply, as insufficient power can prevent proper startup. Ensure you’re using a reliable power adapter rated at least 2.5A for newer Pi models.
If the power supply isn’t the issue, try booting from a backup SD card if you created one before the update. This can help determine whether the problem is kernel-related or caused by corrupted files. For cases where the screen remains blank during boot, connect your Pi to a different display or try pressing Ctrl+Alt+F1 to switch to a terminal interface.
Sometimes, incompatible configurations in the config.txt file can cause boot failures. Access this file by mounting the SD card on another computer and check for any recent changes. Remove any custom overclocking settings or experimental configurations temporarily to test if they’re causing the issue.
If these steps don’t resolve the problem, you can try forcing a specific kernel version by editing the cmdline.txt file. As a last resort, consider reverting to the previous kernel version using the backup you created before the update. Remember that keeping detailed notes during the update process can make troubleshooting much easier if problems arise.

Recovery Options
If your Raspberry Pi encounters issues during a kernel update, don’t panic. Here are several proven recovery methods to get your system back on track.
First, try booting from a previous kernel version. When your Pi starts up, hold down the Shift key to access the boot menu. Select an older kernel version from the list to boot your system. If successful, you can then attempt the update process again.
For cases where the Pi won’t boot at all, connect your SD card to another computer using a card reader. Mount the boot partition and locate the config.txt file. Add the line “kernel=kernel.img” to force the system to use the default kernel.
If these steps don’t work, you can perform a backup kernel restore. Every time you update your kernel, Raspberry Pi automatically creates a backup in the /boot directory. Access this directory and rename the backup file (usually ending in .bak) to kernel.img to restore the previous working version.
As a last resort, you can reinstall the kernel packages using a rescue system. Boot your Pi from a fresh Raspbian image on a separate SD card, mount your original system’s partition, and use the package manager to reinstall the kernel packages.
Remember to always maintain backups of your system before performing kernel updates to simplify the recovery process if needed.
Updating your Raspberry Pi’s kernel is a crucial maintenance task that can significantly enhance your device’s performance, security, and compatibility with new hardware. Throughout this guide, we’ve covered various methods to safely update your kernel, from the straightforward apt-get update approach to more advanced manual compilation techniques.
Remember to always back up your data before starting any kernel update process. This simple precaution can save you hours of frustration if something goes wrong. It’s also essential to verify your current kernel version before and after the update to ensure the process was successful.
For most users, the recommended approach is to use the standard update method through the package manager, as it provides the best balance of safety and effectiveness. However, advanced users who need specific kernel features or customizations can benefit from manual compilation methods.
Key best practices to keep in mind include:
– Regularly checking for kernel updates
– Maintaining adequate free space on your SD card
– Following official Raspberry Pi documentation
– Testing critical applications after updates
– Keeping a backup of your working kernel configuration
By following these guidelines and choosing the appropriate update method for your skill level, you can maintain an optimized and secure Raspberry Pi system. Don’t hesitate to seek help from the Raspberry Pi community if you encounter any issues during the update process.