

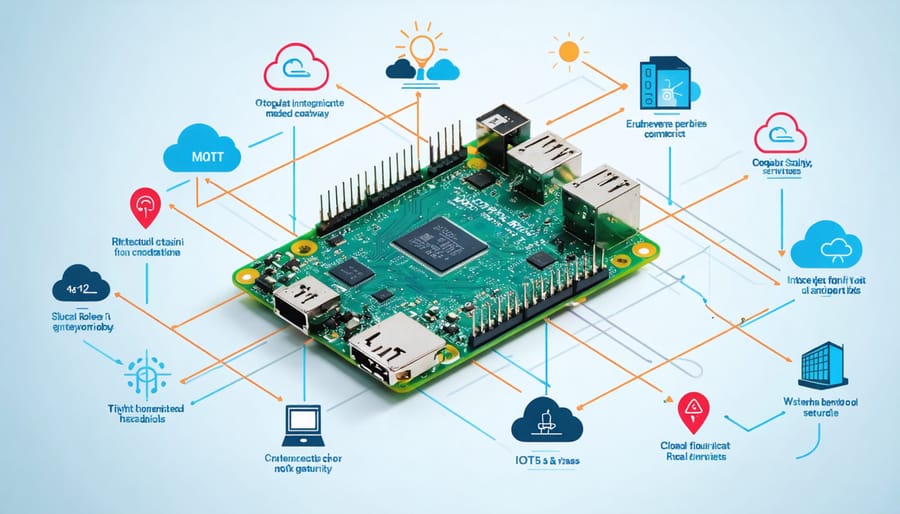
Transform your Raspberry Pi into a powerful IoT gateway by leveraging its compact form factor and robust networking capabilities. As the bridge between local sensors and cloud services, a properly configured Pi enables seamless IoT integration while maintaining security and performance. Modern protocols like MQTT, CoAP, and HTTP/2 run efficiently on the Pi’s ARM architecture, making it an ideal choice for both home automation enthusiasts and industrial IoT deployments. Whether connecting smart home devices or industrial sensors, the Pi’s flexibility, combined with its active community support and extensive documentation, provides a cost-effective solution for managing diverse IoT ecosystems. This guide explores the essential steps to configure your Raspberry Pi as a reliable IoT gateway, focusing on security best practices, performance optimization, and scalable architecture design.
Why Choose Raspberry Pi as Your IoT Gateway
Hardware Capabilities
The Raspberry Pi’s hardware capabilities make it an ideal choice for IoT gateway applications. At its core, the latest Raspberry Pi 4 features a quad-core ARM Cortex-A72 processor running at 1.5GHz, coupled with options for 2GB, 4GB, or 8GB of RAM. This processing power is more than sufficient for handling multiple IoT device connections and data processing tasks simultaneously.
For connectivity, the Pi offers versatile options essential for IoT operations. Built-in dual-band Wi-Fi (2.4GHz and 5GHz) enables wireless connections to both IoT devices and the internet, while Bluetooth 5.0 supports low-energy device communications. The presence of two USB 3.0 ports and two USB 2.0 ports allows for additional connectivity modules or sensors.
Storage capabilities are flexible, with the microSD card slot supporting cards up to 512GB for the operating system and data storage. For expanded storage needs, the USB 3.0 ports can connect to external SSDs or hard drives. The Gigabit Ethernet port ensures reliable, high-speed network connectivity, making it perfect for scenarios requiring stable data transmission between IoT devices and cloud services.
These hardware features, combined with low power consumption and compact size, position the Raspberry Pi as a cost-effective yet powerful IoT gateway solution.

Cost-Effectiveness and Scalability
One of the most compelling aspects of using a Raspberry Pi as an IoT gateway is its exceptional cost-effectiveness. With prices starting around $35-45 for basic models, it represents a fraction of the cost compared to commercial IoT gateways that can run into hundreds or thousands of dollars. This affordability extends to scaling your IoT infrastructure, as multiple Raspberry Pis can be deployed across different locations while maintaining a reasonable budget.
The platform’s scalability is equally impressive, thanks to its virtual machine capabilities and containerization support. You can easily expand your IoT network by adding more sensors and devices without significant hardware investments. The Raspberry Pi’s robust GPIO pins and various communication interfaces (I2C, SPI, UART) allow for connecting multiple types of sensors and actuators simultaneously.
Moreover, the vast ecosystem of compatible hardware and software solutions makes it simple to scale your IoT implementation based on your growing needs. Whether you’re starting with a small home automation project or expanding to a larger industrial application, the Raspberry Pi’s flexibility and cost-effectiveness make it an ideal choice for IoT gateway solutions.

Setting Up Modern IoT Protocols
MQTT Implementation
Setting up MQTT on your Raspberry Pi is essential for building powerful IoT applications. Follow these steps to configure your MQTT broker:
First, install the Mosquitto MQTT broker:
“`bash
sudo apt update
sudo apt install -y mosquitto mosquitto-clients
“`
Enable Mosquitto to start automatically on boot:
“`bash
sudo systemctl enable mosquitto
“`
Create a configuration file at /etc/mosquitto/conf.d/default.conf:
“`bash
listener 1883
allow_anonymous false
password_file /etc/mosquitto/passwd
“`
Set up user authentication for security:
“`bash
sudo mosquitto_passwd -c /etc/mosquitto/passwd yourusername
“`
Restart the Mosquitto service:
“`bash
sudo systemctl restart mosquitto
“`
Test your MQTT broker by opening two terminal windows. In the first window, subscribe to a test topic:
“`bash
mosquitto_sub -h localhost -t test/topic -u yourusername -P yourpassword
“`
In the second window, publish a message:
“`bash
mosquitto_pub -h localhost -t test/topic -m “Hello MQTT” -u yourusername -P yourpassword
“`
If configured correctly, you’ll see the message appear in the subscriber window. Your MQTT broker is now ready to handle IoT device communications securely.
CoAP Integration
CoAP (Constrained Application Protocol) is a lightweight protocol ideal for IoT devices with limited resources. To integrate CoAP into your Raspberry Pi gateway, you’ll first need to install the necessary libraries. Open your terminal and run:
“`
sudo pip3 install aiocoap
“`
This installs the Python implementation of CoAP, which is perfect for our gateway setup. For testing purposes, you can also install a CoAP client:
“`
sudo pip3 install coapthon3
“`
Create a basic CoAP server script on your Raspberry Pi:
“`python
from aiocoap import *
import asyncio
async def handle_coap(request):
payload = b”Hello CoAP!”
return Message(payload=payload)
def main():
root = Resource()
root.add_resource([‘test’], handle_coap)
return root
if __name__ == “__main__”:
asyncio.run(main())
“`
This creates a simple CoAP endpoint that responds with “Hello CoAP!” when accessed. To enhance your gateway’s functionality, you can add resource discovery and implement specific endpoints for different IoT devices.
CoAP uses UDP port 5683 by default. Ensure this port is open in your firewall settings:
“`
sudo ufw allow 5683/udp
“`
For security, consider implementing DTLS (Datagram Transport Layer Security) when deploying in production environments. CoAP’s lightweight nature makes it perfect for battery-powered sensors and constrained IoT devices while maintaining efficient communication with your Raspberry Pi gateway.
WebSocket Support
WebSocket technology enables real-time, two-way communication between your Raspberry Pi gateway and connected IoT devices, making it an essential feature for modern IoT applications. Unlike traditional HTTP requests, WebSocket connections remain open, reducing overhead and allowing instant data transmission in both directions.
To implement WebSocket support on your Raspberry Pi gateway, you can use popular libraries like ‘ws’ for Node.js or ‘websockets’ for Python. Here’s a basic example using Python:
“`python
import asyncio
import websockets
async def handle_device(websocket, path):
while True:
data = await websocket.recv()
# Process received data
await websocket.send(“Acknowledged”)
start_server = websockets.serve(handle_device, “0.0.0.0”, 8765)
asyncio.get_event_loop().run_until_complete(start_server)
asyncio.get_event_loop().run_forever()
“`
This setup allows your IoT devices to establish persistent connections with the gateway, enabling features like real-time sensor data streaming, instant command execution, and device status updates. The low latency of WebSocket communications makes it perfect for time-sensitive applications like home automation or industrial monitoring.
Remember to implement proper error handling and reconnection logic in your WebSocket implementation to ensure reliable communication between devices and your gateway. Additionally, consider using secure WebSocket (WSS) for encrypted communications when dealing with sensitive data.
Security Considerations
Authentication and Encryption
When implementing a Raspberry Pi as an IoT gateway, security should be your top priority. Start by setting up strong authentication mechanisms using certificates and tokens. SSL/TLS encryption is essential for all communications between your IoT devices and the gateway, as well as between the gateway and cloud services.
Configure your Raspberry Pi to use public key authentication instead of password-based login. Generate SSH keys and disable password authentication in the SSH configuration file. This significantly reduces the risk of unauthorized access to your gateway.
For IoT device communication, implement the MQTT protocol with TLS encryption. Use the Mosquitto broker with TLS certificates to ensure all data transmissions are encrypted. Create a Certificate Authority (CA) on your Raspberry Pi to manage device certificates, and ensure each connected device has its unique certificate for authentication.
Consider implementing a firewall using ‘ufw’ (Uncomplicated Firewall) to control incoming and outgoing traffic. Only open the necessary ports for your IoT communications, typically ports 8883 for secure MQTT and 22 for SSH access.
For additional security, set up fail2ban to protect against brute force attacks, and regularly update your system packages using ‘apt update’ and ‘apt upgrade’ commands. Remember to change default credentials and regularly rotate encryption keys to maintain a robust security posture.
Access Control and Monitoring
When setting up your Raspberry Pi as an IoT gateway, implementing robust access control and monitoring systems is crucial for maintaining security and operational visibility. Start by creating separate user accounts with appropriate permissions for different access levels, using the built-in Linux user management system.
Enable SSH key-based authentication instead of password-based login for remote access, and configure fail2ban to protect against brute force attacks. Set up a firewall using UFW (Uncomplicated Firewall) to control incoming and outgoing traffic, only allowing necessary ports and services.
For monitoring, implement Prometheus and Grafana to track system metrics like CPU usage, memory consumption, and network traffic. Set up automated alerts for critical events using tools like Nagios or custom scripts with email notifications. Consider using log management solutions like rsyslog or logrotate to maintain system logs effectively.
Install ModSecurity as a web application firewall if you’re exposing web interfaces, and regularly audit your access logs for suspicious activities. Enable two-factor authentication for administrative access where possible, and maintain an up-to-date list of authorized devices and users.
Remember to regularly backup your access control configurations and monitoring settings. Schedule periodic security audits to review access patterns and adjust permissions as needed. This comprehensive approach ensures your IoT gateway remains secure while providing necessary visibility into its operation.
Performance Optimization
Resource Management
When using a Raspberry Pi as an IoT gateway, effective resource management is crucial for maintaining optimal performance. The Pi’s limited resources need to be carefully monitored and managed to handle multiple device connections and sensor integration techniques efficiently.
To manage CPU usage, implement process prioritization using nice values and monitor system load with tools like top or htop. Set up automatic alerts when CPU usage exceeds 80% to prevent system slowdowns. For memory management, regularly check available RAM using free -h and consider enabling swap space, though this should be used sparingly to prevent SD card wear.
Network resource management is equally important. Use tools like iftop to monitor network traffic and implement QoS (Quality of Service) rules to prioritize critical IoT device communications. Consider setting up bandwidth limits for less critical devices to ensure essential services remain responsive.
For optimal performance:
– Use systemd-journald with storage=volatile to reduce logging overhead
– Implement automatic cleanup scripts for temporary files
– Configure device polling intervals based on priority
– Use lightweight protocols like MQTT for device communication
– Enable hardware watchdog to automatically restart if the system becomes unresponsive
Regular monitoring and adjustment of these resources will ensure your IoT gateway operates reliably even under heavy load conditions.
Scaling Strategies
As your Raspberry Pi IoT gateway handles more connected devices and increased data traffic, implementing effective scaling strategies becomes crucial. One practical approach is to utilize load balancing techniques by distributing device connections across multiple worker processes. You can achieve this using Node-RED’s multi-threading capabilities or by implementing a PM2 process manager to handle concurrent connections efficiently.
Data buffering and message queuing systems like MQTT QoS levels help manage sudden spikes in device communications. Consider implementing a message broker like Mosquitto with persistent storage to ensure reliable data handling even during high-traffic periods. For larger deployments, you can set up a cluster of Raspberry Pis using Docker Swarm or Kubernetes, allowing for horizontal scaling as your IoT network grows.
Database optimization is equally important. Instead of storing all data locally, implement a hybrid storage strategy using local caching for recent data while periodically uploading historical data to cloud storage. This approach helps maintain responsive performance while preventing storage bottlenecks on your Pi.
Monitor your gateway’s resource usage using tools like htop or Prometheus to identify potential bottlenecks early. Set up automated alerts for CPU, memory, and storage thresholds, allowing you to take proactive measures before performance issues impact your IoT network. Remember to regularly review and optimize your gateway’s configuration as your device network expands.
The Raspberry Pi’s versatility as an IoT gateway opens up endless possibilities for home automation, data collection, and device management. By following the setup guidelines and security measures outlined in this article, you can create a reliable and efficient IoT hub for your projects. Remember to regularly update your system, monitor performance metrics, and implement robust security practices to maintain a stable gateway environment.
To get started with your own IoT gateway, begin by gathering the necessary hardware components and following our configuration steps. As you become more comfortable with the basic setup, experiment with different protocols and expand your network of connected devices. Join the vibrant Raspberry Pi community to share experiences and learn from others working on similar projects.
Whether you’re a hobbyist or planning to implement this solution in a professional setting, the Raspberry Pi continues to prove itself as a cost-effective and powerful IoT gateway platform.