

Transform your Raspberry Pi into a powerful deep learning platform by combining TensorFlow Lite, OpenCV, and edge computing capabilities. The compact $35 computer packs enough processing power to run real-time object detection, facial recognition, and natural language processing models – making it perfect for prototyping AI applications without expensive hardware.
Recent optimizations in deep learning frameworks have dramatically improved inference speeds on the Pi’s ARM processor. Deploy pre-trained models to analyze camera feeds, sensor data, or audio inputs with latency as low as 200ms. Whether you’re building a smart security camera, an intelligent IoT device, or an educational AI project, the Pi provides an accessible entry point into practical machine learning.
This guide will walk you through setting up a complete deep learning environment on your Raspberry Pi, from installing the essential libraries to deploying your first neural network. We’ll explore proven techniques for maximizing performance, managing memory constraints, and implementing popular computer vision and NLP applications – all while keeping power consumption and costs minimal.
The intersection of affordable computing and artificial intelligence has created unprecedented opportunities for makers and developers. With the right optimization strategies and architectural choices, your Raspberry Pi can become a capable deep learning edge device ready for real-world AI applications.
Setting Up Your Raspberry Pi for Deep Learning
Required Hardware and Software Stack
To get started with deep learning on Raspberry Pi, you’ll need both essential hardware components and compatible software frameworks. The basic hardware requirements include:
• Raspberry Pi 4 (minimum 4GB RAM recommended)
• MicroSD card (32GB or larger)
• Power supply (3A USB-C)
• Display, keyboard, and mouse for initial setup
• Optional hardware optimization add-ons for enhanced performance
For the software stack, several deep learning frameworks have been optimized for Raspberry Pi’s ARM architecture:
TensorFlow Lite: Google’s lightweight version of TensorFlow, specifically designed for edge devices. It’s the most popular choice for Raspberry Pi deep learning projects due to its optimized performance and extensive community support.
PyTorch: While slightly more resource-intensive, PyTorch can run on Raspberry Pi and offers excellent flexibility for custom neural network development.
OpenCV: Essential for computer vision projects, OpenCV works seamlessly with both TensorFlow Lite and PyTorch.
Additional software requirements include:
• Raspberry Pi OS (formerly Raspbian)
• Python 3.7 or newer
• pip package manager
• NumPy and SciPy libraries
Remember that while Raspberry Pi can handle deep learning tasks, it’s important to optimize your models for edge computing to ensure smooth performance. Pre-trained models often work best for resource-constrained environments.
Optimizing Your Pi for Maximum Performance
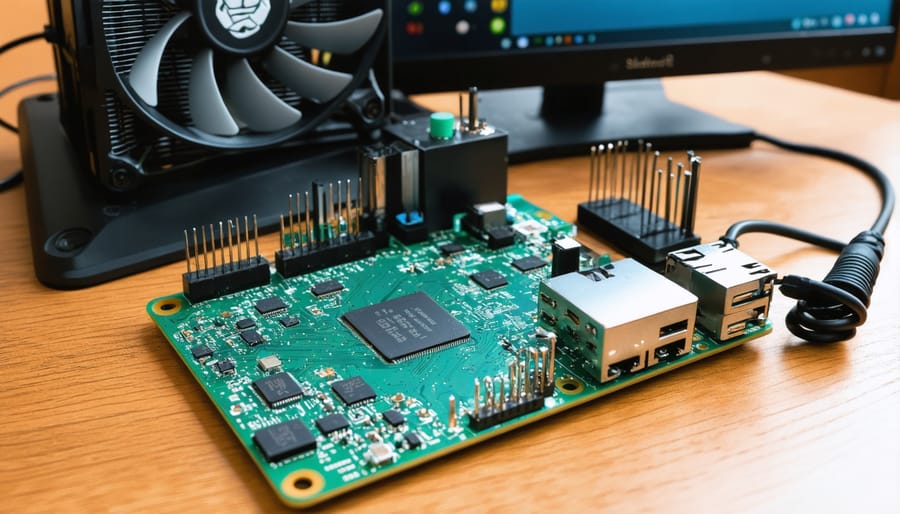
To get the most out of your Raspberry Pi for deep learning applications, several key optimizations can significantly improve performance. Start by overclocking your Pi safely – the Raspberry Pi 4 can typically handle a modest overclock to 2.0 GHz without stability issues. Access this through the raspi-config utility and gradually increase the frequency while monitoring temperatures.
Memory management is crucial. Allocate more RAM to the CPU rather than the GPU by adjusting the gpu_mem setting in /boot/config.txt to around 128MB, as deep learning tasks are primarily CPU-intensive. Consider adding a high-quality heatsink and fan to maintain optimal operating temperatures, as thermal throttling can severely impact performance.
Use a high-speed Class 10 microSD card or, better yet, boot from a USB 3.0 SSD for faster data access and reduced bottlenecks. Clean up your system by removing unnecessary services and background processes. Use the command ‘sudo systemctl disable’ for services you don’t need.
Optimize your deep learning framework installation. If using TensorFlow Lite, ensure you’re running the latest version optimized for ARM processors. Consider using quantization techniques to reduce model size and improve inference speed. Monitor your system’s performance using tools like htop and vcgencmd measure_temp to ensure your optimizations are effective.
Remember to maintain adequate power supply – use a high-quality 3A power adapter to prevent power-related performance issues.
Popular Deep Learning Frameworks for Raspberry Pi
TensorFlow Lite Implementation
TensorFlow Lite offers a lightweight solution for running machine learning models on Raspberry Pi. Let’s walk through the setup process and basic implementation steps.
First, ensure your Raspberry Pi’s operating system is up to date by running:
“`bash
sudo apt-get update
sudo apt-get upgrade
“`
Install the required dependencies for TensorFlow Lite:
“`bash
sudo apt-get install python3-pip
pip3 install tflite-runtime
“`
For optimal performance, it’s recommended to create a virtual environment:
“`bash
python3 -m venv tflite_env
source tflite_env/bin/activate
“`
Once the environment is set up, you can download pre-trained TensorFlow Lite models or convert your existing TensorFlow models. For conversion, use the TensorFlow Lite Converter:
“`python
import tensorflow as tf
converter = tf.lite.TFLiteConverter.from_saved_model(‘your_model’)
tflite_model = converter.convert()
“`
To run inference with your TensorFlow Lite model:
“`python
import tflite_runtime.interpreter as tflite
# Load the model
interpreter = tflite.Interpreter(model_path=”model.tflite”)
interpreter.allocate_tensors()
# Get input and output tensors
input_details = interpreter.get_input_details()
output_details = interpreter.get_output_details()
# Process input data
interpreter.set_tensor(input_details[0][‘index’], input_data)
interpreter.invoke()
# Get results
output_data = interpreter.get_tensor(output_details[0][‘index’])
“`
For better performance on Raspberry Pi, consider these optimization tips:
– Use quantized models to reduce memory usage
– Implement batch processing when possible
– Monitor CPU temperature during intensive operations
– Close unnecessary background processes
– Use the latest version of TensorFlow Lite
Remember that while TensorFlow Lite is optimized for edge devices, complex models may still run slower on Raspberry Pi compared to more powerful hardware. Start with simple models and gradually increase complexity based on your Pi’s performance capabilities.
Alternative Frameworks and Their Use Cases
While TensorFlow Lite is popular for Raspberry Pi projects, several alternative frameworks offer unique advantages for different use cases. PyTorch Mobile provides excellent flexibility and an intuitive Python interface, making it ideal for developers who prefer PyTorch’s dynamic computational graphs. It’s particularly useful for computer vision projects and rapid prototyping on the Pi.
OpenVINO, developed by Intel, excels at optimizing neural networks for edge devices like the Raspberry Pi. Its model optimizer can significantly improve inference speed, making it perfect for projects requiring real-time processing and enhanced edge AI capabilities.
For lightweight applications, Edge Impulse offers a user-friendly platform specifically designed for embedded devices. It’s particularly suitable for beginners and those working on sensor-based projects, as it simplifies the entire workflow from data collection to deployment.
ONNX Runtime deserves consideration for cross-platform compatibility. If you’re planning to develop models on different platforms before deploying to your Pi, ONNX provides excellent model portability and optimization features.
Caffe2Go works well for mobile-first applications and can be a good choice when porting existing mobile deep learning projects to the Raspberry Pi. Its lightweight nature makes it suitable for projects with limited computational resources.
When choosing a framework, consider these factors:
– Available RAM and processing power
– Model size and complexity
– Real-time processing requirements
– Development experience level
– Existing codebase compatibility
– Community support and documentation
For beginners, Edge Impulse or TensorFlow Lite might be the best starting point. More experienced developers might prefer PyTorch Mobile or OpenVINO for their advanced features and optimization capabilities.
Practical Deep Learning Projects
Image Recognition System
Building an image recognition system on your Raspberry Pi is one of the most exciting machine learning projects you can undertake. Thanks to pre-trained models like MobileNet and ResNet, you can create a powerful recognition system without extensive training resources.
To get started, you’ll need to install TensorFlow Lite and OpenCV on your Raspberry Pi. These frameworks provide the necessary tools for implementing computer vision and deep learning capabilities. Begin by updating your system and installing the required dependencies:
“`bash
sudo apt-get update
sudo apt-get install python3-pip
pip3 install tensorflow-lite opencv-python
“`
Next, download a pre-trained model. MobileNet is particularly well-suited for Raspberry Pi due to its lightweight nature and efficient performance. You can obtain the model files from TensorFlow’s model zoo, along with the corresponding label file that maps numerical predictions to human-readable categories.
Connect a camera module to your Raspberry Pi and create a Python script that:
1. Initializes the camera
2. Loads the pre-trained model
3. Captures images in real-time
4. Preprocesses the images to match the model’s input requirements
5. Performs inference using the model
6. Displays results with confidence scores
The system can recognize thousands of everyday objects, from household items to animals and vehicles. For optimal performance, ensure good lighting conditions and stable camera positioning. You can enhance the system by:
– Adding a display interface to show results
– Implementing continuous detection for video streams
– Creating custom triggers based on specific object detection
– Storing detection results in a database for analysis
Remember to optimize your code for the Raspberry Pi’s limited resources by using appropriate batch sizes and implementing frame rate controls when necessary.
Voice Assistant Integration
One of the most exciting applications of deep learning on Raspberry Pi is creating a smart AI assistant using voice recognition. By leveraging libraries like TensorFlow Lite and PyTorch, you can build a system that responds to voice commands and performs various tasks.
To get started, you’ll need to install the necessary audio processing libraries such as PyAudio and SpeechRecognition. These tools handle the conversion of audio input into text that your deep learning model can process. The model itself can be trained to recognize specific wake words or commands using techniques like Convolutional Neural Networks (CNNs) or Recurrent Neural Networks (RNNs).
A basic voice recognition system typically follows this workflow:
1. Capture audio input through a USB microphone
2. Convert the audio to text using speech recognition
3. Process the text through your trained model
4. Generate appropriate responses or actions
For optimal performance on the Raspberry Pi’s limited resources, consider using pre-trained models that have been optimized for edge devices. Popular options include the “Whisper” model from OpenAI or Mozilla’s DeepSpeech, both of which can be configured to run efficiently on the Pi.
Remember to implement noise reduction and audio filtering techniques to improve recognition accuracy. You can also enhance the system by adding features like custom wake words, multilingual support, or integration with home automation systems. With some fine-tuning, your Raspberry Pi can become a capable voice-controlled assistant that responds to your commands reliably.
Real-time Object Detection
Real-time object detection with Raspberry Pi offers an exciting way to bring computer vision capabilities to your projects. By combining a Pi Camera module with pre-trained deep learning models, you can create an AI-powered camera system that can identify and track objects in real-time.
To get started, you’ll need to install OpenCV and TensorFlow Lite on your Raspberry Pi. These frameworks provide the necessary tools for implementing object detection algorithms. Popular models like MobileNet SSD and YOLO (You Only Look Once) work well with the Pi’s limited processing power while maintaining reasonable accuracy.
Connect your Pi Camera module to the dedicated camera port and ensure it’s properly enabled in your Raspberry Pi configuration. The Python picamera library makes it easy to capture video streams, which can then be processed frame by frame through your chosen detection model.
For optimal performance, consider these tips:
– Use TensorFlow Lite models optimized for edge devices
– Reduce input image resolution to balance speed and accuracy
– Implement frame skipping if needed to maintain smooth performance
– Enable hardware acceleration when available
Your object detection system can be customized for various applications, such as:
– Home security monitoring
– Wildlife observation
– Inventory management
– Traffic monitoring
– People counting
Remember that while the Raspberry Pi may not match the processing power of high-end systems, it’s perfectly capable of running real-time object detection for many practical applications. Start with simple projects and gradually increase complexity as you become more comfortable with the implementation.
Troubleshooting and Performance Tips
When running deep learning models on your Raspberry Pi, you might encounter several common challenges. Here’s how to address them and optimize your project’s performance.
Memory Management
One of the most frequent issues is running out of memory. To mitigate this:
– Use model quantization to reduce model size
– Implement batch processing for larger datasets
– Clear unused variables and cache regularly
– Consider using swap space, but be aware it may slow down processing
Temperature Control
Raspberry Pi can get hot when running intensive deep learning tasks:
– Install a cooling fan or heatsinks
– Monitor temperature using ‘vcgencmd measure_temp’
– Set up automatic throttling alerts
– Ensure proper ventilation around your device
Slow Processing Speed
To improve processing performance:
– Use optimized frameworks like TensorFlow Lite
– Reduce model complexity where possible
– Overclock your Pi (with caution)
– Close unnecessary background processes
Power-Related Issues
Unstable power can cause crashes:
– Use a high-quality power supply (minimum 2.5A)
– Monitor voltage drops with ‘vcgencmd get_throttled’
– Avoid USB devices that drain power
– Consider a UPS for critical applications
Storage Optimization
To manage limited storage space:
– Use compressed model formats
– Regular cleanup of temporary files
– Store datasets on external storage
– Implement efficient data loading techniques
Network Performance
For networked applications:
– Use local inference when possible
– Implement efficient data transfer protocols
– Consider edge computing approaches
– Cache results when appropriate
By following these troubleshooting tips and implementing the suggested optimizations, you can significantly improve the performance and reliability of your deep learning projects on Raspberry Pi. Remember to regularly monitor system resources and maintain proper documentation of any issues and solutions you encounter.
Deep learning on Raspberry Pi opens up a world of exciting possibilities for makers, hobbyists, and developers alike. Through this exploration, we’ve seen how these affordable single-board computers can handle sophisticated machine learning tasks, from image recognition to natural language processing. While the Raspberry Pi may have its limitations compared to more powerful hardware, its combination of accessibility, low cost, and active community support makes it an ideal platform for learning and experimenting with deep learning concepts.
Remember that success with deep learning projects on Raspberry Pi comes down to optimizing your models, choosing appropriate frameworks, and understanding the hardware constraints. Whether you’re building a smart security camera, creating a voice assistant, or developing an automated plant monitoring system, the skills you’ve learned here provide a solid foundation for your journey.
Don’t be afraid to start small and gradually build up to more complex projects. The deep learning and Raspberry Pi communities are incredibly supportive, offering countless resources, tutorials, and sample projects to help you along the way. So grab your Raspberry Pi, pick a project that excites you, and join the growing community of makers pushing the boundaries of what’s possible with these remarkable devices.