

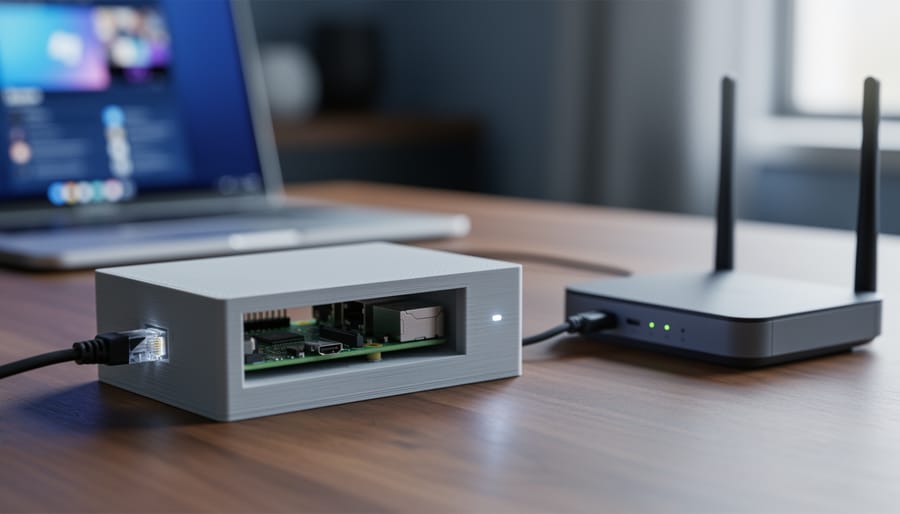
You can build a Raspberry Pi-based timer that logs and limits your online casino sessions in an afternoon with basic Python skills and about $50 in hardware. The project creates a visual dashboard that tracks play duration, enforces self-imposed time limits, and generates accountability reports without requiring server-side access to casino platforms.
This tutorial merges maker culture with digital wellness for moonbet players and other online gaming enthusiasts who want a technical approach to session management. Rather than relying on casino-provided tools or browser extensions that can be easily disabled, you’ll build a dedicated hardware solution that sits between you and your gaming habit.
The system works by monitoring network traffic to detect when you’re connected to gaming sites, tracking elapsed time, and triggering alerts when you approach your preset limits. It logs all sessions to a local database and displays real-time statistics on a small screen. You can configure quiet hours, daily caps, and even cooling-off periods that require physical interaction with the device to override.
This isn’t a silver bullet for problem gambling. Anyone determined to bypass their own safeguards will find a way. But for players who genuinely want accountability and a friction point between impulse and action, a physical device you built yourself creates a different kind of commitment than a browser setting you can dismiss with one click.
The build takes roughly three hours from unboxing to first boot, requires no soldering, and uses all open-source software you can customize to your specific needs.
What You’ll Need: Components and Prerequisites

This project requires modest hardware and basic command-line skills. Budget about four to six hours for the complete build if you’re new to Raspberry Pi, less if you’ve worked with Python and Linux before.
Hardware Components
You’ll need the following physical components to build your session timer:
- Raspberry Pi 3 Model B+ or newer (Zero 2 W works but offers less expansion room)
- MicroSD card, 16GB minimum, with adapter for initial setup
- Official Raspberry Pi power supply or quality USB-C adapter delivering stable 5V/3A
- Ethernet cable for reliable network connection (WiFi works but wired is more dependable)
- LED indicators (two colors recommended: green for active session, red for warning)
- Basic momentary push buttons for manual session start/stop controls
- Breadboard and jumper wires for GPIO connections
- Optional: 16×2 LCD display for countdown visibility, piezo buzzer for audio alerts
If you already own a Raspberry Pi from another project, you can repurpose it. The Pi 4 offers better performance for running additional services like Pi-hole simultaneously, but the Pi 3B+ handles this timer system without issues.
Software Requirements
For the operating system, Raspberry Pi OS Lite (64-bit) provides everything needed without desktop bloat. You’ll install Python 3.9 or later, which comes preinstalled on current images. Essential Python libraries include RPi.GPIO for hardware control, schedule for timing functions, and requests for optional logging features.
Network filtering requires either Pi-hole (if implementing DNS-level blocking) or iptables knowledge for router-based restrictions. Both approaches get covered in the setup section.
Skill Prerequisites
You should be comfortable using the terminal, editing text files with nano or vim, and following technical documentation. Prior Python experience helps but isn’t mandatory since the scripts use straightforward logic. Familiarity with your home network setup matters more, particularly knowing how to access your router’s admin panel or configure DNS settings.
No soldering is required for the basic build, though adding permanent connections improves reliability over breadboard prototypes.
Understanding the System Architecture
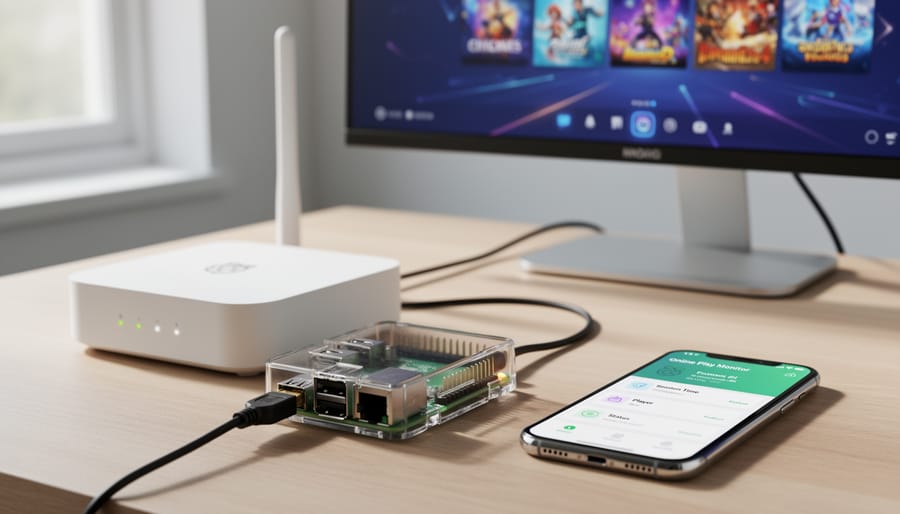
The timer system operates through three interconnected layers that work together to track, alert, and enforce your gaming time boundaries. At its core, the Raspberry Pi runs a Python script that monitors when you access designated casino websites, incrementing an internal counter for the duration of each session. This tracking happens either by monitoring network traffic through your router (if you configure the Pi as a network gateway) or by checking active browser windows if you’re running the script locally on the device you use for gaming.
The alert system triggers at intervals you define, typically starting with gentle reminders at the halfway point of your allotted time. As you approach your limit, alerts become more prominent: an LED might shift from green to amber to red, an LCD display counts down remaining minutes, or a buzzer sounds at five-minute intervals. These graduated warnings give you natural stopping points rather than abrupt cutoffs, respecting research showing that monetary and time limits work best when users set them proactively.
When your session limit expires, the enforcement mechanism activates. The simplest implementation uses DNS-level blocking through Pi-hole or similar tools, redirecting requests for casino domains to a page displaying your statistics. More robust setups integrate with your router’s firewall through SSH commands, adding temporary iptables rules that block specific IP ranges. The system logs each session’s duration, start time, and how you responded to alerts, creating a record you can review weekly to understand your patterns and adjust limits accordingly.
Important Safety and Responsibility Considerations

Before you start building, understand what this project can and cannot do. This timer system is a self-accountability tool for people who already practice responsible gaming habits. It will not prevent or treat gambling addiction, compulsive behavior, or problem gaming patterns.
Think of this Raspberry Pi system as a reminder mechanism, similar to setting an alarm to limit your time on social media. Someone determined to bypass it will find a way. They can unplug the device, reset the router, switch to mobile data, or use a VPN. The system works only when you commit to respecting the limits you’ve set for yourself.
From a technical standpoint, secure your setup properly. Password-protect both your Raspberry Pi and router admin panels with strong, unique credentials. If you’re logging session data, store it locally and encrypt the files. Never transmit gambling activity logs over unencrypted connections or upload them to cloud services where they might be accessed by others.
Consider who else uses your network. DNS-level blocking affects every device connected to your home network. Family members or roommates trying to access legitimate sites could encounter false positives if your filtering rules are too broad. Document what you’ve configured and how to temporarily disable it for others if needed.
The most important safety consideration remains honest self-assessment. If you find yourself constantly tweaking the code to extend time limits, disabling protections “just this once,” or feeling anxious when the system blocks access, these are warning signs that you need support beyond what any DIY tool can provide.
Step-by-Step: Building Your Session Timer
Preparing Your Raspberry Pi
Start with a fresh microSD card of at least 16GB, though 32GB is recommended for logging data over time. Download Raspberry Pi OS Lite from the official Raspberry Pi website and use the Raspberry Pi Imager to write it to your card. Before ejecting, enable SSH by creating an empty file named “ssh” in the boot partition so you can configure the Pi headlessly.
- Insert the SD card into your Raspberry Pi and connect it to power and ethernet. Wait about 90 seconds for first boot to complete.
- SSH into the Pi using the default credentials (username: pi, password: raspberry). Find its IP address through your router’s admin panel or use a network scanner.
- Run
sudo raspi-configto change the default password immediately, set your timezone under Localisation Options, and expand the filesystem to use the full SD card capacity. - Navigate to Interface Options in raspi-config and enable GPIO (if using physical buttons or LEDs) and ensure networking is properly configured.
- Update the system with
sudo apt update && sudo apt upgrade -y, which typically takes 5-10 minutes on a fresh install. - Install Python dependencies by running
sudo apt install python3-pip python3-rpi.gpio -y, then use pip to add any additional libraries you’ll need for the timer script.
Verify everything works by running python3 --version to confirm Python 3.7 or higher is installed, and hostname -I to check network connectivity. Test GPIO access with gpio readall if you installed wiringPi. Your Raspberry Pi is now ready for the timer script in the next section.
Creating the Timer Script
“`python
#!/usr/bin/env python3
import time
import datetime
import json
from pathlib import Path
SESSION_LIMIT = 3600 # 60 minutes in seconds
WARNING_INTERVALS = [1800, 2700, 3300] # 30, 45, 55 minute warnings
LOG_FILE = Path.home() / “casino_timer.log”
class SessionTimer:
def __init__(self):
self.start_time = time.time()
self.session_id = datetime.datetime.now().strftime(“%Y%m%d_%H%M%S”)
def elapsed(self):
return int(time.time() – self.start_time)
def log_event(self, event_type, message):
entry = {
“session_id”: self.session_id,
“timestamp”: datetime.datetime.now().isoformat(),
“elapsed”: self.elapsed(),
“event”: event_type,
“message”: message
}
with open(LOG_FILE, ‘a’) as f:
f.write(json.dumps(entry) + “\n”)
def main():
timer = SessionTimer()
timer.log_event(“START”, “Session began”)
warned = set()
while True:
elapsed = timer.elapsed()
for interval in WARNING_INTERVALS:
if elapsed >= interval and interval not in warned:
timer.log_event(“WARNING”, f”{interval//60} minute mark reached”)
print(f”⚠️ {(SESSION_LIMIT – elapsed)//60} minutes remaining”)
warned.add(interval)
if elapsed >= SESSION_LIMIT:
timer.log_event(“LIMIT”, “Time limit exceeded”)
print(“🛑 Session time limit reached”)
break
time.sleep(30) # Check every 30 seconds
if __name__ == “__main__”:
main()
“`
Save this as `session_timer.py` in your home directory. The script tracks elapsed time from startup, compares it against `SESSION_LIMIT`, and logs each event with timestamps. The `WARNING_INTERVALS` list controls when alerts appear, adjust these values to match your preferred notification schedule.
To customize time limits, modify `SESSION_LIMIT` (measured in seconds). For a 90-minute session, set it to `5400`. Add more warning intervals by extending the list: `[1200, 2400, 3000]` gives alerts at 20, 40, and 50 minutes.
The JSON log format makes it easy to analyze sessions later with spreadsheet software or custom reporting scripts. Each entry captures the session ID, exact timestamp, elapsed duration, and event type for accountability tracking.
Setting Up Network Filtering
Network filtering turns your timer from a simple reminder into an actual enforcement mechanism. You have two main approaches: DNS-level blocking through Pi-hole or direct traffic filtering with iptables rules. Choose based on your network setup and comfort level with command-line tools.
Pi-hole Integration: The Simpler Path
If you already run Pi-hole on your network, this is the cleanest solution. Your timer script communicates with Pi-hole’s API to dynamically add casino domains to the blocklist when time expires. Install the Pi-hole Python library with `pip3 install pihole-api`, then modify your timer script to authenticate with your Pi-hole instance and push domain additions to the blacklist group.
The workflow works like this: when your session timer hits zero, the script sends a POST request to Pi-hole adding domains like “ to the blocklist. Pi-hole then blocks DNS resolution for those domains across every device using it as their DNS server. To restore access, the script removes those domains after your cooldown period ends or the next day at your configured reset time.
Direct iptables Filtering: Complete Control
For users without Pi-hole, iptables provides precise traffic control directly on the Raspberry Pi. This requires the Pi to function as your network gateway or for you to route traffic through it, which adds complexity but gives you granular filtering power.
- Configure your Raspberry Pi as a transparent proxy by enabling IP forwarding: edit `/etc/sysctl.conf` and uncomment `net.ipv4.ip_forward=1`
- Install iptables-persistent to save your rules across reboots: `sudo apt install iptables-persistent`
- Create a custom chain for casino blocking: `sudo iptables -N CASINO_BLOCK`
- Add specific IP addresses or domain ranges to block: `sudo iptables -A CASINO_BLOCK -d [IP_address] -j REJECT`
- Integrate this chain into your timer script so it adds the blocking rule to the FORWARD chain when limits expire and removes it when the session resets
Your Python script controls rule insertion with subprocess calls like `([‘sudo’, ‘iptables’, ‘-A’, ‘FORWARD’, ‘-j’, ‘CASINO_BLOCK’])`. Remember to configure passwordless sudo for iptables commands or the script will fail when run as a service.
The iptables approach requires maintaining a list of casino site IP addresses, which is more maintenance-intensive than DNS blocking since sites can use multiple IPs or CDNs. For most home users, Pi-hole offers better usability with less ongoing configuration.
Adding Visual and Audio Alerts
Connect a simple LED to GPIO pin 17 and ground through a 220-ohm resistor. This gives you a visual indicator that costs pennies and requires three lines of Python using the `gpiozero` library:
“`python
from gpiozero import LED
from time import sleep
warning_led = LED(17)
warning_led.blink(on_time=0.5, off_time=0.5) # Flashes when limit approaches
“`
For clearer feedback, wire an I2C LCD display (typically 16×2 characters) to pins 3 and 5. After enabling I2C in `raspi-config` and installing `RPLCD`, you can show remaining time:
“`python
from RPLCD.i2c import CharLCD
lcd = CharLCD(‘PCF8574′, 0x27)
lcd.write_string(f’Time left: {minutes}m’)
“`
Audio alerts work through the headphone jack or a USB speaker. Use `pygame.mixer` to play MP3 warnings at 15, 10, and 5 minutes remaining. Keep sounds distinct but not jarring, a gentle chime works better than an alarm.
For phone notifications, create a free Pushover account and add their Python library. Your script sends alerts directly to your mobile device:
“`python
import pushover
pushover.init(“your_api_token”)
pushover.Client(“your_user_key”).send_message(“10 minutes remaining”, title=”Session Alert”)
“`
Combine methods for redundancy. An LED provides constant ambient awareness, the display shows precise countdown, and phone notifications reach you even when you’re away from the Pi.
Testing and Verifying Your System Works

Start by testing the timer with drastically reduced limits, set a 2-minute session cap instead of your planned 30 minutes to verify the system responds quickly. Launch your test casino site (or a placeholder URL if you don’t want to access real gambling platforms during development), start the Python script, and watch the countdown. You should see console output updating each second and your visual indicators responding in real time.
Run through this verification checklist to confirm each component works:
- Timer script logs the session start time and counts down accurately
- Visual alerts (LED or display) show warnings at your configured intervals
- Audio notifications trigger at the right moments without script errors
- Blocking activates precisely when the timer expires, not before or after
- Log files capture complete session data with timestamps and duration
- System persists through Raspberry Pi reboots if configured for autostart
Test the blocking mechanism separately by manually triggering the network restriction. If you integrated a network firewall approach, verify the iptables rules actually block traffic rather than just logging attempts. Try accessing blocked domains from different devices on your network to confirm coverage.
Common issues include script crashes from missing Python dependencies (check your Raspberry Pi OS setup has all libraries installed), blocking rules that don’t survive reboot, or alerts that fire incorrectly due to timezone mismatches in your terminal configuration. If the system seems bypassable, that’s expected, this is accountability tech, not a fortress. The point is creating friction, not building an unbreakable wall.
Customizing Your Limits and Expanding the Project
Once your timer system is running reliably, you can extend it far beyond basic session tracking. Start by adjusting time limits to match your personal goals, perhaps stricter weekday caps and slightly more flexible weekend windows. Add a simple budget tracker by modifying your Python script to log deposit amounts (entered manually or scraped from email receipts if you’re comfortable with that complexity), then calculate weekly or monthly spend totals alongside time data.
For accountability, schedule a cron job that emails you a weekly summary of your play sessions: total time, frequency, and any limit breaches. Tools like Python’s smtplib make this straightforward. Integrate with Google Calendar or similar services to define “allowed play windows”, your script can check the current time against calendar events and block access outside those periods, adding structure to spontaneous urges.
If you want deeper insights, build a lightweight web dashboard using Flask or a simple HTML page that reads your log files and displays charts of session duration trends, time-of-day patterns, and streaks of compliance. This transforms raw data into visual motivation. You might also explore other smart hub ideas to link your timer with broader home automation, imagine LED room lighting that shifts color as you approach your daily limit, or a voice assistant reminder triggered by your Pi. These expansions keep the project engaging while reinforcing the accountability framework you’ve built.
Frequently Asked Questions
Most builders want to know the practical realities of this project before they commit time and components. Here are the answers to the most common questions.
Can someone just bypass this system?
Yes, absolutely. This is a self-accountability tool, not a security system. Anyone with admin access to the Pi, router, or the ability to switch networks can disable it. The value lies in creating friction and conscious choice, not in building an impenetrable barrier.
Which Raspberry Pi model should I use?
A Raspberry Pi 3B or newer works well. The Pi Zero W can handle the basic timer and blocking functions but struggles with more complex network filtering. For the most responsive experience with dashboard features, go with a Pi 4.
Does this work with mobile devices and apps?
It depends on your implementation. DNS-level blocking catches mobile browsers on your home network, but dedicated casino apps often use hardcoded IPs or VPNs that bypass local filtering. You’ll have better coverage with router-level rules, though determined users can still switch to cellular data.
Can I adapt this for other websites or screen time limits?
Definitely. The core logic works for any domain or category of sites. Many builders use similar setups to limit social media, video streaming, or work-hour browsing. Just modify the blocklist and adjust your time thresholds.
The time tracking accuracy depends on your monitoring approach. Scripts that ping domains or check active connections are accurate to within a few seconds. Passive DNS logging is less precise because it only catches lookup requests, not actual session duration. If you’re running the timer locally on the same machine used for browsing, you’ll get the most reliable data.
Keep in mind that this project shines as a personal guardrail, not a foolproof solution. It creates intentional pauses and visible reminders of your limits, which is often enough to break autopilot behavior. Think of it as a speed bump rather than a locked gate.
Building your own accountability system demonstrates how maker culture can intersect with personal wellness in meaningful ways. This Raspberry Pi timer isn’t a magic solution, it’s a tool that works only when you commit to respecting the limits you’ve set for yourself. The real power lies not in the hardware or code, but in your decision to create boundaries and stick with them.
The beauty of this project extends beyond online casino play. You can adapt the same framework for social media limits, gaming sessions, streaming binges, or any activity where you want better time awareness. The skills you’ve developed here, session tracking, network filtering, alert systems, transfer to countless other self-regulation challenges.
Remember that DIY solutions shine brightest as part of a broader approach to digital wellness. They complement healthy habits, self-awareness, and when needed, professional guidance. If you find yourself constantly working around your own system or feeling compelled to disable it, that’s a signal to seek support beyond what technology alone can provide.
Technology should serve you, not the other way around. By building tools that align with your values and goals, you’re taking an active role in shaping your relationship with digital activities, and that’s what responsible innovation looks like.