

Transform your Raspberry Pi into a network firewall that rivals commercial solutions at a fraction of the cost. By repurposing this versatile single-board computer, which typically ranges from $45 to $80 depending on the model, you can create a powerful first line of defense against network threats. As Jeff Geerling, a leading Raspberry Pi authority, has demonstrated in his extensive testing, these boards are more than capable of handling serious networking workloads when properly configured.
With dual ethernet ports and the right software configuration, a raspberry pi firewall monitors traffic, blocks malicious connections, and provides detailed network analytics in real-time. Popular distributions like OPNsense and pfSense, specifically optimized for the Pi’s ARM architecture, transform this pocket-sized computer into a professional-grade security appliance capable of handling gigabit throughput.
Securing a home network or implementing a cost-effective solution for a small business becomes straightforward with a customizable firewall that offers advanced features like intrusion detection, VPN capabilities, and granular access controls. The Pi already serves many users as a smart home hub setup and adding firewall duties to the same device (or a dedicated unit) creates a unified network management platform while consuming less than 5 watts of power.
Why Choose Raspberry Pi for Your Network Firewall
Hardware Requirements
To build a reliable Raspberry Pi firewall, you’ll need specific hardware components to ensure optimal performance. The Raspberry Pi 4 Model B remains a solid choice in 2026, though the Raspberry Pi 5 now offers enhanced processing power for more demanding network loads. The Pi 4 starts at $35 and provides excellent value for most home firewall applications.
Here’s what you’ll need to get started:
| Component | Minimum Specification | Recommended |
|---|---|---|
| Raspberry Pi Model | Pi 4 Model B, 2GB RAM | Pi 4 Model B, 4GB RAM or Pi 5 |
| MicroSD Card | 16GB Class 10 or UHS-I | 32GB UHS-I or better |
| USB Ethernet Adapter | USB 2.0 compatible adapter | USB 3.0 Gigabit (TP-Link, StarTech) |
| Power Supply | Official 5.1V/3A (Pi 4) or 5.1V/5A (Pi 5) | Same with surge protection |
| Case & Cooling | Basic case with ventilation | Case with integrated fan and heatsinks |
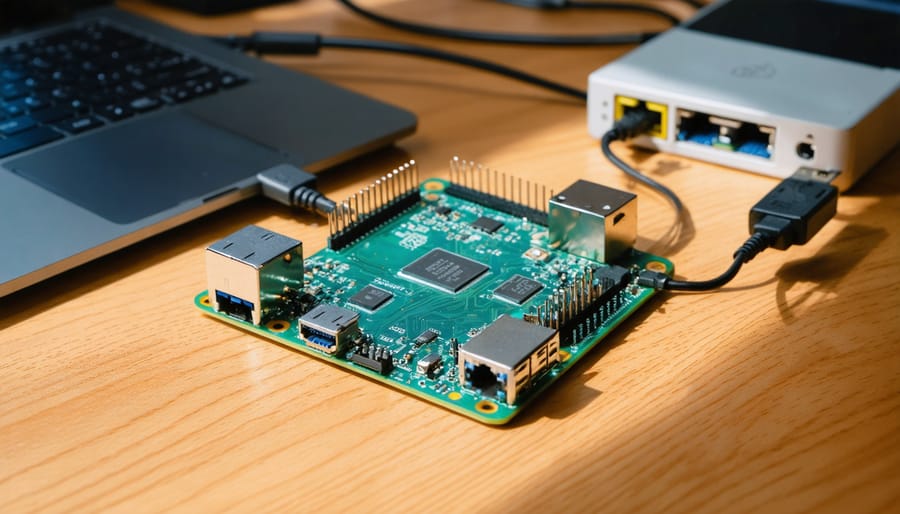
Two network interfaces are essential for firewall operation: the Pi’s built-in Ethernet port and a USB-to-Ethernet adapter for the second connection. Choose a USB 3.0 Gigabit adapter from manufacturers like TP-Link or StarTech that explicitly list Raspberry Pi compatibility.
If you’re planning to integrate the firewall with your home automation system the 4GB RAM configuration becomes more important. Running multiple services simultaneously benefits from the additional memory headroom.
You’ll also want to gather these items for initial setup and long-term reliability:
- Cat 5e or Cat 6 Ethernet cables
- USB keyboard and mouse for configuration
- HDMI cable and monitor (only needed during setup)
- Heatsinks for CPU and RAM chips if not included with your case
A Raspberry Pi 4 configured with dual network interfaces for firewall functionality.
Performance Considerations
When implementing a Raspberry Pi firewall, understanding its performance capabilities is crucial for optimal network protection. The Pi 4, especially with its improved processor and networking capabilities, can handle typical home network traffic efficiently, managing throughput of up to 1 Gbps in most scenarios. However, when implementing complex firewall rules or handling multiple simultaneous connections, you may notice some performance impact.
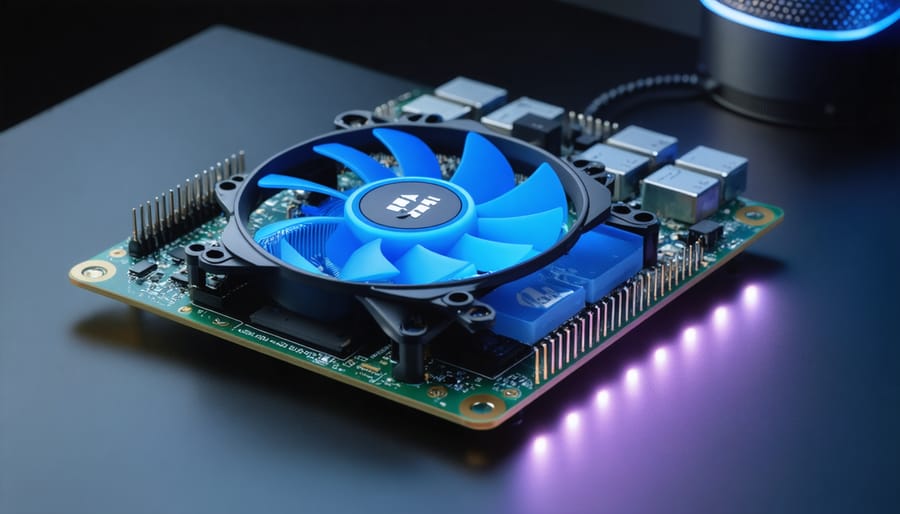
Like other power-efficient Raspberry Pi solutions the firewall setup benefits from proper cooling and resource management. Users should monitor CPU usage and temperature, particularly when running additional services alongside the firewall.
For optimal performance, consider these factors:
– Use a high-quality SD card or SSD for better I/O operations
– Implement efficient firewall rules to minimize processing overhead
– Monitor memory usage and adjust configurations accordingly
– Enable hardware offloading where possible
– Consider using a dedicated ethernet adapter for improved throughput
Most home networks won’t push the Pi to its limits, but users with heavy traffic loads should consider implementing load balancing or upgrading to more powerful hardware if needed.

Setting Up Your Pi Firewall
Software Options
When building a raspberry pi firewall, several proven software options are available as of 2026. OPNsense and pfSense remain the dominant choices, though the landscape has evolved in recent years.
OPNsense continues to stand out for its modern user interface and consistent security updates. It provides advanced features like intrusion detection, traffic shaping, and detailed monitoring capabilities. The platform is particularly user-friendly, making it an excellent choice for beginners while still offering enough depth for experienced users. Support for Raspberry Pi has improved significantly, with official ARM64 builds now available and optimized for Pi 4 and Pi 5 models.
pfSense maintains its position as a longtime favorite in the DIY firewall community. It offers comprehensive network protection features, including stateful packet filtering, VPN capabilities, and detailed traffic analysis. Netgate, the company behind pfSense, introduced official Raspberry Pi support in 2025 with pfSense Plus CE, though resource requirements remain higher than OPNsense.
- Lower resource requirements make it ideal for Raspberry Pi hardware.
- Modern, intuitive web interface simplifies configuration for newcomers.
- Frequent security updates and active development cycle.
- Native ARM64 support with dedicated Raspberry Pi images.
- Smaller plugin ecosystem compared to pfSense.
- Less extensive documentation and fewer third-party tutorials available.
- Community support is growing but still smaller than pfSense.
- Mature ecosystem with extensive plugin library and community packages.
- Comprehensive documentation and vast knowledge base built over years.
- Large, active community provides strong support resources.
- Enterprise-proven feature set with broad compatibility.
- Higher memory and CPU requirements can strain Raspberry Pi performance.
- More complex interface presents a steeper learning curve.
- ARM support is newer and less optimized than x86 versions.
Both distributions support essential raspberry pi network firewall features like:
– Network address translation (NAT)
– DHCP server functionality
– DNS forwarding and filtering
– VPN server capabilities (WireGuard, OpenVPN, IPsec)
– Traffic monitoring and logging
– Intrusion detection and prevention
For Raspberry Pi specifically, OPNsense generally performs better due to its lighter footprint and optimized ARM builds. However, pfSense’s mature ecosystem and broader community support make it compelling for users who prioritize stability and extensive documentation.
When choosing between the two, consider your technical expertise, desired features, and hardware model. A Raspberry Pi 4 with 4GB or 8GB RAM handles either option comfortably, while the Pi 5 provides even better headroom. Both options deliver enterprise-grade security features while remaining accessible for home network deployment.
Initial Configuration
Before configuring your Raspberry Pi as a firewall, ensure you have a fresh installation of Raspberry Pi OS Lite, as we won’t need a graphical interface for this project. Connect to your Pi via SSH and update the system using ‘sudo apt update’ and ‘sudo apt upgrade’.
Your Raspberry Pi will need two network interfaces: one for incoming traffic (WAN) and another for your local network (LAN). If you’re using a Pi with built-in ethernet, you’ll need to add a USB network adapter for the second interface. Connect the ethernet port to your modem and the USB adapter to your local network switch or devices.
Check your network interfaces by running ‘ip addr’ in the terminal. You should see at least two interfaces, typically named ‘eth0’ and ‘eth1’. Note which interface corresponds to WAN and LAN, you’ll need this information for later configuration.
Edit the network configuration file using ‘sudo nano /etc/dhcpcd.conf’ and add static IP assignments for both interfaces. For example:
interface eth0
static ip_address=192.168.1.1/24
static routers=192.168.1.254
interface eth1
static ip_address=10.0.0.1/24
Save the configuration and reboot your Pi. This setup creates the foundation for your firewall, with separate networks for external and internal traffic. Verify connectivity on both interfaces before proceeding with firewall rules.
Security Rules and Policies
Establishing effective security rules is crucial for your Raspberry Pi firewall. Start by implementing basic rules that block unauthorized incoming traffic while allowing legitimate connections.
A complete iptables ruleset provides defense in depth by setting secure defaults and explicitly permitting only necessary traffic. Here’s a production-ready configuration that implements core security principles:
# Set default policies to drop all traffic
sudo iptables -P INPUT DROP
sudo iptables -P FORWARD DROP
sudo iptables -P OUTPUT ACCEPT

# Allow established and related connections
sudo iptables -A INPUT -m state --state ESTABLISHED,RELATED -j ACCEPT

# Allow loopback interface traffic
sudo iptables -A INPUT -i lo -j ACCEPT

# Allow SSH with rate limiting (max 4 connections per 60 seconds)
sudo iptables -A INPUT -p tcp --dport 22 -m state --state NEW -m recent --set
sudo iptables -A INPUT -p tcp --dport 22 -m state --state NEW -m recent --update --seconds 60 --hitcount 4 -j DROP
sudo iptables -A INPUT -p tcp --dport 22 -j ACCEPT

# Allow HTTP and HTTPS traffic
sudo iptables -A INPUT -p tcp --dport 80 -j ACCEPT
sudo iptables -A INPUT -p tcp --dport 443 -j ACCEPT

# Save rules for persistence across reboots
sudo sh -c "iptables-save > /etc/iptables.rules"
This ruleset establishes a deny-by-default posture where all incoming traffic is blocked unless explicitly permitted. The rate limiting on SSH is particularly important, throttling connection attempts to prevent brute force attacks without completely blocking legitimate access.
Make your rules persistent by creating a systemd service or using the iptables-persistent package. Without persistence, your firewall configuration will disappear on reboot, leaving your network exposed.
Regularly review and update these rules based on your network’s needs. Add rules for additional services as needed, but always question whether opening a port is necessary. Every open port is a potential attack surface.
Advanced Features and Optimization
Traffic Monitoring
A key advantage of using a Raspberry Pi as a network firewall is its ability to monitor and log network traffic effectively. By implementing traffic monitoring, you can gain valuable insights into your network’s behavior and potential security threats.
Start by installing and configuring tcpdump, a powerful packet analyzer that comes pre-installed on most Linux distributions. To capture network traffic, use the command: `sudo tcpdump -i eth0 -w capture.pcap`. This will save the captured packets to a file for later analysis.
For real-time traffic visualization, consider installing ntopng, which provides a web-based interface for monitoring network usage. Install it using: `sudo apt-get install ntopng`. Once installed, access the dashboard by navigating to your Pi’s IP address on port 3000.
To maintain detailed logs of firewall activities, enable logging in your iptables rules. Add the `–log-prefix` parameter to your rules to make log entries easily identifiable. For example:
“`
sudo iptables -A INPUT -p tcp –dport 80 -j LOG –log-prefix “HTTP_IN: ”
“`
Monitor these logs using the `journalctl` command or by checking `/var/log/messages`. For long-term storage and analysis, consider setting up log rotation to prevent your storage from filling up.
Remember to regularly review your traffic logs to identify patterns, potential security issues, or unusual network behavior that might indicate a breach attempt.
Performance Tuning
To maximize your Raspberry Pi firewall’s performance, several key optimizations can significantly improve throughput and reduce latency. Start by adjusting the TCP/IP stack settings in /etc/sysctl.conf. Increasing the net.core.rmem_max and net.core.wmem_max values can enhance network buffer sizes, while enabling net.ipv4.tcp_fastopen can reduce connection establishment time.
Here’s a quick checklist of essential performance tuning steps:
- Adjust TCP/IP stack parameters in /etc/sysctl.conf (buffer sizes, tcp_fastopen)
- Enable hardware offloading features using ethtool where supported
- Optimize swappiness setting (around 10) to keep rules in RAM
- Organize firewall rules with most-matched rules at the top
- Monitor resource usage regularly with iftop, nethogs, or similar tools
Consider enabling hardware offloading features if your Pi’s network interface supports them. You can check and enable these features using the ethtool command. However, be cautious with older Pi models, as enabling too many offloading features might actually decrease performance.
Memory management is crucial for optimal firewall operation. Allocate appropriate memory to your firewall service by adjusting the vm.swappiness parameter to a lower value (around 10) to reduce swap usage. This keeps frequently accessed rules in RAM rather than swap space.
For rule optimization, arrange your firewall rules with the most frequently matched rules at the top of your chain. This reduces processing time as the firewall won’t need to check through unnecessary rules. Use connection tracking wisely. While useful, excessive connection tracking can consume significant resources.
Monitor your firewall’s performance using tools like iftop or nethogs to identify bottlenecks. Regular logging and performance metrics analysis will help you fine-tune your configuration based on actual usage patterns and requirements.
Remember to balance security with performance. Sometimes a slight performance trade-off is worth the added security benefits.
Troubleshooting Common Issues
When running a Raspberry Pi firewall, you’ll encounter issues from time to time. Here’s how to address them effectively and keep your firewall running smoothly.
If your Pi suddenly stops filtering traffic, first check your network connections and ensure all cables are properly seated. A quick restart of the Pi often resolves temporary glitches. For persistent connectivity issues, verify your network interface configurations in the ‘/etc/network/interfaces’ file or check your netplan configuration if you’re running Ubuntu.
DNS resolution problems are another frequent challenge. If websites aren’t loading properly, check your DNS settings and ensure your Pi’s DNS servers are correctly configured. You can modify these in the ‘/etc/resolv.conf’ file or through your firewall software’s interface. Consider using reliable public DNS servers like Cloudflare (1.1.1.1) or Google (8.8.8.8) as fallback options.
High CPU usage can impact firewall performance. Monitor your system resources using the ‘htop’ command for a more detailed view than the traditional ‘top’. If your Pi is struggling, consider reducing the number of active rules or upgrading to a Raspberry Pi 5 for better performance. Implementation of rate limiting on your rules can help manage resource consumption effectively.
Memory leaks may occur in long-running systems. Schedule periodic reboots using cron jobs to maintain optimal performance. Check system logs with ‘journalctl -xe’ or review ‘/var/log/syslog’ for any recurring errors or warnings that might indicate configuration issues.
For maintenance best practices:
– Review and update your firewall rules regularly
– Monitor disk usage and implement log rotation
– Keep your Raspberry Pi OS and firewall software updated with security patches
– Backup your configuration files to external storage or cloud
– Test your ruleset after making changes using a secondary device
If your firewall becomes too restrictive, temporarily disable specific rules rather than the entire firewall while troubleshooting. This maintains basic protection while you identify the problematic rules. Use the ‘iptables -L -v’ command to see which rules are actually being triggered.
Document any changes you make to your configuration in a simple text file or wiki. This documentation proves invaluable when troubleshooting future issues or when you need to rebuild your setup from scratch.
If you experience persistent issues despite these solutions, consult the official documentation of your chosen firewall software or reach out to the Raspberry Pi community forums. The r/raspberry_pi subreddit and official forums remain active sources of troubleshooting help in 2026.