

Automate your testing workflow on Raspberry Pi projects with powerful open-source tools that streamline development and ensure code quality. After setting up your development environment, integrate popular frameworks like Pytest and Robot Framework to create comprehensive test suites. These battle-tested solutions enable continuous integration, detailed reporting, and cross-platform compatibility without licensing costs.
Modern automated testing frameworks transform manual verification processes into efficient, repeatable operations that catch bugs early and maintain consistent code quality. Whether you’re building IoT applications, web services, or embedded systems on your Pi, these tools provide the foundation for professional-grade testing infrastructure. They support everything from unit testing and integration testing to end-to-end automation, complete with detailed logs and customizable test runners.
Choose from a robust ecosystem of testing tools including Selenium for web automation, JUnit for Java applications, and specialized frameworks for hardware testing. Each offers extensive documentation, active community support, and proven reliability across thousands of projects. Start small with basic unit tests, then scale your testing strategy as your projects grow more complex.
Robot Framework: Your Pi’s New Testing Companion
Getting Started with Robot Framework on Pi
Getting started with Robot Framework on your Raspberry Pi is a straightforward process that can enhance your approach to testing your first Pi project. Begin by opening your terminal and updating your Pi’s package list with ‘sudo apt-get update’. Next, install Python’s package manager (pip) if you haven’t already: ‘sudo apt-get install python3-pip’.
With pip installed, you can now install Robot Framework using the command ‘pip3 install robotframework’. This will set up the core framework. For web testing capabilities, you’ll also want to install the Selenium library: ‘pip3 install robotframework-seleniumlibrary’.
Create a new directory for your test projects using ‘mkdir robot-tests’ and navigate into it with ‘cd robot-tests’. Here, you’ll create your first test file with the .robot extension. A basic test file structure includes these sections:
– *** Settings ***
– *** Variables ***
– *** Test Cases ***
– *** Keywords ***
To verify your installation, create a simple test case and run it using the ‘robot’ command. The framework will generate detailed HTML reports and logs automatically, making it easy to analyze your test results.
Remember to keep your test files organized and use descriptive names for your test cases. This will help maintain your testing suite as it grows larger.
Essential Robot Framework Libraries for Pi
Robot Framework offers several essential libraries that are particularly valuable for Raspberry Pi testing projects. The Selenium library remains a cornerstone for web interface testing, allowing you to automate browser-based interactions with Pi-hosted web applications. For hardware testing, the GPIO library provides direct access to the Pi’s GPIO pins, enabling automated testing of sensors, motors, and other connected components.
The SSHLibrary is particularly useful for Pi projects, as it allows you to execute remote commands and verify system responses across your network. When working with image processing applications, the ImageHorizon library helps automate visual testing tasks, which is perfect for Pi camera module projects.
For database testing, the DatabaseLibrary supports various SQL databases commonly used in Pi projects, while the RequestsLibrary facilitates API testing for web services running on your Pi. The Process library is essential for monitoring and controlling system processes, especially useful when testing Pi-based automation scripts.
The AutoIt library proves valuable when testing applications with native GUI elements, while the Collections library helps manage complex data structures in your test cases. For projects involving serial communication, the Serial library enables automated testing of UART connections between your Pi and other devices.
Remember to install these libraries using pip, and always check compatibility with your specific Pi model and Python version before implementation.
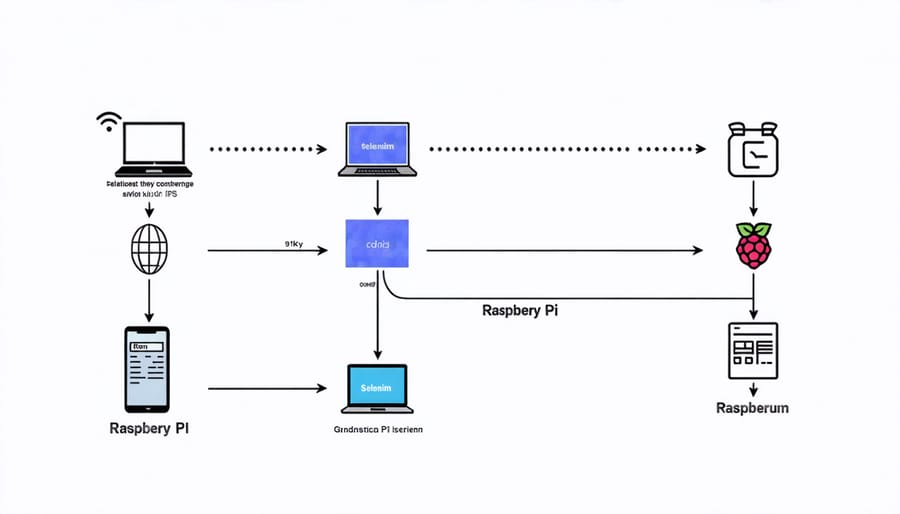
Selenium: Web Testing Magic for Pi Applications
Setting Up Selenium on Raspberry Pi
Setting up Selenium on your Raspberry Pi enables powerful web interface testing capabilities, and the process is straightforward when you follow these steps. First, ensure your Pi is running the latest version of Raspberry Pi OS and open the terminal.
Install Python’s package manager (pip) if you haven’t already:
“`
sudo apt-get update
sudo apt-get install python3-pip
“`
Next, install Selenium using pip:
“`
pip3 install selenium
“`
You’ll need a web driver for your preferred browser. For Chrome:
“`
sudo apt-get install chromium-chromedriver
“`
For Firefox:
“`
sudo apt-get install firefox-esr
wget https://github.com/mozilla/geckodriver/releases/download/v0.30.0/geckodriver-v0.30.0-linux-arm7.tar.gz
sudo tar -xf geckodriver-v0.30.0-linux-arm7.tar.gz -C /usr/local/bin/
“`
Verify your installation by running a simple Python test script:
“`python
from selenium import webdriver
driver = webdriver.Firefox() # or Chrome()
driver.get(“https://www.raspberrypi.org”)
“`
If everything is configured correctly, you should see your chosen browser launch and navigate to the Raspberry Pi website automatically.
Creating Your First Selenium Test Suite
Creating your first Selenium test suite is straightforward when you follow these essential steps. First, create a new project directory and install the Selenium WebDriver along with your preferred programming language’s Selenium bindings. Python users can simply run ‘pip install selenium’ in their terminal.
Start by importing the necessary Selenium packages in your test file. Create a new test class that will contain your test cases. Begin with a simple test that opens a web browser and navigates to a specific URL:
“`python
driver = webdriver.Firefox()
driver.get(“https://your-website.com”)
“`
Add assertions to verify elements on the page. For example, check if a button exists or verify text content:
“`python
assert “Expected Title” in driver.title
element = driver.find_element(By.ID, “submit-button”)
“`
Group related tests into test suites using test frameworks like PyTest or unittest. Remember to include setup and teardown methods to handle browser initialization and cleanup:
“`python
def tearDown(self):
self.driver.quit()
“`
Always add clear comments and meaningful test names to maintain readable and maintainable code. Start with basic navigation and form submission tests before moving on to more complex scenarios like data validation and error handling.
PyTest: Python Testing Made Simple
PyTest Configuration for Pi Projects
Setting up PyTest for your Raspberry Pi projects requires careful configuration to ensure optimal performance and reliable test execution. Start by creating a pytest.ini file in your project’s root directory to define basic settings like test discovery patterns and logging preferences.
For Pi-specific projects, consider adding these essential configurations to your pytest.ini:
[pytest]
testpaths = tests
python_files = test_*.py
log_cli = true
log_cli_level = INFO
To handle GPIO-related tests effectively, create a conftest.py file with fixtures that properly initialize and clean up GPIO states. This prevents resource conflicts and ensures consistent test environments across different test runs.
When testing hardware interactions, implement mock objects for sensors and actuators to enable testing without physical components. This approach speeds up test execution and allows for testing edge cases that might be difficult to reproduce with actual hardware.
For improved performance on Pi’s limited resources:
– Use pytest-xdist to run tests in parallel
– Implement test categories using markers
– Configure test timeouts appropriate for Pi’s processing capabilities
– Enable pytest-cache to speed up subsequent test runs
Remember to adjust memory usage settings when testing resource-intensive applications, especially on older Pi models with limited RAM.
Writing Effective PyTest Cases
Writing effective PyTest cases starts with organizing your test files properly. Create a “tests” directory in your project and name your test files with the “test_” prefix to ensure PyTest can discover them automatically.
Here’s a proven structure for writing clear and maintainable test cases:
“`python
def test_function_name():
# Arrange – Set up your test data
expected_result = 42
test_input = 21
# Act – Execute the function being tested
actual_result = multiply_by_two(test_input)
# Assert – Verify the results
assert actual_result == expected_result
“`
Follow these best practices for robust tests:
– Write descriptive test names that explain the scenario
– Use fixtures for reusable test data
– Test one concept per function
– Include both positive and negative test cases
– Keep tests independent of each other
For parameterized testing, use the @pytest.mark.parametrize decorator to run multiple scenarios:
“`python
@pytest.mark.parametrize(“input,expected”, [
(2, 4),
(0, 0),
(-1, -2)
])
def test_multiply_by_two(input, expected):
assert multiply_by_two(input) == expected
“`
Remember to run your tests frequently during development to catch issues early and maintain code quality.
JUnit: Java Testing for Pi Applications
JUnit stands as a cornerstone for testing Java applications on the Raspberry Pi, offering a robust framework that’s particularly well-suited for validating Pi-specific code. For Java developers working on Pi projects, JUnit provides a familiar and reliable way to ensure code quality and functionality.
To get started with JUnit testing on your Pi, you’ll first need to add JUnit dependencies to your project’s build file. For Maven projects, simply include the JUnit dependency in your pom.xml file. If you’re using Gradle, add it to your build.gradle file. The latest version of JUnit 5 is recommended for new projects, though JUnit 4 remains widely used and supported.
Here’s a practical example of testing a GPIO-related class:
“`java
@Test
public void testLEDToggle() {
LEDController led = new LEDController(GPIO_PIN_17);
led.turnOn();
assertTrue(led.isOn());
led.turnOff();
assertFalse(led.isOn());
}
“`
When testing Pi-specific hardware interactions, consider creating mock objects for hardware components. This approach allows you to test your logic without requiring physical hardware connections during every test run. It’s particularly useful during continuous integration processes.
Best practices for JUnit testing on Pi projects include:
– Keep tests focused on single responsibilities
– Use descriptive test names that explain the expected behavior
– Implement proper setup and teardown methods for hardware resources
– Create separate test suites for hardware-dependent and independent tests
– Use assumptions for tests that require specific Pi hardware configurations
Remember to run your tests both on your development machine and on the Pi itself, as some behaviors might differ between environments. Consider using JUnit’s parameterized tests for checking behavior across different Pi models or GPIO configurations.
Practical Integration Tips
Successfully integrating automated testing tools into your Raspberry Pi projects requires careful planning and systematic implementation. Start by establishing a clear testing strategy that outlines which tools will handle specific testing needs. For instance, use Selenium for web interface testing while employing PyTest for unit testing Python components.
Create a dedicated testing environment that mirrors your production setup. This helps avoid compatibility issues and ensures consistent results. To optimize your Pi development workflow, consider running resource-intensive tests on a development machine while keeping lighter tests on the Pi itself.
Version control is crucial – use Git to track your test scripts and configurations. Maintain a separate branch for testing infrastructure to prevent conflicts with your main development work. Document your test setup procedures and maintain a requirements.txt file for Python dependencies.
Implement continuous integration gradually. Start with basic unit tests, then progressively add integration and end-to-end tests. Use Jenkins or GitLab CI/CD pipelines to automate test execution, but be mindful of your Pi’s resources. Schedule resource-intensive tests during off-peak hours.
For better maintainability, organize your test files using a clear structure: separate unit tests, integration tests, and end-to-end tests into different directories. Create helper functions for common testing operations to reduce code duplication and improve readability.
Remember to regularly review and update your test suite. Remove obsolete tests, update assertions as requirements change, and continuously refine your testing strategy based on project needs and team feedback.
Open source automated testing tools have revolutionized how we approach quality assurance in Raspberry Pi projects. By leveraging frameworks like Selenium, Robot Framework, and PyTest, developers can ensure their applications run reliably while saving valuable time and resources. These tools not only make testing more efficient but also help create more robust and dependable applications.
To get started with automated testing on your Pi projects, begin with a single framework that best matches your needs and gradually expand your testing suite as you become more comfortable. Remember to focus on writing clear, maintainable test cases and utilize continuous integration practices to maximize the benefits of automation.
Whether you’re a hobbyist working on personal projects or an educator teaching testing concepts, these open source tools provide the perfect foundation for implementing professional-grade testing practices. Consider joining online communities, contributing to open source testing projects, and sharing your experiences with others to further develop your testing expertise.
The journey to mastering automated testing is ongoing, but with these powerful open source tools at your disposal, you’re well-equipped to create more reliable and professional Raspberry Pi applications.