

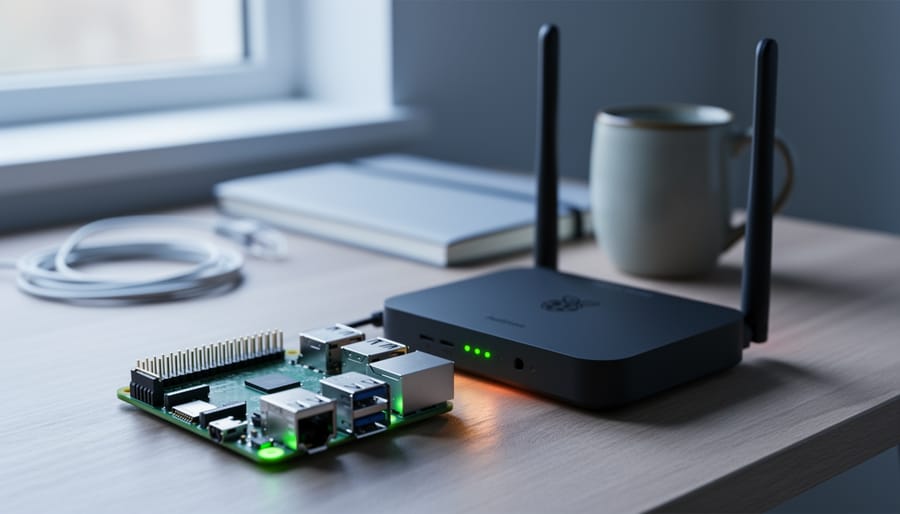
Access Raspberry Pi’s WiFi settings through three proven methods depending on your setup scenario. For desktop users, click the network icon in the top-right corner, select your network, and enter credentials—the fastest route when you have a monitor connected. Headless setups require creating a wpa_supplicant.conf file on the boot partition before first startup, containing your network name and password in plain text configuration format. Command-line enthusiasts can use raspi-config to configure wireless settings post-boot by navigating to System Options, then Wireless LAN, entering your country code, SSID, and passphrase.
Each method serves different scenarios: GUI works for interactive setups, headless configuration enables remote deployment without peripherals, and CLI provides flexibility for SSH sessions or automated scripts. Success depends on correct country code settings (required for regulatory compliance), accurate SSID entry (case-sensitive), and proper security protocol matching between your Pi and router. Most connection failures stem from typos in credentials, incorrect file formatting in wpa_supplicant.conf, or unsupported 5GHz channels on older Raspberry Pi models. Once connected, your Pi becomes a versatile network device capable of running services, accessing updates, and communicating with other devices wirelessly—eliminating cable constraints for your projects.
Why WiFi Matters for Raspberry Pi Network Management
WiFi connectivity transforms your Raspberry Pi from a tethered device into a versatile network management powerhouse. While ethernet cables offer reliable connections, wireless capability opens up possibilities that wired setups simply can’t match.
The most immediate advantage is placement flexibility. With WiFi enabled, you can position your Raspberry Pi anywhere within your wireless range, whether that’s tucked behind furniture, mounted on a wall, or placed in a central location for optimal signal distribution. This freedom becomes crucial when running network services that benefit from strategic positioning.
For home network projects, wireless connectivity proves essential. Running a Pi-hole DNS server doesn’t require your device to sit next to your router, consuming valuable ethernet ports. Similarly, setting up a network firewall or VPN gateway becomes far more practical when you’re not limited by cable length and port availability. Network monitoring tools like Nagios or Prometheus can collect data from various network segments without physical constraints.
WiFi also simplifies testing and development. Moving your Raspberry Pi between locations for signal testing, deploying multiple units across your home network, or quickly repositioning equipment becomes effortless. You’ll save ethernet ports on your router for devices that truly need wired connections, while your Pi handles network management tasks wirelessly.
Additionally, wireless connectivity enables portable network projects. From travel routers to mobile security scanners, WiFi capability turns your Raspberry Pi into a truly flexible networking tool that adapts to your needs rather than dictating where you can deploy it.
Before You Start: What You’ll Need
Before diving into the WiFi setup process, let’s make sure you have everything ready. First, check your Raspberry Pi model. The Raspberry Pi 3, 4, 400, and Zero W/WH all come with built-in WiFi capabilities, making setup straightforward. If you’re using an older model like the Raspberry Pi 2 or the original Pi, you’ll need a compatible USB WiFi adapter.
On the software side, ensure you have a recent version of Raspberry Pi OS installed on your microSD card. Whether you’re running the full desktop version or the lightweight Raspberry Pi OS Lite, the methods we’ll cover work for both.
You’ll also need your network credentials handy: your WiFi network name (SSID) and password. If you’re setting up a hidden network, make note of that detail as well.
The tools you need depend on your setup approach. For desktop users with a monitor, keyboard, and mouse connected, you’ll configure WiFi directly through the graphical interface. For headless setups without a display, you’ll need another computer to prepare configuration files on the SD card before first boot, or an ethernet cable for initial access via SSH. Having a text editor ready on your main computer is helpful for creating configuration files in headless scenarios.

Method 1: Enable WiFi Using the Desktop Interface
Accessing Network Settings
If you’re running Raspberry Pi OS with a desktop environment, accessing your WiFi settings is straightforward and user-friendly. Simply look at the top-right corner of your screen where you’ll find the system tray icons. The WiFi icon appears as two curved lines radiating upward, similar to the WiFi symbol on most devices.
Click this icon to reveal a dropdown menu displaying all available wireless networks within range. If your Raspberry Pi’s WiFi is currently disabled, you’ll see a message indicating this, along with an option to turn it on. For more detailed network configuration options, right-click the WiFi icon and select “Wireless & Wired Network Settings” from the context menu. This opens the network preferences window where you can manage connections, configure IP settings, and adjust advanced options.
Alternatively, access network settings through the main menu by clicking the Raspberry Pi logo in the top-left corner, navigating to “Preferences,” and selecting “Raspberry Pi Configuration.” From there, click the “Interfaces” tab to enable or disable WiFi functionality completely. This method is particularly useful when you need to toggle WiFi hardware on or off rather than just connect to specific networks.
Connecting to Your Network
Once you’ve accessed the WiFi configuration interface, you’ll need to locate your network’s SSID (Service Set Identifier) from the list of available networks. This is simply your WiFi network’s name that appears when scanning for nearby connections. Click or select your SSID from the displayed options.
Next, you’ll be prompted to enter your network credentials. Type your WiFi password carefully, as it’s case-sensitive. If you’re using WPA2 or WPA3 security (recommended for most home networks), ensure you’re entering the correct passphrase. For hidden networks, you’ll need to manually input both the SSID and password.
After submitting your credentials, give your Raspberry Pi a moment to establish the connection. Most interfaces will display a connection status indicator, such as a WiFi icon with signal strength bars or a text confirmation message. To verify successful connectivity, you can open a terminal and run a simple ping command to test internet access, or check your router’s admin panel to see if your Pi appears in the connected devices list. A solid connection means you’re ready to proceed with your projects.
Setting a Static IP for Network Management
For home network management projects, assigning a static IP address ensures your Raspberry Pi remains accessible at a consistent address. This is essential when running services like Pi-hole or network monitors that other devices need to find reliably.
To configure a static IP through the GUI, open the Raspberry Pi Configuration tool from the Preferences menu. Navigate to the Interfaces tab, then click on the network settings. Select your WiFi connection, click Edit, and choose the IPv4 Settings tab. Change the method to Manual and enter your desired IP address, netmask, and gateway information. Apply the changes and reboot your Pi to activate the new static configuration.
Method 2: Enable WiFi Headlessly (No Monitor Required)
Creating the wpa_supplicant.conf File
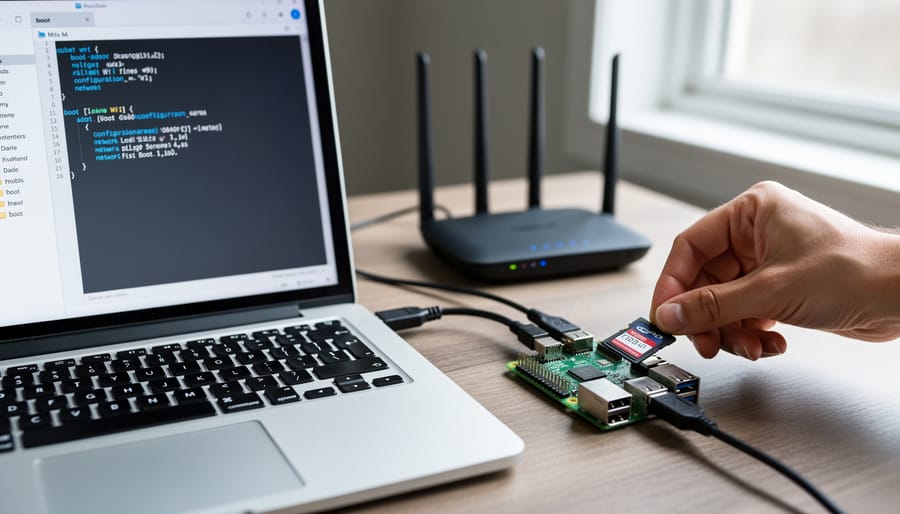
Setting up WiFi before your Raspberry Pi’s first boot is incredibly convenient, especially if you’re running a headless setup without a monitor or keyboard. This method involves creating a special configuration file that tells your Pi which network to connect to automatically.
First, insert your freshly flashed SD card into your computer. You should see a boot partition appear – this is where we’ll add our WiFi credentials. Using a text editor like Notepad (Windows), TextEdit (Mac), or nano (Linux), create a new file named exactly wpa_supplicant.conf. Naming precision matters here, so double-check for typos.
Inside this file, add the following configuration, replacing the placeholder values with your actual network details:
country=US
ctrl_interface=DIR=/var/run/wpa_supplicant GROUP=netdev
update_config=1
network={
ssid=”YourNetworkName”
psk=”YourNetworkPassword”
key_mgmt=WPA-PSK
}
Replace “YourNetworkName” with your WiFi network’s name and “YourNetworkPassword” with your actual password. Keep the quotation marks around both values. Also update the country code (US shown here) to match your location using the two-letter ISO code.
Save this file directly to the boot partition’s root directory, not in any subfolder. When your Raspberry Pi boots up, it will automatically detect this file, move it to the correct system location, and connect to your WiFi network. This seamless process eliminates the need for ethernet cables or additional peripherals during initial setup, making your network management projects much easier to deploy.
Enabling SSH for Remote Access
Enabling SSH (Secure Shell) alongside WiFi is essential for complete headless operation of your Raspberry Pi. SSH allows you to remotely access and manage your device over the network without needing a monitor or keyboard.
For headless setups, simply create an empty file named “ssh” (without any extension) in the boot partition of your SD card before first boot. This tells the Raspberry Pi OS to enable SSH automatically. If you’re already booted into the system, enable SSH through the Raspberry Pi Configuration tool by navigating to Interfaces and toggling SSH to “Enabled.”
From the command line, use “sudo raspi-config” to access configuration settings, select “Interfacing Options,” then “SSH,” and choose “Yes” to enable it. You can also enable it directly with “sudo systemctl enable ssh” followed by “sudo systemctl start ssh.”
Once enabled, connect to your Pi remotely using an SSH client. On Linux or Mac, open Terminal and type “ssh pi@raspberrypi.local” or use your Pi’s IP address. Windows users can use PuTTY or the built-in Windows PowerShell. The default password is “raspberry,” but change it immediately using “passwd” for security.
Verifying Connection and Finding Your Pi’s IP
Once your Raspberry Pi reboots, you’ll want to confirm it successfully connected to your WiFi network. If you have a monitor attached, check the WiFi icon in the top-right corner of the desktop—it should display signal strength bars instead of an X.
For headless setups, you’ll need to find your Pi’s IP address to establish an SSH connection. The easiest method is logging into your router’s admin panel (typically accessible by typing 192.168.1.1 or 192.168.0.1 into your browser). Look for a section labeled “Connected Devices” or “DHCP Clients” where you’ll find an entry for “raspberrypi” along with its assigned IP address.
Alternatively, use network scanning tools like Advanced IP Scanner for Windows or Angry IP Scanner for cross-platform compatibility. These tools scan your local network and display all connected devices with their IP addresses and hostnames. You can also use the command line tool nmap if you’re comfortable with terminal commands.
Once you’ve located the IP address, test the connection by opening a terminal and typing “ssh pi@[IP-ADDRESS]” (replace with your actual IP). A successful login confirms your WiFi is working properly and you’re ready to start your projects.
Method 3: Configure WiFi via Command Line
Using raspi-config
For beginners and those who prefer a straightforward approach, raspi-config offers the easiest way to enable WiFi from the command line. This built-in tool features a simple menu-driven interface that requires no complex commands or file editing.
Start by opening a terminal on your Raspberry Pi or connecting via SSH. Launch the configuration tool by typing:
sudo raspi-config
Navigate using your arrow keys to “System Options” and press Enter. Select “Wireless LAN” from the submenu. You’ll be prompted to enter your WiFi network name (SSID) followed by your network password. The tool handles all the technical details behind the scenes, automatically updating the necessary configuration files.
Once completed, select “Finish” and reboot your Pi when prompted. Your device will automatically connect to the WiFi network on startup. This method works perfectly for most home networks and is particularly helpful during initial setup when you want to transition from ethernet to wireless connectivity quickly and reliably.
Manual Configuration with nmcli
For users who prefer terminal-based control, nmcli offers powerful WiFi configuration options. NetworkManager’s command-line interface is particularly useful when setting up headless Raspberry Pi systems or automating network configurations through scripts.
First, verify that NetworkManager is active by running `sudo systemctl status NetworkManager`. To scan for available networks, use `nmcli device wifi list`. This displays all nearby WiFi networks with their signal strength and security settings.
To connect to your network, execute `nmcli device wifi connect “YourNetworkName” password “YourPassword”`. Replace the placeholders with your actual network credentials. The system will automatically create a connection profile that reconnects on subsequent boots.
For more granular control, create a connection profile manually: `nmcli connection add type wifi con-name “MyConnection” ifname wlan0 ssid “YourNetworkName”`. Then set the password with `nmcli connection modify “MyConnection” wifi-sec.key-mgmt wpa-psk wifi-sec.psk “YourPassword”`.
View all saved connections using `nmcli connection show`, and activate a specific profile with `nmcli connection up “MyConnection”`. To prioritize networks, adjust the autoconnect priority: `nmcli connection modify “MyConnection” connection.autoconnect-priority 10`.
This method gives you scriptable, repeatable WiFi configurations ideal for managing multiple Raspberry Pi devices or creating standardized network deployments.
Optimizing WiFi for Home Network Management Tasks
Choosing the Right WiFi Band (2.4GHz vs 5GHz)
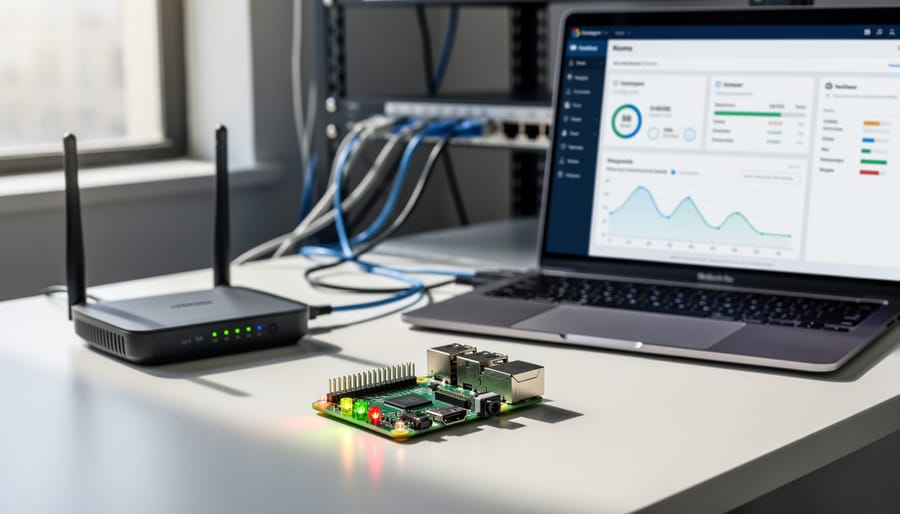
When configuring WiFi on your Raspberry Pi for network management projects, understanding the differences between 2.4GHz and 5GHz bands helps you make the right choice for your specific needs.
The 2.4GHz band offers excellent range, penetrating walls and obstacles more effectively, making it ideal if your Pi sits far from your router or in a different room. This band is perfect for network monitoring tools or Pi-hole installations that don’t require massive bandwidth. However, it’s a crowded frequency shared with cordless phones, microwaves, and Bluetooth devices, which can cause interference and slower speeds.
The 5GHz band delivers significantly faster throughput and experiences less interference since fewer devices use it. This makes it excellent for bandwidth-intensive applications like media servers or VPN gateways. The trade-off is reduced range and weaker wall penetration, so your Pi needs to be relatively close to your router.
For most home network management applications like DNS filtering or network monitoring, 2.4GHz provides sufficient performance with better reliability. Choose 5GHz when your Pi handles data-heavy tasks and sits within good router proximity. Some newer Raspberry Pi models support dual-band connectivity, letting you switch between bands based on your current project requirements.
Setting Up Connection Monitoring and Auto-Reconnect
Maintaining a stable WiFi connection is crucial when your Raspberry Pi runs essential services like a smart home hub or network monitor. A simple auto-reconnect script can save you from frustrating downtime.
Start by creating a monitoring script that checks your connection every five minutes. Open a terminal and create a new file with nano /home/pi/wifi-check.sh. Add this script:
#!/bin/bash
ping -c 4 8.8.8.8 > /dev/null
if [ $? != 0 ]; then
sudo ifconfig wlan0 down
sleep 5
sudo ifconfig wlan0 up
fi
Make the script executable with chmod +x /home/pi/wifi-check.sh. Now schedule it using cron by running crontab -e and adding this line:
*/5 * * * * /home/pi/wifi-check.sh
This checks connectivity every five minutes and automatically restarts your WiFi interface if the connection drops. For more robust monitoring, consider installing Network Manager with sudo apt install network-manager, which provides built-in reconnection handling and better configuration management. You can also use systemd-networkd-wait-online to ensure services only start after network connectivity is confirmed, preventing startup failures on critical applications.
Troubleshooting Common WiFi Issues
WiFi Not Detecting Networks
If your Raspberry Pi isn’t detecting any WiFi networks, start by checking your country code configuration. The WiFi radio won’t scan properly without the correct regulatory domain set. Open a terminal and type “sudo raspi-config”, navigate to Localisation Options, then WLAN Country, and select your location. This ensures your Pi operates on legal frequencies for your region.
Driver conflicts can also prevent network detection, especially with older Pi models or third-party WiFi adapters. Run “lsmod | grep brcm” to verify the Broadcom driver is loaded correctly. If you’re using a USB WiFi adapter, check compatibility with “lsusb” and ensure the required drivers are installed through “sudo apt update && sudo apt install firmware-linux-nonfree”.
For persistent scanning issues, try restarting the WiFi interface with “sudo ip link set wlan0 down” followed by “sudo ip link set wlan0 up”. You can manually trigger a network scan using “sudo iwlist wlan0 scan” to identify if your Pi detects any access points at all. If networks appear in the scan but not in your GUI, the issue likely lies with your network manager rather than the hardware itself.
Connection Drops or Unstable Performance
If your Raspberry Pi WiFi keeps disconnecting or performs sluggishly, several factors could be at play. First, check power management settings that might be putting your WiFi adapter to sleep. Edit the /etc/rc.local file and add the command “iwconfig wlan0 power off” before the exit line to disable power saving mode. This simple tweak often resolves intermittent dropouts.
Signal strength issues are another common culprit. Position your Pi closer to your router, or consider adding a small heatsink to the WiFi chip if overheating occurs during heavy network activity. You can monitor signal strength by running “iwconfig wlan0” in the terminal – aim for signal levels above -70 dBm for stable performance.
Interference from nearby devices operating on the same 2.4GHz frequency can cause unstable connections. Try switching your router to a less congested channel (1, 6, or 11 work best) or move to the 5GHz band if your Pi model supports it. Additionally, ensure your power supply delivers adequate current – underpowered Pis exhibit WiFi instability. Use a quality 5V 3A adapter to eliminate power-related connectivity problems.
Authentication and Password Errors
Authentication failures often stem from incorrect credentials in your wpa_supplicant.conf file. Double-check your network name (SSID) and password for typos, remembering that both are case-sensitive. If your WiFi password contains special characters like quotes, dollar signs, or backslashes, you’ll need to escape them properly. For passwords with quotation marks, use a backslash before the character (\”), and ensure your entire password remains within the quotes.
Encryption mismatches can prevent connections even with correct credentials. Modern routers typically use WPA2 or WPA3, but older Raspberry Pi models may struggle with WPA3-only networks. Check your router settings and enable WPA2 compatibility mode if needed. If you’re still experiencing issues, try temporarily disabling MAC address filtering on your router to rule out access control problems.
For networks with hidden SSIDs, add the line scan_ssid=1 within your network block in wpa_supplicant.conf. This forces your Pi to actively search for the network. After making any credential changes, reboot your Raspberry Pi or restart the wireless service with sudo systemctl restart networking to apply the updates.
Security Considerations for Network Management Devices
When your Raspberry Pi becomes a WiFi-enabled network management device, security transforms from a nice-to-have into an absolute necessity. A compromised Pi can expose your entire home network to threats, so let’s explore the essential practices to keep your setup secure.
Start with password strength. The default Raspberry Pi username and password combination (pi/raspberry) is widely known and should be changed immediately. Create a strong, unique password with at least 12 characters combining uppercase, lowercase, numbers, and symbols. Even better, disable password authentication entirely and use SSH keys for remote access, which provides significantly stronger protection against brute-force attacks.
Firmware and software updates are your first line of defense against known vulnerabilities. Run sudo apt update && sudo apt upgrade regularly, ideally weekly for devices managing critical network functions. Enable automatic security updates if you’re comfortable with automated maintenance, but remember to test updates on non-critical systems first.
Network segmentation provides an additional safety layer. Consider placing your Raspberry Pi on a separate VLAN or subnet from your primary devices. This isolation means that if your Pi is compromised, attackers won’t have direct access to your personal computers and smartphones. Configure your firewall rules to allow only necessary traffic between network segments.
Finally, disable unused services and close unnecessary ports. If you’re not using VNC, Bluetooth, or other features, turn them off. Each running service represents a potential attack vector. Use tools like ufw (Uncomplicated Firewall) to restrict incoming connections to only the specific ports your network management applications require.
You’ve now explored multiple approaches to enable WiFi on your Raspberry Pi, from the beginner-friendly desktop interface to advanced command-line configurations and headless setups. Each method has its place—choose the GUI for visual simplicity, CLI for remote management, or headless configuration when you need to get connected without peripherals. The key is selecting the approach that matches your comfort level and project requirements.
With your Raspberry Pi now connected wirelessly, you’re ready to tackle exciting network management projects. Whether you’re setting up Pi-hole for ad-blocking, configuring VPN servers, or building a Home Assistant setup for smart home control, reliable WiFi connectivity is your foundation. From here, you can explore advanced voice control projects or network monitoring tools that leverage your wireless connection. Remember to keep your system updated and refer back to the troubleshooting section whenever connectivity issues arise. Happy building!