

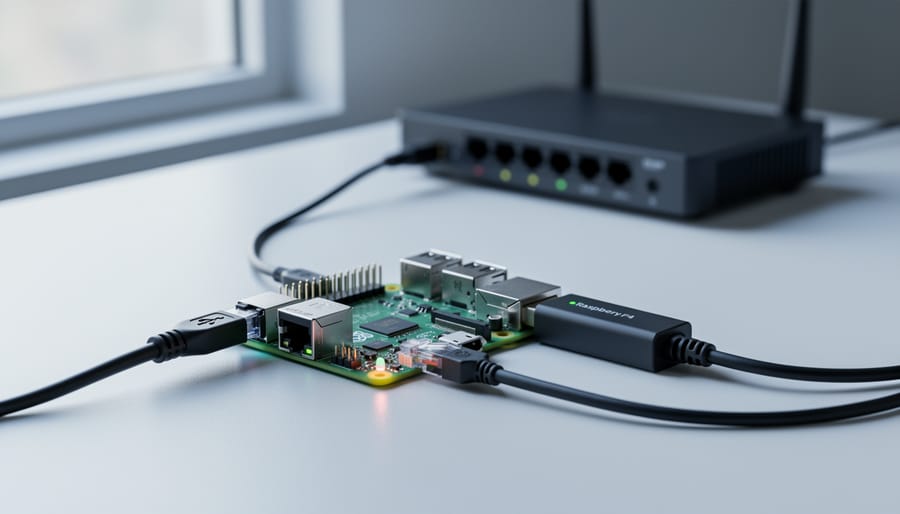
Transform your Raspberry Pi into a fully functional network router by selecting a model with dual network interfaces—either a Raspberry Pi 4 with a USB-to-Ethernet adapter or any model paired with a compatible USB network dongle. Flash Raspberry Pi OS Lite onto a microSD card using the official Raspberry Pi Imager, enabling SSH during the initial setup to streamline configuration without requiring a dedicated monitor.
Configure your primary Ethernet port as the WAN connection to your existing modem and designate the secondary interface as the LAN port for your local network. Install and configure essential routing software including dnsmasq for DHCP and DNS services, along with iptables to establish Network Address Translation (NAT) rules that allow multiple devices to share your internet connection securely.
Enable IP forwarding by modifying the sysctl configuration file, ensuring your Pi can properly route packets between network interfaces. This single change transforms your device from a basic computer into an active routing platform capable of managing network traffic efficiently.
Set up firewall rules that protect your network while allowing legitimate traffic to flow freely. Configure port forwarding, Quality of Service (QoS) parameters, and bandwidth management settings based on your specific networking needs—whether you’re creating a guest network, establishing VPN access, or simply replacing an aging commercial router with customizable open-source alternative.
Test your configuration thoroughly by connecting client devices to the LAN port, verifying internet connectivity, and monitoring performance metrics. The modular nature of Raspberry Pi routing allows you to add features incrementally, from ad-blocking capabilities to advanced traffic monitoring, creating a personalized networking solution that grows with your requirements.
What You’ll Need Before Starting
Hardware Checklist
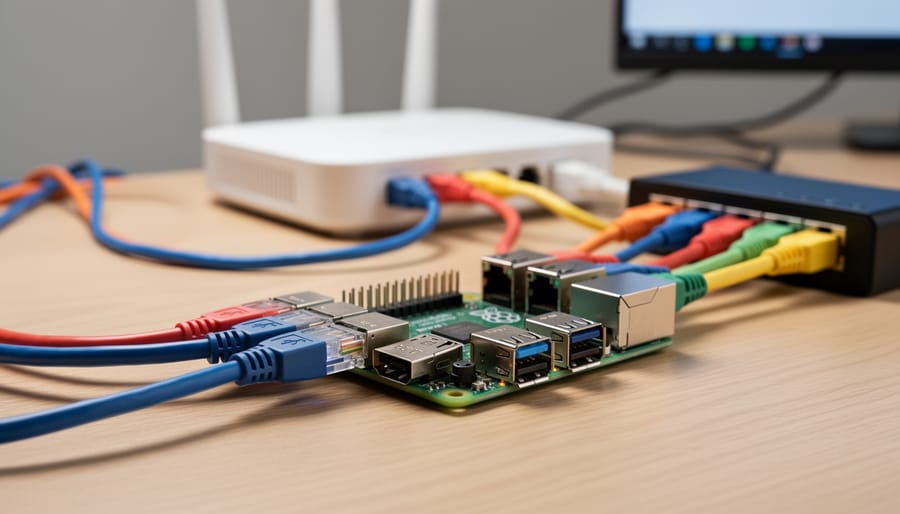
Before you begin your Raspberry Pi router project, gather these essential components to ensure a smooth setup process. At the heart of your build, you’ll need a Raspberry Pi 4 Model B with at least 2GB of RAM, though the 4GB model offers better performance for handling multiple network connections. The Pi 4 is ideal due to its dual micro-HDMI ports and Gigabit Ethernet capability.
You’ll require a quality microSD card with at least 16GB capacity and Class 10 speed rating for reliable performance. Purchase cards from reputable brands like SanDisk or Samsung to avoid compatibility issues. A USB-C power supply delivering 5V/3A is crucial, as underpowering can cause instability. Use the official Raspberry Pi power adapter when possible.
For network connectivity, obtain a USB Ethernet adapter to provide the second network interface needed for routing. Look for adapters with Realtek RTL8153 or ASIX AX88179 chipsets, which offer excellent Linux compatibility. An Ethernet cable connects your Pi to the existing modem or network.
Optional but recommended items include a protective case for the Pi with adequate ventilation, and heat sinks or a small fan if you expect heavy routing loads. Having a USB keyboard, mouse, and HDMI cable available during initial configuration will simplify the setup process before transitioning to remote management.
Software Requirements
Before transforming your Raspberry Pi into a network router, you’ll need the right operating system. The choice of software significantly impacts performance and ease of setup.
Raspberry Pi OS Lite is the most popular choice for router projects. This stripped-down version omits the desktop environment, freeing up valuable system resources for routing tasks. It’s lightweight, well-documented, and perfect for headless operation. Most routing tutorials assume you’re using this OS, making troubleshooting easier.
OpenWrt offers a more specialized approach. Originally designed for routers, this Linux distribution provides a web interface specifically built for network management. It includes pre-configured firewall rules and routing protocols, reducing manual configuration. However, the initial setup requires more technical knowledge compared to Raspberry Pi OS.
DietPi presents a middle ground option. This ultra-lightweight system optimizes resource usage while maintaining simplicity. It includes automated installation scripts for common networking software, streamlining the setup process considerably.
For router applications, Raspberry Pi OS Lite stands out as the best option for most users. Its familiar Debian environment, extensive community support, and compatibility with standard networking tools like iptables and dnsmasq make it ideal for beginners and experienced users alike. OpenWrt suits those wanting advanced routing features out-of-the-box, while DietPi appeals to users prioritizing minimal resource consumption. Whichever you choose, ensure you download the latest version to benefit from security updates and improved hardware support.
Installing the Operating System
Preparing Your SD Card
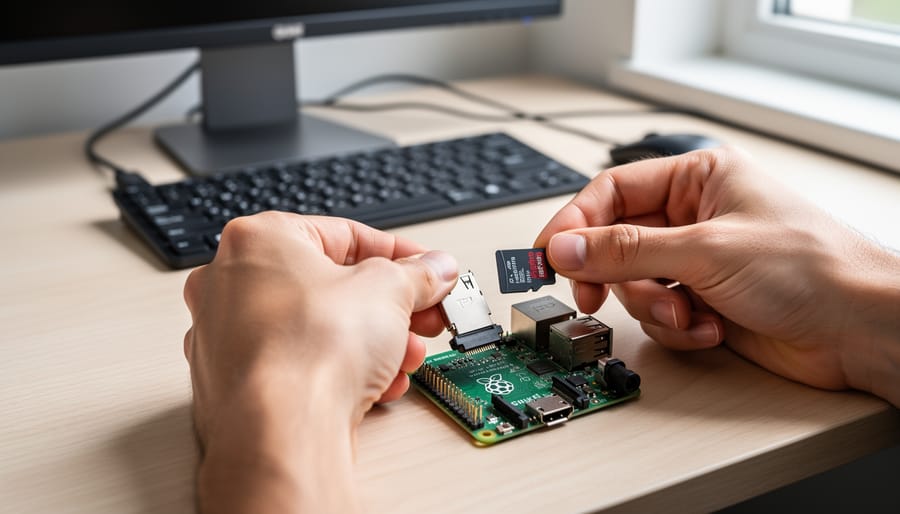
Getting your SD card ready is the first hands-on step in building your Raspberry Pi router. You’ll need a quality microSD card with at least 16GB capacity, though 32GB is recommended for better performance and longevity.
The easiest method is using Raspberry Pi Imager, the official tool available for Windows, macOS, and Linux. Download it from the Raspberry Pi website, then insert your SD card into your computer using a card reader. Launch the Imager and click “Choose OS.” For a router setup, select “Raspberry Pi OS Lite” under the Raspberry Pi OS (other) menu since you won’t need the desktop interface.
Next, click “Choose Storage” and select your SD card. Before writing, click the gear icon to access advanced options. Here, enable SSH, set a hostname, configure your username and password, and optionally set up Wi-Fi for initial access. These pre-configurations save significant time later.
Click “Write” and wait for the process to complete, usually taking 5-10 minutes. The Imager will verify the installation automatically.
For those interested in SD card-free alternatives later, check out our guide on network boot setup.
Once flashing completes, safely eject your SD card and you’re ready to move forward with the hardware setup.
Initial Boot and Basic Configuration
Once you’ve successfully powered up your Raspberry Pi for the first time, you’ll need to complete several essential configuration steps to prepare it for router duties. If you’re working with Raspberry Pi OS Lite (recommended for router projects), you’ll start at the command line. For desktop versions, you can access the terminal application.
The first priority is enabling SSH access, which allows you to manage your Pi remotely without needing a dedicated monitor and keyboard. On newer Raspberry Pi OS versions, SSH is disabled by default for security. To enable it, navigate to the Raspberry Pi Configuration tool by typing sudo raspi-config in the terminal. Select “Interface Options,” then “SSH,” and choose “Yes” to enable it. This proves invaluable when your Pi is tucked away in your network closet or if you prefer managing it via remote desktop access from another computer.
Next, change the default password immediately. The default credentials (username: pi, password: raspberry) are widely known and pose a security risk, especially for a device handling network traffic. Use the passwd command to set a strong, unique password.
With basic security addressed, update your system to ensure you have the latest software packages and security patches. Run sudo apt update to refresh the package lists, followed by sudo apt upgrade -y to install available updates. This process may take several minutes depending on your internet connection and when the OS image was created.
Finally, configure your timezone and localization settings through raspi-config to ensure accurate logging and time-sensitive operations, which matter when managing network routing and monitoring traffic patterns.
Connecting Your Network Adapters
Understanding WAN and LAN Interfaces
When transforming your Raspberry Pi into a router, understanding the difference between WAN and LAN interfaces is essential for proper network configuration. Think of your router as a traffic controller managing two distinct zones.
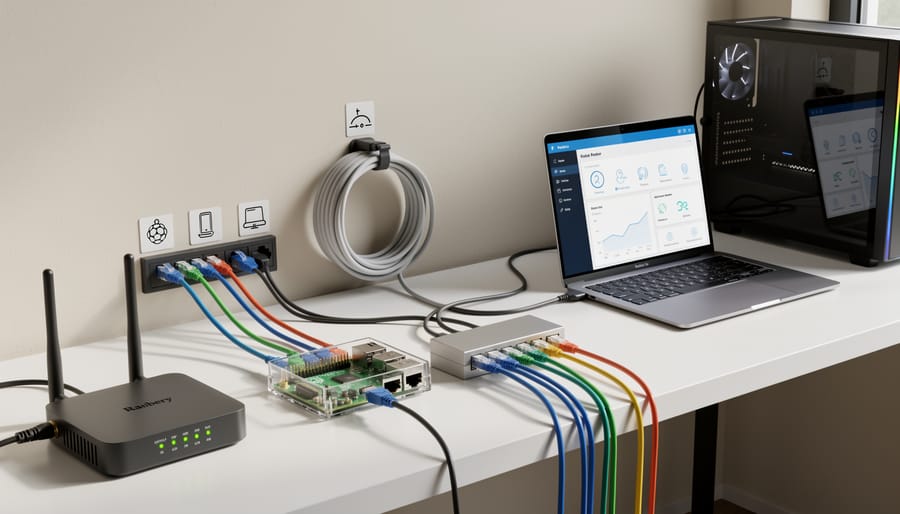
The WAN (Wide Area Network) interface connects your router to the outside world, typically linking to your internet service provider’s modem. This is your gateway to the internet, and all incoming and outgoing traffic passes through this port. On a Raspberry Pi router setup, you’ll usually designate one Ethernet port or a USB network adapter as the WAN interface.
The LAN (Local Area Network) interface, on the other hand, connects to your internal devices like computers, phones, and smart home gadgets. This creates your private network where devices can communicate with each other and access the internet through the router. The Raspberry Pi’s built-in Ethernet port commonly serves as the LAN interface, though you can add a USB hub with multiple network adapters for additional LAN ports.
Here’s how traffic flows: when a device on your LAN requests a webpage, the router receives that request through the LAN interface, processes it, and forwards it to the internet through the WAN interface. The response travels back through the WAN, gets processed by the router, and delivered to your device via the LAN interface. This separation ensures proper security and network management, with the router acting as a protective barrier between your private network and the public internet.
Physical Connection Setup
Before powering up your Raspberry Pi router, you’ll need to establish the proper physical connections. Start by inserting the microSD card with your operating system into the card slot on the underside of your Pi. Make sure it clicks into place securely.
Next, connect your Ethernet cables. Plug one cable from your modem or existing router into the Raspberry Pi’s built-in Ethernet port – this will serve as your WAN (internet input) connection. If you’re using a USB-to-Ethernet adapter for additional wired connections, insert it into one of the available USB ports now.
For wireless functionality, ensure your USB Wi-Fi dongle is firmly connected to a USB port if your Raspberry Pi model doesn’t have built-in Wi-Fi. Models like the Pi 3 and newer have integrated wireless capabilities, so you can skip this step.
Connect your power supply to the micro-USB or USB-C port, depending on your Pi model. You should see a red LED illuminate immediately, indicating power is flowing. Within moments, a green LED should begin flickering, showing SD card activity as the system boots.
To verify hardware recognition, connect a monitor via HDMI and observe the boot sequence. You can also SSH into your Pi once it’s running and use the command “lsusb” to list connected USB devices, confirming your network adapters are detected properly.
Configuring Network Interfaces
Setting Up Static IP for LAN Interface
To configure your Raspberry Pi as a router, you need to assign a static IP address to the LAN-facing interface (typically eth0 if you’re using Ethernet). This static IP will serve as the default gateway for devices on your local network.
First, determine which network interface will face your LAN. Run `ip addr show` to see your available interfaces. You’ll typically use eth0 for wired connections or a USB Ethernet adapter for additional ports.
Next, edit the dhcpcd configuration file by entering `sudo nano /etc/dhcpcd.conf`. Scroll to the bottom of the file and add the following configuration, adjusting the interface name if needed:
“`
interface eth0
static ip_address=192.168.1.1/24
static routers=192.168.1.1
static domain_name_servers=8.8.8.8 8.8.4.4
“`
This configuration sets your Raspberry Pi’s LAN interface to 192.168.1.1 with a subnet mask of 255.255.255.0 (the /24 notation). This IP will become the gateway address that your connected devices use to access the internet.
Save the file by pressing Ctrl+X, then Y, and Enter. Restart the dhcpcd service with `sudo systemctl restart dhcpcd` or reboot your Pi using `sudo reboot`.
After rebooting, verify the configuration by running `ip addr show eth0`. You should see your static IP address listed. You can also test connectivity by pinging the address from another device on your network once everything is configured.
Choose an IP range that doesn’t conflict with your existing network if you’re adding this router to an established setup.
Configuring WAN Interface for Internet Access
Your WAN (Wide Area Network) interface is the bridge between your Raspberry Pi router and the outside world. This is where your Pi will connect to your ISP’s modem to receive internet connectivity, which it will then distribute to devices on your local network.
Start by connecting your primary network adapter to your ISP’s modem using an Ethernet cable. If you’re using the Raspberry Pi’s built-in Ethernet port, this will typically be eth0. For setups using a USB-to-Ethernet adapter as your WAN interface, it might appear as eth1 or have a different designation.
To configure the WAN interface, you’ll need to edit the dhcpcd configuration file. Open a terminal and type: sudo nano /etc/dhcpcd.conf
Most ISPs assign IP addresses dynamically using DHCP, which is the default behavior. In this case, your WAN interface should obtain an IP address automatically without additional configuration. However, you’ll want to ensure the interface is set to request an address on boot.
If your ISP requires a static IP address (less common for residential connections), you’ll need to add specific parameters to the configuration file. Add these lines for a static WAN configuration:
interface eth0
static ip_address=YOUR_ISP_PROVIDED_IP/24
static routers=YOUR_ISP_GATEWAY
static domain_name_servers=8.8.8.8 8.8.4.4
Replace the placeholder values with the information provided by your ISP. Save the file and exit the editor.
Reboot your Raspberry Pi with sudo reboot to apply the changes. Once it restarts, verify your WAN connection by running: ip addr show eth0
You should see an IP address assigned to your WAN interface. Test internet connectivity with: ping -c 4 8.8.8.8
A successful response confirms your WAN interface is properly configured and receiving internet access from your modem.
Installing and Configuring DHCP Server
Installing dnsmasq
Now that you’ve got your Raspberry Pi ready, it’s time to install dnsmasq, a lightweight but powerful tool that will handle both DHCP and DNS services for your router. This software will manage IP address assignment for devices connecting to your network and resolve domain names efficiently.
First, update your package list to ensure you’re installing the latest version. Open a terminal on your Raspberry Pi and run:
“`
sudo apt update
sudo apt install dnsmasq
“`
The installation process takes just a minute or two. Once complete, dnsmasq will automatically start, but we need to stop it temporarily to configure it properly:
“`
sudo systemctl stop dnsmasq
“`
Before diving into configuration, it’s good practice to back up the original configuration file. This gives you a safety net if something goes wrong:
“`
sudo mv /etc/dnsmasq.conf /etc/dnsmasq.conf.backup
“`
This command renames the existing configuration file rather than deleting it. You’ll create a fresh configuration file in the next section, which makes troubleshooting easier since you’re working with a clean slate rather than commenting out hundreds of default settings. The backup remains available if you ever need to reference the original examples or restore default settings.
Configuring DHCP Settings
Now it’s time to configure the DHCP server to manage IP addresses for devices connecting to your Raspberry Pi router. This involves editing the dnsmasq configuration file, which handles both DHCP and DNS services.
Open the configuration file by typing sudo nano /etc/dnsmasq.conf in your terminal. You’ll see a lengthy file with many commented-out options. Scroll to the bottom and add your custom settings to keep things organized.
Start by defining the interface where DHCP should operate. Add interface=eth0 (or whichever interface connects to your local network). This ensures DHCP only runs on your internal network, not on the WAN-facing connection.
Next, set your IP address range with the dhcp-range option. For example, dhcp-range=192.168.1.50,192.168.1.150,12h assigns addresses from 192.168.1.50 to 192.168.1.150 with a 12-hour lease time. Choose a range that fits your network size while avoiding conflicts with your router’s static IP. The lease time determines how long devices keep their assigned addresses before renewal. Shorter leases (like 2h) work well for networks with frequently changing devices, while longer periods (24h or more) suit stable environments.
Configure DNS servers using dhcp-option=6,8.8.8.8,8.8.4.4 for Google’s public DNS, or substitute your preferred servers. You can also add dhcp-option=3,192.168.1.1 to specify your Raspberry Pi as the default gateway.
Include domain-needed and bogus-priv to prevent forwarding malformed DNS requests. Save the file with Ctrl+X, then Y, and Enter.
Test your configuration by running sudo dnsmasq –test. If no errors appear, restart the service with sudo systemctl restart dnsmasq. Your DHCP server is now ready to assign addresses automatically.
Enabling IP Forwarding and NAT
Enabling IP Forwarding
To transform your Raspberry Pi into a functional router, you’ll need to enable IP forwarding, which allows the device to pass network packets between different network interfaces. Think of it as giving your Pi permission to act as a traffic controller for your network data.
For a quick temporary solution, enter this command in the terminal:
“`
sudo sysctl -w net.ipv4.ip_forward=1
“`
This enables IP forwarding immediately but resets after a reboot, making it perfect for testing your router setup before committing to permanent changes.
To make IP forwarding permanent, you’ll need to modify a system configuration file. Open the sysctl configuration with:
“`
sudo nano /etc/sysctl.conf
“`
Look for the line that reads #net.ipv4.ip_forward=1 (the # symbol means it’s commented out and inactive). Remove the # symbol to uncomment it, so it reads:
“`
net.ipv4.ip_forward=1
“`
Save the file by pressing Ctrl+X, then Y, and Enter. Apply the changes without rebooting using:
“`
sudo sysctl -p
“`
To verify IP forwarding is active, run:
“`
cat /proc/sys/net/ipv4/ip_forward
“`
If it returns 1, you’re all set! This foundational step ensures your Raspberry Pi can properly route traffic between your network interfaces.
Configuring iptables for NAT
Now that you’ve enabled IP forwarding, it’s time to configure Network Address Translation (NAT) using iptables. This crucial step allows devices connected to your Raspberry Pi router to access the internet by translating their private IP addresses to your router’s public IP address.
First, let’s set up the basic NAT rule. This rule tells your Pi to masquerade traffic from your local network (typically eth0 or a wireless interface) as it exits through your WAN interface. Enter the following command:
“`
sudo iptables -t nat -A POSTROUTING -o eth0 -j MASQUERADE
“`
Replace eth0 with your actual WAN interface name if different. This command adds a rule to the NAT table that performs masquerading on all outgoing packets.
Next, configure iptables to allow forwarding for established connections and related traffic:
“`
sudo iptables -A FORWARD -i eth0 -o wlan0 -m state –state RELATED,ESTABLISHED -j ACCEPT
sudo iptables -A FORWARD -i wlan0 -o eth0 -j ACCEPT
“`
Again, adjust interface names to match your setup. These rules ensure that traffic can flow between your internal network and the internet in both directions.
The challenge with iptables rules is that they don’t survive reboots by default. To make them persistent, install the iptables-persistent package:
“`
sudo apt install iptables-persistent
“`
During installation, you’ll be prompted to save current IPv4 and IPv6 rules. Select Yes for both. If you need to save rules later after making changes, use:
“`
sudo netfilter-persistent save
“`
Verify your rules are active with:
“`
sudo iptables -t nat -L -n -v
“`
You should see your MASQUERADE rule listed in the POSTROUTING chain. Your Raspberry Pi is now configured to route traffic between networks.
Testing Your Router Setup
Connecting a Test Device
Once your Raspberry Pi router is configured, it’s time to verify everything works correctly by connecting a test device. This step confirms that DHCP is assigning IP addresses properly and that internet connectivity flows through your new router.
Start by connecting a laptop or smartphone to your Raspberry Pi’s network. If you’re using the Pi’s built-in Wi-Fi as an access point, search for your network name in your device’s Wi-Fi settings and connect using the password you configured. For wired connections, simply plug an Ethernet cable from your test device into the Pi’s Ethernet port (assuming you’ve set up the appropriate network interfaces).
After connecting, check that your device receives an IP address automatically. On Windows, open Command Prompt and type “ipconfig” to view your network configuration. Mac and Linux users can use “ifconfig” or “ip addr” in the terminal. Look for an IP address within the range you specified in your DHCP configuration, typically something like 192.168.1.100.
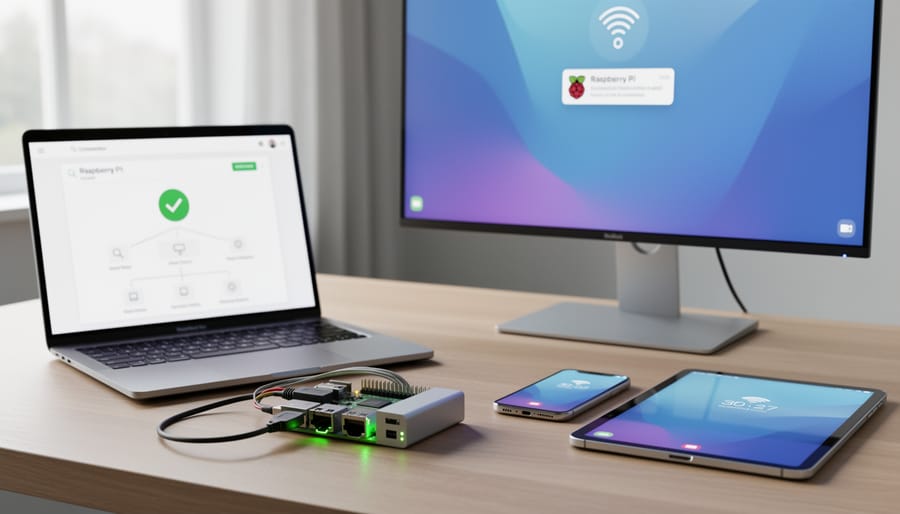
Next, test internet connectivity by opening a web browser and visiting a few websites. Try both domain names and IP addresses (like 8.8.8.8) to ensure DNS resolution works properly. You can also use the ping command to test connectivity: “ping google.com” should return successful responses if everything is configured correctly. If you encounter issues, double-check your routing rules and ensure IP forwarding is enabled on the Raspberry Pi.
Common Issues and Quick Fixes
Even experienced users encounter hiccups when setting up a Raspberry Pi as a router. Here are the most common issues and their solutions.
If your Pi isn’t getting an IP address via DHCP, first verify your ethernet cable connections are secure. Check that your upstream router or modem has DHCP enabled and available addresses in its pool. You can manually assign a static IP to your Pi’s WAN interface as an alternative solution.
No internet access despite proper connections usually points to NAT configuration problems. Double-check your iptables rules are correctly forwarding traffic between interfaces. Run “sudo iptables -L -v” to verify your rules are active. If they disappeared after a reboot, ensure you’ve saved them using iptables-persistent.
Connected devices can’t access the internet often means DNS isn’t configured properly. Verify dnsmasq is running with “sudo systemctl status dnsmasq” and check that your /etc/dnsmasq.conf file includes valid upstream DNS servers like 8.8.8.8 or 1.1.1.1.
For wireless connectivity issues, confirm your USB WiFi adapter supports access point mode by running “iw list”. Not all adapters are compatible. Consider upgrading to a recommended model if yours doesn’t support AP mode.
Finally, slow performance might indicate your Pi is underpowered for your network demands. A Raspberry Pi 4 with 4GB RAM handles most home routing tasks comfortably. You can also explore adding a VPN server setup for enhanced security once basic routing works reliably.
Optional Enhancements to Consider
Setting Up Ad-Blocking
Once your Raspberry Pi router is operational, you can enhance it with network-wide ad blocking using Pi-hole. This popular open-source application acts as a DNS sinkhole, filtering out advertising domains before they reach any device on your network. The beauty of this approach is that every connected device benefits from ad blocking without requiring individual browser extensions or software installations.
To get started, install Pi-hole with a single command through your Pi’s terminal. The installation wizard guides you through configuration options, including selecting your DNS provider and setting admin passwords. You’ll need to configure your router settings to point DNS queries to your Pi’s IP address, ensuring all network traffic flows through Pi-hole’s filtering system.
Pi-hole provides a web-based dashboard where you can monitor blocked queries, whitelist legitimate sites, and view network statistics in real-time. This gives you complete visibility into your network’s browsing patterns and the effectiveness of your ad blocking. The system updates its blocklists automatically, maintaining protection against new advertising domains without manual intervention.
Adding VPN Capabilities
Adding VPN capabilities to your Raspberry Pi router creates a secure tunnel for remote access to your home network, protecting your data when using public Wi-Fi and allowing you to access local resources from anywhere. Two popular options stand out: OpenVPN and WireGuard.
OpenVPN is the veteran choice, offering robust security and compatibility across virtually all devices and operating systems. It’s been battle-tested for years and includes extensive documentation. However, it can be more complex to configure initially. To install OpenVPN, you can use PiVPN, a convenient installation script that simplifies the entire process. Simply run the command and follow the interactive prompts to generate server certificates and client configurations.
WireGuard represents the modern alternative, gaining rapid adoption due to its streamlined codebase and impressive performance. It establishes connections faster than OpenVPN and uses less processing power, making it ideal for the Raspberry Pi’s limited resources. The configuration files are also notably simpler, with just a few lines needed for basic setup. WireGuard is now included in the Linux kernel, ensuring excellent support and stability.
For beginners, WireGuard offers the gentler learning curve, while OpenVPN provides broader device compatibility. Both options will encrypt your traffic and assign you a local IP address when connected remotely. Whichever you choose, remember to forward the appropriate port on your main router and consider using a dynamic DNS service if your ISP doesn’t provide a static IP address.
Congratulations on successfully transforming your Raspberry Pi into a fully functional network router! You’ve accomplished something truly valuable: creating a customizable, cost-effective networking solution that puts you in complete control of your home or office network. Unlike commercial routers with locked-down firmware and limited configuration options, your Raspberry Pi router offers unlimited potential for customization, enhanced security through open-source software, and the flexibility to adapt as your needs evolve.
Through this project, you’ve gained practical experience with Linux networking, firewall configuration, DHCP and DNS management, and network security principles. These skills transfer directly to professional IT environments and provide a foundation for more advanced networking projects. You’ve also joined a vibrant community of makers and tech enthusiasts who continuously share improvements, troubleshooting tips, and creative implementations.
For next steps, consider exploring advanced features like VPN server integration for secure remote access, implementing Quality of Service rules to prioritize specific traffic types, or setting up network-wide ad blocking with Pi-hole. You might also experiment with monitoring tools to visualize network traffic and performance metrics, giving you deeper insights into your network’s behavior.
Don’t hesitate to explore community forums, GitHub repositories, and Raspberry Pi documentation when you encounter challenges or want to expand functionality. The learning never stops, and each optimization teaches you something new about networking. Your router is now a living project that can grow alongside your skills and requirements, making it far more than just another piece of hardware.