


Measure your Raspberry Pi Zero’s power consumption using a USB power meter – expect between 80-140mA (0.4-0.7W) at idle and up to 350mA (1.75W) under full load with peripherals attached. These numbers matter significantly when designing battery-powered projects, as a 2000mAh power bank could theoretically run a Pi Zero for 14-25 hours depending on your configuration and workload.
Disable unnecessary hardware interfaces through the config.txt file to slash power draw. Turn off HDMI output when running headless (saves 20-30mA), disable the LED indicator (saves 3-5mA), and avoid USB peripherals that draw power directly from the board. Each optimization compounds, potentially extending battery life by 30-50% in real-world applications.
Select power sources based on your project’s actual requirements rather than maximum rated draw. A quality 5V 1A adapter handles most Pi Zero projects comfortably, while portable applications benefit from lithium polymer batteries paired with 5V boost converters. For ultra-low-power scenarios like weather stations or sensors, consider pairing the Pi Zero with sleep modes and wake-on-event configurations.
Understanding these power characteristics transforms how you approach Pi Zero projects. Whether you’re building a portable retro gaming console, deploying remote sensors, or creating wearable tech, knowing exactly how much energy your setup consumes lets you plan battery capacity, estimate runtime, and optimize your design for maximum efficiency without sacrificing functionality.
Understanding Raspberry Pi Zero Power Consumption: The Real Numbers
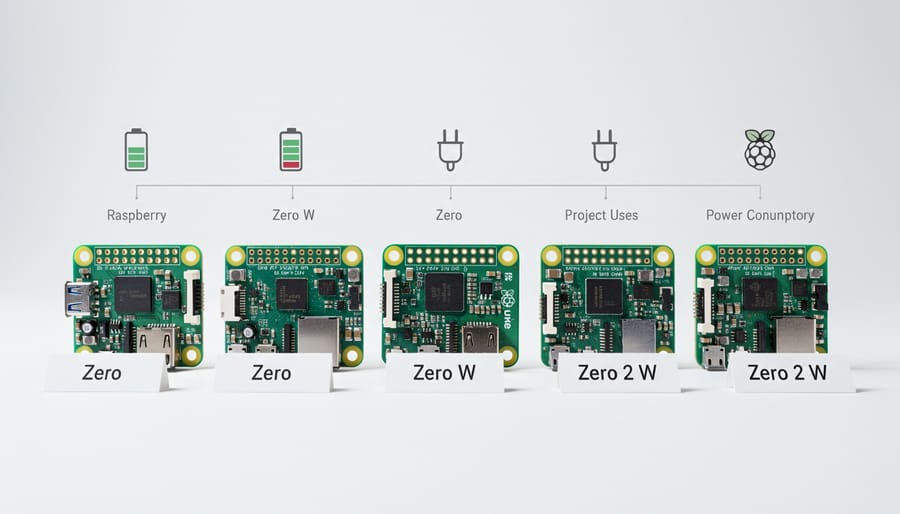
Pi Zero vs Pi Zero W vs Pi Zero 2 W: Power Draw Comparison
Understanding the power differences between Pi Zero models is essential for battery-powered projects. Here’s what you need to know about each board’s energy appetite.
The original Pi Zero draws approximately 100-120mA at idle (0.5-0.6W at 5V), making it the most power-efficient option. Without built-in wireless capabilities, it’s ideal for ultra-low-power applications where you can use wired connections or add external radios only when needed.
The Pi Zero W adds WiFi and Bluetooth, increasing idle consumption to 120-150mA (0.6-0.75W). When actively using WiFi, expect peaks around 200-250mA. This roughly 30-50mA increase over the original Zero is the price you pay for wireless convenience. For most projects, this tradeoff is worthwhile since you avoid external USB adapters that often consume more power anyway.
The Pi Zero 2 W represents a significant performance jump with its quad-core processor, but power consumption increases accordingly. Idle draw sits around 180-200mA (0.9-1.0W), and under heavy CPU load, it can spike to 400-500mA. That’s 3-4 times the original Zero’s consumption at peak, but you’re getting roughly 5 times the processing power.
For battery projects running continuously, the original Zero maximizes runtime. The Zero W makes sense when wireless connectivity is essential and moderate battery life is acceptable. Choose the Zero 2 W when you need computational power for image processing, complex calculations, or running multiple services simultaneously, and you have adequate power supply or can implement aggressive power management strategies.
What Actually Drains Your Pi Zero’s Battery
Understanding what consumes power on your Pi Zero helps you make smarter decisions for battery-powered projects. The processor is your biggest consumer, accounting for roughly 40-50% of total power draw, especially during intensive tasks. This jumps significantly when running CPU-heavy applications or compiling code.
WiFi comes in second, consuming about 20-30% of power when active. The built-in wireless module on the Pi Zero W draws approximately 120mA during transmission, making it a major consideration for wireless communication projects. Bluetooth adds another 10-15% when enabled, even if not actively transmitting data.
GPIO pins contribute 5-10% depending on what you’re driving. LEDs, sensors, and motors connected through GPIO can quickly add up. A single LED might draw 20mA, while servo motors can pull 100mA or more during operation.
USB peripherals vary widely but can consume 15-25% of your power budget. Keyboards, mice, and especially external storage devices are notorious power hogs. Even a simple USB WiFi dongle can draw 150mA continuously.
The good news? You can disable unused components to dramatically extend battery life, sometimes doubling your runtime.
Measuring Your Own Power Usage: Tools and Techniques
Hardware Tools for Power Measurement
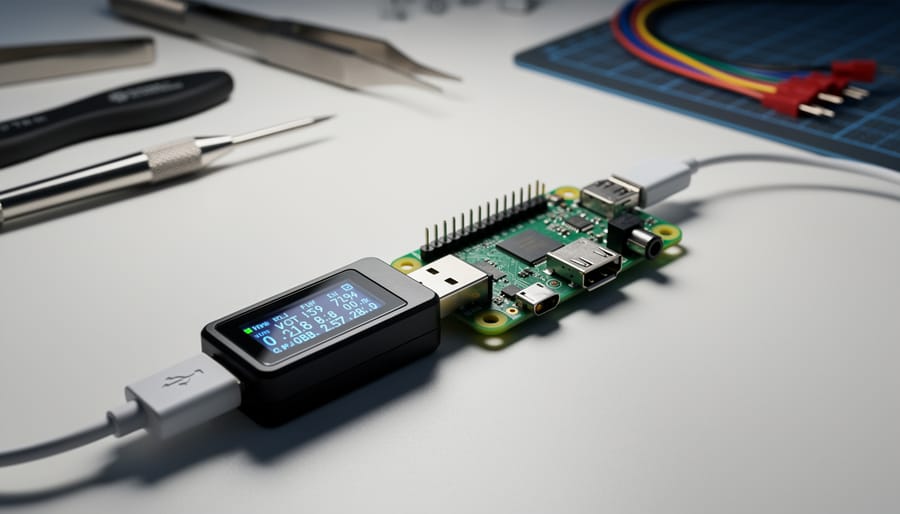
To accurately measure your Raspberry Pi Zero’s power consumption, you’ll need reliable hardware tools. USB power meters are the most practical choice for beginners, offering real-time voltage, current, and power readings without requiring circuit modifications. Popular options include the PortaPow Premium USB Power Monitor ($12-15), which displays voltage and amperage clearly, and the YZXstudio USB Tester ($20-35), featuring data logging capabilities for tracking consumption patterns over time.
For more precise measurements, digital multimeters provide accuracy within milliamps. The UNI-T UT61E ($35-50) and Fluke 115 ($150-180) are excellent choices at different price points. When using a multimeter, set it to measure DC current (mA/A mode) and connect it in series between your power supply and the Pi Zero’s positive wire. Always start with the highest current range to prevent damaging the meter.
Budget-conscious makers can start with basic USB meters like the DROK USB Tester ($8-12), perfect for quick checks. Whichever tool you choose, ensure it supports at least 5V/3A to handle peak loads during boot. Remember to measure both idle and active states for comprehensive understanding of your project’s power requirements.
Software Monitoring Tools
Monitoring your Pi Zero’s power consumption doesn’t require external hardware. Several built-in command-line tools provide valuable insights into your device’s power behavior. The most useful utility is vcgencmd, which comes pre-installed on Raspberry Pi OS and offers real-time system information.
To check your current voltage and throttling status, open a terminal and type: vcgencmd get_throttled. This command reveals whether your Pi is experiencing undervoltage conditions, which directly impact performance and stability. You can also monitor core voltage with: vcgencmd measure_volts core.
For CPU temperature readings, which correlate with power consumption, use: vcgencmd measure_temp. Higher temperatures typically indicate increased power draw, making this a useful indirect measurement tool.
Another helpful utility is htop, installed via: sudo apt install htop. This interactive process viewer shows CPU usage per core, helping you identify power-hungry applications. Since the Pi Zero’s processor frequency scales based on load, monitoring CPU usage gives you practical insights into consumption patterns.
For comprehensive logging, create a simple bash script that periodically captures vcgencmd outputs to a text file. This allows you to track power-related metrics over extended periods, perfect for optimizing battery-powered projects. While these tools don’t provide exact wattage measurements, they offer practical indicators for understanding and managing your Pi Zero’s power behavior during development and testing.
Essential Power Optimization Strategies That Actually Work
Disable Unused Hardware Components
One of the most effective ways to reduce your Raspberry Pi Zero’s power consumption is by disabling hardware components you’re not actively using. Let’s walk through how to turn off these power-hungry features.
Starting with HDMI, which can consume around 25-30mA even when no display is connected, you can disable it temporarily using a simple command. SSH into your Pi Zero or access the terminal and type:
“`
sudo /opt/vc/bin/tvservice -o
“`
To re-enable HDMI later, use `sudo /opt/vc/bin/tvservice -p`. For a permanent solution, add `hdmi_blanking=2` to your /boot/config.txt file.
For the onboard LEDs, particularly the activity LED that blinks constantly, you can disable them by editing the config.txt file. Open it with `sudo nano /boot/config.txt` and add these lines:
“`
dtparam=act_led_trigger=none
dtparam=act_led_activelow=off
“`
This can save approximately 5-10mA depending on your model.
If you’re working with a Pi Zero W and don’t need wireless connectivity, disabling WiFi and Bluetooth can save significant power. Add these lines to /boot/config.txt:
“`
dtoverlay=disable-wifi
dtoverlay=disable-bt
“`
Alternatively, you can disable them temporarily using commands:
“`
sudo rfkill block wifi
sudo rfkill block bluetooth
“`
For USB functionality, you can disable the USB controller entirely when it’s not needed. This is particularly useful for headless projects that only require GPIO access. Use this command:
“`
echo ‘1-1’ | sudo tee /sys/bus/usb/devices/usb1/authorized_default
“`
Remember to test each change individually to ensure your project still functions correctly. By selectively disabling unused components, you can potentially reduce power consumption by 40-50mA or more, significantly extending battery life for portable projects.
CPU Frequency Scaling and Governor Settings
The Raspberry Pi Zero’s CPU frequency scaling is one of your most powerful tools for managing power consumption. The CPU governor determines how your Pi adjusts its processor speed based on workload, directly impacting both performance and energy usage.
By default, the Pi Zero uses the “ondemand” governor, which dynamically scales the CPU frequency between 700 MHz and 1 GHz based on current demand. While this provides good balance, you can optimize further depending on your project needs.
The “powersave” governor locks the CPU to its lowest frequency (700 MHz), minimizing power draw significantly—typically reducing consumption by 50-100 mA under load. This works perfectly for projects like temperature sensors, data loggers, or simple web servers where processing speed isn’t critical. The trade-off? Tasks will take longer to complete, which might actually consume more total energy if your Pi stays active longer.
Conversely, the “performance” governor keeps the CPU at maximum frequency constantly, consuming more power but completing tasks faster. This can actually save energy in scenarios where your Pi performs intensive bursts of work then enters idle or sleep states.
To check your current governor, run: cat /sys/devices/system/cpu/cpu0/cpufreq/scaling_governor
To switch governors temporarily, use: echo “powersave” | sudo tee /sys/devices/system/cpu/cpu0/cpufreq/scaling_governor
For permanent changes, edit /etc/rc.local or use the cpufrequtils package. The “powersave” governor typically saves 30-40% power in battery applications, making it ideal for solar-powered projects or extended battery operation where slight performance reduction is acceptable.
Smart Sleep Modes and Wake-on-Event
While the Raspberry Pi Zero doesn’t feature traditional sleep modes like laptops or smartphones, you can implement clever power-saving strategies that dramatically reduce consumption during inactive periods. The most effective approach involves completely shutting down the Pi and using external hardware to wake it up when needed.
One popular method uses a GPIO pin combined with an external timer circuit or real-time clock module. When your project doesn’t require constant operation, you can program the Pi to shut itself down completely, dropping power consumption to nearly zero. An RTC module like the DS3231 can then trigger a wake signal by briefly connecting the RUN pin to ground, effectively restarting your Pi at predetermined intervals. This is perfect for weather stations that only need to log data every hour or cameras that capture images on a schedule.
For event-based wake scenarios, consider using GPIO-connected sensors paired with a transistor circuit. A PIR motion sensor, for example, can trigger the RUN pin when movement is detected, allowing your Pi to remain off until actually needed. This approach works beautifully for wildlife cameras or security applications.
Implementing these sleep cycles requires some initial setup. Install a shutdown script that runs before powering down, and configure your RTC or wake circuit to pull the RUN pin low momentarily. The Pi will boot up, execute your tasks, then shut down again automatically. This cycle can reduce average power consumption from 100-150mA to just a few milliamps during sleep periods.
For less critical applications, you can also use simple cron jobs combined with manual shutdowns, though this requires external intervention to restart the system.
Choosing the Right Power Supply for Your Pi Zero Project
Battery-Powered Projects: Capacity Calculations
Calculating battery runtime for your Pi Zero projects is surprisingly straightforward once you know your power consumption. The basic formula is: Runtime (hours) = Battery Capacity (mAh) / Current Draw (mA). However, real-world results require accounting for battery efficiency and voltage conversion losses.
Let’s work through a practical example. If your Pi Zero consumes 120mA at 5V and you’re using a 10,000mAh power bank, you might expect 83 hours of runtime. However, power banks operate at 3.7V internally and boost to 5V, introducing approximately 15-20% conversion loss. Your actual runtime would be closer to 65-70 hours.
Battery chemistry significantly impacts performance. Lithium-ion cells maintain consistent voltage throughout discharge and handle the Pi Zero’s variable current demands well, making them ideal for portable projects. Alkaline batteries experience voltage drop under load, which can trigger brownout conditions before fully depleting. NiMH rechargables offer a middle ground with decent capacity and stable voltage.
For accurate calculations, always measure your specific project’s current draw under actual operating conditions. A Pi Zero streaming video consumes far more power than one logging temperature data intermittently. Consider adding a 20-25% safety margin to your calculations to account for battery aging and temperature effects.
Pro tip: Use battery protection circuits or dedicated power management HATs to prevent over-discharge, which damages lithium cells and reduces their lifespan. This ensures your portable projects run reliably for the long term.
Solar and Alternative Power Options
For long-term outdoor Pi projects, solar power offers an excellent sustainable solution. Small 5W to 10W solar panels paired with a charge controller can keep your Pi Zero running indefinitely during daylight hours while charging backup batteries. Look for panels with 5V USB outputs for simple integration.
Supercapacitors provide an interesting alternative to traditional batteries, offering extremely long lifespans and rapid charge cycles. While they store less energy than lithium batteries, they excel in applications with frequent charge-discharge cycles and can handle temperature extremes better.
Energy harvesting opens exciting possibilities for ultra-low-power scenarios. Piezoelectric sensors, thermoelectric generators, and RF energy harvesters can supplement power supplies in specific environments. Though harvested energy is minimal, it pairs well with the Pi Zero’s low consumption when combined with deep sleep modes and efficient wake-up scheduling. Consider hybrid approaches combining solar panels with supercapacitors for reliable 24/7 operation.
Hands-On Project: Building a Battery-Efficient Weather Station
Let’s put everything we’ve learned into practice by building a solar-powered weather station that can run for weeks on a single battery charge. This project combines multiple power-saving techniques to achieve impressive battery life while collecting temperature, humidity, and pressure data every 15 minutes.
Parts you’ll need: Raspberry Pi Zero W, BME280 sensor module, TP4056 lithium battery charging module with protection circuit, 3.7V 2500mAh lithium battery, 6V 2W solar panel, micro SD card (8GB minimum), and a Witty Pi 3 Mini power management board. The total cost runs around $45-50.
For wiring, connect the BME280 sensor to the Pi Zero’s I2C pins (GPIO 2 and 3). The Witty Pi board sits between your power source and the Pi, controlling when the device powers on and off. Connect your solar panel to the TP4056 charging module input, the battery to its output, and feed power from there to the Witty Pi. This setup handles charging while powering your station.
The magic happens in the scheduling script. Configure the Witty Pi to wake the Pi Zero every 15 minutes, take readings for 45 seconds, then shut down completely. Here’s the core Python code:
“`python
import bme280
import smbus2
from time import sleep
import csv
port = 1
address = 0x76
bus = smbus2.SMBus(port)
bme280.load_calibration_params(bus, address)
data = bme280.sample(bus, address)
with open(‘/home/pi/weather_data.csv’, ‘a’) as f:
writer = csv.writer(f)
writer.writerow([data.timestamp, data.temperature,
data.humidity, data.pressure])
“`
Add this to your /etc/rc.local to run on boot, and configure a Witty Pi schedule that runs for 45 seconds every 15 minutes.
Measured results are impressive. During the 45-second active period, the system draws approximately 150mA at 5V. With the BME280 sensor and WiFi disabled except when needed, average consumption drops to just 0.8mA during sleep mode. This translates to an average power consumption of roughly 15mAh per day.
With a 2500mAh battery, you’re looking at 160+ days of runtime without any solar charging. Add the 2W solar panel, and the system becomes virtually self-sustaining in most climates, needing only 2-3 hours of indirect sunlight daily to stay charged indefinitely.
For similar long-term deployments, check out techniques used in battery-powered scanning projects that employ comparable power management strategies. The key takeaway: proper sleep scheduling and minimal active time make multi-month battery operation entirely achievable with the Pi Zero.

Common Power Management Mistakes to Avoid
Even experienced Pi Zero users make power-draining mistakes that can cut battery life significantly. Here are the most common pitfalls and how to fix them.
Leaving WiFi permanently enabled ranks as the biggest power drain. The Pi Zero W constantly scans for networks even when not actively transmitting data, consuming around 120mA continuously. The fix is simple: disable WiFi when not needed using `sudo ifconfig wlan0 down` in your code, or better yet, only enable it during specific intervals for data transmission. For projects requiring wireless communication without WiFi’s power hunger, consider low-power RF modules instead.
Using inefficient voltage regulators wastes energy as heat. Linear regulators converting 12V down to 5V dissipate significant power, especially under load. Switch to buck converters with 85-90% efficiency ratings for battery-powered projects. This single change can extend runtime by 30-40%.
Polling sensors continuously in code drains power unnecessarily. Instead of checking sensor values every millisecond in a tight loop, implement interrupt-driven approaches or add delays between readings. A temperature sensor checked every 10 seconds instead of continuously can reduce average current draw by 20-30mA.
Forgetting to disable HDMI output costs you 25mA constantly. Add `/usr/bin/tvservice -o` to your startup script if your project runs headless.
Running at maximum CPU frequency when unnecessary wastes energy. Use the ondemand CPU governor to scale frequency based on load, or manually set lower speeds for simple tasks. A Pi Zero running at 700MHz instead of 1GHz can save 50mA during processing tasks.
Finally, leaving LEDs enabled adds 5-10mA per LED. Disable the activity LED by adding `dtparam=act_led_trigger=none` to your config.txt file.
Understanding your Raspberry Pi Zero’s power consumption opens up exciting possibilities for creating efficient, long-lasting projects. As we’ve explored, the Pi Zero typically draws between 100-150mA under normal operation, but this can be reduced to as low as 80mA or even lower with careful optimization. Simple adjustments like disabling HDMI, reducing clock speeds, and managing USB peripherals can significantly extend battery life, potentially transforming a project that runs for hours into one that operates for days or even weeks.
Now it’s your turn to put this knowledge into practice. Grab a USB power meter and start measuring your own projects. You’ll likely discover opportunities for optimization specific to your setup. Remember that every milliamp saved translates directly into longer battery life and lower energy costs. Whether you’re building a weather station, wildlife camera, or portable gaming device, proper power management is the key to success.
The Pi Zero’s incredibly low power consumption makes it ideal for battery-powered applications, and with the techniques covered in this guide, you’re well-equipped to create projects that are both powerful and energy-efficient. Start experimenting, measure your results, and enjoy the extended runtime that smart power management delivers.