

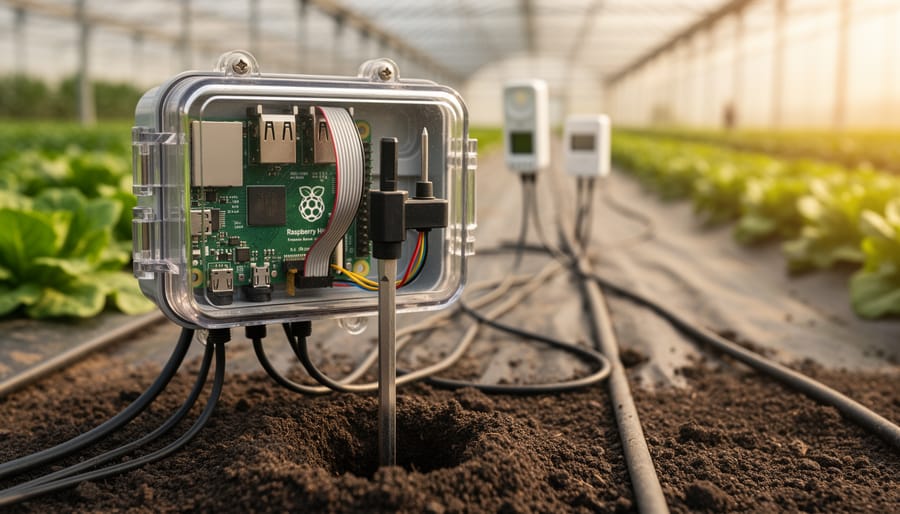
Modern agriculture faces a critical challenge: feeding a growing global population while using resources more efficiently. IoT sensors connected to affordable single-board computers like Raspberry Pi offer farmers and growers unprecedented insight into their crops, soil, and environmental conditions in real-time.
These intelligent monitoring systems transform traditional farming into data-driven operations. A soil moisture sensor can prevent both overwatering and drought stress, saving thousands of gallons of water annually. Temperature and humidity monitors alert growers to conditions that promote disease before visual symptoms appear. Light sensors optimize greenhouse operations by tracking photosynthetically active radiation, the specific wavelengths plants need for growth.
The accessibility revolution matters most. What once required expensive commercial systems now costs under $200 to build. A Raspberry Pi 4 with 2GB RAM, combined with five to seven agricultural sensors, provides professional-grade monitoring capabilities. The platform’s GPIO pins connect directly to analog and digital sensors, while its processing power handles data logging, analysis, and wireless transmission to smartphones or computers.
Real-world results validate the approach. Hobby greenhouse operators report 30-40% reductions in water usage. Small-scale farmers detect pest pressure earlier through environmental pattern recognition. Educators use these systems to teach students both agricultural science and practical electronics.
This guide walks you through sensor selection, hardware assembly, and software configuration. You’ll build a functioning agricultural monitoring station that collects actionable data, whether you’re managing a backyard garden, small farm, or educational greenhouse.
Why Raspberry Pi Changed Everything for Farm Automation
Before Raspberry Pi burst onto the scene in 2012, precision agriculture was largely the domain of industrial farms with deep pockets. Professional IoT sensor systems for monitoring soil conditions, weather patterns, and crop health could easily cost tens of thousands of dollars, putting them far out of reach for small-scale farmers, agricultural students, and hobbyists wanting to experiment with smart farming techniques.
The Raspberry Pi changed this landscape dramatically. At just $35 for a basic model, it democratized access to agricultural automation technology in a way that nothing else had before. Suddenly, anyone with basic technical curiosity could build a sophisticated farm monitoring system for a fraction of the traditional cost. This wasn’t just about saving money—it opened the door for innovation from unexpected places, as hobbyists and small farmers began developing creative solutions tailored to their specific needs.
What makes the Raspberry Pi particularly well-suited for agricultural applications? First, its GPIO pins for sensors provide a straightforward way to connect various monitoring devices without requiring expensive proprietary hardware. You can hook up soil moisture sensors, temperature probes, and humidity monitors using affordable components from standard electronics suppliers.
The Pi’s low power consumption is another game-changer for farm deployments. Many agricultural monitoring stations need to operate continuously in remote locations, sometimes running on solar power or batteries. The Raspberry Pi can run 24/7 while drawing minimal electricity, making it practical for field installations far from the power grid.
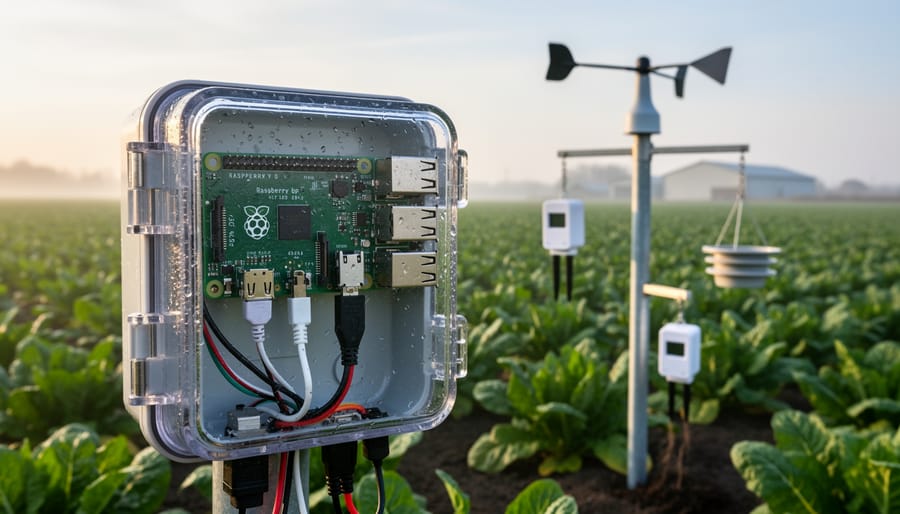
Weather resistance is achievable with proper housing—a simple waterproof enclosure costs under $20 and protects your Pi from rain, dust, and temperature extremes. This makes outdoor deployment viable even in harsh conditions.
The Pi’s full Linux operating system means you can run sophisticated data analysis, set up web servers for remote monitoring, and integrate with cloud platforms—all capabilities that would require expensive industrial hardware in traditional setups. This combination of affordability, flexibility, and power has truly leveled the playing field in precision agriculture.
Essential IoT Sensors Every Smart Farm Needs
Soil Moisture Sensors: Stop Guessing When to Water
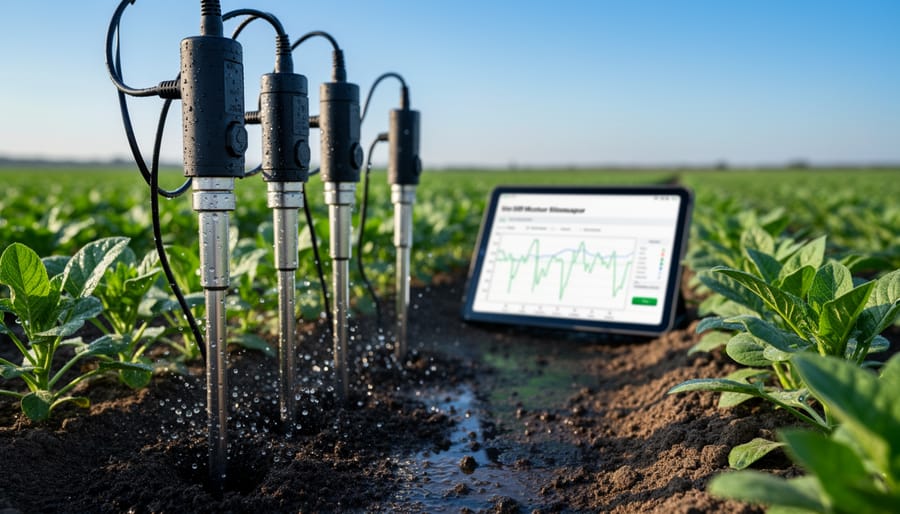
Knowing when your crops need water can make or break your harvest—and your water bill. Soil moisture sensors eliminate the guesswork by providing real-time data about moisture levels at root depth.
There are two main types to consider for your Raspberry Pi project. Capacitive sensors measure moisture by detecting changes in the soil’s dielectric properties without direct contact with the soil itself. This makes them more durable and resistant to corrosion, perfect for long-term outdoor deployment. Resistive sensors, on the other hand, measure electrical resistance between two probes inserted into the soil. While cheaper, they degrade faster due to corrosion and typically last only 6-12 months in continuous use.
For Raspberry Pi compatibility, the Adafruit STEMMA Soil Sensor (capacitive) connects easily via I2C interface and works beautifully with Python libraries. The DFRobot Gravity Analog Soil Moisture Sensor offers a budget-friendly resistive option that connects through an ADC converter like the MCP3008.
Real-world results are impressive. Farmers using automated soil moisture monitoring report 20-40% water savings compared to traditional irrigation schedules. A hobby greenhouse project in California reduced water usage by 35% while actually improving plant health by avoiding overwatering.
Connection is straightforward: capacitive sensors typically use I2C (just four wires), while resistive sensors need an analog-to-digital converter since the Pi lacks analog inputs. Both provide readings you can log, graph, and use to trigger automated irrigation systems.
Temperature and Humidity Monitoring for Crop Health
Monitoring temperature and humidity is essential for maintaining optimal crop health and preventing costly diseases. Two popular sensors make this easy for Raspberry Pi-based agricultural projects: the DHT22 and the BME280.
The DHT22 sensor is an affordable, beginner-friendly option that measures temperature with ±0.5°C accuracy and humidity within ±2-5%. It’s perfect for basic monitoring setups and connects to your Raspberry Pi with just three wires. The BME280, while slightly more expensive, offers superior accuracy and also includes barometric pressure readings, making it ideal for more comprehensive environmental monitoring systems.
These sensors help you catch problems before they damage your crops. High humidity combined with certain temperature ranges creates perfect conditions for fungal diseases like powdery mildew and blight. By tracking these metrics continuously, you can trigger ventilation systems, adjust irrigation schedules, or apply preventive treatments at exactly the right time.
For greenhouse growers, this data is particularly valuable. You can identify microclimates within your growing space and optimize heating or cooling systems to reduce energy costs. The sensors work seamlessly with Python libraries like Adafruit_DHT and smbus2, allowing you to log data every few minutes and visualize trends over days or weeks. Many growers set up alerts that notify them via email or SMS when conditions move outside ideal ranges, preventing crop stress before it begins.
Light Sensors for Optimizing Growth Cycles
Light sensors play a crucial role in precision agriculture by helping you monitor and optimize the amount of sunlight your crops receive. For Raspberry Pi-based agricultural projects, two sensor types stand out: photoresistors and lux sensors like the BH1750.
Photoresistors offer a simple, budget-friendly starting point for beginners. These analog components change resistance based on light intensity, requiring an analog-to-digital converter (ADC) like the MCP3008 to interface with your Raspberry Pi. While they provide relative light measurements rather than precise lux values, they’re perfect for detecting day/night cycles and basic light availability patterns.
For more accurate measurements, digital lux sensors like the BH1750 communicate directly via I2C protocol, eliminating the need for additional converters. These sensors measure illuminance in lux units, giving you standardized data that’s essential for greenhouse management. You can track whether your crops receive adequate light throughout the day and identify periods of light stress that might impact photosynthesis and growth rates.
In greenhouse applications, combining light sensor data with temperature and humidity readings creates a comprehensive view of growing conditions. This integration helps you decide when to deploy shade cloths during intense sunlight or activate supplemental LED grow lights during overcast periods. By logging this data over time, you’ll identify patterns that correlate with crop health and yields, enabling data-driven decisions that optimize your growing cycles.
pH and Nutrient Sensors for Soil Health
Understanding your soil’s chemistry is crucial for healthy crops, and IoT sensors make this monitoring accessible even for DIY enthusiasts. pH sensors measure soil acidity or alkalinity on a scale from 0-14, with most plants thriving between 6.0-7.5. These sensors typically use electrode probes that generate voltage readings corresponding to pH levels. When connecting to your Raspberry Pi, you’ll need an analog-to-digital converter since the Pi only reads digital signals.
NPK sensors take soil analysis further by measuring nitrogen, phosphorus, and potassium levels—the three essential nutrients for plant growth. These sensors work through electrical conductivity or optical methods, sending data directly to your Raspberry Pi for analysis.
Here’s the catch: accuracy matters significantly. Budget pH sensors (under $20) may drift by 0.5-1.0 pH units without regular calibration, while quality sensors maintain 0.1 accuracy. Plan to calibrate pH sensors monthly using standard buffer solutions at pH 4.0, 7.0, and 10.0. NPK sensors require less frequent calibration but need proper probe placement—typically 4-6 inches deep in moist soil for consistent readings.
For beginners starting their first agricultural monitoring project, pH sensors offer an excellent entry point since they’re straightforward to integrate and provide immediate actionable data about whether your soil needs amendment.
Camera Modules for Visual Crop Monitoring
Camera modules transform your Raspberry Pi into a powerful visual monitoring station for precision agriculture. The official Raspberry Pi Camera Module V2 offers 8-megapixel resolution and connects directly to your board’s CSI port, making it ideal for capturing detailed images of crop health, identifying pest infestations, and tracking growth stages over time.
For automated surveillance applications, you can set up time-lapse photography to document plant development, allowing you to spot issues like nutrient deficiencies or disease symptoms early. The high-quality camera module supports macro photography for close-up pest detection, helping you identify aphids, caterpillars, or fungal infections before they spread across your crops.
Compatible third-party cameras with infrared capabilities enable night vision monitoring, perfect for detecting nocturnal pests or wildlife that might damage your fields. When combined with basic computer vision libraries like OpenCV, your camera system can automatically flag anomalies in plant appearance or unusual activity patterns.
The compact size and low power consumption make these modules practical for deploying multiple monitoring stations across larger growing areas, creating a comprehensive visual network that complements your sensor data collection.
Building Your First Raspberry Pi Agricultural Sensor Station
What You’ll Need: Hardware and Components
Building your own agricultural IoT monitoring system requires carefully selected components that balance functionality with cost-effectiveness. Here’s your complete shopping list to get started.
For the brain of your operation, you’ll need to choose between two Raspberry Pi models. The Raspberry Pi 4 (4GB model, approximately $55 from authorized retailers like Adafruit or The Pi Hut) offers superior processing power and multiple USB ports, making it ideal if you plan to connect several sensors simultaneously or process data locally. However, for basic soil and temperature monitoring with 2-3 sensors, the Raspberry Pi Zero W (around $15) provides excellent value with built-in Wi-Fi at a fraction of the cost.
Essential sensors include a DHT22 temperature and humidity sensor ($10-15 from Amazon or SparkFun), a capacitive soil moisture sensor ($8-12, available on Amazon or AliExpress), and optionally a light sensor like the BH1750 ($5-8) for tracking sunlight exposure. Avoid resistive soil moisture sensors as they corrode quickly in outdoor conditions.
You’ll also need a microSD card (16GB minimum, $8-12), a quality power supply matching your Pi model ($8-15), waterproof enclosures for outdoor sensors ($10-20 from hardware stores), and jumper wires plus a breadboard for prototyping ($10-15 kit from electronics suppliers).
Total estimated cost ranges from $75 for a basic Pi Zero setup to $140 for a comprehensive Pi 4 system with multiple sensors. Most components ship within days from major electronics retailers, though international suppliers may take 2-4 weeks.
Weatherproofing Your Setup for Outdoor Use
Protecting your agricultural IoT sensors from rain, dust, and temperature extremes is essential for long-term reliability. Start with IP-rated enclosures (IP65 or higher) that provide dust-tight and water-resistant protection. These plastic or aluminum boxes shield your Raspberry Pi and electronics while allowing sensors to monitor their environment. Position temperature and humidity sensors in vented enclosures to ensure accurate readings without direct exposure to moisture.
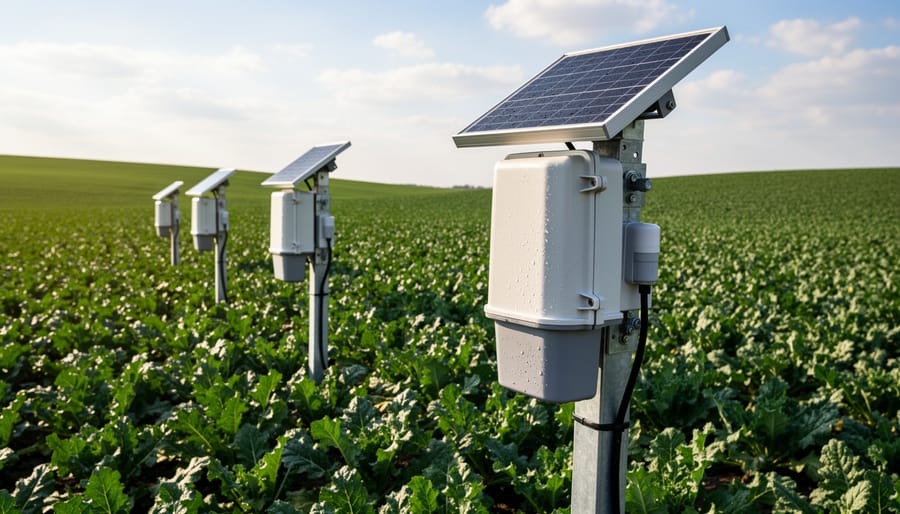
For power solutions, solar power solutions offer excellent flexibility for remote field deployments where running electrical wiring isn’t practical. A 20-50W solar panel paired with a deep-cycle battery and charge controller keeps your Raspberry Pi running continuously. For installations near buildings, standard weatherproof extension cords with GFCI protection provide simpler, more reliable power.
Cable management matters outdoors. Use UV-resistant cable conduit or waterproof cable glands where wires enter enclosures. Silicone sealant adds extra protection around entry points. Keep sensor cables elevated off the ground using zip ties and stakes to prevent water pooling and rodent damage.
Consider adding desiccant packets inside enclosures to absorb condensation, and install your setup in shaded areas when possible to reduce heat buildup. Regular maintenance checks every few weeks help catch potential issues before they cause sensor failures.
Connecting Sensors and Basic Wiring
Connecting sensors to your Raspberry Pi is easier than you might think! Let’s break down the basics to get your agricultural monitoring system up and running.
The Raspberry Pi features GPIO (General Purpose Input/Output) pins that serve as the connection points for your sensors. These 40 pins include power pins (3.3V and 5V), ground pins, and data pins that communicate with sensors. Think of GPIO pins as the nervous system of your Pi, allowing it to sense the physical world.
For simple sensors like soil moisture probes, you’ll typically use individual GPIO pins with basic digital or analog signals. However, many advanced agricultural sensors communicate through specialized protocols. I2C (Inter-Integrated Circuit) is perfect for connecting multiple sensors using just two data wires (SDA and SCL), plus power and ground. This means you can hook up temperature, humidity, and light sensors all on the same bus. SPI (Serial Peripheral Interface) offers faster communication speeds, ideal for sensors that need quick data transfer.
Here’s a basic wiring setup for a typical soil moisture sensor: Connect the sensor’s VCC pin to the Pi’s 3.3V pin (Pin 1), ground to any GND pin (Pin 6), and the signal output to GPIO4 (Pin 7). For I2C devices like a BME280 environmental sensor, connect VCC to 3.3V, GND to ground, SDA to GPIO2 (Pin 3), and SCL to GPIO3 (Pin 5).
Always double-check voltage requirements before connecting sensors. Most Raspberry Pi GPIO pins operate at 3.3V, and connecting a 5V signal directly can damage your board. Use a logic level converter when working with 5V sensors to keep everything safe and functional.
Software Solutions: Collecting and Analyzing Your Data
Python Libraries That Make Sensor Reading Easy
Getting your Raspberry Pi to talk to agricultural sensors is surprisingly straightforward, thanks to some excellent Python libraries. These tools handle the complex low-level communication, letting you focus on building your monitoring system.
GPIO Zero is your starting point for simple sensors. This beginner-friendly library makes reading digital and analog sensors feel natural. Here’s how to read a soil moisture sensor connected to GPIO pin 17:
“`python
from gpiozero import Button
from time import sleep
moisture_sensor = Button(17)
while True:
if moisture_sensor.is_pressed:
print(“Soil is dry – time to water!”)
else:
print(“Soil moisture looks good”)
sleep(60)
“`
For more specialized sensors, Adafruit’s CircuitPython libraries are invaluable. They support hundreds of sensors with consistent, well-documented code. Reading temperature and humidity from a DHT22 sensor becomes this simple:
“`python
import adafruit_dht
import board
dht_sensor = adafruit_dht.DHT22(board.D4)
temperature = dht_sensor.temperature
humidity = dht_sensor.humidity
print(f”Temperature: {temperature}°C, Humidity: {humidity}%”)
“`
Both libraries include extensive examples and active community support, making troubleshooting easier when you encounter issues. Install them using pip, and you’ll be reading sensor data within minutes rather than hours spent wrestling with datasheets.
Data Visualization Options: From Spreadsheets to Dashboards
Once you’ve collected data from your IoT sensors, you’ll need a way to visualize it meaningfully. Let’s compare three popular platforms that work excellently with Raspberry Pi projects.
ThingSpeak is beginner-friendly and perfect for those just starting out. This cloud-based platform lets you create charts and graphs with minimal coding—just a few lines to push your sensor data to their servers. The free tier supports up to four sensor channels, which covers most basic agricultural setups. However, customization options are limited, and data refresh rates max out at 15 seconds on the free plan.
Grafana offers professional-grade dashboards with stunning visuals and extensive customization. It runs locally on your Raspberry Pi or on a cloud server, giving you complete control over your data. You can create complex queries, set up alerts, and design multi-panel displays that update in real-time. The downside? There’s a steeper learning curve, and you’ll need to set up a database like InfluxDB alongside it. Plan to spend a weekend learning the basics.
Blynk strikes a nice middle ground, offering drag-and-drop mobile app creation that displays your sensor data beautifully on smartphones and tablets. It’s ideal if you want quick access to your farm data while walking the fields. The interface is intuitive, but the free tier limits you to basic widgets, and heavy customization requires their paid plans.
For beginners, start with ThingSpeak. As your skills grow, graduate to Grafana for maximum flexibility.
Setting Up Automated Alerts and Actions
Once your sensors are collecting data, the real power comes from automating responses to that information. Start by configuring threshold alerts in your monitoring software or Node-RED dashboard. For temperature sensors, set upper and lower limits that trigger notifications when conditions become critical for your crops. Most Raspberry Pi workflow automation setups can send email alerts using Python’s smtplib library or SMS messages through services like Twilio.
For basic automation, connect a relay module to your Raspberry Pi’s GPIO pins to control irrigation systems. Write a simple Python script that activates the relay when soil moisture drops below a specific threshold, automatically watering your plants. You can also trigger exhaust fans when greenhouse temperatures exceed safe levels or turn on grow lights based on natural light sensor readings.
Node-RED makes this particularly beginner-friendly with its visual programming interface. Simply drag and drop function nodes to create rules like “if soil moisture is below 30%, send SMS and activate water pump for 5 minutes.” Start with simple automations and gradually add complexity as you become comfortable with the system. Always include manual override switches for safety and test your automated actions thoroughly before leaving them unsupervised.
Real-World Results: What Farmers Are Actually Achieving
The proof is in the harvest, and farmers worldwide are seeing impressive returns from their Raspberry Pi-based IoT sensor investments. Let’s look at what growers are actually achieving with these DIY monitoring systems.
A small-scale organic vegetable farm in California implemented a network of six Raspberry Pi units equipped with soil moisture sensors across their 5-acre property. Within the first growing season, they documented a 35% reduction in water usage while maintaining crop yields. The automated irrigation triggers eliminated their previous guesswork approach, and the farm owner noted that the entire system paid for itself in just four months through water bill savings alone.
In Australia, a family-run vineyard deployed Raspberry Pi weather stations combined with leaf wetness sensors to predict fungal disease pressure. This early warning system allowed them to reduce fungicide applications by 40%, cutting both chemical costs and labor hours. More importantly, they caught two potential disease outbreaks early enough to prevent significant crop damage, saving an estimated $15,000 in lost production during their first year of operation.
A greenhouse operation in the Netherlands used Raspberry Pi sensors to monitor temperature, humidity, and CO2 levels across multiple growing zones. By fine-tuning their environmental controls based on real-time data, they achieved a 22% increase in tomato yields and reduced heating costs by 18%. The grower emphasized that having 24/7 monitoring gave them peace of mind and eliminated the need for middle-of-the-night greenhouse checks.
Even hobby farmers are seeing benefits. A backyard gardener in Texas built a simple Raspberry Pi system with temperature and moisture sensors for under $100. They reported saving approximately 3 hours per week on manual monitoring and watering tasks, while their vegetable production increased noticeably due to more consistent growing conditions. These real-world examples demonstrate that you don’t need enterprise-level budgets to achieve meaningful improvements in your agricultural operations.
Troubleshooting Common Challenges
Power Management in Remote Locations
Powering IoT sensors in remote agricultural fields presents unique challenges, but several practical solutions make reliable operation achievable. The most effective approach combines multiple power sources to ensure consistent monitoring even during extended periods of low sunlight or harsh weather conditions.
Solar panels paired with rechargeable battery banks form the backbone of most off-grid sensor deployments. A 20-30 watt solar panel can typically power a Raspberry Pi Zero-based sensor system while keeping batteries charged. Choose deep-cycle batteries rated for at least 20Ah capacity to maintain operation through cloudy days or overnight periods.
Implementing aggressive power management strategies significantly extends battery life. Configure your Raspberry Pi to enter sleep mode between sensor readings, waking only at scheduled intervals. A typical setup might take measurements every 15-30 minutes rather than continuously, reducing average power consumption from 500mA to under 100mA. Consider using a real-time clock module with wake-on-alarm functionality to completely power down the Pi between readings.
For extremely remote locations, pair solar charging with wind generators as a backup during overcast periods. Additionally, use voltage regulators and charge controllers to protect both your batteries and equipment from damage due to overcharging or voltage fluctuations, ensuring your agricultural monitoring system remains operational year-round.
Connectivity Issues: WiFi, LoRa, and Cellular Options
Choosing the right wireless communication method for your agricultural IoT project depends heavily on your farm’s specific conditions. Let’s break down your main options and when each makes sense.
WiFi is the most straightforward choice if you’re monitoring areas within 100-150 feet of your router. It offers high data transfer speeds and works seamlessly with Raspberry Pi’s built-in WiFi module. However, WiFi coverage drops significantly in rural areas with buildings, hills, or dense vegetation. The cost is minimal since you likely already have a router, but reliability becomes the issue on larger properties.
LoRa (Long Range) technology is a game-changer for farms with poor WiFi coverage. LoRa modules can transmit data up to 10 kilometers in rural settings, making them ideal for monitoring distant fields. The trade-off is lower data transmission rates, but agricultural sensors typically send small data packets anyway—temperature, moisture, and pH readings don’t require much bandwidth. LoRa modules cost around $15-30 per device, and you’ll need a LoRa gateway connected to your Raspberry Pi hub.
Cellular options using 4G/LTE modules provide the most flexibility but at higher costs. Expect to pay $20-40 per module plus monthly data plans. This approach works best when you need reliable connectivity across multiple remote locations or when other options simply won’t reach.
For most hobbyist projects, start with WiFi for nearby monitoring or LoRa for extended range without recurring costs.
Scaling Up: From One Sensor to a Complete Farm Network
Once you’ve successfully deployed your first Raspberry Pi sensor station, you’ll likely want to expand coverage across your growing area. Scaling from a single node to a complete farm network requires thoughtful planning, but the process is more straightforward than you might think.
Start by mapping out your coverage needs. Walk your property and identify critical monitoring zones—areas with different microclimates, irrigation zones, or crop types. A good rule of thumb is placing sensor nodes every 50-100 feet in open fields, though you’ll need closer spacing in greenhouses or areas with varied terrain.
For communication between multiple Raspberry Pi units, mesh networking offers excellent reliability. Unlike traditional WiFi networks where each device connects directly to a central router, mesh networks allow your Pi units to communicate with each other, passing data along until it reaches your central hub. Popular solutions include LoRa modules for long-range, low-power communication (up to 2 miles in rural areas) or Zigbee for shorter distances with lower latency.
Consider implementing a tiered architecture. Designate one Raspberry Pi as your master node—this unit collects data from all sensor stations, runs your database, and hosts your dashboard. Worker nodes simply gather sensor readings and transmit them to the master. This approach reduces power consumption and processing requirements for your field-deployed units.
Data aggregation becomes crucial with multiple sensors. Install a time-series database like InfluxDB on your master Pi to efficiently store readings from all nodes. Label each data point with its source station ID and location coordinates. This organization lets you create comparative visualizations and identify location-specific trends.
Power management grows more important at scale. Solar panels with battery banks work well for remote nodes, while units near buildings can use weatherproof power adapters. Budget approximately 5-10 watts per basic sensor station.
Cloud integration provides remote access to your expanding network. Services like ThingSpeak or AWS IoT Core offer free tiers suitable for hobbyist projects. Your master Pi can push aggregated data to the cloud, letting you monitor conditions from anywhere while keeping local backups.
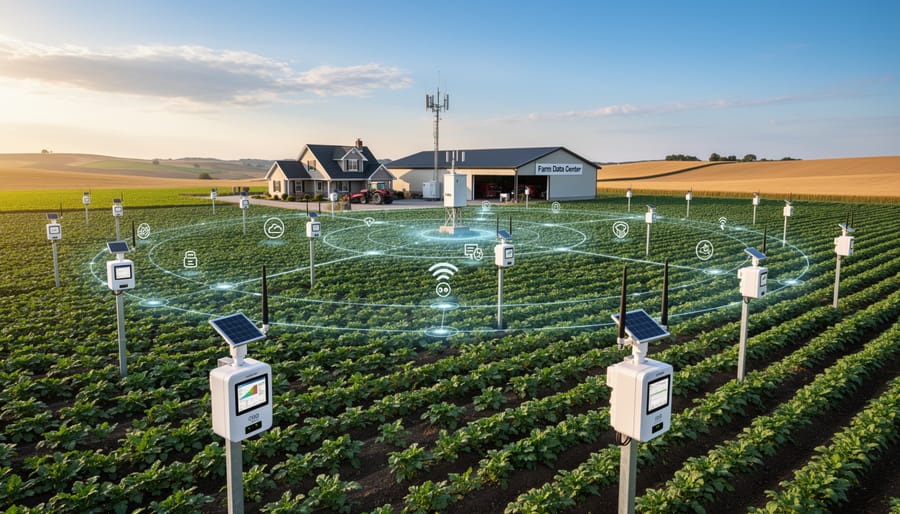
You’ve made it to the end of this guide, and hopefully you’re feeling inspired about the possibilities that Raspberry Pi IoT sensors bring to agriculture. The beauty of this technology lies in its accessibility – you don’t need a massive budget or years of programming experience to make a real difference in how you monitor and manage crops or gardens.
Start small and build your confidence. A single sensor station measuring soil moisture and temperature can already provide valuable insights that transform your watering schedule and plant health. As you become comfortable with the basics, you can expand your network, add more sensors, and experiment with advanced features like automated irrigation or predictive analytics. Remember, every expert started exactly where you are now, and the learning journey itself is incredibly rewarding.
The agricultural IoT landscape is constantly evolving, and your Raspberry Pi projects can grow alongside it. Whether you’re managing a backyard garden, helping a local farm optimize resources, or simply exploring this technology as an educational project, you’re contributing to a more sustainable and data-driven approach to food production.
Ready to take the next step? Explore our library of Raspberry Pi tutorials for guidance on specific sensor integrations, advanced programming techniques, and troubleshooting tips. Your first agricultural monitoring system is just one project away.