

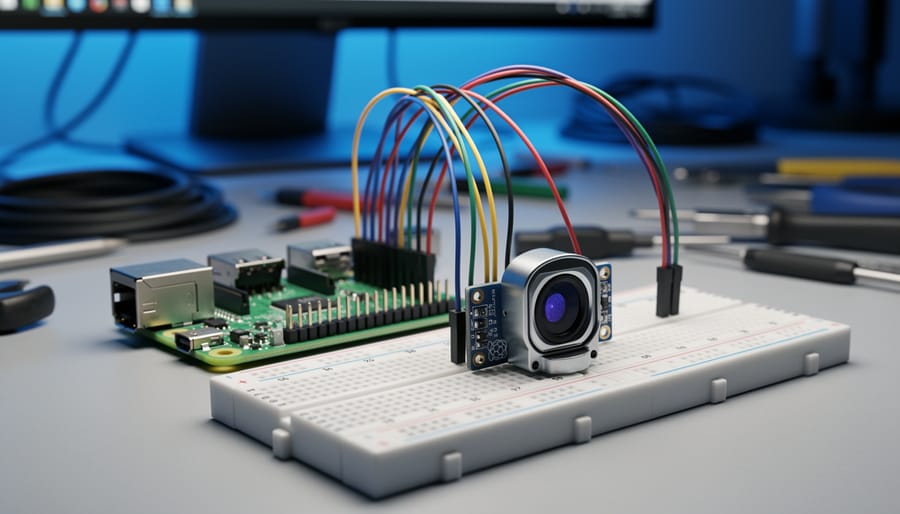
Connect your fingerprint sensor to your Raspberry Pi’s GPIO pins following the sensor’s datasheet—most optical sensors use pins for power (5V/3.3V), ground, TX, and RX for UART communication. Install the necessary Python libraries like pyfingerprint or adafruit-fingerprint using pip, which handle the serial communication protocols between your Pi and the biometric module. Configure your Raspberry Pi’s serial port by disabling the login shell through raspi-config and enabling the hardware UART interface, ensuring your sensor can communicate without conflicts.
Choose between optical sensors ($10-30 range, good for basic projects) and capacitive sensors ($30-60 range, offering better accuracy and liveness detection) based on your security requirements and budget constraints. Test your setup with simple enrollment and verification scripts before building complex authentication systems—start by enrolling 2-3 fingerprints and verifying them through terminal commands to confirm proper sensor operation.
Implement error handling in your code for common issues like failed reads, timeout errors, and duplicate fingerprint rejections, which occur frequently in real-world applications. Build your authentication logic around the sensor’s confidence scores, typically setting thresholds between 50-200 depending on your security needs—lower values increase false positives while higher values may reject legitimate users. Create a simple database or JSON file to map stored fingerprint IDs to user names or access permissions, enabling practical door locks, attendance systems, or secure file access projects that demonstrate genuine biometric integration capabilities.
Why Add a Fingerprint Sensor to Your Raspberry Pi?
Adding a fingerprint sensor to your Raspberry Pi opens up a world of practical applications that bring professional-grade biometric security to your DIY projects. Whether you’re just starting your maker journey or looking to level up existing builds, fingerprint authentication offers a perfect blend of security, convenience, and that cool factor we all love in tech projects.
For home security enthusiasts, integrating fingerprint sensors transforms basic setups into sophisticated systems. Imagine controlling door locks, alarm systems, or secure areas with just a touch. No more fumbling for keys or remembering complex passwords when your hands are full. Your fingerprint becomes the ultimate access credential that can’t be lost, forgotten, or easily duplicated.
Education and attendance tracking represent another compelling use case. Teachers and workshop organizers can build affordable attendance systems that accurately log participants without relying on easily-forgotten ID cards or time-consuming manual roll calls. Students get hands-on experience with biometric technology while solving real-world problems.
Personal project authentication takes on new dimensions too. Protect sensitive files on your Raspberry Pi media center, restrict access to specific applications, or create multi-user environments where each fingerprint unlocks personalized settings and content. This is particularly valuable for shared devices in family or educational settings.
Smart lock implementations showcase the practical marriage of hardware and software skills. Build custom cabinet locks, garage door controllers, or safe access systems with components costing a fraction of commercial alternatives. These projects not only secure your belongings but also demonstrate impressive technical capabilities that employers and fellow makers appreciate.
The best part? Fingerprint sensors are surprisingly affordable and beginner-friendly, making biometric security accessible to hobbyists at any skill level.
Choosing the Right Fingerprint Sensor for Your Project
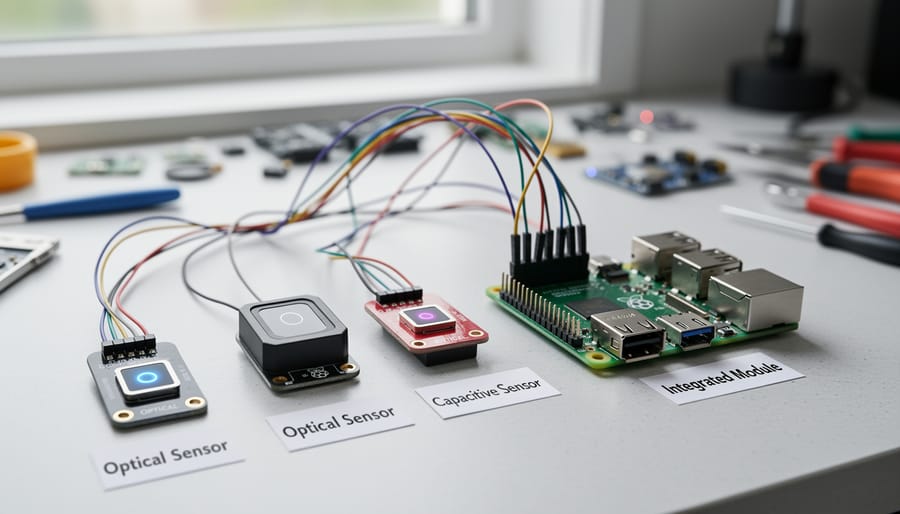
Optical vs. Capacitive Sensors: What’s the Difference?
When choosing a fingerprint sensor for your Raspberry Pi project, you’ll encounter two main types: optical and capacitive sensors. Understanding their differences will help you select the right one for your needs.
Optical sensors work like tiny cameras, capturing an image of your fingerprint using LED light. They’re the most common choice for hobbyist projects because they’re affordable, typically costing between $5-$15, and relatively easy to integrate. These sensors perform well in most conditions and offer decent accuracy for basic authentication tasks. However, they can sometimes be fooled by high-quality photos and may struggle with wet or very dry fingers.
Capacitive sensors use electrical currents to create a detailed map of your fingerprint’s ridges and valleys. These are the same sensors you’ll find in modern smartphones. They’re more secure than optical sensors since they’re nearly impossible to spoof with images, and they work better with slightly moist fingers. The trade-off is higher cost, usually $20-$40, and they can be more sensitive to scratches or damage on the sensing surface.
For most beginner projects like simple door locks, attendance systems, or learning authentication basics, optical sensors are your best bet. They’re forgiving, budget-friendly, and provide sufficient security for home projects. If you’re building something requiring higher security standards or planning a more polished product, capacitive sensors justify their extra cost with superior accuracy and anti-spoofing protection. Both types integrate smoothly with Raspberry Pi through UART or USB connections, making either option accessible for makers at any skill level.
Top Fingerprint Sensors Compatible with Raspberry Pi
Choosing the right fingerprint sensor for your Raspberry Pi project depends on your budget, technical requirements, and comfort level with hardware integration. Let’s explore some of the most popular options that have proven reliable in the maker community.
The R307 Optical Fingerprint Sensor stands out as a beginner-friendly choice that offers excellent value. This compact module communicates via UART serial interface, making it straightforward to connect with just a few wires. It can store up to 1000 fingerprints and provides decent accuracy for most hobbyist applications. At around $15-20, it’s an affordable entry point for experimenting with biometric security. The R307 works particularly well for basic access control projects like door locks or secure boxes.
For those seeking higher accuracy and reliability, the GT-511C3 fingerprint scanner delivers professional-grade performance. This sensor boasts a faster recognition speed and better image quality than budget alternatives. It supports both UART and TTL serial communication, and while it costs approximately $40-50, the investment pays off through its superior false rejection rate. The GT-511C3 is ideal for projects where security cannot be compromised.
The AS608 Capacitive Fingerprint Module offers a middle-ground solution combining affordability with solid performance. Unlike optical sensors, its capacitive technology resists spoofing attempts better, though it requires cleaner fingers for optimal scanning. Priced around $25-30, it provides good value for intermediate users wanting enhanced security features.
Here’s a quick comparison to help you decide:
| Module | Interface | Price Range | Ease of Use | Reliability |
|——–|———–|————-|————-|————-|
| R307 | UART | $15-20 | Excellent | Good |
| GT-511C3 | UART/TTL | $40-50 | Good | Excellent |
| AS608 | UART | $25-30 | Good | Very Good |
Each sensor comes with Python libraries and community support, ensuring you’ll find plenty of tutorials and troubleshooting help as you build your project.
What You’ll Need: Hardware and Software Requirements
Getting started with a fingerprint sensor project is easier than you might think. Let’s walk through everything you’ll need to bring your biometric security project to life.
For the Raspberry Pi itself, most models work wonderfully with fingerprint sensors. The Raspberry Pi 3B+, 4, and Zero 2 W are excellent choices, offering reliable GPIO pins and sufficient processing power. Even the compact Raspberry Pi Zero W can handle basic fingerprint recognition tasks, though the Pi 4 provides the best performance for more complex applications.
When selecting a fingerprint sensor, the R307 and AS608 modules are popular, affordable options that work seamlessly with Raspberry Pi. These optical sensors typically cost between $10-20 and offer reliable fingerprint matching. For higher security needs, consider capacitive sensors like the GT-521F52, which are harder to fool but come at a premium price point.
You’ll need a few essential components for connections. Female-to-female jumper wires connect your sensor to the Raspberry Pi’s GPIO pins. A USB-to-TTL serial adapter can simplify communication, though direct UART connection works perfectly fine. Regarding power requirements, most fingerprint sensors operate on 3.3V or 5V, drawing minimal current that your Raspberry Pi can easily supply through its GPIO pins.
On the software side, start with Raspberry Pi OS (formerly Raspbian) as your operating system. You’ll need Python 3 installed, along with the pyfingerprint library for sensor communication. Basic familiarity with the terminal and Python programming helps, but don’t worry if you’re just starting out—we’ll guide you through each step. Optional components include an external power supply for power-hungry projects and a breadboard for prototyping before permanent installations.
Wiring Your Fingerprint Sensor to Raspberry Pi
Understanding the Pin Connections
Before diving into your fingerprint sensor project, let’s demystify those tiny pins on your module. Most fingerprint sensors feature four essential connections that work together to communicate with your Raspberry Pi.
The VCC pin supplies power to your sensor, typically requiring 3.3V or 5V depending on your specific model. Always check your sensor’s datasheet to avoid damage—using incorrect voltage is the quickest way to fry your hardware! The GND pin completes the circuit by connecting to your Pi’s ground, creating a common reference point for electrical signals.
The TX (transmit) and RX (receive) pins handle the actual data communication between your sensor and Raspberry Pi. These work in tandem: the sensor’s TX connects to your Pi’s RX pin, and vice versa. Think of it like a two-way conversation where each device needs to listen on one channel while speaking on another.
When connecting sensors to Raspberry Pi, always power down your board first. This simple habit prevents accidental short circuits and protects both components. Use the GPIO pinout diagram specific to your Raspberry Pi model—pin numbering varies between versions, and mixing them up can lead to frustrating troubleshooting sessions later.
Physical Connection Steps
Connecting your fingerprint sensor to the Raspberry Pi is straightforward and requires no soldering skills. Most sensors use either USB or UART communication, with USB being the simpler plug-and-play option for beginners.
For USB fingerprint sensors, simply connect the sensor to any available USB port on your Raspberry Pi. The device should be automatically recognized by the system. You can verify the connection by opening a terminal and typing `lsusb`, which displays all connected USB devices. Look for an entry that mentions your sensor’s manufacturer or a generic “fingerprint” designation.
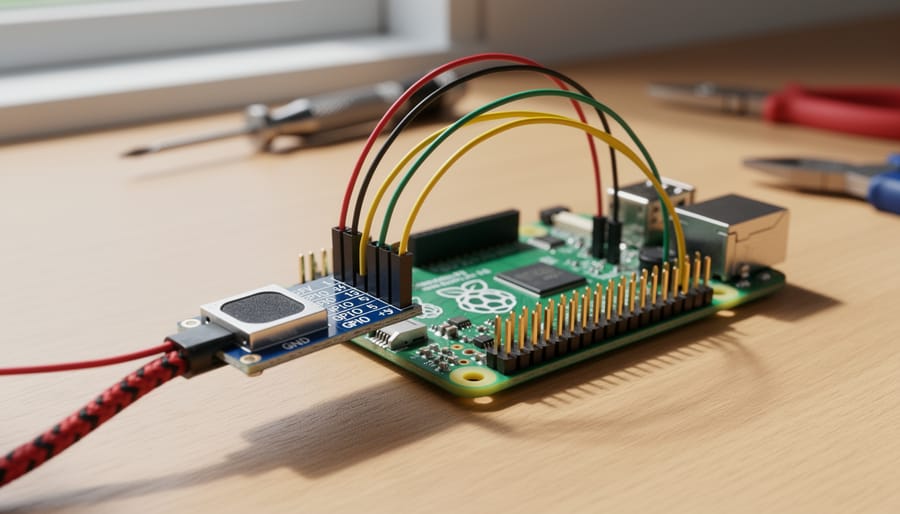
If you’re using a UART-based sensor like the popular R307 or AS608 models, you’ll need to connect it to the GPIO pins. Most sensors come with a 6-pin JST connector and pre-attached wires, making connections simple without breadboards. Connect the red wire to Pin 4 (5V power), black wire to Pin 6 (Ground), white or yellow wire to Pin 10 (GPIO 15/RXD), and green wire to Pin 8 (GPIO 14/TXD). Double-check your sensor’s datasheet as wire colors can vary between manufacturers.
Common connection mistakes include reversed TX and RX wires. If your sensor isn’t responding, try swapping these two connections. Another frequent issue is insufficient power supply. Fingerprint sensors draw considerable current during scanning, so ensure your Raspberry Pi power adapter provides at least 2.5A for older models or 3A for Raspberry Pi 4.
Before powering on, visually inspect all connections to confirm they’re secure and properly seated. Loose wires are the primary cause of intermittent sensor behavior. For added reliability, consider using female-to-female jumper wires with Dupont connectors, which grip GPIO pins more firmly than loose wires and can be easily reconnected if troubleshooting becomes necessary.
Setting Up the Software Environment
Installing Required Libraries and Dependencies
Before you can start capturing and verifying fingerprints, you’ll need to install the necessary software libraries on your Raspberry Pi. The most popular option for working with optical fingerprint sensors is the pyfingerprint library, which provides a straightforward Python interface for communicating with these devices.
First, make sure your Raspberry Pi is up to date by opening a terminal and running:
“`
sudo apt-get update
sudo apt-get upgrade
“`
These commands refresh your package lists and upgrade existing software to their latest versions, ensuring compatibility and security.
Next, install Python’s package manager if you haven’t already:
“`
sudo apt-get install python3-pip
“`
The pip tool allows you to easily install and manage Python libraries from the Python Package Index.
Now install the pyfingerprint library itself:
“`
sudo pip3 install pyfingerprint
“`
This library handles all the low-level communication protocols with your fingerprint sensor, including enrolling new fingerprints, searching for matches, and managing the sensor’s onboard template storage. It supports most common optical fingerprint sensors like the AS608 and R305 models.
Additionally, you’ll want to install the pyserial library for serial communication:
“`
sudo pip3 install pyserial
“`
This component enables your Raspberry Pi to communicate with the sensor through the GPIO pins using the UART serial protocol. Once installed, you’re ready to start writing code and testing your fingerprint sensor.
Configuring Serial Communication
Before your fingerprint sensor can communicate with the Raspberry Pi, you need to enable the serial interface. By default, this interface is disabled on newer Raspberry Pi models, so let’s walk through the simple activation process.
Start by opening the terminal and typing `sudo raspi-config`. This opens the configuration tool. Navigate to “Interface Options” using your arrow keys, then select “Serial Port.” You’ll see two prompts: first, select “No” when asked if you want a login shell accessible over serial (this prevents interference). Then select “Yes” to enable the serial port hardware. Exit the tool and reboot your Pi with `sudo reboot`.
Once your Raspberry Pi restarts, it’s time to verify everything is working. Connect your fingerprint sensor to the GPIO pins according to your wiring diagram. Open the terminal again and run `ls /dev/serial*` to list available serial devices. You should see `/dev/serial0` listed, which is your active UART interface.
To confirm your sensor is communicating properly, install the pyserial library with `pip3 install pyserial`. Then try a simple test script that opens the serial connection and checks for responses from the sensor. If you receive data without errors, congratulations—your serial communication is configured correctly and you’re ready to start programming fingerprint functionality!
Hands-On Tutorial: Enrolling and Recognizing Fingerprints
Enrolling Your First Fingerprint
Now that your fingerprint sensor is properly connected, it’s time to enroll your first fingerprint. This process captures your unique fingerprint pattern and stores it in the sensor’s internal memory for future authentication.
The enrollment process typically requires multiple scans of the same finger to ensure accuracy. Most fingerprint sensors need at least two clear scans, though some may require three or four. This redundancy helps the sensor account for slight variations in finger placement and pressure.
Start by creating a Python script that initializes communication with your sensor. You’ll need to import the appropriate library for your specific sensor model. For example, if you’re using the R307 sensor, you’ll import the corresponding driver library and establish a serial connection on the GPIO pins you wired earlier.
The basic enrollment workflow follows these steps: First, initialize the sensor and check its readiness. Next, prompt the user to place their finger on the sensor pad. The sensor will capture an image and convert it to a template. Remove your finger when prompted, then place the same finger again for a second scan. The sensor compares both templates to ensure they match before storing the combined data.
When capturing fingerprints, position your finger flat on the sensor pad without pressing too hard. Apply consistent, moderate pressure and ensure the sensor’s surface is clean and dry. If the sensor repeatedly fails to capture a clear image, try adjusting your finger angle slightly or ensuring better lighting conditions.
Each enrolled fingerprint receives a unique ID number, allowing you to store multiple users in the sensor’s memory. Most affordable sensors can store between 100 and 1,000 different fingerprints, making them suitable for multi-user projects like access control systems or attendance trackers.

Writing a Simple Authentication Script
Now that you’ve got your fingerprint sensor wired up and the necessary libraries installed, it’s time to create a practical authentication script. This Python program will verify fingerprints against stored templates and provide clear feedback to users.
Let’s start with a basic authentication script that handles the enrollment and verification process. The code below demonstrates how to search for a matching fingerprint in the sensor’s database:
“`python
import adafruit_fingerprint
import serial
import time
# Initialize UART connection
uart = serial.Serial(“/dev/ttyUSB0”, baudrate=57600, timeout=1)
finger = adafruit_fingerprint.Adafruit_Fingerprint(uart)
def authenticate_user():
print(“Place your finger on the sensor…”)
while finger.get_image() != adafruit_fingerprint.OK:
time.sleep(0.1)
print(“Processing fingerprint…”)
if finger.image_2_tz(1) != adafruit_fingerprint.OK:
print(“Error: Failed to process image”)
return False
if finger.finger_search() != adafruit_fingerprint.OK:
print(“Authentication failed: No match found”)
return False
print(f”Success! Matched ID: {finger.finger_id} with confidence: {finger.confidence}”)
return True
# Run authentication
if authenticate_user():
print(“Access granted!”)
else:
print(“Access denied!”)
“`
This script includes several error-handling mechanisms. The get_image() function continuously checks for finger placement, preventing premature processing. The image_2_tz() function converts the captured image into a template, while finger_search() compares it against all stored templates.
The confidence score returned by the sensor typically ranges from 0 to 255, with higher values indicating stronger matches. You can adjust the security threshold by modifying the sensor’s confidence settings to balance between security and convenience. For most home automation projects, a confidence level above 50 provides reliable authentication while minimizing false rejections.
Handling and Storing Fingerprint Data Securely
When working with fingerprint sensors on your Raspberry Pi, handling biometric data responsibly is absolutely crucial. Unlike passwords that can be changed, your fingerprints are permanent identifiers, making security and privacy your top priorities.
Most fingerprint sensors designed for hobby projects, like the R307 and GT-511C3, store fingerprint templates directly on the sensor’s internal memory rather than transmitting raw fingerprint images. This on-sensor storage approach is inherently more secure because the biometric data never leaves the module. The sensor converts your fingerprint into a mathematical template, and only this template gets stored—not the actual fingerprint image. This design choice significantly reduces security risks.
However, if your project requires storing templates externally or managing a database of users, you’ll need to implement proper encryption. Never store fingerprint data in plain text. Use encryption libraries like PyCrypto or cryptography in Python to encrypt templates before saving them. Additionally, consider hashing the data with salt to add an extra security layer.
Here are essential best practices to follow:
First, limit access to your fingerprint database by implementing strong authentication mechanisms and securing your Raspberry Pi with firewalls and regular security updates. Second, store only the minimum necessary data—template IDs and encrypted fingerprints are sufficient for most applications. Third, implement audit logging to track when and how fingerprint data is accessed.
From an ethical standpoint, always inform users that you’re collecting biometric data and obtain explicit consent. Consider the principle of data minimization: if your project doesn’t absolutely require storing fingerprints, use alternative authentication methods.
For educational projects, remember that real user data should be handled with the same care as commercial applications. Even hobbyist projects must respect privacy principles, especially if others will interact with your system.
Troubleshooting Common Issues
Even with careful setup, you might encounter some hiccups when working with fingerprint sensors on your Raspberry Pi. Let’s walk through the most common issues and how to fix them.
If your sensor isn’t being detected at all, start by checking your physical connections. Loose wires are the usual culprit. Verify that your TX and RX pins are correctly connected and not swapped – the sensor’s TX should connect to the Pi’s RX, and vice versa. Run the command `ls /dev/tty*` in your terminal to see if your USB-to-serial adapter or GPIO UART appears in the list. If you’re using the hardware UART on GPIO pins 14 and 15, make sure you’ve disabled the serial console and enabled the serial port interface through `sudo raspi-config`.
Poor fingerprint recognition rates often stem from sensor placement or finger positioning. Clean the sensor surface gently with a soft, lint-free cloth to remove any dust or oils. When enrolling fingerprints, ensure you’re capturing multiple angles of the same finger – most sensors require 4-6 samples for accurate registration. Press firmly but naturally, and make sure your finger is dry. If recognition remains spotty, try re-enrolling the fingerprint completely.
Power issues manifest as intermittent sensor behavior or complete failure to initialize. Fingerprint sensors typically draw 50-150mA during operation, which can strain the Raspberry Pi’s 3.3V pin when combined with other components. Use a dedicated 5V power supply for your Pi (at least 2.5A rated) and consider powering the sensor from the 5V pin if it supports that voltage. Check your sensor’s datasheet to confirm voltage requirements.
Communication errors showing timeout messages usually indicate incorrect baud rate settings. The default is often 57600, but verify this in your sensor’s documentation. In your Python code, double-check that your serial initialization matches: `serial.Serial(‘/dev/serial0’, baudrate=57600)`. If problems persist, try reducing the baud rate to 9600 for more reliable communication, especially with longer wire runs.
Taking Your Project Further: Advanced Applications
Once you’ve mastered the basics of fingerprint authentication with your Raspberry Pi, there’s a whole world of exciting enhancements waiting to be explored. These advanced applications will transform your simple sensor project into a sophisticated, real-world solution.
Start by integrating a database system like SQLite or MySQL to manage multiple users efficiently. This allows you to store fingerprint templates alongside user information such as names, access levels, and entry timestamps. You’ll create a scalable system that can handle dozens or even hundreds of authorized users, perfect for shared spaces or small businesses.
Adding an LCD display takes user interaction to the next level. A 16×2 or 20×4 character display, or even a small OLED screen, provides visual feedback showing user names, access status, and timestamp information. This makes your system more professional and user-friendly, eliminating the guesswork of whether authentication succeeded.
For multi-user systems, implement role-based access control. Assign different permission levels to users, determining who can access specific resources or during particular time windows. This is especially useful for makerspaces, offices, or home environments where different family members need varying access rights.
Connect your fingerprint system to IoT platforms like MQTT, Blynk, or Home Assistant for remote monitoring and control. Receive notifications on your smartphone when someone accesses your system, view access logs from anywhere, or integrate with existing smart home automation routines. You could even combine this with other authentication projects for multi-factor security.
Build a complete access control system by connecting your Raspberry Pi to electronic locks, relay modules, or servo motors. Add features like automatic door strikes, magnetic locks, or motorized deadbolts that unlock only for authorized fingerprints. Include backup methods like keypad codes or RFID cards for redundancy, ensuring you’re never locked out if the sensor malfunctions.
Integrating a fingerprint sensor with your Raspberry Pi is more accessible than you might think. Whether you’re building your first security system, creating a smart lock for your home, or simply exploring the fascinating world of biometric authentication, the barrier to entry has never been lower. With affordable sensors readily available and a wealth of community resources at your fingertips, even complete beginners can successfully implement this technology.
Throughout this guide, we’ve walked through the essential steps—from selecting the right sensor and wiring it correctly to writing functional code and understanding security best practices. The beauty of working with Raspberry Pi is that mistakes are part of the learning process, and the platform’s forgiving nature makes experimentation both safe and rewarding.
Now it’s your turn to bring these concepts to life. Start with a simple enrollment and verification project, then gradually add complexity as your confidence grows. Remember, every expert was once a beginner who decided to take that first step.
Ready to expand your Raspberry Pi skills even further? Explore our growing collection of Pidora tutorials covering everything from sensor integration to automation projects. Each guide is designed with the same hands-on approach, helping you transform ideas into working projects. Your journey into biometric security starts now—grab your Raspberry Pi, pick up a fingerprint sensor, and start building something amazing today.