

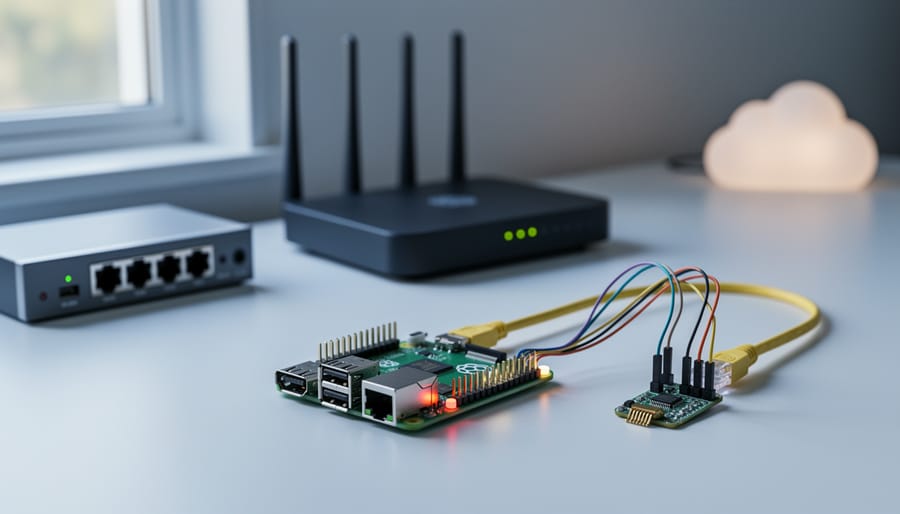
Transform your Raspberry Pi into a powerful edge computing device that captures, processes, and streams data to the cloud in real-time. Edge-to-cloud architecture places intelligent processing at the source of data collection (the edge) while maintaining connectivity to centralized cloud services for storage, analytics, and integration with other platforms.
Start by understanding the three-layer model: edge devices like your Raspberry Pi collect and pre-process data locally, reducing bandwidth costs and latency. The connectivity layer transmits only relevant information through protocols like MQTT or HTTP. Cloud platforms receive this filtered data for advanced analytics, visualization, and triggering automated responses across your connected ecosystem.
Deploy lightweight containerized applications on your Raspberry Pi using Docker to handle sensor readings, video streams, or IoT device data. Process this information locally to make split-second decisions, such as triggering alerts when temperature thresholds are exceeded or detecting motion patterns before sending condensed event summaries to the cloud.
Configure bi-directional communication so your cloud platform can send commands back to edge devices, enabling remote control and configuration updates. This creates a responsive system where cloud-based machine learning models can enhance edge decision-making, while edge devices provide the real-time responsiveness that pure cloud solutions cannot match.
This architecture proves invaluable for home automation, environmental monitoring, security systems, and industrial IoT applications where immediate local processing combines with the scalability and accessibility of cloud infrastructure. The following guide walks you through building a complete edge-to-cloud solution from hardware setup to cloud integration.
What Edge-to-Cloud Actually Means (Without the Marketing Jargon)
Think of the edge-to-cloud concept like a neighborhood restaurant chain. The cloud is your central kitchen and storage facility where you keep bulk ingredients, recipes, and analyze sales data from all locations. The edge is each individual restaurant location where you actually cook the food, serve customers, and handle immediate decisions like adjusting menu items based on what’s running low. You wouldn’t send every customer order to the central kitchen for processing, that would be slow and inefficient. Instead, you handle cooking locally and only send summary data, inventory updates, and special requests to headquarters.
In technical terms, edge computing means processing data close to where it’s generated, using devices like your Raspberry Pi, sensors, and local hardware. Cloud computing happens in remote data centers with massive processing power and storage capacity. Neither works best alone, they’re designed to complement each other through various cloud integration architectures.
Here’s how data flows in a typical edge-to-cloud setup. First, sensors connected to your Raspberry Pi collect raw data, maybe temperature readings, camera images, or motion detection events. Your Pi, sitting at the edge, performs initial processing. It might filter out irrelevant data, compress images, or only trigger alerts when specific conditions are met. This immediate, local processing happens in milliseconds without internet dependency.
Next, your Pi sends only meaningful, processed data to the cloud. Instead of streaming 24/7 video footage, you might only upload clips when motion is detected. The cloud then handles long-term storage, complex analytics, machine learning training, and makes data accessible from anywhere.
The Raspberry Pi sits perfectly at the edge because it’s powerful enough to run real processing tasks, yet affordable and small enough to deploy anywhere. It can operate independently when internet connectivity drops, make split-second decisions locally, and reduce bandwidth costs by only sending relevant information to the cloud.
Why Your Raspberry Pi Is Perfect for Edge Streaming
Your Raspberry Pi sits at the sweet spot for edge streaming applications, offering a compelling combination of features that make it ideal for bridging the physical and digital worlds. Let’s explore why this credit-card-sized computer punches well above its weight class.
First and foremost, power efficiency matters when you’re running devices 24/7 at the edge. The Raspberry Pi 4 consumes just 3-7 watts under typical loads, meaning you can leave it running continuously without worrying about electricity bills or heat management. Compare that to a traditional server or desktop PC, and you’re looking at a fraction of the operating costs over time.
The GPIO (General Purpose Input/Output) pins are where the magic really happens. These 40 pins let you connect sensors, cameras, and other hardware directly to your Pi, eliminating the need for intermediary devices. Whether you’re reading temperature data, detecting motion, or capturing images, the GPIO interface makes hardware integration straightforward and accessible even for beginners.
Processing power has come a long way with recent Pi generations. The Raspberry Pi 4’s quad-core ARM processor and up to 8GB of RAM provide enough muscle to handle real-time data processing, video encoding, and running lightweight AI models at the edge. This means you can filter, analyze, and make decisions locally before sending relevant data to the cloud, reducing bandwidth costs and latency.
At $35-75 depending on the model, the Pi delivers exceptional value. You can deploy multiple edge nodes without breaking the budget, making it perfect for prototyping or scaling small-to-medium projects.
Finally, the vibrant Raspberry Pi community provides endless tutorials, libraries, and troubleshooting support. When you hit a roadblock, chances are someone has already solved it and documented the solution online.

The Essential Components You’ll Need
Hardware Requirements
Building an edge-to-cloud streaming system starts with selecting the right hardware components. Let’s break down what you’ll need to get your project up and running.
For your edge device, the Raspberry Pi 4 Model B with 4GB or 8GB RAM is your best bet. It offers excellent processing power for handling sensor data, running lightweight analytics, and maintaining stable cloud connections. The Raspberry Pi 3 Model B+ can work for simpler projects with fewer sensors, but you might experience performance limitations with complex data processing. If budget is tight, the Raspberry Pi Zero 2 W provides basic functionality, though it’s better suited for single-sensor applications with minimal local processing.
Sensor selection depends on your specific use case. Popular choices include the DHT22 for temperature and humidity monitoring, PIR motion sensors for event detection, and camera modules for visual data capture. Make sure your sensors are compatible with the Pi’s GPIO pins or USB ports.
Power supply matters more than you might think. Use the official Raspberry Pi power adapter (5V, 3A for Pi 4) to ensure stable operation. Inconsistent power can cause data corruption and unexpected shutdowns, disrupting your cloud connection.
For network connectivity, Ethernet provides the most reliable connection for continuous cloud streaming, eliminating WiFi interference issues. However, the built-in WiFi works perfectly fine for most home and educational projects, especially if you’re working with event-driven data rather than constant streaming.
Optional but recommended components include a quality microSD card (32GB Class 10 minimum) for your operating system and local data buffering, a protective case to prevent dust accumulation, and heatsinks or small fans if you’re running intensive processes. These extras extend your hardware’s lifespan and improve reliability, which is crucial when your device operates as an unattended edge node.
Software Stack Overview
Building an edge-to-cloud system with your Raspberry Pi requires understanding the software layers that work together to collect, transmit, and process your data. Think of it as a relay race where each component hands off information smoothly to the next.
At the foundation, you’ll need an operating system. Raspberry Pi OS remains the go-to choice for most projects, offering excellent hardware compatibility and a beginner-friendly interface. Ubuntu is another solid option, especially if you’re planning to scale your project or prefer a more enterprise-focused environment. Both support the necessary tools for edge computing and cloud connectivity.
For streaming data from your Pi to the cloud, you’ll primarily work with two protocols. MQTT (Message Queuing Telemetry Transport) is perfect for IoT scenarios because it’s lightweight and designed for unreliable networks. It uses a publish-subscribe model that efficiently handles sensor data. HTTP/HTTPS works well for request-response patterns and is ideal when you need secure, standard web communication. Many projects use both, depending on specific requirements.
The cloud platform you choose becomes your data’s destination and processing hub. AWS IoT Core offers extensive integration with other Amazon services and robust device management. Azure IoT Hub excels in enterprise environments with strong security features and seamless Microsoft ecosystem integration. Google Cloud IoT Core provides powerful data analytics capabilities, though Google has announced its deprecation in favor of partner solutions, so consider this when planning long-term projects.
Event integration tools like Node-RED deserve special mention. This visual programming tool runs beautifully on Raspberry Pi and simplifies connecting your edge devices to cloud services without heavy coding. It’s particularly valuable for prototyping and educational purposes, letting you see data flow through your system in real-time.
How Data Flows From Your Pi to the Cloud
Understanding how your data travels from a sensor on your Raspberry Pi to the cloud might seem complex, but it’s actually a logical sequence of steps that work together seamlessly. Let’s break down this journey so you can see exactly what happens at each stage.
The process begins when a sensor connected to your Pi collects information. This could be temperature readings from a DHT22 sensor, motion detection from a PIR sensor, or any other physical measurement. The Pi continuously polls these sensors or listens for sensor events at regular intervals.
Once data is captured, your Pi performs local processing and filtering. This edge processing step is crucial because it reduces unnecessary cloud traffic and costs. For example, if your temperature sensor reads 72.5°F but hasn’t changed significantly from the last reading, your Pi might decide not to send this redundant data. You can also set thresholds, so data only transmits when values exceed certain limits or patterns emerge.
Next, the filtered data gets packaged into a standardized format. Most cloud platforms use JSON or similar structures because they’re lightweight and easy to parse. Your Pi wraps the sensor reading with metadata like timestamps, device IDs, and data types. Common protocols for this transmission include MQTT for real-time messaging or HTTP/HTTPS for REST API calls.
The packaged data then travels across your internet connection to the cloud platform. This transmission uses secure channels with authentication tokens or certificates to ensure only authorized devices can send data.
When the cloud platform receives your data, it can trigger various actions based on rules you’ve configured. This might include storing the data in a database, sending alerts via email or SMS when values exceed thresholds, updating a dashboard in real-time, or triggering automated responses like turning on cooling systems.
Think of this pipeline as a relay race where each component passes the baton efficiently, ensuring your data moves from physical sensor to actionable cloud insight in seconds.
Choosing Your Cloud Platform and Integration Method
AWS IoT Core: Best for Scalability
AWS IoT Core stands out as the powerhouse choice when you need enterprise-grade scalability for your Raspberry Pi projects. This fully managed service from Amazon handles billions of messages and can manage millions of devices simultaneously, making it perfect for projects that might grow beyond your initial expectations.
The platform offers robust MQTT protocol support, which is ideal for efficient, low-bandwidth communication between your Raspberry Pi and the cloud. What makes AWS integration with Raspberry Pi particularly compelling is the seamless Lambda integration. You can trigger serverless functions directly from incoming IoT messages, enabling real-time data processing without managing servers.
Getting started is straightforward with well-documented SDKs and the AWS IoT Device SDK for Python. The pricing structure follows a pay-as-you-go model based on messages sent and received, plus connectivity minutes. While this can be cost-effective for small projects under the free tier (250,000 messages monthly), costs scale with usage.
AWS IoT Core shines for projects requiring advanced features like device shadows, fleet management, or integration with other AWS services such as S3, DynamoDB, or Kinesis. It’s ideal for production-ready applications, educational environments teaching cloud architecture, and any project where scalability and reliability are non-negotiable priorities.
Azure IoT Hub: Windows Ecosystem Integration
Azure IoT Hub stands out as the natural choice if you’re already working within the Microsoft ecosystem. It provides seamless integration with Azure services like Azure Functions, Stream Analytics, and Power BI, making it particularly powerful for projects requiring Windows-based processing or enterprise-grade analytics.
For Raspberry Pi projects, Azure IoT Hub offers excellent Python SDK support and straightforward device provisioning. The service excels at bidirectional communication, allowing you to send commands back to your Pi from the cloud—perfect for remote control applications. Integration with Azure Machine Learning makes it compelling for AI-enhanced edge projects.
Pricing starts with a free tier offering 8,000 messages per day, ideal for hobbyist experimentation. Paid tiers begin at around $10 monthly for 400,000 messages, scaling based on your throughput needs. The learning curve is moderate, with Microsoft providing comprehensive documentation and tutorials tailored to IoT scenarios.
Choose Azure IoT Hub when you need tight integration with Microsoft services, require enterprise security features, or plan to leverage Azure’s AI capabilities. It’s also worth considering if you’re using Windows IoT Core on your Raspberry Pi. However, for simpler projects or those prioritizing AWS ecosystem integration, other platforms might offer more straightforward implementations.
Google Cloud IoT and Open-Source Alternatives
Google Cloud IoT provides a robust, enterprise-grade platform for connecting edge devices like your Raspberry Pi to powerful cloud analytics and storage. It handles device authentication, message routing, and integrates seamlessly with other Google Cloud services like BigQuery and Cloud Functions. For many projects, especially those requiring scalability and professional support, Google Cloud IoT offers excellent reliability and security.
However, you’re not limited to commercial platforms. Open-source alternatives give you complete control over your data and often eliminate ongoing costs. Node-RED stands out as a visual programming tool that makes building edge-to-cloud flows incredibly intuitive through drag-and-drop nodes. You can run it directly on your Raspberry Pi to process sensor data before sending it anywhere.
For time-series data storage and visualization, InfluxDB paired with Grafana creates a powerful self-hosted stack. This combination excels at handling IoT sensor streams and creating beautiful dashboards without vendor lock-in.
Mosquitto MQTT broker offers lightweight messaging you can host yourself, while platforms like Home Assistant provide comprehensive IoT management with extensive device support. These open-source options require more initial setup but reward you with flexibility, privacy, and zero recurring fees—perfect for learning and experimentation.
Hands-On: Building Your First Edge-to-Cloud Stream
Setting Up Your Raspberry Pi
Getting your Raspberry Pi ready for edge-to-cloud streaming is straightforward and takes about 30 minutes. Let’s walk through each step so you can start collecting and transmitting data in no time.
Start by installing Raspberry Pi OS on your microSD card using the official Raspberry Pi Imager tool, available for Windows, Mac, and Linux. Choose Raspberry Pi OS Lite if you’re comfortable with command-line interfaces, or the full desktop version if you prefer a graphical environment. During setup, enable SSH access through the imager’s advanced options to make remote configuration easier.
Once your Pi boots up, connect your sensors to the GPIO pins. For temperature and humidity monitoring, the DHT22 sensor is a popular choice that connects with just three wires: power, ground, and data. Make sure to check your sensor’s pinout diagram to avoid incorrect wiring.
Next, update your system and install the necessary software libraries. Open a terminal and run:
sudo apt-get update && sudo apt-get upgrade
sudo apt-get install python3-pip
Now install the MQTT client library, which handles communication between your Pi and cloud services:
pip3 install paho-mqtt
For sensor interaction, install the appropriate library. For DHT sensors, use:
pip3 install Adafruit_DHT
Finally, configure your network settings to ensure stable connectivity. A wired Ethernet connection provides the most reliability for continuous data streaming, but WiFi works well for most projects. You’re now ready to write your first data collection script.
Writing the Streaming Code
Now let’s create the Python code that will stream sensor data from your Raspberry Pi to the cloud. This example demonstrates a simple yet effective approach using the popular DHT22 temperature and humidity sensor with MQTT.
First, install the required libraries by running pip install paho-mqtt Adafruit_DHT in your terminal. Here’s the complete streaming script:
“`python
import paho.mqtt.client as mqtt
import Adafruit_DHT
import time
import json
# MQTT Configuration
BROKER = “your-mqtt-broker.com”
PORT = 1883
TOPIC = “sensors/dht22”
# Sensor Configuration
SENSOR = Adafruit_DHT.DHT22
GPIO_PIN = 4
# Connect to MQTT broker
client = mqtt.Client()
client.connect(BROKER, PORT)
print(“Starting sensor streaming…”)
while True:
# Read sensor data
humidity, temperature = Adafruit_DHT.read_retry(SENSOR, GPIO_PIN)
if humidity and temperature:
# Prepare data payload
payload = {
“temperature”: round(temperature, 2),
“humidity”: round(humidity, 2),
“timestamp”: time.time()
}
# Publish to MQTT
client.publish(TOPIC, json.dumps(payload))
print(f”Published: {payload}”)
time.sleep(5) # Wait 5 seconds between readings
“`
Let’s break down what each section does. The configuration section defines where your data goes (the MQTT broker address) and which sensor you’re using. The connection line establishes communication with your cloud service. Inside the main loop, we read sensor values, package them into a JSON format that’s easy to process later, and publish them to the specified topic. The five-second delay prevents overwhelming your broker with data while still providing frequent updates.
Connecting to Your Cloud Service
Now let’s get your Raspberry Pi talking to the cloud! We’ll use AWS IoT Core as our example since it offers a generous free tier and plays nicely with edge devices.
Start by logging into your AWS account and navigating to the IoT Core service. Click “Manage” then “Things” and create a new thing – this represents your Raspberry Pi in the cloud. Choose “Create a single thing” and give it a memorable name like “raspberrypi-edge-device”.
Next comes the critical authentication setup. AWS IoT uses certificate-based security, which is more secure than passwords. During thing creation, select “Auto-generate a new certificate”. Download all four files: the certificate, public key, private key, and root CA certificate. Store these securely on your Raspberry Pi in a dedicated directory like /home/pi/aws-iot-certs/. Set proper permissions with chmod 600 on the private key to keep it protected.
You’ll also need to attach a policy to your certificate. Create a new policy that allows your device to connect, publish, and subscribe to specific topics. For testing, you can start permissive and tighten security later.
To verify everything works, install the AWS IoT SDK for Python on your Pi with pip3 install AWSIoTPythonSDK. Use the provided sample scripts, updating them with your endpoint URL (found in IoT Core settings), certificate paths, and topic names. Run the script and check the AWS IoT Core test console – you should see messages appearing in real-time, confirming your edge-to-cloud connection is alive!
Event Integration: Making Your Data Do Something Useful
Collecting data at the edge is only half the battle—the real magic happens when your streaming data triggers meaningful actions. This is where your Raspberry Pi transforms from a simple data collector into an intelligent IoT management hub that responds to real-world conditions.
Start with alerts and notifications. When your temperature sensor detects unusual readings, you can instantly send yourself an email, SMS, or push notification. Services like Twilio for SMS or SendGrid for email integrate easily with Python scripts. For example, a simple conditional statement checking if temperature exceeds 30°C can trigger an immediate alert to your phone—perfect for monitoring server rooms or greenhouses.
Database logging provides historical context for your data. While cloud platforms often include built-in storage, you can also log to MySQL, PostgreSQL, or time-series databases like InfluxDB. This creates a searchable record that helps identify patterns over time. Combine this with Grafana or similar visualization tools to build live dashboards that display your data streams in real-time graphs and charts.
The most powerful integration involves device-to-device automation. Your Raspberry Pi can trigger other smart devices based on streaming conditions. Detect motion? Turn on lights through a smart plug. Temperature dropping? Activate a heater. This requires MQTT message publishing, RESTful API calls, or GPIO pin controls to connected relays.
For automated responses, implement rule engines that evaluate multiple conditions simultaneously. Using Node-RED on your Pi, you can create visual workflows where temperature plus humidity plus time-of-day determines whether to water plants automatically. These logic chains transform raw data into intelligent decision-making without constant human intervention.
The key is starting simple—pick one action type, get it working reliably, then gradually build complexity as you understand how your system behaves in real-world conditions.
Security Considerations You Can’t Ignore
Security doesn’t have to be intimidating—think of it as building protective layers around your edge-to-cloud system, one sensible step at a time. When streaming data from your Raspberry Pi to the cloud, you’re creating a pathway that needs safeguarding, but the good news is that modern tools make this surprisingly straightforward.
Start with encrypted connections. Always use TLS/SSL protocols when transmitting data between your Pi and cloud services. Most cloud platforms like AWS IoT Core or Azure IoT Hub enforce this by default, but verify your connections use HTTPS or MQTTS rather than plain HTTP or MQTT. This ensures your video streams and sensor data remain private during transit.
Certificate management comes next. Your Raspberry Pi needs proper digital certificates to authenticate with cloud services. Store these certificates in dedicated directories with restricted permissions (chmod 600 works well). Set calendar reminders to renew certificates before they expire—nothing breaks a production system faster than expired credentials.
For credential storage, never hardcode passwords or API keys directly in your scripts. Instead, use environment variables or dedicated secrets management tools. The simple approach: create a credentials configuration file outside your code repository, and reference it in your application. For more robust securing your Raspberry Pi cloud deployments, consider HashiCorp Vault or AWS Secrets Manager.
Network security matters too. Configure your router’s firewall to allow only necessary outbound connections. If possible, create a separate network segment for IoT devices. Understanding cloud storage security principles helps you make informed decisions about data retention policies.
Finally, enable automatic security updates on your Raspberry Pi with unattended-upgrades. Regular patching closes vulnerabilities before they become problems. Schedule monthly reviews of your security configurations to ensure everything remains current and functional.
Troubleshooting Common Connection Issues
Even the most carefully configured edge-to-cloud systems can encounter hiccups. Let’s tackle the most common connection issues you might face and how to resolve them quickly.
Connection drops are frustrating but usually straightforward to diagnose. Start by checking your network stability using the ping command to test connectivity to your cloud endpoint. Run “ping -c 100 your-cloud-endpoint.com” to send 100 packets and watch for packet loss. If you’re seeing drops, investigate your Wi-Fi signal strength with “iwconfig wlan0” or consider switching to a wired Ethernet connection for more reliable performance.
Certificate errors often appear when working with HTTPS or MQTT over TLS. If you encounter “certificate verify failed” messages, first ensure your Raspberry Pi’s system time is correct using “timedatectl status” since incorrect time stamps cause validation failures. Update your certificate bundle with “sudo apt-get update && sudo apt-get install ca-certificates” to refresh trusted certificates.
Latency issues can severely impact real-time streaming applications. Test your connection speed with “speedtest-cli” after installing it via pip. For detailed network diagnostics, use “mtr your-cloud-endpoint.com” which combines ping and traceroute functionality to identify where delays occur along the route.
Bandwidth limitations require strategic optimization. Monitor your current usage with “vnstat” or “iftop” to identify bottlenecks. Consider implementing data compression in your streaming pipeline or reducing your sampling rate for sensor data. For video streams, adjust resolution and frame rate to match your available bandwidth.
When debugging, enable verbose logging in your application to capture detailed error messages. The journalctl command helps review system logs, while tcpdump allows packet-level inspection when you need deeper network analysis. Remember, systematic troubleshooting beats random fixes every time.
You now have everything you need to build a powerful edge-to-cloud streaming system with your Raspberry Pi. By combining local processing at the edge with cloud storage and analytics, you’ve created an architecture that delivers the best of both worlds: real-time responsiveness and long-term insights.
The tutorial project we’ve walked through demonstrates the fundamentals, but it’s really just the beginning. Start with this basic temperature monitoring setup to get comfortable with the workflow, then expand based on your interests. Add multiple sensors to track different environmental conditions. Incorporate computer vision with the Pi Camera module for visual monitoring. Integrate machine learning models that run locally on your device before sending results to the cloud. Set up automated alerts and dashboards that give you instant visibility into your data streams.
The beauty of this architecture is its scalability. What starts as a single Raspberry Pi monitoring your garage temperature can grow into a network of devices tracking everything from home energy usage to garden conditions to air quality across multiple locations. Each edge device processes data intelligently, reducing bandwidth costs and enabling instant responses, while the cloud provides centralized management and historical analysis.
The possibilities are limited only by your imagination. Whether you’re building home automation systems, educational projects, or prototypes for IoT products, edge-to-cloud streaming with Raspberry Pi gives you professional-grade capabilities at hobbyist-friendly prices. So power up that Pi and start streaming your way to smarter, more connected projects.