


Transform your Raspberry Pi into a powerful QR code scanning station with just a camera module, Python libraries, and some straightforward code. Building your own QR scanner offers unmatched flexibility for inventory management, attendance tracking, or automated data entry – all at a fraction of commercial scanner costs.
This comprehensive guide walks through creating a complete QR scanning system using a Raspberry Pi, from initial hardware setup to real-time code scanning and data processing. Whether you’re automating your small business operations or building an educational project, you’ll learn how to capture, decode, and handle QR data while gaining valuable hands-on experience with computer vision concepts.
Perfect for makers and developers who want to understand both the hardware and software aspects of QR scanning, this project combines the accessibility of the Raspberry Pi platform with practical Python programming. Get ready to build a professional-grade scanning solution that can be customized for your specific needs.
Hardware Requirements and Setup
Required Components
To build a functional QR code scanner with your Raspberry Pi, you’ll need the following essential components:
• Raspberry Pi (Model 3B+ or 4B recommended for optimal performance)
• Raspberry Pi Camera Module V2 or HQ Camera (V2 is more cost-effective)
• MicroSD card (16GB or larger)
• Power supply (5V/3A recommended)
• USB keyboard and mouse (for initial setup)
• Display with HDMI input (or Raspberry Pi official touch display)
Optional but recommended components:
• Case for Raspberry Pi (to protect components)
• GPIO breakout board (for additional connectivity)
• External battery pack (if you want to optimize power consumption for portable use)
For best results, ensure your camera module is genuine Raspberry Pi hardware, as third-party cameras may have compatibility issues. The official Raspberry Pi camera modules offer better performance and reliable driver support. If you plan to use this setup in a fixed location, consider adding a small LCD display for standalone operation without requiring an external monitor.
Physical Assembly
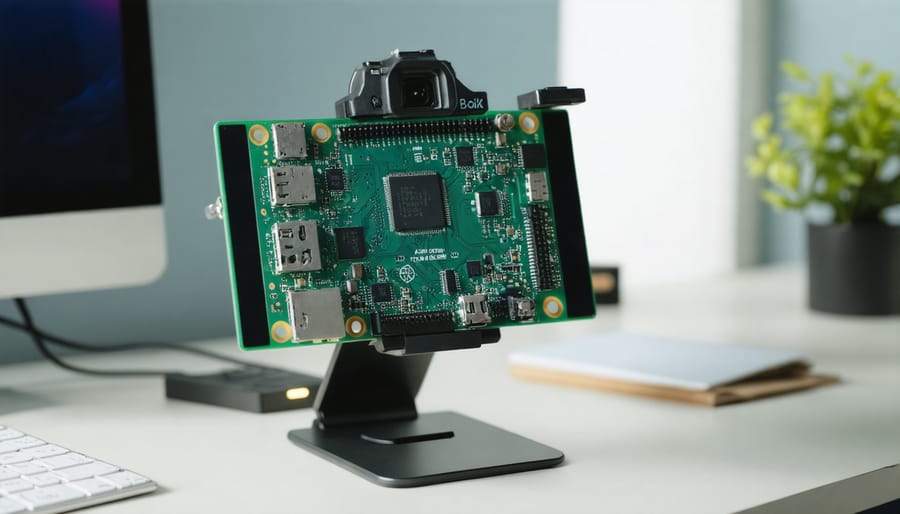
Start by gathering your components: a Raspberry Pi (any model), a USB webcam or Raspberry Pi Camera Module, and any necessary cables. If using the Camera Module, carefully lift the camera connector on your Raspberry Pi and insert the ribbon cable with the blue side facing the Ethernet port. For USB webcams, simply plug into any available USB port.
Ensure your Raspberry Pi is powered off before making any connections. If you’re new to connect peripheral devices, take extra care with the camera ribbon cable to avoid damage. For better scanning results, mount your camera securely using a stand or bracket, positioning it approximately 6-8 inches above your scanning surface.
If you’re using a display for real-time feedback, connect an HDMI cable to your monitor. Finally, insert your microSD card with the operating system installed, connect your keyboard and mouse, and plug in the power supply. Double-check all connections before powering on your Raspberry Pi to ensure everything is properly seated and secure.
Software Installation and Configuration
Installing Dependencies
Before we can start scanning QR codes with our Raspberry Pi, we need to install several essential dependencies. Open your terminal and ensure your system is up to date by running:
“`bash
sudo apt update
sudo apt upgrade
“`
Next, install Python 3 and pip if they aren’t already on your system:
“`bash
sudo apt install python3 python3-pip
“`
Now, let’s install the required Python libraries. We’ll need OpenCV for image processing, pyzbar for QR code detection, and pillow for image handling:
“`bash
sudo apt install libzbar0
pip3 install opencv-python
pip3 install pyzbar
pip3 install pillow
“`
If you’re planning to use a USB webcam, you’ll also need to install fswebcam:
“`bash
sudo apt install fswebcam
“`
For Raspberry Pi Camera Module users, enable the camera interface using:
“`bash
sudo raspi-config
“`
Navigate to “Interface Options” and enable the camera. After installation, restart your Raspberry Pi to ensure all dependencies are properly configured. You can verify the installations by running:
“`bash
python3 -c “import cv2; import pyzbar; from PIL import Image”
“`
If no errors appear, you’re ready to proceed with the QR code scanner setup.
Camera Setup
Before diving into the QR code scanning functionality, we need to properly set up and configure the Raspberry Pi camera module. Start by connecting the camera module to your Raspberry Pi’s camera port while the device is powered off. The ribbon cable should be inserted with the blue side facing the Ethernet port.
Once connected, power on your Raspberry Pi and open the terminal. Enable the camera interface by running:
“`bash
sudo raspi-config
“`
Navigate to “Interface Options” and select “Camera,” then choose “Yes” to enable it. After rebooting your Raspberry Pi, verify the camera is working by capturing a test image:
“`bash
raspistill -o test.jpg
“`
For optimal QR code scanning, position your camera module approximately 6-8 inches from where the codes will be presented. Ensure adequate lighting in your scanning area, as poor lighting conditions can affect recognition accuracy. You may need to adjust the camera’s focus manually if you’re using a variable focus module.
Install the required camera libraries by running:
“`bash
sudo apt-get update
sudo apt-get install python3-picamera
“`
To improve scanning performance, consider these camera settings:
– Resolution: 1024×768 is typically sufficient for QR codes
– Framerate: 30 fps works well for most applications
– Exposure mode: ‘auto’ for varying lighting conditions
– White balance: ‘auto’ for consistent color reproduction
Test your camera setup using the Python REPL to ensure everything is working correctly before proceeding with the QR code scanning implementation.
Programming the QR Scanner
Basic Scanner Code
Here’s a basic Python script that implements QR code scanning functionality using a Raspberry Pi and a camera module. We’ll use the ‘opencv-python’ and ‘pyzbar’ libraries for image processing and QR code detection:
“`python
import cv2
from pyzbar.pyzbar import decode
from picamera2 import Picamera2
def initialize_camera():
picam2 = Picamera2()
picam2.preview_configuration.main.size = (1280, 720)
picam2.preview_configuration.main.format = “RGB888”
picam2.configure(“preview”)
picam2.start()
return picam2
def scan_qr_codes():
camera = initialize_camera()
while True:
# Capture frame from camera
frame = camera.capture_array()
# Decode QR codes in the frame
qr_codes = decode(frame)
# Process each detected QR code
for qr in qr_codes:
# Extract QR code data
qr_data = qr.data.decode(‘utf-8’)
print(f”QR Code detected: {qr_data}”)
# Draw rectangle around QR code
points = qr.polygon
if len(points) > 4:
hull = cv2.convexHull(points)
cv2.polylines(frame, [hull], True, (0, 255, 0), 2)
# Display the frame
cv2.imshow(‘QR Scanner’, frame)
# Exit if ‘q’ is pressed
if cv2.waitKey(1) & 0xFF == ord(‘q’):
break
cv2.destroyAllWindows()
if __name__ == “__main__”:
scan_qr_codes()
“`
This code creates a continuous scanning loop that captures frames from the Raspberry Pi camera, processes them to detect QR codes, and displays the results in real-time. The script includes error handling and visual feedback by drawing green rectangles around detected QR codes. You can exit the program by pressing ‘q’. Remember to install the required libraries using pip before running the script.
For better performance, you might want to adjust the camera resolution or add additional error handling based on your specific needs. This basic implementation serves as a foundation that you can build upon for more complex applications.
Error Handling and Optimization
To build a reliable QR scanner system, implementing proper error handling and optimization techniques is crucial. Let’s explore some key strategies to enhance scanning performance and make your system more robust.
First, implement basic error handling for camera issues. Add try-except blocks around your camera initialization and capture operations:
“`python
try:
camera = PiCamera()
except PiCameraError:
logging.error(“Camera initialization failed”)
notify_admin() # Custom function to alert system administrator
“`
To improve scan speed, consider these optimization techniques:
– Pre-allocate memory for image processing
– Reduce image resolution while maintaining readability
– Implement frame skipping when processing isn’t keeping up
– Use threading to separate image capture from processing
Here’s an example of implementing frame skipping:
“`python
skip_frames = 0
while running:
if skip_frames > 0:
skip_frames -= 1
continue
frame = capture_frame()
if processing_queue.qsize() > 3:
skip_frames = 2
“`
For reliability, implement these best practices:
1. Store scanned data locally before transmission
2. Add checksum verification for scanned codes
3. Implement automatic recovery after power failures
4. Include logging for troubleshooting
Monitor system performance using built-in tools:
– Track CPU usage with psutil
– Monitor memory consumption
– Record scanning success rates
– Measure average processing time per frame
Regular system maintenance and updates will help maintain optimal performance. Consider implementing automatic cleanup of old logs and temporary files to prevent storage issues.
Data Handling and Storage
Data Processing Options
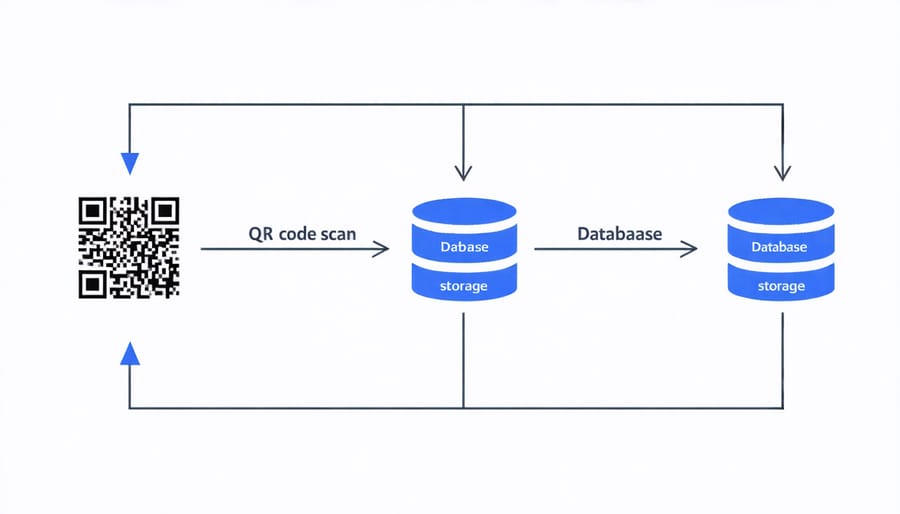
Once you’ve successfully scanned a QR code, there are several ways to process and utilize the captured data on your Raspberry Pi. The most straightforward approach is to display the decoded content on the screen, which is perfect for basic testing and verification. For more practical applications, you can store the scanned data in a text file or CSV format for later analysis.
If you’re building an inventory system, consider setting up a SQLite database to store and organize your scanned codes efficiently. This allows for easy searching, sorting, and data management. For real-time applications, you can configure your system to trigger specific actions based on the QR code content, such as controlling GPIO pins or sending notifications.
Web integration is another powerful option – you can set up a local web server on your Raspberry Pi to process QR codes and display results through a browser interface. For networked applications, consider using MQTT to publish scanned data to other devices or services. You can also implement data validation to ensure the scanned codes match expected formats or patterns before processing.
Remember to implement error handling to manage invalid QR codes or connection issues gracefully. This ensures your scanning system remains robust and reliable during operation.
Database Integration
Once your QR scanner is operational, connecting it to a database enhances its functionality by enabling data storage and retrieval. For local storage, SQLite provides a lightweight solution that’s perfect for Raspberry Pi projects. Begin by installing SQLite using the command ‘pip install sqlite3’ in your terminal.
Create a simple database structure using Python:
“`python
import sqlite3
conn = sqlite3.connect(‘qr_data.db’)
cursor = conn.execute(”’CREATE TABLE IF NOT EXISTS scans
(id INTEGER PRIMARY KEY,
qr_content TEXT,
timestamp DATETIME)”’)
“`
For cloud-based solutions, consider using MongoDB Atlas or MySQL depending on your scaling needs. Before implementing any database connection, remember to secure your Raspberry Pi to protect sensitive data.
To automatically save scanned QR codes to your database, add this function to your main scanning script:
“`python
def save_scan(qr_content):
cursor.execute(“INSERT INTO scans (qr_content, timestamp) VALUES (?, datetime(‘now’))”, (qr_content,))
conn.commit()
“`
This setup allows you to track all scanned codes with timestamps, perfect for inventory management or attendance tracking systems.
Building a QR scanner with your Raspberry Pi opens up endless possibilities for automation and data collection projects. We’ve covered everything from setting up the hardware components to implementing the scanning functionality and handling the decoded data. By following this guide, you’ve created a versatile tool that can be used in inventory management, access control systems, or educational demonstrations.
To take your project further, consider adding features like automatic database logging, real-time web interface updates, or integration with other IoT devices. You might also explore using different camera modules or implementing error correction for better scanning accuracy in varying light conditions.
Remember to regularly update your software packages and maintain proper camera positioning for optimal scanning results. The beauty of using a Raspberry Pi for QR scanning lies in its flexibility and potential for customization – you can always modify the code to better suit your specific needs.
Whether you’re using this setup for home automation, small business applications, or educational purposes, the skills you’ve learned here provide a solid foundation for more advanced Raspberry Pi projects. Don’t hesitate to experiment with different libraries and add your own creative touches to make the project truly yours.