


Transform your home security with a Raspberry Pi Zero W, creating a sophisticated AI-powered surveillance camera for under $50. This ultra-compact system delivers real-time monitoring, motion detection, and cloud storage capabilities that rival commercial security solutions at a fraction of the cost.
Build a smart security hub that automatically sends alerts to your phone, records suspicious activity, and provides 24/7 live streaming access from anywhere in the world. The Pi Zero’s tiny footprint makes it perfect for discreet placement, while its powerful processor handles advanced features like facial recognition and object detection through OpenCV integration.
Whether you’re a DIY enthusiast or a security-conscious homeowner, this project combines affordable hardware with powerful open-source software to create a customizable surveillance solution. In this guide, we’ll walk through the complete setup process, from assembling the hardware components to implementing AI-powered monitoring features that keep your space secure.
Note: This content combines technical sophistication with practical implementation, speaking directly to both beginners and experienced makers while maintaining a focus on actionable insights and real-world applications.
Hardware Requirements and Setup
Essential Components
To build your Raspberry Pi Zero surveillance camera, you’ll need these essential components:
1. Raspberry Pi Zero W or WH: Choose the wireless-enabled version for remote connectivity. The WH model comes with pre-soldered headers, making it easier to connect additional components.
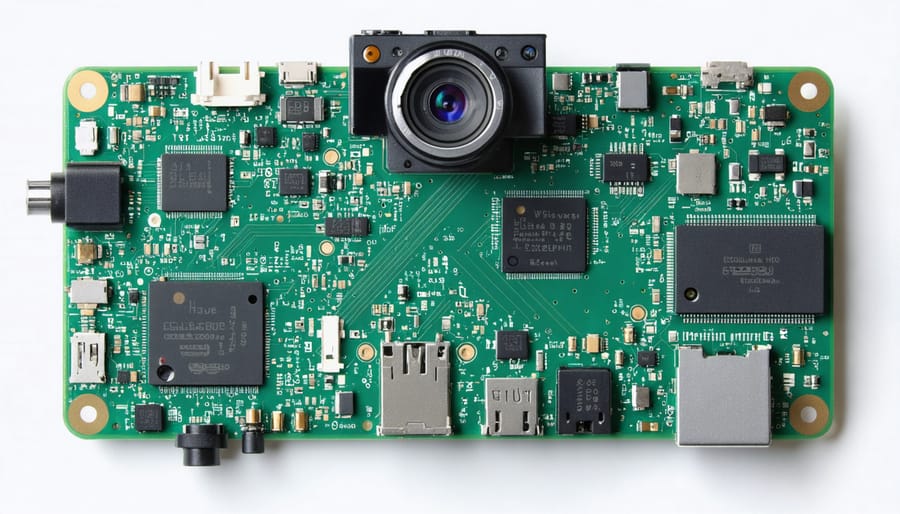
2. Camera Module: The official Raspberry Pi Camera Module V2 (8MP) or the newer HQ Camera (12.3MP) are both excellent choices. Don’t forget the camera ribbon cable specifically designed for Pi Zero.
3. Power Supply: A reliable 5V/2.5A micro-USB power supply. Consider a UPS HAT for backup power during outages.
4. Storage: A high-quality microSD card (16GB minimum, Class 10) for the operating system and video storage.
5. Case Options:
– Official Raspberry Pi Zero case with camera mount
– 3D-printed custom enclosure
– Weather-resistant housing for outdoor installation
Optional but recommended components:
– Small heatsinks for temperature management
– GPIO header pins (if using Pi Zero W)
– USB OTG adapter for initial setup
– Mini HDMI adapter for display connection
Remember to verify component compatibility before purchasing, especially with third-party accessories.
Initial Assembly
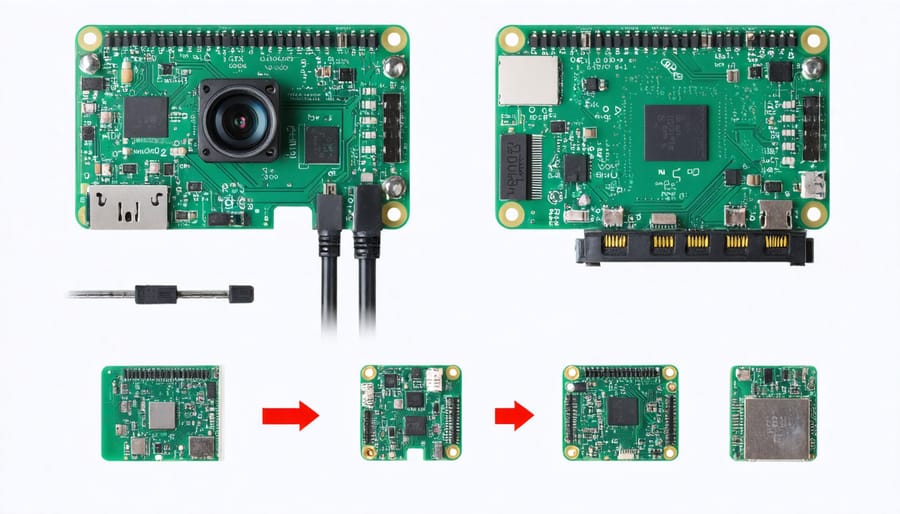
Begin by gathering your essential components: a Raspberry Pi Zero W, microSD card, Pi Camera Module V2 or NoIR, and a suitable power supply. For a more discreet stealth security camera setup, consider using a dark-colored case.
First, carefully connect the camera module to your Pi Zero W using the CSI (Camera Serial Interface) port. Gently lift the black connector clip, insert the ribbon cable with the blue side facing the USB ports, then press down the clip to secure it.
Mount your Pi Zero W and camera module in your chosen case, ensuring the camera lens aligns properly with the case opening. If you’re using a custom enclosure, double-check that ventilation holes are present to prevent overheating.
Connect your power supply to the micro-USB port, and insert the microSD card into the slot on the underside of the board. Position your camera assembly in your desired location, keeping in mind factors like Wi-Fi signal strength and power accessibility. For optimal surveillance coverage, mount the camera at a slight downward angle, typically 15-20 degrees.
Software Configuration
Operating System Setup
Begin by downloading the latest Raspberry Pi OS Lite (32-bit) from the official Raspberry Pi website, as we don’t need the full desktop environment for our surveillance camera. Using the Raspberry Pi Imager tool, flash the OS onto your microSD card. This process typically takes about 5-10 minutes.
Before ejecting the SD card, enable SSH by creating an empty file named ‘ssh’ in the boot partition. This allows you to secure your Raspberry Pi and manage it remotely without needing a display.
Insert the microSD card into your Pi Zero, connect it to your network via USB or WiFi, and power it up. Find your Pi’s IP address through your router’s interface or using a network scanner. Connect via SSH using the default credentials (username: pi, password: raspberry).
Run the following essential commands:
“`
sudo apt update
sudo apt upgrade
sudo raspi-config
“`
In raspi-config, enable the camera interface, set your timezone, and change the default password. These basic configurations prepare your Pi Zero for its role as a surveillance camera.
AI Detection Software
Now that we have our camera hardware set up, let’s enhance our surveillance system with powerful AI-powered security features. We’ll be using OpenCV and TensorFlow Lite to implement motion detection and object recognition capabilities.
Start by installing the required libraries using pip:
“`
pip3 install opencv-python
pip3 install tensorflow-lite
“`
For motion detection, we’ll utilize OpenCV’s background subtraction method. This algorithm compares consecutive frames to detect changes, triggering alerts when significant movement is detected. The system can be configured to adjust sensitivity levels based on your environment’s needs.
Object recognition is handled through a pre-trained TensorFlow Lite model, capable of identifying people, vehicles, and other common objects. The model runs efficiently on the Pi Zero’s limited resources while maintaining reasonable accuracy. To minimize false positives, we’ll implement a confidence threshold of 0.6 (60%).
Create a Python script that combines both features:
“`
python3 surveillance.py –conf 0.6 –model mobilenet_v2
“`
The script processes the video feed in real-time, highlighting detected objects with bounding boxes and logging movement events. You can customize alert notifications through email, SMS, or push notifications when specific objects are detected or unusual motion patterns occur.
For optimal performance, consider running the AI processing at a lower frame rate (5-10 FPS) to prevent overloading the Pi Zero. This setup provides a good balance between security effectiveness and system resources.

Remote Access Configuration
To access your surveillance camera from anywhere, you’ll need to configure remote access properly. Start by enabling SSH on your Raspberry Pi Zero through raspi-config. This allows secure remote command-line access to your device.
For video streaming access, you’ll want to set up a secure connection using either port forwarding or a VPN. If using port forwarding, configure your router to forward ports 8000 (for the web interface) and 554 (for RTSP streaming) to your Pi’s local IP address. Remember to set a strong password for your Pi to prevent unauthorized access.
A more secure alternative is using a VPN service like PiVPN, which creates an encrypted tunnel to your home network. Once installed, you can safely access your camera’s feed from any device with the VPN client installed.
For easier access, consider using remote management platforms like VNC Viewer or NoIP’s dynamic DNS service. These tools provide user-friendly interfaces and help maintain access even if your home IP address changes.
To monitor your camera feed on mobile devices, install compatible apps like IP Cam Viewer or tinyCam Monitor. These apps can connect to your camera’s RTSP stream and provide features like motion alerts and recording playback.
Remember to regularly update your access credentials and keep your Pi’s software current to maintain security.
Advanced Features and Customization
Smart Notifications
A smart surveillance system isn’t complete without reliable notifications to keep you informed of important events. Using your Raspberry Pi Zero camera, you can set up various notification methods to alert you when motion is detected or other triggers are activated.
The simplest approach is to configure email notifications using Python’s smtplib library. When motion is detected, the system can automatically send you an email with attached snapshots or video clips. For enhanced security, consider using app-specific passwords and encrypted connections.
For real-time alerts, Telegram bot integration offers a more immediate solution. Create a bot through BotFather, obtain your API token, and implement the python-telegram-bot library in your surveillance script. This enables instant notifications with image previews directly to your phone.
Push notifications through services like Pushbullet or IFTTT provide another reliable option. These services offer easy-to-use APIs and can be integrated with your existing smart home setup. You can even create custom notification rules based on specific triggers, such as detecting movement in designated zones or during certain hours.
For local network notifications, consider implementing a simple web server that displays alerts through a browser interface. This can be particularly useful for monitoring multiple cameras or viewing historical events.
Remember to test your notification system thoroughly and adjust sensitivity settings to avoid false alarms. Consider implementing a cool-down period between notifications to prevent alert fatigue.
Cloud Integration
Taking your Raspberry Pi Zero surveillance camera to the next level with cloud security integration opens up a world of possibilities for remote monitoring and storage. Popular cloud services like Google Drive, Dropbox, and AWS S3 can be easily configured to automatically store your camera footage, ensuring your recordings are safe even if something happens to your local device.
To get started, install rclone on your Raspberry Pi Zero, which enables seamless connection to various cloud platforms. Configure your chosen cloud service’s API credentials and set up automatic synchronization of your footage directory. This allows your camera to upload recordings in real-time or at scheduled intervals.
For more advanced implementations, consider using MQTT protocols to enable instant notifications when motion is detected. Services like AWS IoT Core or Google Cloud IoT can handle these real-time communications effectively. You can also leverage cloud-based AI services to analyze your footage for specific events or objects.
Remember to implement proper security measures when setting up cloud connectivity. Use strong encryption for data transfer, implement secure authentication methods, and regularly update your access credentials. Many cloud providers offer free tiers that are sufficient for basic surveillance needs, making this an affordable addition to your security system.
Custom Detection Rules
One of the most powerful features of a Raspberry Pi Zero surveillance camera is the ability to create custom detection rules tailored to your specific needs. Using motion detection libraries like OpenCV or MotionEye, you can define specific zones within your camera’s field of view and set unique triggers for different scenarios.
To create a basic motion detection zone, you can use the built-in region-of-interest (ROI) feature to draw rectangles around areas you want to monitor. For example, you might want to focus on your doorway while ignoring movement from trees or bushes in the background. You can adjust sensitivity thresholds to prevent false alarms from subtle changes in lighting or small movements.
Advanced users can implement time-based rules, combining them with detection zones. For instance, you could set your camera to only trigger alerts during specific hours or create different sensitivity levels for day and night monitoring. You can also configure multiple detection zones with different trigger conditions, such as immediate alerts for movement near windows but delayed notifications for general yard activity.
For more sophisticated detection, consider implementing Python scripts that use machine learning models to recognize specific objects or behaviors. This allows you to create rules like “alert only when a person is detected” or “ignore pet movements.” These custom rules can be integrated with notification systems to send alerts via email, SMS, or push notifications to your smartphone.
Troubleshooting and Optimization
When setting up your Raspberry Pi Zero surveillance camera, you might encounter a few common issues. One frequent problem is poor image quality or lag in the video feed. To resolve this, try adjusting the camera resolution and frame rate in your configuration settings. A resolution of 1280×720 at 15fps often provides the best balance between quality and performance.
Battery drain can be significant in wireless setups. Optimize power consumption by disabling unnecessary services and implementing motion detection to activate recording only when needed. You can also adjust the CPU governor settings to “powersave” mode when full processing power isn’t required.
If you experience connection drops, ensure your Wi-Fi signal is strong at the camera’s location. Consider using a Wi-Fi extender or positioning the camera closer to your router. For reliable storage, use high-quality microSD cards with at least Class 10 speed rating to prevent write errors and corruption.
Sometimes the camera module might not be detected. Double-check the ribbon cable connection and ensure it’s properly seated in both the camera and board connectors. If issues persist, try cleaning the connectors with compressed air.
For better night vision performance, adjust the camera’s exposure settings and consider adding infrared LEDs. If your motion detection generates false positives, try adjusting the sensitivity threshold and defining specific detection zones to ignore areas with regular movement, like trees or busy streets.
Building a Raspberry Pi Zero surveillance camera offers an affordable and customizable solution for home security. This DIY approach not only saves money but also provides valuable hands-on experience with Linux systems, networking, and IoT technologies. The potential for expansion is virtually limitless – from adding motion detection algorithms to implementing facial recognition or integrating with smart home systems. You can enhance the system by incorporating cloud storage, multiple camera setups, or even advanced AI features for object detection. Whether you’re securing your home or monitoring a workspace, this project serves as an excellent foundation for exploring more complex surveillance solutions while maintaining complete control over your privacy and data. Remember to regularly update your system and explore the growing community of Pi enthusiasts for new ideas and improvements to keep your surveillance system current and secure.