


Transform your Raspberry Pi collection into a powerful computing cluster that rivals traditional server setups at a fraction of the cost. By building a Kubernetes cluster with multiple Raspberry Pi nodes, you’ll create a scalable, energy-efficient platform perfect for distributed computing, containerized applications, and hands-on learning of cloud architecture.
Modern cluster computing has evolved beyond expensive data centers, and Raspberry Pi clusters represent this democratization of parallel processing power. Whether you’re running machine learning workloads, hosting web services, or experimenting with distributed databases, a Pi cluster provides an accessible entry point into enterprise-level computing concepts. The combination of low cost, minimal power consumption, and extensive community support makes Raspberry Pi clusters an ideal choice for both educational environments and practical applications.
What truly sets Pi clusters apart is their versatility – they can serve as everything from a home lab for practicing DevOps principles to a production-ready edge computing solution. By mastering Pi cluster deployment, you’ll gain practical experience with container orchestration, load balancing, and high-availability configurations that directly translate to professional cloud computing environments.
Why Choose Raspberry Pi for Your Computing Cluster
Cost-Effective Cloud Computing
Building a Raspberry Pi cluster offers a cost-effective cloud computing solution compared to traditional cloud services. While major cloud providers charge monthly fees based on usage, a Pi cluster requires only the initial hardware investment and minimal electricity costs. A basic four-node cluster can be built for approximately $200-300, including Raspberry Pi boards, power supplies, and networking equipment.
When comparing costs over time, a Pi cluster becomes increasingly economical. Traditional cloud services might cost $50-100 monthly for similar computing power, meaning your Pi cluster investment could break even within 3-6 months. For development, testing, and learning environments, this makes Pi clusters particularly attractive.
However, it’s important to consider the trade-offs. While Pi clusters won’t match the raw performance of professional cloud services, they offer hands-on experience with cluster computing concepts at a fraction of the cost. For hobbyists, students, and small-scale projects, the cost savings and educational value make Pi clusters an excellent alternative to commercial cloud solutions.
Learning and Testing Environment
A Raspberry Pi cluster provides an ideal environment for learning parallel computing concepts and testing distributed applications. Students and enthusiasts can gain hands-on experience with fundamental concepts like load balancing, fault tolerance, and distributed processing without significant financial investment. The compact nature of Raspberry Pi boards makes it possible to create a complete cluster computing setup on a desk or small workspace.
The learning curve starts with basic Linux administration and networking, progressing naturally to more advanced topics like containerization and orchestration. Educators can design practical exercises ranging from simple parallel processing tasks to complex distributed computing scenarios. Students benefit from visualizing real-time resource allocation and understanding how multiple nodes work together to solve computational problems.
For testing environments, Raspberry Pi clusters excel in simulating production scenarios at a smaller scale. Developers can prototype distributed applications, test deployment strategies, and experiment with different clustering configurations before moving to full-scale production environments. This setup is particularly valuable for learning container orchestration platforms like Kubernetes, allowing users to understand cluster management principles without the complexity and cost of cloud-based solutions.
Building Your Raspberry Pi Cluster
Required Hardware Components
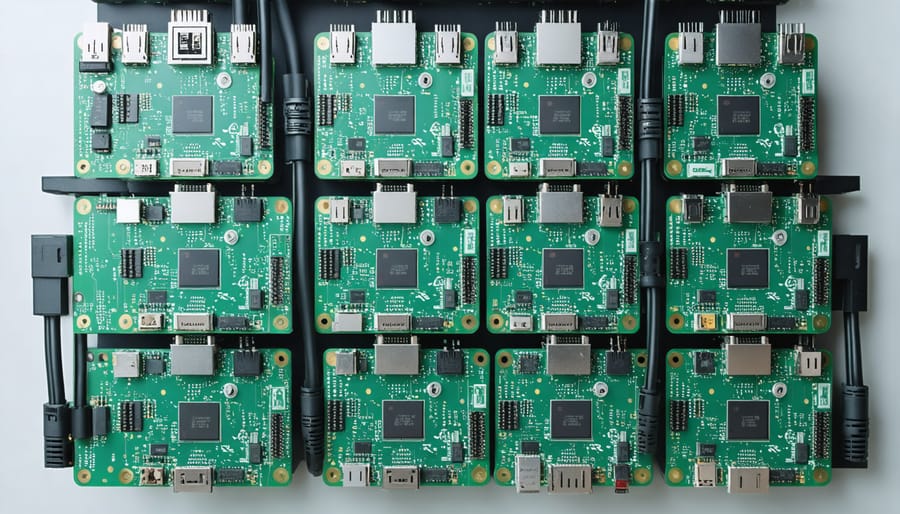
To build a functional Raspberry Pi cluster, you’ll need several key components to ensure successful mini data center setup. Here’s what you’ll require:
Core Components:
– At least 2 Raspberry Pi boards (Raspberry Pi 4 Model B recommended, with 4GB or 8GB RAM)
– MicroSD cards (32GB minimum) for each Pi
– Power supply units (Official 15W USB-C recommended) for each Pi
– Ethernet cables (Cat 6 recommended for optimal performance)
– Network switch (Gigabit Ethernet, 8-port recommended)
Optional but Recommended:
– Cluster case or stacking kit
– Cooling fans or heatsinks
– Shared power supply unit
– USB to Ethernet adapter for management node
– Short USB-C cables for compact setup
Additional Supplies:
– MicroSD card reader
– Cable management supplies
– Small screwdriver set
– Thermal paste (if using heatsinks)
– Network storage device (optional)
When selecting components, prioritize reliability over cost savings. Quality power supplies and networking equipment are crucial for stable cluster operation. For beginners, starting with 2-3 nodes is recommended, while more experienced users might opt for 4-8 nodes for advanced applications and testing.
Network Configuration
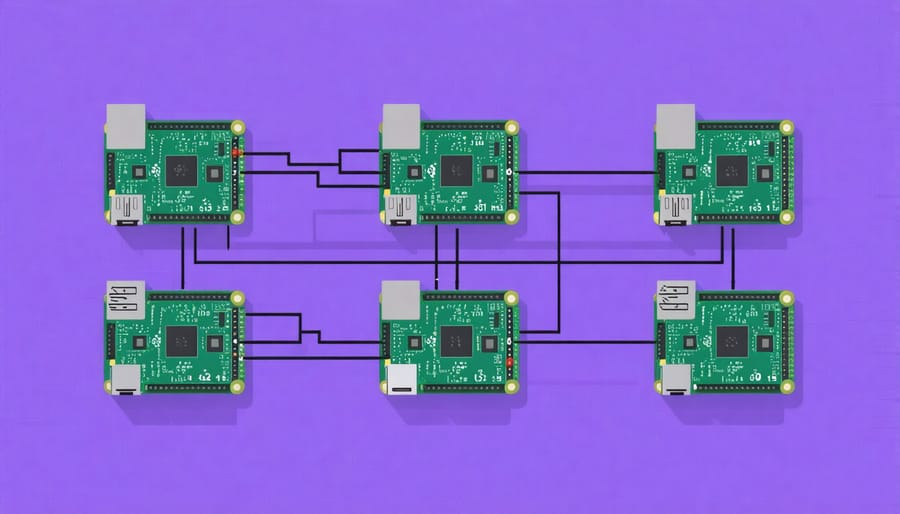
The network configuration is a crucial aspect of building a Raspberry Pi cluster. Start by assigning a static IP address to each Pi node in your cluster to ensure consistent communication. You can do this by editing the /etc/dhcpcd.conf file on each Pi, adding the following lines:
interface eth0
static ip_address=192.168.1.X/24
static routers=192.168.1.1
static domain_name_servers=192.168.1.1
Replace ‘X’ with a unique number for each node (like 101, 102, 103). The master node typically takes the first address in your sequence.
Next, set up SSH access between nodes. Generate SSH keys on the master node using ‘ssh-keygen’ and copy them to each worker node with ‘ssh-copy-id’. This enables password-less communication within the cluster.
For optimal performance, consider using ethernet connections rather than Wi-Fi. A dedicated network switch connecting all Pis will provide better stability and faster data transfer rates between nodes.
Configure hostnames for easy identification by editing /etc/hostname and /etc/hosts files on each Pi. Use descriptive names like ‘master’, ‘node1’, ‘node2’, etc.
Finally, test the network connectivity using simple ping commands between nodes. If you’re planning to use container orchestration tools like Kubernetes, ensure all nodes can communicate on required ports (typically 6443, 2379-2380, and 10250).
Operating System Selection
When building a Raspberry Pi cluster, selecting the right operating system is crucial for optimal performance and compatibility. The most popular choice is Raspberry Pi OS (formerly Raspbian), which is specifically optimized for Pi hardware and offers excellent stability for cluster computing applications.
For cluster computing, you’ll want to use the Raspberry Pi OS Lite version, which comes without a desktop environment. This minimal installation reduces overhead and frees up resources for your cluster operations. Alternative options include Ubuntu Server ARM edition, which provides robust server capabilities and extensive package support.
Before installation, ensure you’re using the 64-bit version of your chosen OS if your Pi models support it, as this enables better performance for cluster computing tasks. Download the OS image and use the Raspberry Pi Imager tool to flash it onto your SD cards. You’ll need to prepare identical OS installations for each node in your cluster.
After installation, it’s essential to perform basic configuration steps on each Pi:
– Enable SSH for remote management
– Set static IP addresses
– Update system packages
– Install necessary clustering software
For advanced users, specialized distributions like DietPi or HypriotOS offer lightweight alternatives optimized for container operations and cluster management. However, beginners should stick with Raspberry Pi OS for its extensive community support and documentation.
Remember to keep all nodes in your cluster running the same OS version to avoid compatibility issues and simplify maintenance.
Implementing Multi-Cloud Features
Docker Swarm Implementation
Docker Swarm transforms your Raspberry Pi cluster into a powerful containerized environment, enabling efficient application deployment and management across multiple nodes. This orchestration tool is particularly well-suited for Raspberry Pi clusters due to its lightweight nature and straightforward implementation.
To begin setting up Docker Swarm, ensure Docker is installed on all your Raspberry Pi nodes. On your designated manager node, initialize the swarm by running:
“`bash
docker swarm init –advertise-addr
“`
This command generates a join token, which you’ll use to connect worker nodes to the swarm. Copy the provided command and execute it on each worker node to add them to the cluster.
Once your swarm is established, you can deploy services using Docker Compose files. Create a simple stack file (docker-compose.yml) to define your services:
“`yaml
version: ‘3’
services:
web:
image: nginx
deploy:
replicas: 3
ports:
– “80:80”
“`
Deploy your stack using:
“`bash
docker stack deploy -c docker-compose.yml myapp
“`
Docker Swarm automatically distributes containers across your nodes, handling load balancing and service discovery. Monitor your deployment using:
“`bash
docker service ls
docker node ls
“`
For high availability, configure at least three manager nodes. This ensures your cluster remains operational even if one manager fails. Remember to implement resource constraints appropriate for Raspberry Pi’s limited resources:
“`yaml
deploy:
resources:
limits:
cpus: ‘0.5’
memory: 512M
“`
Regular maintenance involves updating services, monitoring node health, and managing secrets securely. Use Docker’s built-in rolling updates to minimize downtime during deployments:
“`bash
docker service update –image nginx:latest myapp_web
“`
This containerized approach provides a scalable, maintainable foundation for your Raspberry Pi cluster, enabling efficient application deployment and management.
Load Balancing Configuration
Load balancing is crucial for maintaining optimal performance across your Raspberry Pi cluster. A well-configured load balancer ensures that work is distributed evenly among all nodes, preventing any single Pi from becoming overwhelmed while others remain underutilized.
For basic load balancing, HAProxy is an excellent starting point. Install it on your master node with:
“`bash
sudo apt-get install haproxy
“`
Configure HAProxy by editing /etc/haproxy/haproxy.cfg to include your worker nodes:
“`
frontend http_front
bind *:80
default_backend http_back
backend http_back
balance roundrobin
server worker1 192.168.1.101:80 check
server worker2 192.168.1.102:80 check
server worker3 192.168.1.103:80 check
“`
For more advanced scenarios, consider implementing Kubernetes’ native load balancing features. This provides sophisticated traffic distribution with features like health checks and automatic failover.
Another popular option is NGINX, which offers both load balancing and reverse proxy capabilities. Its configuration is straightforward:
“`nginx
upstream cluster {
server 192.168.1.101;
server 192.168.1.102;
server 192.168.1.103;
}
server {
location / {
proxy_pass http://cluster;
}
}
“`
Remember to monitor your load balancing performance using tools like htop or Prometheus. This helps identify bottlenecks and adjust your configuration accordingly. Regular testing of failover scenarios ensures your cluster remains resilient under various conditions.
Cloud Service Integration
Integrating your Raspberry Pi cluster with major cloud providers opens up exciting possibilities for hybrid computing environments and enhanced scalability. Popular cloud platforms like AWS, Google Cloud, and Azure offer specific tools and services that work seamlessly with Raspberry Pi clusters, enabling you to create powerful distributed computing solutions.
To get started, you’ll need to implement appropriate cloud integration architectures that align with your project requirements. Most cloud providers offer SDK packages compatible with Raspberry Pi’s ARM architecture, making integration relatively straightforward.
For AWS integration, you can utilize AWS IoT Core to connect your cluster nodes securely. This allows your Pi cluster to interact with various AWS services, including Lambda functions, S3 storage, and EC2 instances. Google Cloud Platform offers similar capabilities through their IoT Core service, while Azure provides IoT Hub for seamless device management and communication.
Key considerations for cloud integration include:
– Implementing proper authentication and security protocols
– Managing data transfer costs
– Monitoring bandwidth usage
– Ensuring reliable network connectivity
– Setting up failover mechanisms
To optimize performance, consider using edge computing principles by processing data locally on your Pi cluster before sending results to the cloud. This approach reduces latency and costs while maintaining the benefits of cloud scalability.
For beginners, start with simple cloud storage integration using services like Dropbox or Google Drive APIs. As you become more comfortable, progress to more complex implementations involving containerization, serverless computing, and distributed databases.
Performance Optimization and Monitoring
Monitoring Tools Setup
Monitoring your Raspberry Pi cluster is crucial for maintaining optimal performance and quickly identifying potential issues. For comprehensive cluster monitoring, we’ll set up two essential tools: Prometheus for metrics collection and Grafana for visualization.
Start by installing Prometheus on your master node:
“`bash
sudo apt-get install prometheus
sudo systemctl enable prometheus
sudo systemctl start prometheus
“`
Next, configure each node to expose metrics by installing the node exporter:
“`bash
wget https://github.com/prometheus/node_exporter/releases/download/v1.0.1/node_exporter-1.0.1.linux-armv7.tar.gz
tar xvf node_exporter-1.0.1.linux-armv7.tar.gz
cd node_exporter-1.0.1.linux-armv7
sudo cp node_exporter /usr/local/bin/
“`
Install Grafana to create beautiful dashboards:
“`bash
sudo apt-get install grafana
sudo systemctl enable grafana-server
sudo systemctl start grafana-server
“`
Access Grafana through your web browser at http://master-node-ip:3000. Create a new dashboard to monitor:
– CPU usage and temperature
– Memory utilization
– Network traffic
– Disk usage
– System load
For additional insights, consider installing cAdvisor to monitor containerized applications. This combination of tools provides a robust monitoring solution for your Raspberry Pi cluster, helping you maintain optimal performance and quickly address any issues that arise.

Performance Tuning Tips
To maximize your Raspberry Pi cluster’s performance, focus on both hardware and software optimizations. Start by overclocking your Pi nodes carefully – while this can boost performance, ensure proper cooling solutions are in place to prevent thermal throttling. Installing heat sinks and adding active cooling fans can help maintain stable operations under load.
On the software side, optimize your virtual machine configuration and container settings to efficiently distribute workloads. Use lightweight Linux distributions specifically designed for clustering, such as DietPi or HypriotOS, which consume fewer resources than standard distributions.
Monitor network traffic and minimize unnecessary communication between nodes. Implement load balancing algorithms that suit your specific use case – round-robin works well for general purposes, while weighted distribution might be better for heterogeneous clusters mixing different Pi models.
Consider using SSDs instead of SD cards for the operating system and storage, as this significantly improves I/O performance. Connect your nodes using ethernet rather than Wi-Fi for more reliable and faster communication. If possible, use Gigabit ethernet switches to reduce network bottlenecks.
Regular maintenance is crucial – update your software, clean system logs, and monitor resource usage across nodes. Use monitoring tools like Ganglia or Prometheus to track cluster performance and identify potential bottlenecks before they impact operations.
Building a Raspberry Pi cluster computer offers an exciting and cost-effective way to explore parallel computing and distributed systems. Throughout this guide, we’ve covered everything from selecting the right hardware components to configuring the software and implementing advanced networking features. The versatility of Raspberry Pi clusters makes them ideal for both educational purposes and practical applications, from running Docker containers to hosting web services.
Whether you’re a student learning about distributed computing or a hobbyist exploring cloud technologies, a Raspberry Pi cluster provides hands-on experience with real-world computing concepts. By following the steps outlined in this guide, you can create a functional cluster that serves as a foundation for more advanced projects and experiments.
Remember to start small with 2-3 nodes and gradually expand your cluster as you become more comfortable with the setup and management. Keep exploring new possibilities by experimenting with different operating systems, container orchestration tools, and distributed applications. The skills you develop while building and maintaining a Raspberry Pi cluster will prove invaluable in understanding modern cloud computing architectures and distributed systems.