


Transform your Raspberry Pi into a versatile virtualization platform by leveraging its compact yet powerful architecture for mini data center setup. Deploy multiple virtual machines using lightweight hypervisors like KVM or QEMU to maximize resource efficiency while maintaining stable performance. Scale your IoT management capabilities by running containerized applications alongside traditional VMs, creating a robust testing and development environment. Balance workload distribution across multiple Pi nodes to enhance processing power and ensure seamless failover protection, particularly crucial for edge computing applications. The Raspberry Pi 4’s 64-bit architecture and up to 8GB RAM now make enterprise-grade virtualization accessible to hobbyists and professionals alike, opening new possibilities for home labs and small-scale production environments.
Hardware Requirements and Limitations
Choosing the Right Pi Model
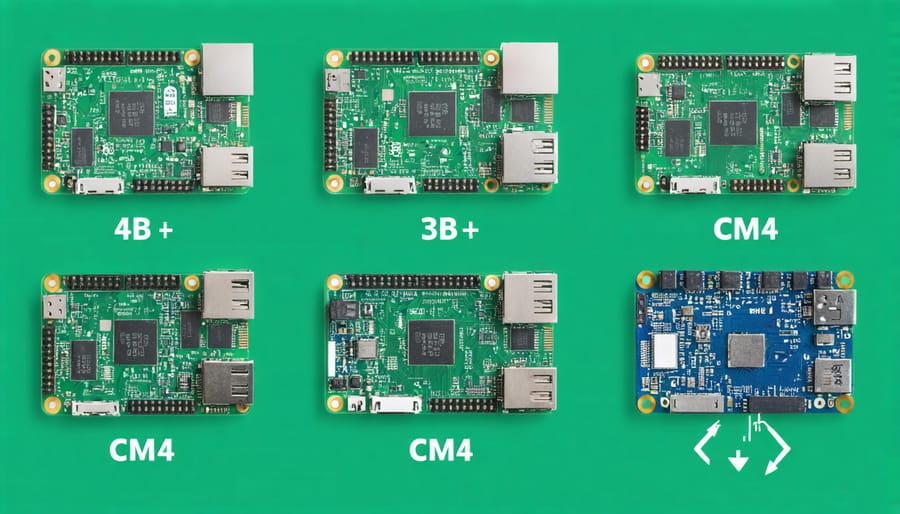
When selecting a Raspberry Pi for running virtual machines, the model you choose significantly impacts performance. The Raspberry Pi 4 Model B is currently the best choice, especially with 8GB RAM, as it provides enough memory for running multiple VMs simultaneously. The 4GB variant can handle basic VM workloads, while the 2GB model is limited to single, lightweight VMs.
Older models like the Raspberry Pi 3 B+ can run VMs but with noticeable performance limitations. These are better suited for testing and learning rather than production environments. The Pi 400, essentially a Pi 4 in keyboard form, offers identical VM capabilities to its standalone counterpart.
For optimal VM performance, consider these key specifications:
– RAM: 8GB for multiple VMs, 4GB minimum for single VM
– CPU: 64-bit processor (available in Pi 3 and newer)
– Storage: Use high-speed SD cards or USB 3.0 SSDs
– Cooling: Active cooling recommended for sustained VM operation
The Pi Zero and Pi 2 models, while useful for many projects, aren’t recommended for VM workloads due to their limited processing power and memory.
Memory and Storage Considerations
When running VMs on a Raspberry Pi, memory and storage management is crucial for smooth operation. For RAM requirements, aim for a minimum of 4GB, though 8GB is recommended for running multiple VMs simultaneously. The Raspberry Pi 4 Model B with 8GB RAM is ideal for this purpose, providing enough headroom for both the host system and virtual machines.
Storage considerations are equally important. Use a high-quality microSD card with at least 32GB capacity, though 64GB or larger is preferred. For better performance, consider using an external SSD connected via USB 3.0, which offers faster read/write speeds and better durability compared to microSD cards.
Remember to allocate resources wisely: reserve at least 1GB RAM for the host system and carefully distribute the remaining memory among your VMs based on their intended use. For storage, assign each VM enough space for its base system (typically 8-16GB) plus additional space for applications and data. Monitor your resource usage regularly and adjust allocations as needed to maintain optimal performance.
Setting Up Your VM Environment
Installing the Hypervisor
Before running virtual machines on your Raspberry Pi, you’ll need to install and configure a hypervisor. KVM (Kernel-based Virtual Machine) is the recommended choice for its performance and stability on ARM architecture.
First, check if your Raspberry Pi supports virtualization by running:
“`bash
grep -c arm64 /proc/cpuinfo
“`
If the output is greater than 0, your device supports virtualization. Now, install the necessary packages:
“`bash
sudo apt update
sudo apt install qemu-kvm libvirt-daemon bridge-utils virtinst libvirt-clients
“`
After installation, enable and start the libvirt service:
“`bash
sudo systemctl enable libvirtd
sudo systemctl start libvirtd
“`
Add your user to the libvirt group for management privileges:
“`bash
sudo usermod -aG libvirt $USER
sudo usermod -aG kvm $USER
“`
To verify the installation, run:
“`bash
virsh list –all
“`
If you see an empty list without errors, the hypervisor is properly installed. For better performance, consider increasing your swap space and allocating more memory to the GPU in your Raspberry Pi’s configuration file.
Remember to reboot your Raspberry Pi after completing these steps to ensure all changes take effect.
Network Configuration
Proper network configuration is essential for your virtual machines to communicate effectively on your Raspberry Pi. Start by configuring the network bridge that allows your VMs to connect to the internet and communicate with other devices on your network.
To set up basic networking, you’ll need to create a bridge interface using the following steps in your terminal:
sudo ip link add name br0 type bridge
sudo ip link set br0 up
sudo ip addr add 192.168.1.1/24 dev br0
For your VMs to access the internet, configure NAT (Network Address Translation) using iptables:
sudo iptables -t nat -A POSTROUTING -o eth0 -j MASQUERADE
sudo echo 1 > /proc/sys/net/ipv4/ip_forward
Each VM should be configured with a unique IP address within your bridge network range. For example, if your bridge is on 192.168.1.0/24, assign VMs addresses like 192.168.1.10, 192.168.1.11, and so on.
For cloud connectivity, ensure your Raspberry Pi has a stable internet connection and consider setting up port forwarding on your router if you need to access your VMs from the internet. Remember to implement proper security measures, such as:
– Strong passwords for VM access
– Regular security updates
– Firewall rules to restrict unnecessary network traffic
– SSH key-based authentication instead of password login
This configuration provides a solid foundation for running networked VMs on your Raspberry Pi while maintaining security and accessibility.
Storage Management
Effective storage management is crucial when running VMs on your Raspberry Pi. Start by implementing secure storage management practices to protect your virtual machines and their data. The primary storage options include using the SD card directly, attaching USB storage devices, or network-attached storage (NAS).
For optimal performance, consider creating dedicated storage pools using LVM (Logical Volume Management). This allows for flexible disk space allocation and easier management of multiple VMs. A typical setup might involve:
1. A boot partition on the SD card
2. External USB SSD for VM storage
3. Network storage for backups and shared resources
When configuring virtual disks, use the qcow2 format for better performance and features like snapshots and compression. Allocate at least 8GB of storage space per VM, though requirements may vary based on your intended use case.
To maintain system stability, monitor storage usage regularly and implement automated cleanup scripts to remove old snapshots and unused disk images. Consider using thin provisioning to maximize available space, but be cautious of overprovisioning that could lead to storage issues.
For backup purposes, set up periodic snapshots and store them on separate physical media or network storage. This ensures data safety and provides a recovery option if issues arise with your virtual machines.
Creating and Managing VMs
VM Creation Process
Creating a virtual machine on your Raspberry Pi involves several straightforward steps. First, ensure your chosen virtualization software is properly installed and running. Open the virtualization manager interface and select “Create New VM” or a similar option, depending on your software.
Begin by allocating system resources for your VM. For optimal performance, assign no more than 50% of your Raspberry Pi’s available RAM and CPU cores. A typical configuration might use 1GB RAM and 2 CPU cores, leaving enough resources for your host system to operate smoothly.
Next, choose your guest operating system. For best compatibility with Raspberry Pi’s ARM architecture, select ARM-based operating systems like Ubuntu ARM, Debian ARM, or Raspberry Pi OS. Create a new virtual disk for your VM, keeping in mind the available storage on your Pi. A minimum of 8GB is recommended for most basic installations.
Configure your network settings, selecting either bridged networking for direct network access or NAT for shared host connectivity. Set up display options according to your needs – headless operation for servers or full GUI for desktop environments.
Finally, mount your operating system image and start the installation process. Follow the standard installation prompts for your chosen OS, setting up user accounts and basic system configurations. Once completed, your VM will be ready for first boot.
Remember to test your VM’s performance and adjust resource allocation if needed. Start with conservative resource assignments and increase them gradually if your workload requires more power while monitoring your Pi’s overall system performance.
Resource Management
Effective resource management is crucial when running VMs on your Raspberry Pi to ensure smooth operation and prevent system slowdowns. Start by monitoring your system’s resources using built-in tools like ‘top’ or ‘htop’ to track CPU usage, memory consumption, and storage utilization in real-time.
For optimal performance, allocate resources based on your VM’s specific needs. A good starting point is to assign no more than 50% of your Pi’s available RAM to each VM, leaving enough headroom for the host system. When running multiple VMs, consider using lightweight Linux distributions that require minimal resources.
Implementation of swap space can help manage memory constraints, but use it judiciously as excessive swapping can impact performance due to the Pi’s SD card speed limitations. A recommended swap size is typically 1-2 times your physical RAM.
CPU scheduling can be fine-tuned using cgroups to prioritize resources between VMs. Set CPU quotas and limits to prevent any single VM from monopolizing system resources. For storage management, utilize thin provisioning to maximize available space and implement regular cleanup routines to remove unused snapshots and temporary files.
Temperature monitoring is especially important for the Raspberry Pi when running VMs. Install temperature monitoring tools and set up automatic throttling or shutdown procedures if temperatures exceed safe levels (typically above 80°C). Consider adding a cooling solution like heatsinks or fans for better thermal management.
Regularly backup your VM configurations and data, and implement automated resource scaling based on usage patterns to maintain optimal performance while maximizing your Pi’s capabilities.
Cloud Integration and Remote Management
Cloud Connectivity Options
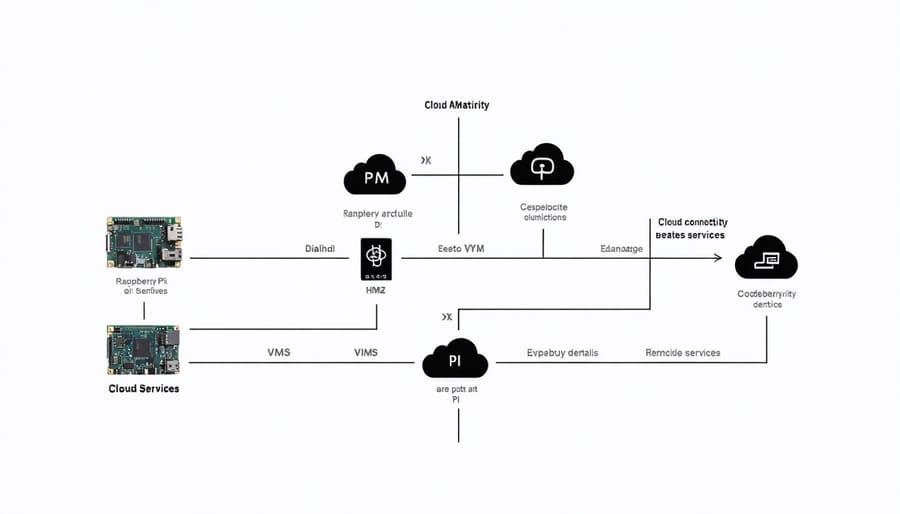
Connecting your Raspberry Pi VMs to cloud services opens up exciting possibilities for remote management and scalability. There are several reliable methods to establish cloud service integration, each suited to different use cases and requirements.
The most straightforward approach is using VPN tunneling, which creates a secure connection between your Raspberry Pi VMs and cloud platforms. This method works well for both personal projects and small-scale deployments, offering a good balance of security and ease of setup.
For more sophisticated setups, you can implement direct API connectivity using cloud provider SDKs. This enables seamless interaction between your VMs and cloud services, perfect for IoT applications that require real-time data exchange. Different cloud integration architectures can be employed depending on your specific needs.
Another popular option is utilizing container orchestration tools like Kubernetes, which can manage the communication between your local VMs and cloud resources. This approach is particularly useful for projects requiring high availability and automated scaling.
Remember to consider factors such as bandwidth limitations, latency requirements, and security protocols when choosing your connectivity method. For most hobbyist projects, starting with a simple VPN connection and gradually expanding to more complex solutions as needed is recommended.
Remote Management Tools
Managing your Raspberry Pi VMs remotely doesn’t have to be complicated. Several powerful tools make it easy to control and monitor your virtual machines from anywhere. VNC (Virtual Network Computing) is perhaps the most popular option, providing a graphical interface to your VMs through a secure connection. Simply install VNC Server on your Raspberry Pi and use VNC Viewer on your remote device to gain full desktop access.
SSH remains the go-to solution for command-line management, offering a lightweight and secure way to access your VMs. Combined with tools like tmux or screen, you can maintain persistent sessions even if your connection drops. For web-based management, Cockpit provides an intuitive interface that lets you monitor system resources, manage virtual machines, and handle storage allocation through your browser.
QEMU’s built-in monitor interface can be accessed remotely through TCP connections, giving you direct control over VM operations. For those managing multiple VMs, Proxmox VE offers a comprehensive web interface with features like live migration, backup management, and resource monitoring.
Remember to secure your remote connections by using strong passwords, SSH keys, and considering a VPN if accessing your VMs over the internet. Many of these tools also support mobile apps, letting you manage your virtual machines right from your smartphone or tablet.
Setting up virtual machines on your Raspberry Pi opens up exciting possibilities for learning, testing, and development. By following the guidelines and requirements outlined in this article, you can successfully create and manage VMs on your Pi, whether for personal projects or educational purposes. Remember to choose the right virtualization solution based on your Pi model and ensure adequate resources are available for optimal performance. Start with a single VM to familiarize yourself with the process, then gradually expand your virtual environment as needed. The combination of Raspberry Pi’s affordability and VM capabilities makes it an excellent platform for exploring virtualization concepts and developing IoT solutions. Don’t hesitate to experiment with different operating systems and configurations to find what works best for your specific needs.