


Transform your Raspberry Pi into a powerful networking hub by mastering essential connectivity features and advanced networking capabilities. After getting started with Raspberry Pi OS, configure your device as a home network server, VPN gateway, or network monitoring station—all with minimal hardware investment and maximum flexibility.
From setting up headless SSH access for remote development to implementing network-wide ad blocking with Pi-hole, the Raspberry Pi’s networking capabilities extend far beyond basic connectivity. Its lightweight footprint and robust networking stack make it ideal for both learning network fundamentals and deploying production-grade solutions.
Whether you’re building a secure home automation system, creating a wireless access point, or establishing a development environment, understanding Raspberry Pi networking unlocks endless possibilities for your projects. This guide will walk you through essential configurations, security best practices, and advanced networking applications that transform your Pi into a versatile networking powerhouse.
Essential Networking Basics for Your Raspberry Pi
Network Configuration Fundamentals
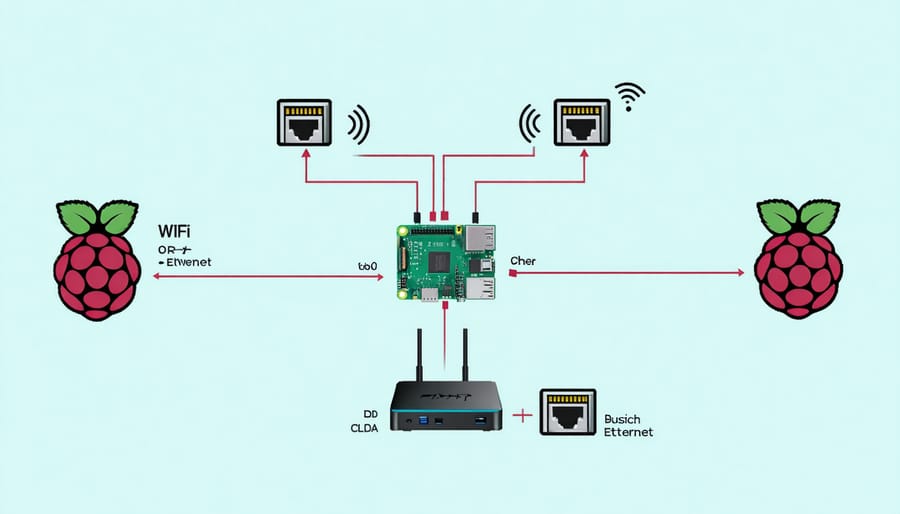
Getting your Raspberry Pi connected to a network is essential for most projects. Start by understanding your Pi’s network interfaces: ethernet (eth0) and wireless (wlan0). For wired connections, simply plug an ethernet cable into your Pi – it typically configures automatically via DHCP.
To configure WiFi settings, you’ll need to modify the wpa_supplicant.conf file. Your Pi requires a static or dynamic IP address to communicate on the network. Static IPs are useful for servers and remote access, while DHCP is simpler for basic projects.
Key network settings include:
– IP address (e.g., 192.168.1.100)
– Subnet mask (typically 255.255.255.0)
– Default gateway (your router’s IP)
– DNS servers (often 8.8.8.8 for Google)
Use the command ‘ip addr’ to view your current network configuration, and ‘ping’ to test connectivity. Remember to update your Pi’s hostname if you’re running multiple devices on the same network to avoid conflicts. For security, always change the default password and consider disabling unused network services.
Security Best Practices
Securing your Raspberry Pi on a network is crucial to protect both your device and your data. Start by changing the default password for the ‘pi’ user account to a strong, unique password. Enable SSH key-based authentication instead of password login for enhanced security when accessing your Pi remotely.
Keep your system updated by regularly running ‘sudo apt update’ and ‘sudo apt upgrade’ commands to patch security vulnerabilities. Install and configure a firewall using ‘ufw’ (Uncomplicated Firewall) to control incoming and outgoing traffic. Only open ports that are absolutely necessary for your projects.
Consider disabling unnecessary services and protocols that might expose your Pi to potential threats. If you’re using your Pi as a server, implement fail2ban to protect against brute force attacks by automatically blocking suspicious IP addresses.
Create a non-root user account for daily operations and restrict sudo privileges appropriately. For added security, configure your router to place the Pi on a separate network segment or VLAN, especially when exposing services to the internet. Regularly monitor system logs for unusual activity and consider setting up automatic security alerts.
Remote Access Methods for Raspberry Pi
SSH Setup and Configuration
SSH (Secure Shell) is essential for remotely accessing and controlling your Raspberry Pi. To enable SSH, you’ll need to follow a few simple steps. If you’re using Raspberry Pi OS with a display, navigate to the Raspberry Pi Configuration tool through the main menu, select the Interfaces tab, and enable SSH. For headless setups, create an empty file named ‘ssh’ (without any extension) in the boot partition of your SD card before first boot.
Once SSH is enabled, you’ll need your Pi’s IP address to connect. Open a terminal on your Pi and type ‘hostname -I’ to find it. From your computer, use an SSH client to connect. On Linux or macOS, open Terminal and type:
ssh pi@your_pi_ip_address
Windows users can use PuTTY or Windows Terminal. When connecting for the first time, you’ll be prompted to accept the Pi’s fingerprint. The default username is ‘pi’, and if you haven’t changed it, the default password is ‘raspberry’.
For enhanced security, it’s crucial to change your default password using the ‘passwd’ command after logging in. You can also set up SSH keys for passwordless authentication, which is more secure than password-based login. Generate an SSH key pair on your computer using:
ssh-keygen -t rsa -b 4096
Then transfer your public key to the Pi using:
ssh-copy-id pi@your_pi_ip_address
This setup enables secure remote access to your Raspberry Pi for development and administration tasks.
VNC for Remote Desktop Access
VNC (Virtual Network Computing) enables you to access your Raspberry Pi’s graphical desktop environment remotely from another computer. This feature is particularly useful when you need to perform tasks that require a GUI interface but don’t want to connect a physical monitor to your Pi.
To enable VNC, first ensure your Raspberry Pi has the latest updates by running:
“`
sudo apt update
sudo apt upgrade
“`
Then, open Raspberry Pi Configuration either through the desktop menu or by typing:
“`
sudo raspi-config
“`
Navigate to “Interface Options” and enable VNC. Once enabled, the VNC server will start automatically whenever your Pi boots up.
To connect to your Pi, you’ll need a VNC viewer on your client device. RealVNC Viewer is a popular choice and works well with Raspberry Pi’s built-in VNC server. Download and install it on your computer, then enter your Pi’s IP address to connect.
For enhanced security, consider setting up a strong password and enabling encryption. You can configure these settings through the VNC server properties on your Pi.
If you’re connecting over the internet, ensure you’ve properly configured port forwarding on your router (default VNC port is 5900) and implemented appropriate security measures to protect your connection.
Remember that VNC performance depends on your network speed, so a local connection will provide the smoothest experience.
Web-based Management Tools
The Raspberry Pi offers several powerful web-based management tools that make remote administration both convenient and efficient. One of the most popular options is Webmin, a comprehensive interface that allows you to manage system services, users, and network configurations through your browser. Simply access your Pi’s IP address on port 10000, and you’ll have full control over your device.
For those seeking a lightweight alternative, Cockpit provides a modern, responsive interface perfect for monitoring system resources and managing containers. It’s particularly useful for keeping track of network usage and system performance in real-time.
Pi-hole’s web interface offers an excellent management solution for those using their Pi as a network-wide ad blocker. Through its dashboard, you can monitor DNS queries, manage blocklists, and view detailed statistics about your network traffic.
The official Raspberry Pi Foundation also maintains the Raspberry Pi Web Interface, which provides basic system configuration options and is ideal for beginners. This tool comes pre-installed on Raspberry Pi OS and can be accessed via port 80.
For development projects, Apache’s web server interface allows you to manage your web hosting configurations directly through the browser. Combined with phpMyAdmin, you can easily manage MySQL databases and web applications hosted on your Pi.
Remember to secure these interfaces with strong passwords and, when possible, implement SSL certificates for encrypted connections.
Advanced Networking Projects
Setting Up a Home Server
A Raspberry Pi makes an excellent home server, offering a cost-effective and energy-efficient solution for various networking needs. To get started, you’ll need your Pi, a microSD card with at least 32GB storage, and a stable ethernet connection for optimal performance.
Begin by installing a server-oriented operating system like Raspberry Pi OS Lite or Ubuntu Server, which provides a solid foundation for your home server setup. Once installed, ensure your Pi has a static IP address to maintain consistent access to your services.
Popular home server applications you can run include:
– File sharing with Samba or NextCloud
– Media streaming using Plex or Jellyfin
– Web hosting with Apache or Nginx
– Network storage (NAS) functionality
– Print server capabilities
– Home automation hub
To enhance security, configure SSH with key-based authentication instead of password login, and set up a firewall using UFW (Uncomplicated Firewall). Remember to regularly update your system and backup important data.
For reliable operation, consider:
– Using a UPS for power backup
– Installing a cooling solution
– Monitoring system resources
– Setting up automatic maintenance scripts
– Creating regular backup schedules
You can expand your server’s capabilities by adding external storage through USB drives or implementing RAID configurations for data redundancy. Many users also integrate their Pi servers with Docker containers for easier service management and deployment.
Remember to document your setup process and maintain proper network security practices to protect your home server from unauthorized access.
Network Monitoring Tools
Transform your Raspberry Pi into a powerful network monitoring station with these essential tools and applications. One of the most popular choices is Nagios, which offers comprehensive network monitoring capabilities and can track system metrics, service availability, and network performance. Installation is straightforward using the command “sudo apt-get install nagios3” followed by basic configuration.
For real-time network analysis, Wireshark provides detailed packet inspection and network troubleshooting. Install it using “sudo apt-get install wireshark” and capture network traffic directly on your Pi. This tool is particularly useful for understanding network behavior and identifying potential security issues.
Cacti offers excellent graphical representation of network statistics and long-term trend analysis. After installing with “sudo apt-get install cacti,” you can monitor bandwidth usage, system load, and other critical metrics through an intuitive web interface.
For a lighter alternative, consider ntop, which provides network usage statistics and monitoring in a user-friendly format. The command “sudo apt-get install ntop” gets you started, and its web interface makes it easy to view real-time network statistics.
Zabbix is another powerful option that excels at monitoring multiple network devices and services. While it requires more system resources, it offers advanced features like automated alerts and extensive customization options.
Remember to monitor your Pi’s resource usage when running these tools, as some can be demanding on the system. For optimal performance, consider running only one major monitoring tool at a time and adjust the polling intervals based on your needs.

Remote Development Environment
Setting up a remote development environment on your Raspberry Pi opens up new possibilities for efficient coding and project management. To set up your development environment, start by installing SSH (Secure Shell) on your Pi. This allows you to access your Pi securely from any computer on your network.
Begin by enabling SSH through the Raspberry Pi Configuration tool or by creating an empty file named ‘ssh’ in the boot partition. Then, install your preferred development tools and text editors like Visual Studio Code, Python IDLE, or Vim. These tools provide essential features for coding, debugging, and version control.
To enhance your development experience, consider setting up version control with Git and configuring your favorite IDE for remote development. Many modern IDEs offer excellent remote development extensions that make working with your Pi seamless.
For better performance, you can optimize your development workflow by implementing cross-compilation techniques. This allows you to write and compile code on your more powerful desktop machine while running the compiled programs on your Pi.
Don’t forget to configure your firewall settings appropriately and use SSH keys instead of passwords for enhanced security. Regular backups of your development environment ensure you won’t lose important work in case of SD card failures or other issues.
As we’ve explored throughout this guide, Raspberry Pi networking opens up a world of possibilities for both beginners and advanced users alike. From setting up basic network connections to creating sophisticated home servers and network monitoring solutions, your Raspberry Pi can serve as a powerful networking tool that’s both cost-effective and educational.
The key to success with Raspberry Pi networking lies in starting with the fundamentals – ensuring proper network configuration, understanding basic networking concepts, and gradually building upon that foundation. Whether you’re interested in creating a home media server, setting up a network-wide ad blocker, or developing IoT projects, the skills you’ve learned here will serve as essential building blocks.
For your next steps, consider starting with a simple project like setting up SSH access or creating a basic file server. As you grow more comfortable, challenge yourself with more complex projects such as implementing a VPN server or network monitoring system. Remember to always prioritize security in your networking projects and regularly update your system to protect against vulnerabilities.
The Raspberry Pi community is vast and supportive, offering countless resources, tutorials, and forums where you can find help and share your experiences. Don’t hesitate to experiment with different networking configurations and applications – this hands-on experience is invaluable for learning and growth in your Raspberry Pi journey.