


Deploy Kubernetes microservices on Raspberry Pi clusters to revolutionize your edge computing applications with scalable, container-orchestrated architectures. This distributed computing approach transforms resource-constrained Pi devices into powerful, production-grade infrastructure capable of running complex containerized workloads.
Kubernetes’ declarative configuration and self-healing capabilities make it ideal for managing microservices across Pi clusters, enabling automatic load balancing, rolling updates, and fault tolerance. By breaking down traditional monolithic applications into lightweight, independently deployable services, organizations can achieve greater flexibility, faster deployment cycles, and improved resource utilization on their Raspberry Pi infrastructure.
Modern development teams leverage this architecture to build resilient, cloud-native applications that seamlessly scale from development environments to production clusters. The combination of Kubernetes’ robust orchestration features with Raspberry Pi’s cost-effective computing power creates an ideal platform for experimenting with containerized applications, implementing CI/CD pipelines, and developing IoT solutions.
Whether you’re building a home lab or deploying enterprise-grade applications, Kubernetes microservices on Raspberry Pi provide the perfect foundation for exploring container orchestration while maintaining production-ready reliability and scalability. This guide will walk you through essential concepts, deployment strategies, and best practices for successful implementation.
Setting Up Your Raspberry Pi Kubernetes Cluster
Hardware Requirements and Considerations
When implementing Kubernetes microservices on Raspberry Pi clusters, understanding the hardware requirements for edge computing is crucial for optimal performance. The minimum recommended setup includes at least three Raspberry Pi 4B nodes, each with 4GB RAM, though 8GB models are preferred for running multiple containers smoothly. Storage requirements start at 32GB per node using high-speed SD cards or SSDs via USB 3.0 for better reliability.
Network connectivity is vital, with Gigabit Ethernet recommended for inter-node communication. A dedicated network switch (minimum 1Gbps) helps maintain stable cluster communication. Power requirements should not be underestimated – use reliable 5V/3A power supplies for each Pi, preferably with a UPS backup to prevent data corruption during power failures.
For cooling, active cooling solutions like fans or heatsinks are essential, as Kubernetes workloads can push the processors to their limits. Consider a cluster case with built-in cooling options for better thermal management.
Additional hardware considerations include:
– A dedicated master node with higher specifications
– USB-to-Ethernet adapters for redundant networking
– External storage solutions for persistent volumes
– Quality network cables (Cat 6 minimum)
– A reliable power distribution system
Remember that these specifications represent the baseline for a development environment. Production deployments may require more robust hardware depending on your specific workload requirements.

Initial Kubernetes Installation Steps
Getting started with Kubernetes on your Raspberry Pi cluster is straightforward with lightweight distributions like K3s or MicroK8s. Let’s walk through the installation process using K3s, which is perfect for resource-constrained devices.
First, ensure your Raspberry Pi nodes are running 64-bit Ubuntu Server or Raspberry Pi OS. On your designated master node, open a terminal and run:
“`bash
curl -sfL https://get.k3s.io | sh –
“`
This command downloads and installs K3s with default settings. After installation, retrieve your cluster token by running:
“`bash
sudo cat /var/lib/rancher/k3s/server/node-token
“`
For worker nodes, use this command, replacing the placeholders with your master node’s IP and token:
“`bash
curl -sfL https://get.k3s.io | K3S_URL=https://MASTER_IP:6443 K3S_TOKEN=YOUR_TOKEN sh –
“`
Verify your cluster is running properly by executing:
“`bash
sudo kubectl get nodes
“`
For MicroK8s installation, the process is equally simple:
“`bash
sudo snap install microk8s –classic
microk8s status –wait-ready
“`
Remember to enable essential add-ons like DNS and storage:
“`bash
microk8s enable dns storage
“`
Both distributions provide lightweight yet powerful Kubernetes implementations perfect for Raspberry Pi clusters. Choose K3s for minimal resource usage or MicroK8s if you prefer Canonical’s ecosystem.
Designing Microservices for Edge Computing
Resource Optimization Strategies
Running Kubernetes on Raspberry Pi requires careful resource management due to the hardware limitations. To optimize edge performance, implement these proven strategies for efficient resource utilization.
First, set appropriate resource requests and limits for your containers. Start with conservative limits, such as 256MB RAM and 0.5 CPU cores per container, and adjust based on actual usage. Use the kubectl top command to monitor resource consumption and fine-tune these values.
Implement horizontal pod autoscaling (HPA) to automatically adjust the number of pod replicas based on CPU or memory utilization. Set reasonable thresholds, typically around 70-80% resource utilization, to maintain optimal performance without overwhelming the system.
Choose lightweight container images specifically designed for ARM architecture. Alpine-based images are particularly effective, often requiring less than 100MB of storage. Remove unnecessary packages and dependencies from your containers to reduce their footprint.
Leverage node affinity and anti-affinity rules to distribute workloads effectively across your Pi cluster. This prevents resource-intensive services from competing for resources on the same node and ensures better overall cluster stability.
Enable resource quotas at the namespace level to prevent any single application from consuming excessive resources. Set practical limits for CPU, memory, and storage usage, and implement LimitRanges to enforce default resource constraints for pods.
Consider implementing a quality of service (QoS) configuration for your pods. Classify them as Guaranteed, Burstable, or BestEffort based on their resource requirements. This helps Kubernetes make intelligent decisions about pod scheduling and eviction when resources are constrained.
Regular monitoring and cleanup of unused resources is essential. Use tools like metrics-server to track resource usage patterns and regularly remove unused containers, images, and volumes to free up valuable storage space.
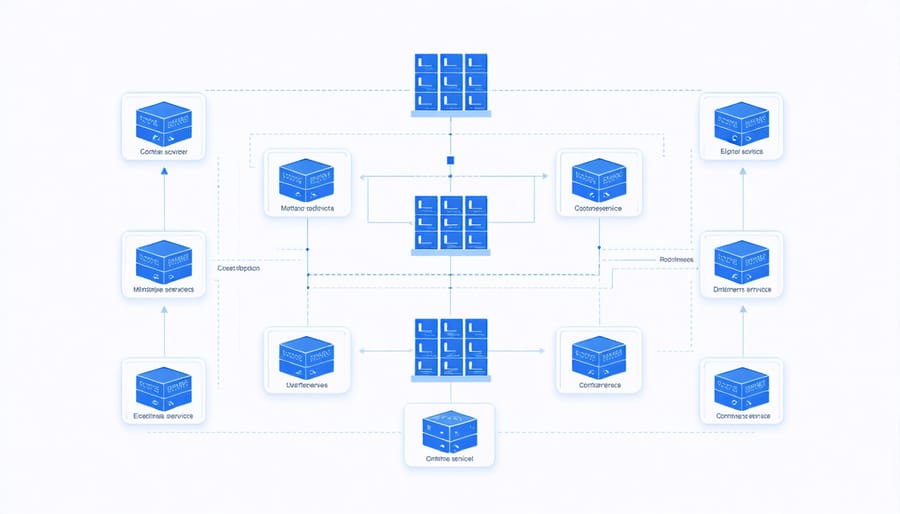
Edge-Specific Architecture Patterns
When deploying Kubernetes microservices at the edge, particularly on Raspberry Pi clusters, specific architectural patterns help optimize performance and resource utilization. The lightweight nature of edge devices demands careful consideration of how services are structured and distributed.
One effective pattern is the Edge-Core architecture, where lightweight services run on edge nodes while heavy computational workloads are offloaded to central cloud resources. This approach works particularly well for IoT applications, where edge devices handle data collection and preliminary processing while complex analytics occur in the cloud.
The Sidecar pattern proves invaluable in edge deployments, allowing you to extend application functionality without modifying the main application container. For Raspberry Pi clusters, this means you can add monitoring, logging, or security features without overwhelming the primary service’s resources.
Event-driven architectures are especially suitable for edge computing scenarios. By implementing an event mesh pattern, microservices can communicate efficiently across the edge network while maintaining loose coupling. This helps manage network latency and bandwidth constraints common in edge environments.
The Circuit Breaker pattern becomes crucial for edge deployments, preventing cascade failures when network connectivity is intermittent. Implementing this pattern helps maintain system stability and ensures graceful degradation when resources become constrained or network issues arise.
For data-intensive applications, the Stream Processing pattern works well at the edge. Edge nodes can process data streams locally, reducing the amount of data that needs to be transmitted to the central cluster. This is particularly useful for real-time sensor data processing on Raspberry Pi nodes.
Consider implementing the Cache-Aside pattern to improve response times and reduce network traffic. Edge nodes can cache frequently accessed data locally, minimizing the need for constant communication with the central cluster and improving overall system performance.
These patterns should be implemented with consideration for the limited resources available on edge devices. Regular monitoring and adjustment of resource allocation ensure optimal performance while maintaining system stability.
Implementing Security Best Practices
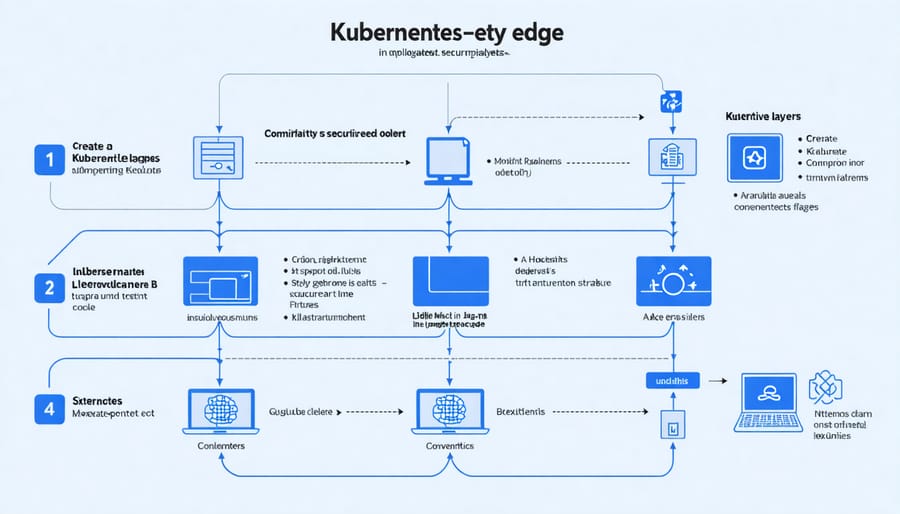
Network Security Configuration
In a Kubernetes microservice architecture running on Raspberry Pi clusters, implementing robust network security is crucial for protecting your edge computing infrastructure. Following established secure networking practices helps safeguard your deployment against potential threats while maintaining optimal performance.
Start by configuring Network Policies to control pod-to-pod communication. These policies act as a virtual firewall, allowing you to specify which pods can communicate with each other based on labels, namespaces, and IP blocks. For example, you might restrict database access to only authenticated application pods or limit external access to specific services.
Implement TLS encryption for all service-to-service communication using cert-manager to automate certificate management. This ensures that data transmitted between microservices remains encrypted and secure, even within your cluster.
Consider using a service mesh like Istio (lightweight configuration) to handle security at the network level. While resource-intensive, a properly configured service mesh provides robust features like mutual TLS, traffic encryption, and access control policies.
For edge devices, configure ingress controllers with proper authentication mechanisms. Use basic auth, OAuth2, or token-based authentication depending on your requirements. Additionally, implement rate limiting to prevent DDoS attacks and API abuse.
Set up network segregation by creating separate namespaces for different environments (development, staging, production) and configuring appropriate RBAC policies. This isolation helps contain potential security breaches and simplifies access management.
Remember to regularly update your network security configurations and monitor traffic patterns for any suspicious activities. Tools like Prometheus and Grafana can help visualize network metrics and detect potential security issues early.
Access Control and Authentication
In Kubernetes microservices architecture, implementing robust access control and authentication is crucial for maintaining security. The primary mechanism for this is Role-Based Access Control (RBAC), which allows you to define fine-grained permissions for different users and service accounts.
Start by creating ServiceAccounts for your microservices, which act as identities for pods running in your cluster. These accounts can then be bound to specific roles using RoleBindings or ClusterRoleBindings. For example, you might create a restricted role for your frontend service that only allows read access to certain resources.
Authentication in Kubernetes can be handled through various methods, with JSON Web Tokens (JWT) being a popular choice for microservices. Implement an API gateway like Ambassador or Kong to handle authentication at the entry point of your cluster. This gateway can validate tokens and enforce access policies before requests reach your services.
For secure communication between microservices, use mutual TLS (mTLS) authentication. Tools like Istio can automatically inject sidecars into your pods to handle mTLS certificates and encryption. This ensures that all service-to-service communication within your cluster is authenticated and encrypted.
Remember to regularly rotate credentials and certificates. Kubernetes Secrets can store sensitive information like API keys and certificates, but consider using external secret management solutions like HashiCorp Vault for additional security features.
When deploying on Raspberry Pi, be mindful of resource usage. Choose lightweight authentication solutions and consider using tools like cert-manager for automated certificate management to reduce administrative overhead while maintaining strong security.
Performance Monitoring and Management
Monitoring Tools Setup
Setting up robust monitoring tools is crucial for maintaining healthy Kubernetes microservices on your Raspberry Pi cluster. We’ll focus on implementing Prometheus and Grafana, two powerful open-source solutions that work seamlessly together.
Start by deploying Prometheus using Helm, the Kubernetes package manager:
“`bash
helm repo add prometheus-community https://prometheus-community.github.io/helm-charts
helm install prometheus prometheus-community/prometheus
“`
Once Prometheus is running, install Grafana to create beautiful visualizations:
“`bash
helm repo add grafana https://grafana.github.io/helm-charts
helm install grafana grafana/grafana
“`
Configure basic monitoring by creating a ConfigMap for Prometheus that includes targets for your microservices:
“`yaml
apiVersion: v1
kind: ConfigMap
metadata:
name: prometheus-config
data:
prometheus.yml:
scrape_configs:
– job_name: ‘kubernetes-services’
kubernetes_sd_configs:
– role: service
“`
For resource monitoring, enable the Kubernetes metrics server:
“`bash
kubectl apply -f https://github.com/kubernetes-sigs/metrics-server/releases/latest/download/components.yaml
“`
Set up essential Grafana dashboards for:
– CPU and memory usage
– Network traffic
– Pod status and health
– API server metrics
– Node performance
Remember to adjust resource requests and limits in your monitoring stack to accommodate the Raspberry Pi’s constraints. Start with minimal resources and scale up as needed:
“`yaml
resources:
requests:
memory: “64Mi”
cpu: “100m”
limits:
memory: “128Mi”
cpu: “200m”
“`
Test your monitoring setup by accessing Grafana’s web interface and ensuring metrics are being collected correctly.
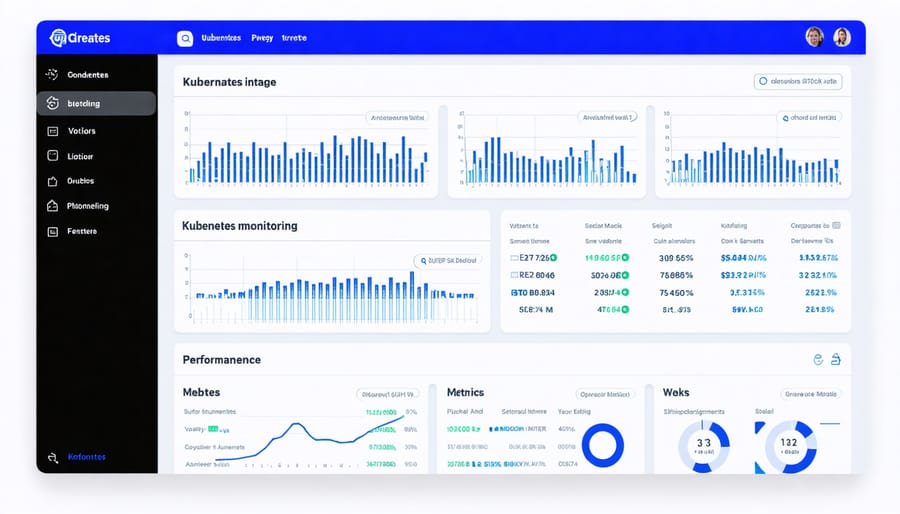
Performance Optimization Tips
When running microservices on Kubernetes in a resource-constrained environment like Raspberry Pi, optimizing performance becomes crucial. Start by implementing horizontal pod autoscaling (HPA) to automatically adjust the number of pods based on CPU and memory usage. Set appropriate resource requests and limits for each container to prevent resource hogging and ensure fair distribution.
Use lightweight base images for your containers, preferably Alpine Linux-based ones, to reduce the memory footprint. Implement caching strategies at various levels – application, service, and database – to minimize redundant computations and network calls. Consider using in-memory caches like Redis for frequently accessed data.
Network optimization plays a vital role in microservice performance. Enable gzip compression for API responses, implement connection pooling, and use efficient service mesh configurations. If possible, utilize local storage for frequently accessed data instead of making network calls.
Monitor your services using Kubernetes’ built-in metrics server and tools like Prometheus and Grafana. Set up proper liveness and readiness probes to ensure efficient container lifecycle management. Configure pod anti-affinity rules to distribute load across your Raspberry Pi cluster nodes effectively.
For database operations, implement connection pooling, optimize queries, and use appropriate indexes. Consider using asynchronous communication patterns where real-time responses aren’t necessary. Implement circuit breakers to prevent cascade failures and maintain system stability under high load.
Finally, regularly review and update your resource allocation based on actual usage patterns. Remove unused resources, implement proper garbage collection, and maintain clean container images to optimize cluster performance.
Implementing Kubernetes microservices on Raspberry Pi opens up exciting possibilities for edge computing and real-world Raspberry Pi applications. Throughout this guide, we’ve explored the essential components of building a robust microservices architecture using Kubernetes on these versatile single-board computers.
Remember to start small with a basic cluster setup before expanding to more complex deployments. Focus on properly configuring your networking, storage, and security policies from the beginning. This foundation will make scaling and maintaining your microservices much easier as your project grows.
Key takeaways include the importance of resource optimization, careful container image selection, and implementing proper monitoring solutions. Given the resource constraints of Raspberry Pi devices, always consider using lightweight alternatives and implementing efficient load balancing strategies.
For your next steps, we recommend:
– Testing your architecture with smaller workloads before scaling up
– Implementing comprehensive monitoring and logging solutions
– Regularly updating your security policies and access controls
– Documenting your deployment process for team collaboration
– Exploring container optimization techniques specific to ARM architecture
As you continue your Kubernetes journey on Raspberry Pi, remember that the community is an invaluable resource. Don’t hesitate to participate in forums, contribute to open-source projects, and share your experiences with others. With careful planning and the knowledge gained from this guide, you’re well-equipped to build scalable, efficient microservices architectures on your Raspberry Pi cluster.