


Transform your Raspberry Pi into a powerful imaging system by connecting a compatible camera module – whether it’s the official Raspberry Pi Camera or a USB webcam. This versatile combination unlocks endless possibilities, from basic photography to advanced computer vision capabilities and real-time video streaming.
The Raspberry Pi camera system stands out for its remarkable flexibility, offering high-resolution imaging at up to 12 megapixels, programmable controls, and seamless integration with Python libraries. Whether you’re building a smart security system, creating time-lapse photography, or developing machine learning applications, the Pi camera serves as an ideal starting point for both beginners and advanced makers.
This guide will walk you through setting up your camera hardware, configuring essential software components, and implementing practical projects that showcase the true potential of your Raspberry Pi camera setup. With just a few components and some basic coding knowledge, you’ll be ready to capture, process, and analyze visual data in ways that were once reserved for expensive, specialized equipment.
Essential Hardware Setup for AI Camera Integration
Choosing the Right Camera Module
When selecting a camera module for your Raspberry Pi, several options cater to different project needs and AI capabilities. The official Raspberry Pi Camera Module 3 stands out with its 12-megapixel sensor and autofocus feature, making it ideal for computer vision projects. For those interested in expanding their AI capabilities, this camera works seamlessly with various AI hardware accessories.
The more affordable Camera Module 2 remains a solid choice for basic projects, offering an 8-megapixel sensor with fixed focus. Both modules come in standard and NoIR variants, with the latter being perfect for night vision applications and infrared photography.
For projects requiring wider angles, the HQ Camera Module provides a 12.3-megapixel sensor with interchangeable lenses, though it comes at a higher price point. Budget-conscious makers can consider third-party options like Arducam or Waveshare cameras, which offer good compatibility and various specialized features.
When choosing, consider factors like resolution requirements, lighting conditions, and whether your project needs specific features like night vision or wide-angle capabilities.

Physical Installation and Configuration
Begin by powering down your Raspberry Pi completely to ensure safe installation. Locate the camera port on your Pi board – it’s a small ribbon connector labeled “CAMERA” near the Ethernet port. Gently lift the black clip on the camera port and insert the camera module’s ribbon cable with the blue side facing the Ethernet port. Press down the clip to secure the connection.
For Pi Camera Module 3, ensure the camera lens is facing away from the board. Mount the camera securely using the provided mounting holes if you’re building a permanent setup. Once physically connected, boot up your Raspberry Pi and enable the camera interface through the Raspberry Pi Configuration tool.
Open Terminal and type “sudo raspi-config”, navigate to “Interface Options,” and select “Camera.” Enable the camera interface and reboot your Pi when prompted. To test your installation, enter “libcamera-hello” in Terminal – you should see a preview window from your camera. If no image appears, double-check your physical connections and ensure the ribbon cable is properly seated.
Setting Up Your AI Environment
Installing Essential AI Libraries
To leverage AI capabilities with your Raspberry Pi camera, you’ll need to set up a proper AI development environment by installing essential libraries. Start by updating your system:
“`bash
sudo apt-get update
sudo apt-get upgrade
“`
Install TensorFlow Lite, which is optimized for Raspberry Pi’s ARM architecture:
“`bash
pip3 install tflite-runtime
“`
Next, install OpenCV for image processing and computer vision:
“`bash
sudo apt-get install python3-opencv
“`
For enhanced AI capabilities, install additional supporting libraries:
“`bash
pip3 install numpy
pip3 install pillow
pip3 install scipy
“`
These libraries provide crucial functionality for image manipulation and numerical computations. If you’re planning to work with deep learning models, consider installing scikit-learn:
“`bash
pip3 install scikit-learn
“`
After installation, verify your setup by importing these libraries in Python:
“`python
import tflite_runtime.interpreter as tflite
import cv2
import numpy as np
“`
If no errors appear, your AI libraries are ready for use. Remember to regularly update these packages to ensure compatibility and access to the latest features.
Camera Software Configuration
Before you can start using your Raspberry Pi camera, you’ll need to configure the necessary software components. Begin by enabling the camera interface through the Raspberry Pi Configuration tool. Open the terminal and type ‘sudo raspi-config’, navigate to ‘Interface Options’, and select ‘Camera’ to enable it.
After enabling the camera, ensure your system is up to date by running ‘sudo apt update’ followed by ‘sudo apt upgrade’. This ensures you have the latest camera software and dependencies installed.
To test your camera’s basic functionality, you can use the built-in raspistill command. Open the terminal and enter ‘raspistill -o test.jpg’ to capture a simple still image. The image will be saved in your current directory. For video capture, try the raspivid command with ‘raspivid -o testvideo.h264 -t 10000’, which records a 10-second video.
Python users can utilize the picamera library for more advanced control. Install it by running ‘sudo apt-get install python3-picamera’. This library provides comprehensive camera control and is essential for developing custom camera applications.
If you encounter any issues, verify your camera connection and ensure the ribbon cable is properly seated. Common troubleshooting steps include checking the camera is recognized using ‘vcgencmd get_camera’ and rebooting your Raspberry Pi after making configuration changes.
Implementing AI Features
Object Detection and Recognition
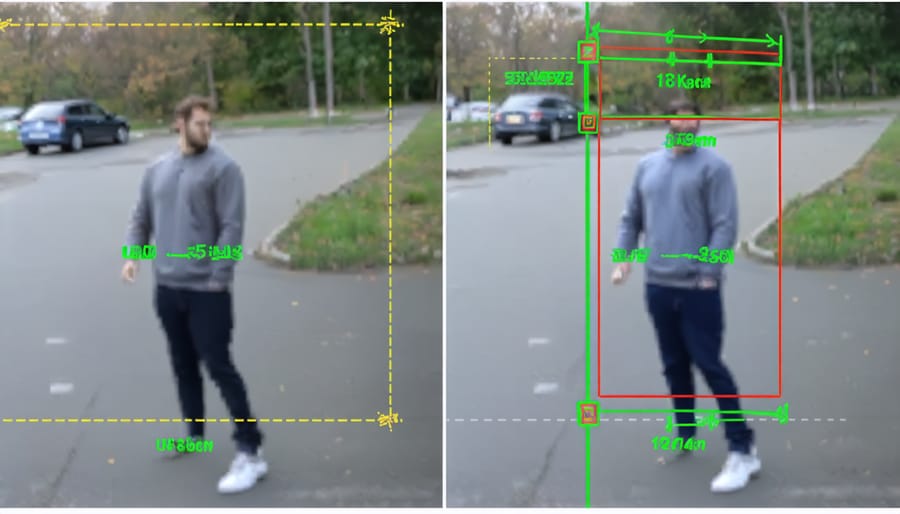
Object detection and recognition can transform your Raspberry Pi camera into a smart monitoring system. Using pre-trained models like TensorFlow Lite or OpenCV, you can create applications that identify and track objects in real-time.
To get started, install TensorFlow Lite on your Raspberry Pi by running the following command in the terminal:
“`bash
pip3 install tflite-runtime opencv-python
“`
One popular approach is using the COCO-SSD model, which can detect up to 90 different object classes including people, cars, and animals. Download the model and labels file to your Pi:
“`bash
wget https://storage.googleapis.com/download.tensorflow.org/models/tflite/coco_ssd_mobilenet_v1_1.0_quant_2018_06_29.zip
unzip coco_ssd_mobilenet_v1_1.0_quant_2018_06_29.zip
“`
Create a simple Python script that captures video from your Pi camera and processes each frame through the model. The script will draw bounding boxes around detected objects and display their labels with confidence scores.
For real-time performance, consider using threading to separate the camera capture and inference processes. This helps maintain smooth video output while processing detections. You can also adjust the detection threshold to filter out low-confidence predictions:
“`python
confidence_threshold = 0.5
if detection_score > confidence_threshold:
draw_detection_box(frame, detection_box, label)
“`
To enhance performance, you can:
– Reduce the input resolution
– Process every nth frame
– Use model quantization
– Implement ROI (Region of Interest) processing
Remember that object detection can be processor-intensive. If you need faster performance, consider using the Coral USB Accelerator, which significantly speeds up inference times on the Raspberry Pi.
This basic implementation can serve as a foundation for more complex projects like security systems, wildlife monitoring, or automated inventory tracking.
Face Detection and Recognition
Face detection and recognition capabilities can transform your Raspberry Pi camera into a smart security system or automated attendance tracker. Using popular libraries like OpenCV and face_recognition, you can implement these features with relative ease.
To get started, install the necessary dependencies by running:
“`
sudo apt-get update
sudo apt-get install python3-opencv
pip3 install face_recognition
“`
The face detection process involves identifying faces within an image, while recognition goes a step further by matching detected faces against known individuals. For basic face detection, OpenCV’s pre-trained Haar Cascade classifier provides a quick solution:
“`python
import cv2
face_cascade = cv2.CascadeClassifier(‘haarcascade_frontalface_default.xml’)
camera = cv2.VideoCapture(0)
while True:
_, frame = camera.read()
gray = cv2.cvtColor(frame, cv2.COLOR_BGR2GRAY)
faces = face_cascade.detectMultiScale(gray, 1.3, 5)
for (x,y,w,h) in faces:
cv2.rectangle(frame, (x,y), (x+w,y+h), (255,0,0), 2)
“`
For facial recognition, create a database of known faces by storing labeled images in a dedicated directory. The face_recognition library can then compare detected faces against this database to identify individuals. Consider implementing features like logging recognized faces with timestamps or triggering specific actions when certain individuals are detected.
Remember to maintain proper lighting conditions and camera positioning for optimal recognition accuracy. Start with a small database of faces and gradually expand as you fine-tune the system’s performance.
Motion Detection and Tracking
Motion detection and tracking is one of the most practical applications for your Raspberry Pi camera system. By implementing intelligent motion detection, you can create security systems, wildlife monitoring stations, or automated surveillance solutions.
To get started with motion detection, you’ll need to install the ‘motion’ package on your Raspberry Pi using the command ‘sudo apt-get install motion’. This powerful software allows you to capture video or images when movement is detected in the camera’s field of view.
Configuration is straightforward through the motion.conf file, where you can adjust sensitivity settings, frame rates, and trigger thresholds. For basic setup, focus on these key parameters:
– threshold: determines how many pixels must change to trigger detection
– framerate: controls how many frames per second to analyze
– minimum_motion_frames: sets how many frames must contain motion before recording
For more advanced tracking capabilities, you can utilize OpenCV with Python. This combination enables real-time object tracking, allowing you to identify and follow specific objects or people in the frame. A simple Python script using OpenCV can detect motion by comparing consecutive frames and highlighting areas of change.
To enhance your system’s intelligence, consider implementing features like:
– Motion zones: Define specific areas to monitor while ignoring others
– Time scheduling: Set active monitoring periods
– Alert notifications: Send email or push notifications when motion is detected
– Video recording: Automatically save footage when movement occurs
Remember to position your camera strategically and consider lighting conditions, as these factors significantly impact detection accuracy. Regular testing and adjustment of sensitivity settings will help optimize your system’s performance.
Optimizing Performance
When working with camera-based AI applications on your Raspberry Pi, optimizing performance is crucial for smooth operation. To enhance your edge AI processing, consider implementing these proven optimization techniques.
First, adjust your camera resolution to match your specific needs. While higher resolutions provide more detail, they also require more processing power. For most AI applications, a resolution of 640×480 pixels offers a good balance between image quality and performance.
Enable GPU acceleration whenever possible by installing appropriate libraries like OpenCV with CUDA support. This significantly improves processing speed for computer vision tasks. Additionally, consider using hardware-specific optimizations like the Pi’s VideoCore GPU for basic image processing operations.
Memory management is equally important. Monitor your RAM usage and implement frame buffering carefully. Instead of processing every frame, consider implementing frame skipping or reducing the frame rate to match your application’s requirements.
Use lightweight AI models optimized for embedded systems. Tools like TensorFlow Lite and OpenVINO can help compress larger models without significant accuracy loss. Pre-process images to reduce unnecessary computations – techniques like resizing, grayscale conversion, or region of interest selection can dramatically improve processing speed.
Finally, ensure proper cooling for your Raspberry Pi, as thermal throttling can significantly impact performance during extended AI processing tasks.
Setting up a camera with your Raspberry Pi opens up countless possibilities for creative projects and practical applications. From basic photo capture to advanced computer vision systems, you’ve now got the foundation to build something truly remarkable. Consider expanding your setup by exploring motion detection for security applications, implementing time-lapse photography, or diving into machine learning for object recognition. The skills you’ve learned can be applied to create smart doorbell systems, wildlife monitoring stations, or even automated plant monitoring systems. Remember to regularly update your software and back up your configurations as you experiment with new features. With the right combination of hardware additions and coding expertise, your Raspberry Pi camera system can evolve into a sophisticated imaging solution tailored to your specific needs. The maker community is vast and supportive, so don’t hesitate to share your projects and learn from others’ experiences.