

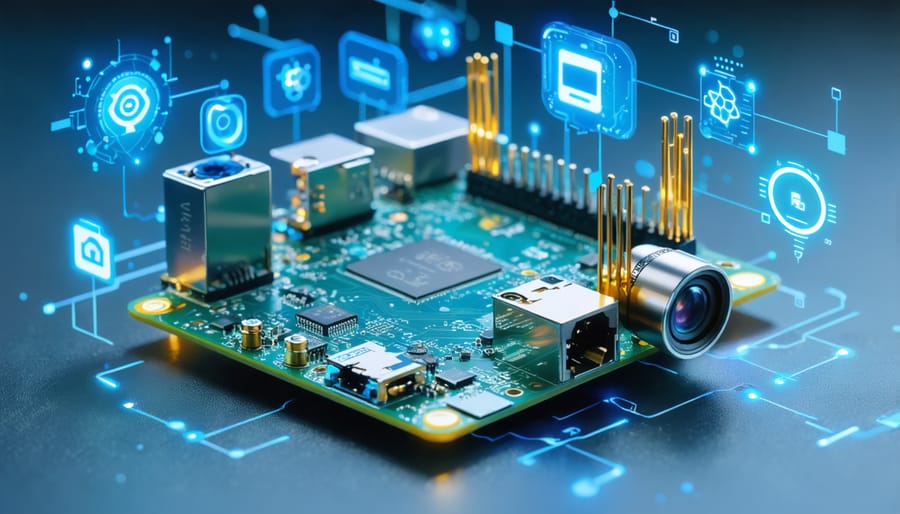
Transform your Raspberry Pi into a powerful AI hub with today’s accessible machine learning tools and frameworks. From voice recognition systems to computer vision applications, the Pi’s compact form factor and robust processing capabilities make it an ideal platform for experimenting with artificial intelligence.
Modern AI frameworks like TensorFlow Lite and OpenCV now run efficiently on Raspberry Pi, enabling projects from smart security cameras to automated plant care systems. Whether you’re a beginner exploring your first neural network or an experienced developer building complex machine learning applications, the Pi offers the perfect balance of affordability, flexibility, and computing power.
This guide explores five practical AI projects you can build today, complete with step-by-step instructions and optimization techniques for the Pi’s hardware. We’ll focus on real-world applications that demonstrate the impressive capabilities of combining AI with this versatile single-board computer, while keeping resource consumption and implementation complexity manageable.
Get ready to elevate your Raspberry Pi projects with the power of artificial intelligence. From initial setup to deploying your first AI model, we’ll cover everything you need to start building intelligent systems that solve practical problems and showcase the future of embedded AI computing.
Getting Your Raspberry Pi Ready for AI
Hardware Requirements and Recommendations
For optimal AI project performance, we recommend using a Raspberry Pi 4 Model B with at least 4GB of RAM, though 8GB is preferred for more demanding applications. The Pi 4’s quad-core processor and enhanced GPU make it ideal for machine learning tasks. A high-quality microSD card (32GB minimum, Class 10) is essential for smooth operation and adequate storage for AI models.
Power supply requirements are crucial – use a reliable 5.1V/3A USB-C power supply to prevent performance throttling. For computer vision projects, the Raspberry Pi Camera Module V2 or the newer HQ Camera offers excellent image quality. Consider investing in essential HAT add-ons like the Google Coral USB Accelerator or Intel Neural Compute Stick 2 to boost processing speed for AI inference.
Additional recommended accessories include a cooling solution (either a heatsink set or fan), a protective case, and a dedicated display for monitoring. For voice-based AI projects, add a USB microphone or the ReSpeaker HAT for improved audio capture. Remember to maintain adequate ventilation, as AI processing can generate significant heat.

Software Setup and Dependencies
To get started with AI projects on your Raspberry Pi, you’ll need a solid software foundation. Begin by installing the latest version of Raspberry Pi OS (formerly Raspbian) on your device. The 64-bit version is recommended for better compatibility with AI frameworks.
Essential Python libraries for AI development include TensorFlow Lite, OpenCV, and NumPy. Install these using pip:
“`
pip3 install tensorflow-lite
pip3 install opencv-python
pip3 install numpy
“`
For voice-based AI projects, you’ll also need:
“`
pip3 install SpeechRecognition
pip3 install pyaudio
“`
Consider installing the Edge TPU runtime if you’re using Google’s Coral USB Accelerator for enhanced AI processing. For computer vision projects, make sure your Raspberry Pi camera module is properly configured in raspi-config.
Most AI frameworks are optimized for Raspberry Pi, but you might need to install specific versions compatible with ARM architecture. Keep your system updated with:
“`
sudo apt-get update
sudo apt-get upgrade
“`
Remember to monitor your available storage space, as AI models can be quite large. A minimum of 16GB SD card is recommended, though 32GB or larger is preferred for more complex projects.
Popular AI Models for Raspberry Pi
TensorFlow Lite Projects
TensorFlow Lite opens up exciting possibilities for machine learning on your Raspberry Pi. Here are some engaging projects you can implement using this powerful framework.
Start with image classification by creating a smart camera that can identify objects in real-time. Using a pre-trained MobileNet model, your Raspberry Pi can recognize hundreds of everyday objects with impressive accuracy. Connect a standard Pi Camera Module, and you’ll be able to build an intelligent security system or automated inventory counter.
Text recognition is another fascinating application. By implementing optical character recognition (OCR) with TensorFlow Lite, you can create a device that reads text from documents or signs. This project is particularly useful for creating assistive technology or automated document processing systems.
For audio enthusiasts, try building a keyword spotting system. This project allows your Raspberry Pi to recognize specific wake words or commands, similar to commercial smart speakers. The model can be trained to respond to custom keywords while running efficiently on the Pi’s limited resources.
One popular project combines motion detection with pose estimation. Using TensorFlow Lite’s PoseNet model, you can create a system that tracks human movements and analyzes postures. This has practical applications in fitness tracking, ergonomic monitoring, or interactive gaming.
These projects can be enhanced by adding custom interfaces through the Pi’s GPIO pins or displaying results on attached screens. Remember to optimize your models for the Pi’s processing capabilities to ensure smooth performance.
Edge Computing AI Solutions
Edge computing on Raspberry Pi enables faster and more efficient edge AI processing by running machine learning models directly on the device. This approach eliminates the need for constant internet connectivity and reduces latency, making it ideal for real-time applications like computer vision and voice recognition.
Popular frameworks like TensorFlow Lite and OpenVINO have been optimized specifically for Raspberry Pi, allowing you to run sophisticated AI models without overwhelming the device’s resources. These frameworks compress traditional neural networks while maintaining reasonable accuracy, making them perfect for edge deployment.
To get started with edge computing on your Pi, consider using pre-trained models that have been quantized and optimized for ARM processors. The Neural Compute Stick 2 (NCS2) can also significantly boost inference performance when connected to your Raspberry Pi via USB, enabling faster processing of complex AI tasks.
Some practical edge computing applications include:
– Local facial recognition for smart doorbells
– Real-time object detection for inventory management
– Offline voice command processing
– Smart agriculture monitoring systems
By processing data locally, you not only improve response times but also enhance privacy and reduce bandwidth usage, making your AI projects more practical and efficient for real-world deployment.
Step-by-Step AI Project Implementation
Voice Recognition Setup
Setting up voice recognition on your Raspberry Pi is a crucial step toward implementing AI voice assistant capabilities. Begin by installing the necessary dependencies through your terminal. Open the command prompt and run:
sudo apt-get update
sudo apt-get install python3-pip
pip3 install SpeechRecognition
pip3 install pyaudio
For optimal performance, you’ll need a USB microphone or USB webcam with built-in mic. Connect your audio input device and verify it’s recognized by running:
arecord -l
Configure your audio settings by creating or editing the .asoundrc file in your home directory. Add the following basic configuration:
pcm.!default {
type asym
playback.pcm “plug:hw:0,0”
capture.pcm “plug:hw:1,0”
}
Test your microphone by recording a short audio clip:
arecord –format=S16_LE –duration=5 –rate=16000 –file-type=raw out.raw
To ensure your voice recognition setup works correctly, create a simple Python test script that listens for voice input and prints the recognized text. This will help you verify that all components are functioning properly before moving on to more complex AI implementations.
Remember to adjust your microphone sensitivity and noise cancellation settings if you experience recognition issues. For better accuracy, consider using a noise-canceling microphone and positioning it away from sources of background noise.
Natural Language Processing Integration
Natural Language Processing (NLP) capabilities can transform your Raspberry Pi into an intelligent text and speech processing system. The most popular NLP libraries for Raspberry Pi include NLTK (Natural Language Toolkit) and spaCy, both of which can be installed through pip. For optimal performance, consider using the lightweight version of these libraries specifically designed for resource-constrained devices.
To get started, install the required libraries using the command:
“`
pip3 install nltk spacy
“`
One practical application is building a text classification system that can analyze sentiment in real-time. You can connect this to a simple LED display, where green indicates positive sentiment and red shows negative sentiment. Here’s a basic implementation:
“`python
import nltk
from nltk.sentiment import SentimentIntensityAnalyzer
import RPi.GPIO as GPIO
# Set up GPIO pins
GPIO.setmode(GPIO.BCM)
GPIO.setup(18, GPIO.OUT) # Green LED
GPIO.setup(23, GPIO.OUT) # Red LED
“`
For more advanced applications, you can integrate speech recognition using libraries like SpeechRecognition or PocketSphinx. These allow your Raspberry Pi to understand spoken commands and convert them to text for processing. Remember that processing speed may vary depending on your Pi model and the complexity of your NLP tasks.
To improve performance, consider using pre-trained models and implementing batch processing for larger text analysis tasks. You can also optimize memory usage by loading only the necessary NLP components and utilizing efficient text preprocessing techniques.
When working with non-English languages, make sure to download the appropriate language models and character encodings. This ensures your NLP system can handle multiple languages effectively while maintaining reasonable processing speeds on the Raspberry Pi’s hardware.
Custom Commands and Actions
Creating custom commands for your AI-powered Raspberry Pi opens up endless possibilities for personalization and automation. By programming specific responses and actions, you can tailor your AI assistant to handle tasks unique to your needs. Let’s explore how to implement custom voice commands and integrate them with home automation controls.
Start by defining custom wake words and command phrases in your preferred programming language, such as Python. Create a dictionary or array that maps specific voice commands to corresponding functions. For example:
command_dict = {
“turn on lights”: light_control_on,
“start music”: play_music,
“check temperature”: get_temperature
}
Implement response handlers using conditional statements to process recognized commands and trigger appropriate actions. You can integrate popular libraries like GPIO Zero for hardware control or requests for API interactions.
To enhance your assistant’s capabilities, consider implementing:
– Dynamic responses using string formatting
– Context-aware commands that remember previous interactions
– Multi-step command sequences
– Time-based triggers and scheduling
– Custom error handling and feedback
For more natural interactions, incorporate confirmation responses and status updates. This helps users understand when commands are recognized and executed successfully. You can also add personality to your assistant by programming varied responses for similar commands.
Remember to structure your code modularly, making it easy to add new commands and modify existing ones. Store frequently used phrases and responses in separate configuration files for better maintenance and customization.
To improve reliability, implement:
– Command validation
– Fallback responses
– Command priorities
– Rate limiting for hardware controls
– Logging for troubleshooting
Test your custom commands thoroughly before deployment, especially when controlling physical devices or sensitive systems. Start with simple commands and gradually build complexity as you become more comfortable with the implementation.
Troubleshooting and Optimization
When working with AI projects on Raspberry Pi, you might encounter several common challenges. Memory management is often the biggest hurdle – if your AI model is too large, you may experience slow performance or system crashes. To address this, consider using model optimization techniques like quantization or pruning to reduce model size while maintaining acceptable accuracy.
Temperature management is another crucial factor. AI processing can cause your Raspberry Pi to heat up quickly. Ensure proper ventilation and consider adding a cooling fan or heatsinks. Monitor your CPU temperature using the command ‘vcgencmd measure_temp’ and implement thermal throttling if necessary.
Network connectivity issues can affect AI applications that require internet access. Keep your system stable by implementing proper error handling and connection recovery mechanisms. For better performance, use a wired connection when possible instead of Wi-Fi.
Storage space can become limited when working with large datasets or models. Regularly clean unused files and consider using external storage for data. For optimal performance, use a high-quality Class 10 microSD card or boot from USB/SSD.
If you experience slow inference times, try running your AI models with TensorFlow Lite or other optimized frameworks specifically designed for edge devices. Additionally, overclocking your Raspberry Pi can improve performance, but be cautious and ensure proper cooling is in place.
Remember to regularly update your system packages and AI frameworks to benefit from the latest optimizations and bug fixes.
Integrating AI with Raspberry Pi opens up a world of exciting possibilities for makers and tech enthusiasts. These projects not only provide hands-on experience with machine learning and artificial intelligence but also create practical solutions for everyday challenges. From voice assistants to computer vision applications, the combination of AI and Raspberry Pi demonstrates how accessible advanced technology has become for hobbyists and students alike. As AI technology continues to evolve, we can expect even more innovative projects and capabilities to emerge. The low cost and versatility of Raspberry Pi, coupled with increasingly sophisticated AI tools, make it an ideal platform for experimentation and learning. Whether you’re a beginner or an experienced developer, these projects offer valuable insights into the future of embedded AI applications while building essential skills in programming, hardware integration, and problem-solving.