

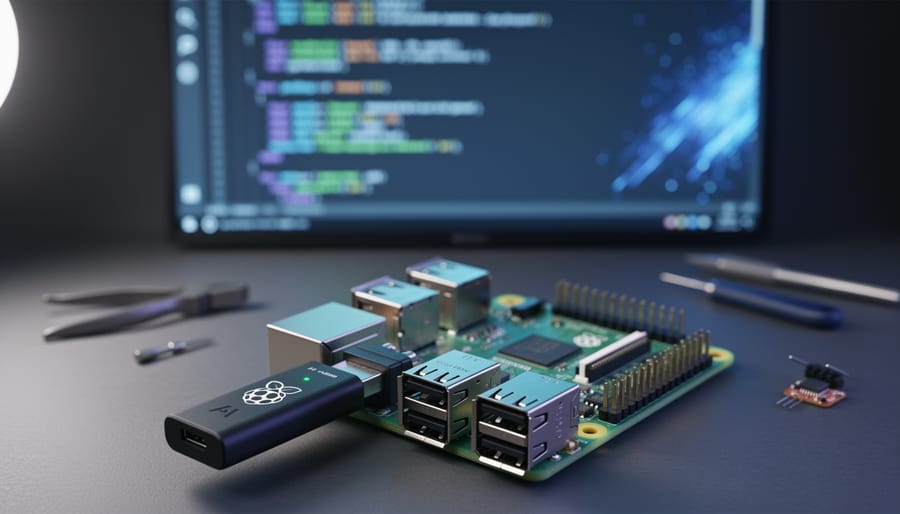
Your Raspberry Pi can run AI models up to 10 times faster with the right accelerator hardware. These compact add-ons transform your single-board computer into a capable machine learning platform, enabling real-time object detection, voice recognition, and neural network inference without cloud dependency or expensive GPU setups.
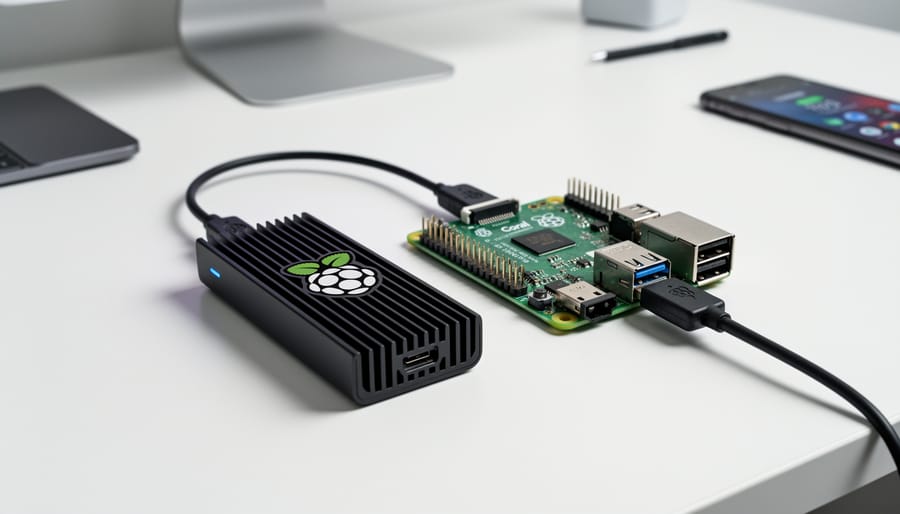
AI accelerators work by offloading computational tasks from the Raspberry Pi’s CPU to specialized chips designed specifically for neural network operations. The most popular options include Google’s Coral USB Accelerator, which uses Edge TPU technology to deliver 4 trillion operations per second, and Intel’s Neural Compute Stick 2, offering support for multiple AI frameworks. Installation typically requires connecting the device via USB, installing compatible drivers and software libraries, then optimizing your AI models to run on the accelerator’s architecture.
Whether you’re building a smart camera for wildlife monitoring, creating a voice-controlled home assistant, or experimenting with computer vision projects, understanding how these accelerators work and which one fits your needs will determine your project’s success. The investment ranges from $60 to $100, making professional-grade AI capabilities accessible to hobbyists and educators alike. This guide walks you through everything needed to select, set up, and maximize your Raspberry Pi AI accelerator.
What Is a Raspberry Pi AI Accelerator?
The Problem With Running AI on Standard Raspberry Pi
While the Raspberry Pi is an incredible little computer, running AI models on standard hardware quickly reveals some significant challenges. The biggest hurdle is the CPU limitation. AI workloads, especially neural networks, require intensive mathematical calculations that the Pi’s ARM-based processor simply wasn’t designed to handle efficiently. Tasks that might take seconds on dedicated AI hardware can stretch into minutes or even hours on an unassisted Raspberry Pi.
Memory becomes another critical bottleneck. Even the Raspberry Pi 4 with 8GB of RAM struggles when loading larger AI models into memory. Complex models can easily exceed available RAM, forcing the system to swap data to the SD card, which dramatically slows performance and can wear out your storage faster.
Then there’s the thermal issue. Running AI inference pushes the processor to its limits, generating substantial heat. Without proper cooling, the Pi will throttle its CPU to prevent overheating, further reducing already limited performance. This creates a frustrating cycle where your AI projects run painfully slow or require extensive waiting periods between operations.
These limitations don’t mean AI is impossible on Raspberry Pi, but they do make practical applications challenging without additional hardware acceleration.
How AI Accelerators Change the Game
Traditional Raspberry Pi boards use general-purpose CPUs that handle AI tasks reasonably well, but they weren’t designed specifically for machine learning workloads. This is where AI accelerators make a dramatic difference. These specialized devices feature dedicated neural processing units (NPUs) or tensor processing units (TPUs) that excel at the matrix multiplication and parallel processing operations fundamental to neural networks.
Think of it like comparing a Swiss Army knife to a specialized tool. Your Pi’s CPU can run AI models, but an accelerator does it faster and more efficiently. These AI HAT add-ons and USB modules enable edge computing, meaning your Pi can process AI tasks locally without relying on cloud services. This brings several advantages: reduced latency, enhanced privacy, lower bandwidth costs, and offline functionality.
Most AI accelerators connect via USB or the HAT interface and integrate seamlessly with popular frameworks like TensorFlow Lite. They handle inference (running trained models) exceptionally well, turning your Raspberry Pi into a capable platform for real-time object detection, voice recognition, and image classification tasks that would otherwise struggle on standard hardware.
Popular Raspberry Pi AI Accelerator Options
Google Coral USB Accelerator
The Google Coral USB Accelerator stands as one of the most popular AI accelerators for Raspberry Pi projects. This compact USB device houses Google’s Edge TPU coprocessor, specifically designed to accelerate TensorFlow Lite models at impressive speeds.
Performance-wise, the Coral USB Accelerator delivers remarkable results. It can execute machine learning inference at up to 100 frames per second for MobileNet v2 models, making real-time applications like object detection and image classification highly responsive. The accelerator draws minimal power while processing, making it ideal for battery-powered or energy-conscious projects.
Compatibility is straightforward with Raspberry Pi 3, 4, and 5 models. The accelerator connects via USB 3.0 for optimal performance, though it also works with USB 2.0 ports at reduced speeds. Setup involves installing the Edge TPU runtime and PyCoral library, which takes just minutes following Google’s documentation.
Best applications include real-time video analysis, smart home automation with visual recognition, wildlife monitoring systems, and educational AI projects. The Coral excels particularly in scenarios requiring fast inference with pre-trained models. However, keep in mind it only supports TensorFlow Lite models, so you’ll need to convert models trained in other frameworks before deployment.
Hailo-8 AI Accelerator
The Hailo-8 AI accelerator stands out as a powerhouse solution for Raspberry Pi enthusiasts looking to supercharge their AI projects. This compact module delivers an impressive 26 TOPS (tera operations per second) of processing power while consuming just 2.5 watts, making it incredibly efficient for edge computing applications.
What makes the Hailo-8 particularly appealing is its seamless integration with Raspberry Pi boards through the M.2 HAT+ adapter or via USB for plug-and-play convenience. The accelerator excels at handling computer vision tasks like object detection, facial recognition, and image classification with remarkable speed and accuracy.
Performance-wise, the Hailo-8 can process multiple high-resolution video streams simultaneously, achieving real-time inference speeds that far exceed what the Raspberry Pi’s CPU alone could manage. This makes it ideal for demanding applications such as security systems, robotics, and smart home automation.
The chip supports popular AI frameworks including TensorFlow, PyTorch, and ONNX, allowing you to deploy pre-trained models or fine-tune custom ones. With comprehensive software support through the Hailo Dataflow Compiler and Python API, getting started is straightforward even for those new to AI acceleration hardware.
Intel Neural Compute Stick 2
Intel’s Neural Compute Stick 2 (NCS2) represents a plug-and-play solution for accelerating AI workloads on your Raspberry Pi. This USB 3.0 device houses Intel’s Myriad X Vision Processing Unit, delivering up to 8 times the performance of its predecessor while maintaining affordability at around $70-100.
The NCS2 shines through its robust software ecosystem. Intel’s OpenVINO toolkit provides comprehensive support for popular frameworks like TensorFlow, PyTorch, and Caffe, making model conversion straightforward even for beginners. The toolkit includes pre-trained models and optimization tools that help you get started quickly without deep learning expertise.
Performance-wise, the NCS2 handles real-time object detection, facial recognition, and image classification tasks smoothly on Raspberry Pi 4. You can expect 4-8 frames per second on MobileNet models, making it suitable for interactive applications like smart cameras or robotics projects.
Setup involves installing the OpenVINO runtime on your Raspberry Pi and connecting the stick to a USB 3.0 port for optimal performance. While USB 2.0 works, you’ll see reduced speeds. The main consideration is power consumption, so ensure your Pi has an adequate power supply when running intensive workloads. Intel’s active community and documentation make troubleshooting accessible for hobbyists at any skill level.
Comparison Table: Which Accelerator Is Right for You?
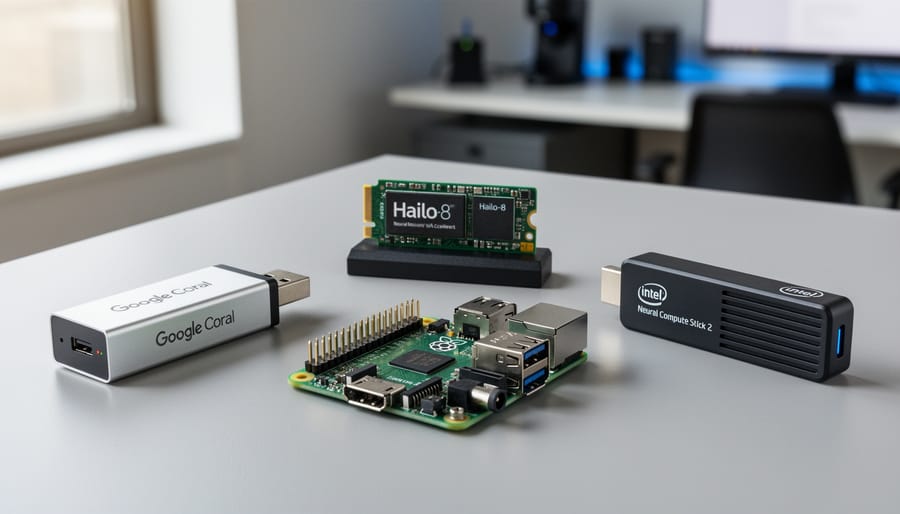
Choosing the right AI accelerator depends on your specific needs and project requirements. Here’s a comprehensive comparison to help you decide:
The Coral USB Accelerator ($59.99) delivers exceptional performance with 4 TOPS processing power, making it ideal for real-time object detection and image classification. Setup is straightforward with plug-and-play USB connectivity, though it requires 2.5W power consumption. This accelerator shines in computer vision projects, smart cameras, and robotics applications.
The Hailo-8L AI Kit ($70) offers impressive 13 TOPS performance in a compact form factor. It consumes just 2W of power and integrates seamlessly via the Raspberry Pi’s HAT connector. While setup involves a few extra steps compared to USB options, it’s perfect for advanced edge AI applications, multi-model inference, and high-performance vision systems.
For budget-conscious makers, the Intel Neural Compute Stick 2 ($69) provides 1-4 TOPS performance with moderate 2.5W power draw. It works well for basic AI learning projects, prototype development, and educational purposes.
Consider the Coral if you prioritize ease of use and proven community support. Choose Hailo-8L for maximum performance in demanding applications. Opt for Intel’s solution when learning AI fundamentals or working within tighter budgets. Each accelerator transforms your Raspberry Pi into a capable edge AI platform.
Setting Up Your AI Accelerator With Raspberry Pi
Hardware Requirements and Compatibility Check
Before adding an AI accelerator to your setup, you’ll need to verify compatibility with your hardware. The good news is that most modern AI accelerators work with Raspberry Pi 4 Model B and Raspberry Pi 5, which offer the necessary USB 3.0 or PCIe connectivity for optimal performance. Earlier models like the Raspberry Pi 3 may support some accelerators through USB 2.0, but expect reduced speeds.
Power requirements are crucial for stable operation. Your power supply should deliver at least 3A at 5V for Raspberry Pi 4, or 5A at 5V for Raspberry Pi 5, especially when running demanding AI workloads. Some accelerators draw additional power through USB, so using an official Raspberry Pi power supply is strongly recommended to avoid voltage drops that can cause system instability.
Check your operating system compatibility too. Most accelerators require Raspberry Pi OS (formerly Raspbian) Bullseye or newer, with specific driver installations. Ensure you have sufficient cooling, as AI processing generates extra heat that can throttle performance without proper ventilation or heatsinks.
Physical Installation Process
Installing your AI accelerator on a Raspberry Pi is straightforward, but the method depends on which type you’ve chosen. Most modern accelerators connect via USB, while some specialized models use the HAT (Hardware Attached on Top) interface or M.2 slots on newer Pi models.
For USB-based accelerators like the Coral USB Accelerator, simply plug the device into any available USB 3.0 port for optimal performance. The blue-colored ports on Raspberry Pi 4 and 5 models indicate USB 3.0 compatibility. No additional hardware installation is required, making this the easiest option for beginners.
HAT-style accelerators mount directly onto the 40-pin GPIO header. Power down your Raspberry Pi completely before installation. Align the HAT carefully with all 40 pins, then press firmly until seated. Secure with the provided standoffs to prevent movement and potential damage.
For M.2 accelerators compatible with Raspberry Pi 5, you’ll need the official M.2 HAT. Remove the protective cover, insert the accelerator into the M.2 slot at a slight angle, then press down and secure with the mounting screw.
Regardless of connection method, ensure your power supply provides adequate current. AI accelerators can draw significant power, so use the official Raspberry Pi power supply or a quality alternative rated for at least 3A.
Software Installation and Driver Setup
Getting your AI accelerator up and running is straightforward, requiring just a few terminal commands. First, ensure your Raspberry Pi OS is fully updated by opening a terminal and running:
sudo apt update && sudo apt upgrade -y
Next, you’ll need to install the appropriate drivers for your specific accelerator. For the Hailo AI HAT, install the required software package:
sudo apt install hailo-all
If you’re using the Coral USB Accelerator, you’ll need to add the Coral repository and install the Edge TPU runtime:
echo “deb https://packages.cloud.google.com/apt coral-edgetpu-stable main” | sudo tee /etc/apt/sources.list.d/coral-edgetpu.list
curl https://packages.cloud.google.com/apt/doc/apt-key.gpg | sudo apt-key add –
sudo apt update
sudo apt install libedgetpu1-std python3-pycoral
Don’t forget to install the TensorFlow Lite runtime, which most AI accelerators require:
pip3 install tflite-runtime
After installation, verify everything works correctly by running a simple detection script. For Coral devices, try:
python3 /usr/share/edgetpu/examples/classify_image.py
You should see inference results appear within seconds. If you encounter errors, double-check your connections and ensure you’ve rebooted after driver installation. Most issues stem from outdated firmware or missing dependencies, so keeping your system updated is essential for smooth operation.
Real-World AI Projects You Can Build
Smart Security Camera With Object Detection
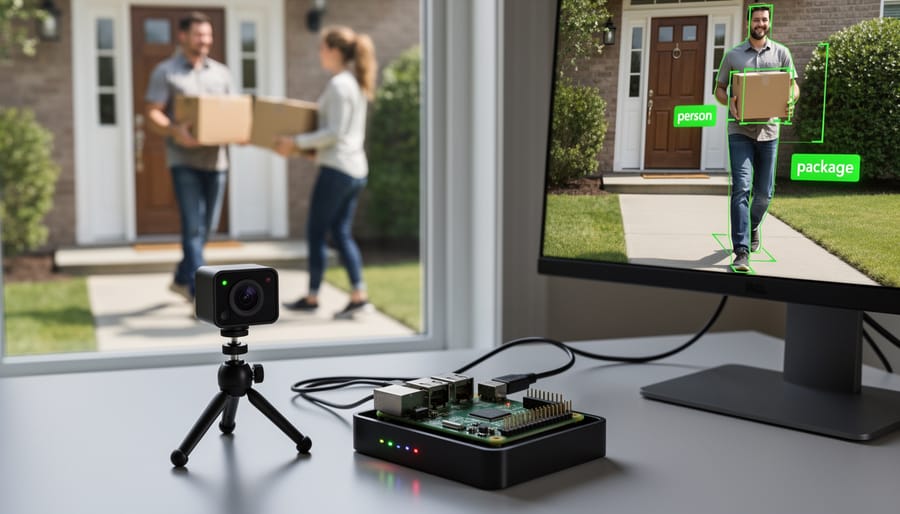
Combine your Raspberry Pi with an AI accelerator to create an AI-powered security camera that detects and classifies objects in real-time. Using models like MobileNet or YOLO, your system can distinguish between people, vehicles, pets, and packages with impressive accuracy. Start by connecting a compatible camera module to your Pi, then install TensorFlow Lite with the accelerator’s drivers. Load a pre-trained object detection model optimized for edge computing. The accelerator handles the heavy processing, enabling your camera to analyze multiple frames per second without lag. You can set up alerts for specific detections, like notifying you when a package arrives or an unfamiliar vehicle enters your driveway. This project demonstrates how AI acceleration transforms a basic Raspberry Pi into a powerful surveillance tool capable of intelligent monitoring at a fraction of commercial system costs.
Voice-Controlled Home Assistant
An AI accelerator transforms your Raspberry Pi into a powerful voice-controlled home assistant that respects your privacy. Unlike commercial alternatives that send your voice data to cloud servers, a locally-processed system keeps everything on your device. The AI accelerator handles speech recognition and natural language processing in real-time, enabling quick responses to commands like controlling smart home devices, setting reminders, or answering questions.
Getting started is simpler than you might think. This voice assistant project becomes significantly more responsive with hardware acceleration. Popular frameworks like Mycroft or Rhasspy work excellently with accelerators, processing wake words and commands without noticeable lag. You’ll need a USB microphone, speaker, and your chosen AI accelerator module.
The benefits are compelling: no subscription fees, no data collection concerns, and complete customization freedom. Your assistant works even without internet connectivity, making it reliable for essential home automation tasks.
Wildlife Monitoring and Species Classification
Transform your Raspberry Pi into an intelligent wildlife camera trap using an AI accelerator to identify animals in real-time. This project combines a Pi camera module, weatherproof enclosure, and machine learning models optimized for species classification. The AI accelerator enables instant on-device processing, eliminating the need for cloud connectivity in remote locations.
Start by training or downloading pre-trained models for local wildlife species using frameworks like TensorFlow Lite. The accelerator dramatically reduces inference time from several seconds to mere milliseconds, allowing your camera trap to classify animals as they pass by without motion blur delays. Configure the system to log timestamps, species names, and capture images only when animals are detected, conserving storage and battery life.
This setup proves invaluable for conservation efforts, backyard naturalists, and educational projects, demonstrating how accessible AI technology can contribute to ecological monitoring and biodiversity research.
Industrial Quality Control System
Manufacturing environments demand precision, and AI accelerators transform your Raspberry Pi into a powerful quality control inspector. By pairing computer vision models with an AI accelerator, you can detect defects, scratches, color inconsistencies, or dimensional anomalies on production lines in real-time. The accelerator handles the computational heavy lifting, enabling your Pi to process multiple camera feeds simultaneously and identify issues faster than traditional inspection methods. This setup works exceptionally well for small to medium manufacturing operations seeking cost-effective automation. You can train custom models to recognize specific defects unique to your products, then deploy them using TensorFlow Lite or PyTorch optimized for your accelerator. The result is consistent quality checking that reduces waste, catches problems early, and maintains production standards without requiring expensive industrial vision systems.
Performance Benchmarks: Before and After
The performance improvements from adding an AI accelerator to your Raspberry Pi are genuinely impressive. Let’s look at real-world benchmarks that demonstrate the difference.
For image classification tasks using MobileNet V2, a standard Raspberry Pi 4 typically achieves around 3-5 frames per second. Add a Google Coral USB Accelerator, and that jumps to 100-120 FPS – that’s roughly a 25x performance boost. Similarly, the Hailo-8L AI accelerator pushes performance even higher, reaching up to 13 TOPS (tera operations per second) for AI workloads.
Inference time tells an equally compelling story. Object detection using YOLOv5 takes approximately 800-1000 milliseconds per frame on a Pi 4 without acceleration. With a Coral accelerator, this drops to just 15-20 milliseconds per frame, making real-time applications actually feasible.
Power efficiency gains are equally noteworthy. While the Pi 4 processor draws around 6.4 watts under full AI load, adding a dedicated accelerator like the Coral reduces overall system power consumption during AI tasks by handling computations more efficiently. The accelerator itself typically adds only 2-3 watts while delivering those dramatic speed improvements.
These benchmarks mean you can run multiple AI models simultaneously, process video streams in real-time, or handle complex neural networks that would otherwise overwhelm the Pi’s CPU. The difference between waiting seconds for results versus getting instant feedback fundamentally changes what projects become practical on your Raspberry Pi.
Common Challenges and Troubleshooting Tips
Even experienced makers encounter bumps when setting up AI accelerators with their Raspberry Pi. Let’s tackle the most common issues and get you back on track.
Driver installation problems top the list of frustrations. If your accelerator isn’t recognized, first verify you’re running the latest Raspberry Pi OS version. Many accelerators require specific kernel versions or firmware updates. Double-check that you’ve followed the manufacturer’s installation instructions exactly, including any required reboots. For Google Coral users, ensure you’ve added the correct repository and installed both the Edge TPU runtime and PyCoral library. If problems persist, try reinstalling the drivers with sudo privileges and check the system logs using dmesg for error messages.
Power supply issues can cause mysterious failures or unstable performance. AI accelerators draw significant current, especially during inference tasks. Your standard 2.5A power supply might not cut it anymore. Upgrade to a quality 3A or higher power adapter, particularly if you’re running multiple peripherals. Watch for the dreaded lightning bolt icon on your screen, which signals undervoltage conditions. USB-based accelerators can also exceed USB port power limits, so consider using a powered USB hub.
Model compatibility challenges often surprise newcomers. Not all AI models work with every accelerator. The Coral Edge TPU requires TensorFlow Lite models with specific quantization, while Intel’s Neural Compute Stick works with OpenVINO format. Before spending hours troubleshooting, verify your model format matches your hardware requirements. Many manufacturers provide model conversion tools and pre-compiled model zoos to simplify this process.
Temperature throttling can silently degrade performance. If inference speeds slow over time, your accelerator might be overheating. Adding heatsinks or improving airflow usually solves this. Some USB accelerators benefit from brief cooldown periods during intensive workloads.
AI accelerators have genuinely transformed what’s possible with Raspberry Pi, turning these compact boards into capable platforms for edge AI applications. Whether you’re interested in real-time object detection, voice recognition, or complex machine learning projects, there’s now an accelerator solution that fits your needs.
The best way to start is simple: pick one straightforward project that excites you. If you’re on a tight budget, begin with software optimization and the Raspberry Pi’s built-in capabilities before investing in hardware. For those ready to add an accelerator, the Coral USB Accelerator offers excellent value and ease of use for beginners, while the Hailo-8L provides cutting-edge performance for more demanding applications.
Remember that the AI accelerator landscape continues evolving rapidly. What matters most is getting hands-on experience. Start small, experiment with different models, and gradually tackle more complex challenges. The community resources, tutorials, and support networks are robust and welcoming to newcomers. Your first AI project might be simple image classification, but it opens the door to countless possibilities in automation, robotics, and intelligent systems that can make a real difference in your projects and learning journey.