

Change your default password immediately after first boot—the standard “raspberry” credentials are the first thing attackers try. Create a strong, unique password and consider implementing SSH key-based authentication to eliminate password vulnerabilities entirely. Hardening your device starts with proper user account management, which means disabling the default pi user and creating a new account with sudo privileges.
Configure firewall rules using UFW (Uncomplicated Firewall) to restrict incoming connections to only necessary ports. Most Raspberry Pi projects don’t need dozens of open ports—identify exactly which services require network access and block everything else. For SSH access, move it from the default port 22 to a non-standard port and implement fail2ban to automatically block repeated login attempts.
Enable two-factor authentication for critical services running on your Pi. Tools like Google Authenticator integrate easily with SSH and web-based applications, adding a crucial second layer of defense. Set up regular automated backups of your authentication configurations and user databases—losing access credentials to a secured system can be just as problematic as a security breach.
Implement the principle of least privilege across all user accounts and service configurations. Each application or service should run with the minimum permissions necessary to function. Create separate user accounts for different projects or services rather than running everything as root or through a single administrator account. Review and audit your access logs weekly to spot unusual login patterns or unauthorized access attempts before they become serious security incidents.
Why Identity and Access Management Matters for Your Raspberry Pi
The Default Credentials Problem
The default username “pi” and password “raspberry” combination remains one of the most dangerous security vulnerabilities in Raspberry Pi deployments. These credentials are set on every Pi to ensure beginners can easily access their devices, but they create a massive attack surface when left unchanged, especially on internet-connected projects.
Attackers use automated tools like Shodan and Masscan to identify Raspberry Pi devices exposed to the internet, then systematically attempt the default credentials. This process takes seconds, and compromised devices quickly become part of botnets used for DDoS attacks, cryptocurrency mining, or data theft.
Real-world incidents demonstrate the severity of this issue. In 2017, the Raspberry Robin malware campaign exploited default credentials to compromise thousands of Pi devices, turning them into IRC-controlled bots. Home automation projects, security cameras, and network-attached storage devices have all fallen victim to these attacks, resulting in privacy breaches and unauthorized access to home networks.
The fix is straightforward but critical: change your default password immediately during initial setup using the ‘passwd’ command. Many users skip this step, assuming their device won’t be discovered online, but modern scanning tools can locate and compromise vulnerable devices within hours of connection.
When Your Pi Becomes a Gateway
Your Raspberry Pi might seem like a small, harmless device sitting on your desk, but once connected to your network, it becomes a potential entry point for attackers. Think of it as leaving a window unlocked in your home—even if it’s small, it’s still an access point.
When a Pi lacks proper identity and access management controls, compromised credentials or weak passwords can give attackers a foothold into your entire network. From there, they can pivot to other devices: your laptop, smart home gadgets, network storage, or school computers. This lateral movement happens because devices on the same network often trust each other by default.
The risk amplifies in educational settings where multiple students access shared Pis. Without proper user authentication and access controls, one compromised device can expose sensitive student data, administrative systems, or research projects. Home networks face similar threats, especially with IoT devices that often have minimal security.
The good news? Implementing basic IAM practices significantly reduces this risk. Start with strong, unique passwords for each user account. Disable unnecessary services and ports. Use SSH keys instead of password authentication. Most importantly, protect personal data by creating separate user accounts with limited privileges for different projects or users. These foundational steps transform your Pi from a network liability into a properly secured device.
Essential IAM Security Foundations: Start Here
Change Default Passwords (The Right Way)
The default password on Raspberry Pi OS is one of the most common security vulnerabilities, yet it’s surprisingly easy to fix. Let’s walk through the proper way to secure your Pi with a strong password.
To change your default password, open the terminal and type `sudo raspi-config`. Navigate to “System Options” and select “Password.” You’ll be prompted to enter a new password twice. Here’s the catch: don’t just swap “raspberry” for “password123” and call it a day.
A strong password should be at least 12 characters long and include a mix of uppercase letters, lowercase letters, numbers, and special characters. Think of it as creating a phrase rather than a word. For example, “MyPi@Home2024!” is far more secure than “raspberry2024.”
But here’s the real game-changer: password managers. Tools like Bitwarden, KeePassXC, or 1Password can generate and store complex passwords for you. This means you can use truly random passwords like “8kL#mP9@xQ2vN$7r” without needing to memorize them. Simply install your preferred password manager on your main computer or phone, generate a unique password for your Pi, and store it securely.
For SSH access, store your credentials in your password manager along with the Pi’s IP address. This way, you’ll have instant access to login information without compromising security. Many password managers also offer command-line tools that can integrate directly with your Pi projects, making credential management seamless across multiple devices.
Create Proper User Accounts
The default “pi” user with the password “raspberry” is one of the biggest security vulnerabilities on any Raspberry Pi. Creating proper user accounts is your first line of defense against unauthorized access.
Start by creating a new user account with administrative privileges. Open the terminal and type: `sudo adduser yourusername`. Replace “yourusername” with something unique to you. You’ll be prompted to create a password—make it strong and memorable. Next, grant this new user sudo privileges by running: `sudo usermod -aG sudo yourusername`.
Once your new account is set up, log out and test it by logging in with your new credentials. This step is crucial—you need to verify everything works before disabling the default pi user.
Now comes the important part: disabling the default pi account. Log in with your new user and run: `sudo passwd –lock pi`. This locks the pi account without deleting it, preserving any files or configurations you might need later. For complete removal, use: `sudo deluser –remove-home pi`, but only do this after backing up any important data.
Consider creating additional accounts for specific purposes. For example, create a limited user account without sudo privileges for running web servers or automated scripts. This implements the principle of least privilege—each account should have only the permissions necessary for its intended purpose.
If someone compromises a limited account, they won’t have access to system-wide settings or sensitive data. This compartmentalization significantly reduces your attack surface and keeps your Raspberry Pi projects secure.
Lock Down SSH Access
SSH (Secure Shell) is your primary gateway into your Raspberry Pi when accessing it remotely, making it a critical security component that deserves immediate attention. Let’s walk through the key configurations that will significantly strengthen your Pi’s defenses as part of your essential security hardening steps.
First, disable root login to prevent attackers from directly accessing your system’s most powerful account. Open your SSH configuration file with sudo nano /etc/ssh/sshd_config and locate the line PermitRootLogin. Change it to PermitRootLogin no. This simple change forces users to log in with regular accounts first, adding an extra authentication layer.
Next, consider changing SSH’s default port from 22 to something less obvious, like 2222 or 8022. While this is security through obscurity, it effectively reduces automated bot attacks. Find the Port directive in the same configuration file and modify it accordingly. Just remember your new port number for future connections.
The most significant security upgrade involves implementing SSH key authentication. Generate a key pair on your local machine using ssh-keygen, then copy the public key to your Pi with ssh-copy-id. This cryptographic method is vastly more secure than passwords, as keys are nearly impossible to brute-force.
Once key authentication is working, disable password authentication entirely by setting PasswordAuthentication no in your SSH config. This eliminates the risk of password-based attacks completely.
After making these changes, restart the SSH service with sudo systemctl restart ssh to apply your new security settings. Test your connection before closing your current session to avoid getting locked out.

Advanced Authentication Methods for Raspberry Pi

Setting Up Two-Factor Authentication (2FA)
Two-Factor Authentication (2FA) adds a crucial second layer of security to your Raspberry Pi by requiring both your password and a time-based code to access the system. Let’s walk through setting up 2FA using Google Authenticator for SSH connections and sudo commands.
Start by installing the necessary package on your Pi. Open a terminal and run: sudo apt update && sudo apt install libpam-google-authenticator. Once installed, configure it for your user account by running google-authenticator in the terminal. You’ll be prompted with several questions. Answer ‘y’ to time-based tokens, then scan the QR code that appears using Google Authenticator or any compatible app like Authy on your smartphone. Save the emergency scratch codes in a secure location in case you lose access to your phone.
Next, configure PAM (Pluggable Authentication Modules) to require 2FA. Edit the SSH PAM configuration with sudo nano /etc/pam.d/sshd and add this line at the top: auth required pam_google_authenticator.so. Then modify the SSH daemon configuration by editing sudo nano /etc/ssh/sshd_config. Find the line ChallengeResponseAuthentication and set it to yes. Restart SSH with sudo systemctl restart ssh.
To enable 2FA for sudo commands, edit sudo nano /etc/pam.d/sudo and add the same auth required line. Now whenever you SSH into your Pi or use sudo, you’ll need both your password and the six-digit code from your authenticator app. This significantly reduces the risk of unauthorized access, even if someone discovers your password.
Certificate-Based Authentication
Certificate-based authentication offers a robust alternative to password-based logins for your Raspberry Pi projects. Instead of relying on easily compromised passwords, this method uses Public Key Infrastructure (PKI) to verify identities through digital certificates—essentially secure digital ID cards that prove who you are.
Here’s how it works: PKI uses pairs of cryptographic keys. You keep one key private (stored securely on your device), while the public key gets embedded in a certificate signed by a trusted Certificate Authority. When you connect to your Pi, it challenges your device to prove it holds the matching private key without ever transmitting that key over the network.
To implement certificate-based SSH authentication on your Raspberry Pi, start by generating an SSH key pair on your client device using ssh-keygen. Copy the public key to your Pi using ssh-copy-id, then disable password authentication in /etc/ssh/sshd_config by setting PasswordAuthentication to no. This ensures only devices with authorized certificates can access your system.
For web services running on your Pi, consider using Let’s Encrypt certificates for HTTPS connections. Tools like Certbot automate the certificate generation and renewal process, making it surprisingly straightforward even for beginners.
The beauty of certificate-based authentication lies in its scalability—once configured, you can manage access across multiple devices without juggling numerous passwords, perfect for networked home automation or IoT projects.
Biometric Options for Pi Projects
Biometric authentication adds a robust security layer to your Raspberry Pi projects, making them both more secure and user-friendly. Let’s explore the most accessible options available.
Fingerprint readers are the most popular choice for Pi enthusiasts. The R307 and R503 optical fingerprint sensors connect via UART and work seamlessly with Raspberry Pi. These modules typically cost between $15-30 and can store up to 1,000 fingerprints. They’re perfect for projects like secure door locks, personal file safes, or authenticated device access. The Adafruit fingerprint sensor library makes integration straightforward, even for beginners.
For facial recognition, the Pi Camera Module combined with OpenCV provides an excellent starting point. This approach works best with Raspberry Pi 4 or 5 due to processing requirements. Alternatively, USB webcams paired with Python libraries like face_recognition offer plug-and-play convenience. Use cases include smart doorbell systems, attendance tracking for classrooms, or personalized home automation that recognizes family members.
Keep in mind that biometric systems require careful consideration of privacy and data protection. Store biometric templates locally on your Pi rather than in the cloud, and always encrypt stored data. For enhanced security, combine biometrics with traditional authentication methods like passwords or RFID cards to create multi-factor authentication systems that significantly reduce unauthorized access risks.
Access Control: Who Can Do What on Your Pi
Understanding Linux Permissions
Linux permissions form the foundation of security on your Raspberry Pi, controlling who can read, write, or execute files and directories. Understanding this system is essential for protecting your projects from unauthorized access.
Every file on your Pi has three permission levels: owner, group, and others. Each level can have read (r), write (w), and execute (x) permissions. When you run the command `ls -l`, you’ll see permissions displayed like `rwxr-xr–`, which breaks down into three sets of three characters.
Let’s make this practical. The first set (rwx) shows the owner can read, write, and execute. The second set (r-x) means group members can read and execute but not modify. The third set (r–) allows everyone else only to read the file.
To modify permissions, use the `chmod` command. For example, `chmod 755 myfile.py` gives the owner full control while allowing others to read and execute only. The numbers represent permission values: 7 (rwx), 6 (rw-), 5 (r-x), and 4 (r–).
Ownership matters too. Use `chown` to change who owns a file: `sudo chown pi:pi myproject.sh` assigns both user and group ownership to the pi account.
For Pi projects, follow this rule: grant minimum necessary permissions. Web server files should be readable but not writable by the web user. Scripts containing passwords should be `chmod 600`, readable only by the owner. Configuration files work well with `644` permissions, allowing reads for services while preventing unauthorized modifications.
Managing Sudo Privileges Safely
Sudo privileges grant users administrative control over your Raspberry Pi, making proper management essential for security. When configured incorrectly, sudo access can become a significant vulnerability, allowing unauthorized users to execute commands with root permissions.
Start by editing the sudoers file safely using visudo, which checks for syntax errors before saving. Never edit /etc/sudoers directly with a standard text editor, as mistakes can lock you out of administrative access. Run sudo visudo from the terminal to make changes safely.
Instead of granting blanket sudo access, restrict users to specific commands they actually need. For example, if a user only needs to restart networking services, configure their sudoers entry like this: username ALL=(ALL) NOPASSWD: /usr/sbin/service networking restart. This limits their elevated privileges to that single command while preventing broader system access.
Remove the NOPASSWD option for critical accounts to require password confirmation for sudo commands. This adds an extra authentication layer that protects against accidental or malicious command execution. For shared Pi projects or educational environments, this practice prevents unauthorized administrative actions.
Consider creating user groups with specific sudo privileges rather than managing individual permissions. Add users to these groups based on their required access level, making permission management more scalable and maintainable as your project grows.
Regularly audit your sudoers file and remove unnecessary privileges. Use sudo -l -U username to review what commands each user can execute. For networked Pi projects running web servers or IoT applications, minimizing sudo access reduces your attack surface significantly and limits potential damage from compromised accounts.
Network-Level IAM Security
Configure UFW Firewall
UFW (Uncomplicated Firewall) provides a straightforward way to control which ports and services can access your Raspberry Pi, forming a critical layer in your identity and access management strategy.
First, install UFW if it’s not already present. Open your terminal and run:
sudo apt update
sudo apt install ufw
Before enabling the firewall, you need to allow SSH access to prevent locking yourself out. Execute:
sudo ufw allow ssh
This command permits incoming connections on port 22. If you’ve changed your SSH port to something custom like 2222, use that number instead.
Next, set default policies to deny all incoming connections while allowing outgoing traffic:
sudo ufw default deny incoming
sudo ufw default allow outgoing
Now you can selectively open only the ports your projects require. For example, if you’re running a web server, allow HTTP and HTTPS:
sudo ufw allow 80/tcp
sudo ufw allow 443/tcp
Enable UFW with:
sudo ufw enable
Verify your configuration by checking the status:
sudo ufw status verbose
This displays all active rules and confirms which ports are accessible. Remember to document which ports you’ve opened and why, making future security audits much simpler. If you need to remove a rule later, use:
sudo ufw delete allow 80/tcp
Regularly review your firewall rules to ensure you’re maintaining the principle of least privilege access.
Implement Fail2Ban
Fail2Ban is a powerful intrusion prevention tool that monitors log files and automatically bans IP addresses showing malicious behavior, like repeated failed login attempts. For your Raspberry Pi, this adds an essential layer of defense against brute-force attacks.
Start by installing Fail2Ban with a simple command:
sudo apt update && sudo apt install fail2ban -y
Once installed, create a local configuration file to protect your settings from updates:
sudo cp /etc/fail2ban/jail.conf /etc/fail2ban/jail.local
Open the configuration file with:
sudo nano /etc/fail2ban/jail.local
Look for the [sshd] section and ensure it’s enabled. You can customize the ban parameters: set bantime to 3600 (1 hour in seconds), maxretry to 3 attempts, and findtime to 600 (10 minutes). This means if someone fails to login three times within 10 minutes, they’ll be banned for an hour.
Enable and start Fail2Ban:
sudo systemctl enable fail2ban
sudo systemctl start fail2ban
Check the status of your SSH jail with:
sudo fail2ban-client status sshd
This command shows currently banned IPs and other useful statistics. Fail2Ban now actively protects your Pi, automatically blocking suspicious login attempts while you focus on your projects.
IAM Tools and Software for Raspberry Pi
Lightweight Directory Services
When you’re managing multiple Raspberry Pi devices, smart home systems, or a small lab environment, manually handling user accounts and passwords across each device quickly becomes a headache. This is where lightweight directory services like OpenLDAP and FreeIPA come into play, transforming your Raspberry Pi into a centralized authentication hub.
Think of directory services as a phone book for your network, but instead of names and numbers, they store usernames, passwords, and permissions. When a user tries to log into any device on your network, that device checks with your Raspberry Pi directory server to verify credentials. This means you only need to create, update, or revoke user accounts in one place, and the changes instantly apply everywhere.
OpenLDAP is the more lightweight option, perfect for basic authentication needs. It’s been around for decades and works well on the Raspberry Pi 3 or newer models with at least 1GB of RAM. While the initial setup requires some command-line configuration, it provides reliable user authentication without consuming excessive resources.
FreeIPA takes things further by bundling OpenLDAP with additional features like Kerberos authentication, DNS management, and a user-friendly web interface. It’s essentially an open-source alternative to Microsoft Active Directory. However, FreeIPA demands more computing power, so you’ll want a Raspberry Pi 4 with 4GB or more RAM for smooth operation.
Both solutions excel at managing authentication across Linux systems, network applications, and even some IoT devices. For beginners, starting with OpenLDAP helps you understand the fundamentals before graduating to FreeIPA’s more comprehensive feature set.
Single Sign-On Solutions
When running multiple services on your Raspberry Pi, managing separate logins for each application becomes tedious and creates security vulnerabilities. Single Sign-On (SSO) solutions solve this by letting users authenticate once and access all connected services, making your Pi-based projects more professional and user-friendly.
Two popular open-source SSO solutions work exceptionally well on Raspberry Pi hardware: Keycloak and Authelia. Keycloak is a robust, feature-rich identity provider that supports multiple authentication protocols including OAuth 2.0, OpenID Connect, and SAML 2.0. It offers user federation, social login integration, and fine-grained access control. However, Keycloak requires significant resources, needing at least a Raspberry Pi 4 with 4GB RAM and careful Java heap size configuration to run smoothly.
Authelia presents a lighter alternative, specifically designed for reverse proxy authentication. It integrates seamlessly with common reverse proxies like Traefik and Nginx, providing two-factor authentication and single sign-on capabilities while consuming fewer resources. A Raspberry Pi 3B or newer can comfortably run Authelia alongside other services, making it ideal for home lab environments.
For resource-constrained setups, Authelia is the practical choice. If you need enterprise-grade features like identity brokering or complex user management, invest in a Pi 4 with adequate RAM for Keycloak. Both solutions dramatically improve security by centralizing authentication, reducing password fatigue, and enabling consistent access policies across your entire Pi ecosystem. Start with Authelia to understand SSO fundamentals before graduating to Keycloak’s advanced capabilities.
Monitoring and Auditing Access
Enable and Review System Logs
Monitoring authentication attempts on your Raspberry Pi helps you detect unauthorized access early. Most authentication events are logged automatically, but knowing where to look makes all the difference.
Start by enabling detailed logging in your SSH configuration. Open /etc/ssh/sshd_config and verify that LogLevel is set to VERBOSE. This captures more detail about connection attempts without overwhelming your system. Restart SSH with sudo systemctl restart ssh to apply changes.
Your primary authentication logs live in /var/log/auth.log. View recent activity using tail -f /var/log/auth.log to watch login attempts in real-time, or grep “Failed password” /var/log/auth.log to spot failed login attempts. Look for patterns like repeated failures from the same IP address, which often indicate brute-force attacks.
For sudo command tracking, check /var/log/auth.log for entries containing “sudo” and “COMMAND”. This reveals who’s escalating privileges and when.
Consider installing logwatch with sudo apt install logwatch for automated daily summaries emailed to your admin account. It digests logs into readable reports highlighting security concerns.
Set a reminder to review logs weekly, focusing on unfamiliar IP addresses, unexpected login times, or multiple failed attempts. These red flags warrant immediate investigation and potentially adding those IPs to your firewall’s blocklist.
Set Up Access Alerts
Staying informed about who’s accessing your Raspberry Pi is crucial for maintaining security. Setting up access alerts helps you detect unauthorized login attempts and unusual activity patterns in real-time.
Start by configuring email notifications using a simple Python script. You’ll need to install the smtplib library (usually pre-installed) and create a script that monitors your authentication logs. The script can parse /var/log/auth.log for failed SSH attempts or successful logins from unknown IP addresses, then send you an email alert when suspicious patterns emerge.
For immediate notifications, consider implementing push alerts through services like Pushover or Telegram bots. These platforms offer free API access and work exceptionally well with lightweight Python scripts. Create a monitoring script that runs as a cron job every few minutes, checking for new login events and sending push notifications to your smartphone.
A basic alert script should track failed login attempts exceeding a threshold (like five failures within ten minutes), successful logins from new geographic locations, and root access attempts. You can enhance this by integrating with fail2ban, which automatically blocks IP addresses after repeated failed attempts while simultaneously triggering your notification system. This combination provides both reactive alerts and proactive defense, giving you peace of mind whether you’re running a home automation system or hosting web services.
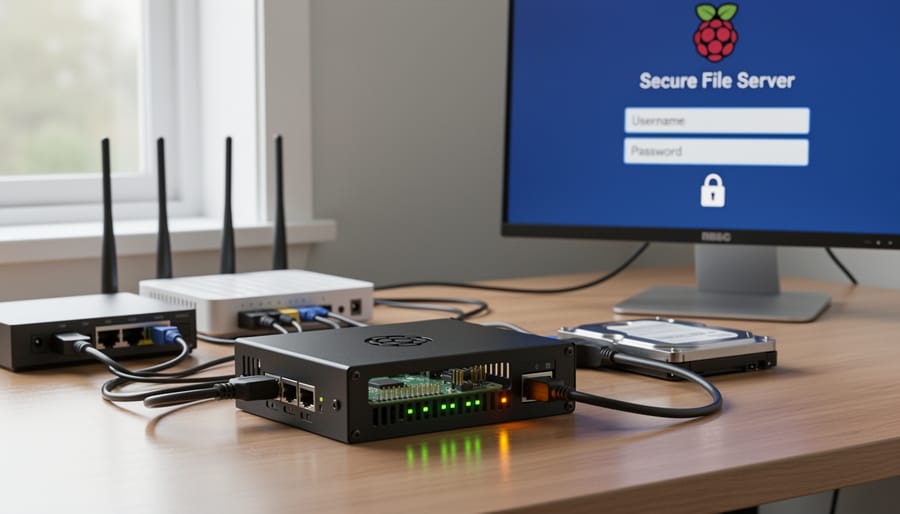
Real-World Project: Building a Secure Pi File Server
Let’s put IAM principles into practice by building a secure file server on your Raspberry Pi using Samba. This hands-on project demonstrates authentication, authorization, and access control in action.
Start by installing Samba with the command: sudo apt update && sudo apt install samba samba-common-bin. Next, create a dedicated directory for your shared files: sudo mkdir -p /home/shares/public and sudo mkdir -p /home/shares/private. Set appropriate ownership using sudo chown -R root:root /home/shares.
Now comes the IAM implementation. Edit the Samba configuration file with sudo nano /etc/samba/smb.conf and add two share definitions. For the public share, configure read-only access for guests by setting read only = yes and guest ok = yes. For the private share, implement stricter controls with valid users = @teamgroup and writeable = yes, ensuring only authenticated users in the team group can access it.
Create user accounts that mirror your IAM strategy. Add a new system user with sudo adduser fileuser, then add them to Samba’s user database using sudo smbpasswd -a fileuser. This separation between system authentication and service-specific credentials demonstrates the principle of credential isolation.
Implement group-based access control by creating a team group: sudo groupadd teamgroup, then add users with sudo usermod -aG teamgroup fileuser. This approach scales efficiently as your user base grows and exemplifies role-based access control.
Test your implementation by connecting from another device on your network. On Windows, access \\your-pi-ip-address\private and enter your credentials. On Linux or Mac, use smb://your-pi-ip-address/private. Verify that unauthorized users cannot access the private share while anyone can view the public share.
Monitor access by checking Samba logs at /var/log/samba/. Regular log reviews help identify unauthorized access attempts and unusual patterns. Consider implementing fail2ban to automatically block IP addresses after multiple failed login attempts, adding another security layer to your IAM implementation.
This project demonstrates core IAM concepts: authentication through user credentials, authorization via group membership, and access control through share permissions. These same principles apply to enterprise systems, making this an excellent learning foundation.
Securing your Raspberry Pi through proper identity and access management doesn’t have to be overwhelming. By implementing the practices we’ve covered, from basic password hygiene and SSH key authentication to advanced solutions like LDAP integration and multi-factor authentication, you’re building multiple layers of defense against unauthorized access. Remember, security isn’t a one-time setup but an ongoing process that requires regular attention and updates.
Start with the fundamentals if you’re new to IAM security. Disable default accounts, create strong passwords, and configure SSH properly. These simple steps immediately strengthen your Pi’s security posture. As you grow more comfortable, gradually introduce advanced techniques like fail2ban, certificate-based authentication, and automated monitoring tools.
Don’t forget to regularly update your Raspberry Pi OS and installed packages using apt update and apt upgrade commands. Security patches often address critical vulnerabilities that could compromise your entire system. Set aside time monthly to review your security configurations, audit user access, and check system logs for suspicious activity.
Whether you’re running a home automation server, network storage, or learning environment, these IAM practices ensure your projects remain secure and reliable. Start implementing these changes today, and you’ll build both technical skills and peace of mind.