


Transform your tech hobby into powerful real-world applications with the Raspberry Pi 4 Model B, a versatile computing platform that opens up endless possibilities for innovation. From building sophisticated home automation systems and retro gaming consoles to creating network-wide ad blockers and media streaming servers, this pocket-sized powerhouse supports projects that rival commercial solutions at a fraction of the cost.
The Pi 4’s quad-core processor, up to 8GB RAM, and dual 4K display support make it ideal for demanding projects like machine learning applications, robotics control systems, and professional-grade network monitoring tools. Whether you’re a beginner looking to set up your first headless server or an experienced maker ready to tackle complex IoT implementations, the latest Raspberry Pi offers the perfect balance of performance, affordability, and community support.
This guide explores practical, hands-on projects that leverage the Pi 4’s enhanced capabilities, complete with step-by-step instructions and expert tips to ensure your success. Get ready to join millions of makers worldwide who are using this remarkable device to bring their technical visions to life.
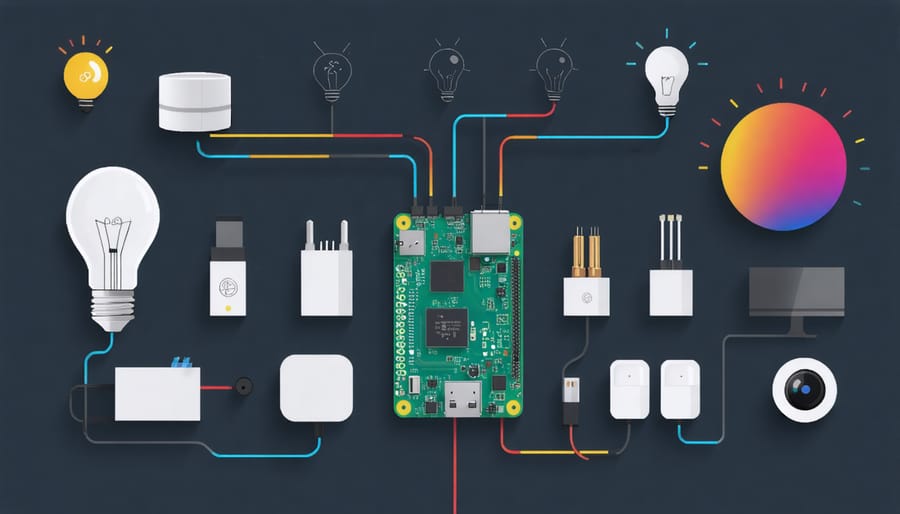
Home Automation Hub
Setting Up Home Assistant
Home Assistant transformation turns your Raspberry Pi 4 into a powerful smart home hub. Before starting, ensure you have a Raspberry Pi 4 with at least 2GB RAM and meet the proper power supply requirements for stable operation.
Begin by downloading the Home Assistant operating system image from the official website. Flash this image to your microSD card using balenaEtcher or Raspberry Pi Imager. Insert the card into your Pi 4 and power it on.
After the initial boot, which takes about 20 minutes, access Home Assistant’s interface by typing “homeassistant.local:8123” in your web browser. If this doesn’t work, use your Pi’s IP address instead (e.g., “192.168.1.XX:8123”).
Create your admin account when prompted and proceed to the onboarding process. Home Assistant will automatically discover compatible smart devices on your network. Add these devices through the integration menu, which supports popular brands like Philips Hue, IKEA TRÅDFRI, and many others.
Configure automation rules through the user-friendly interface. Start with simple automations like scheduling lights or temperature controls, then progress to more complex scenarios as you become familiar with the system.
For enhanced functionality, explore the Add-on Store within Home Assistant to install additional features like Node-RED for advanced automation or the Google Drive Backup add-on for system backups.
Connecting Smart Devices
The Raspberry Pi 4’s versatility shines when connecting smart devices to create an integrated home automation system. Start by ensuring proper GPIO pin configuration for your connected devices. Popular integrations include smart LED strips, motion sensors, and temperature monitors.
To begin, install the necessary libraries using pip:
sudo pip3 install RPi.GPIO
sudo pip3 install adafruit-circuitpython
Connect your smart devices following these basic steps:
1. Power down your Raspberry Pi
2. Connect the device to appropriate GPIO pins
3. Power up and test connections
4. Install device-specific software
For wireless devices, utilize the Pi 4’s built-in Bluetooth and Wi-Fi capabilities. Install Homebridge or Home Assistant to create a central hub that can control multiple smart devices through a single interface. These platforms support popular brands like Philips Hue, LIFX, and various smart plugs.
Remember to secure your smart home network by:
– Using strong passwords
– Enabling two-factor authentication
– Regularly updating firmware
– Creating a separate network for IoT devices
Start with simple projects like smart lights or temperature sensors before advancing to more complex integrations. This approach helps build confidence and understanding of how different devices interact with your Raspberry Pi 4.
Media Center Revolution
Kodi Installation
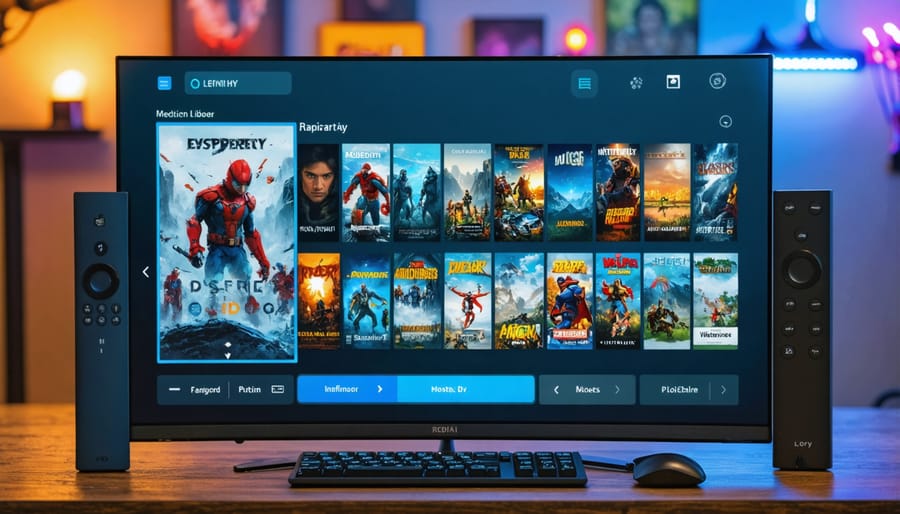
Kodi transforms your Raspberry Pi 4 into a powerful media center, capable of streaming your favorite content and managing your media library. To get started, you’ll need to install the latest version of LibreELEC, a lightweight operating system designed specifically for Kodi.
Begin by downloading the LibreELEC USB-SD Creator tool from the official website. This tool simplifies the installation process by automatically downloading and writing the correct image to your microSD card. Insert your card into your computer using a card reader and launch the USB-SD Creator.
Select Raspberry Pi 4 as your device and choose the latest stable version of LibreELEC. After selecting your microSD card from the dropdown menu, click “Write” and wait for the process to complete. This typically takes about 5-10 minutes.
Once finished, insert the microSD card into your powered-off Raspberry Pi 4. Connect your Pi to your TV or monitor via HDMI, attach a keyboard and mouse, and power it on. The first boot will take you through a simple setup wizard where you can configure basic settings like language, timezone, and network connection.
After the initial setup, you can customize Kodi by installing add-ons for streaming services, setting up your media library, and configuring remote control options. For the best experience, consider using a wireless keyboard with touchpad or the official Kodi remote app on your smartphone.
Remember to regularly update your system through the LibreELEC settings menu to ensure optimal performance and security. With proper setup, your Raspberry Pi 4 will serve as an efficient, low-power media center capable of handling 4K playback and managing extensive media libraries.
Network Storage Setup
Transform your Raspberry Pi 4 into a powerful network storage solution by creating your own NAS (Network Attached Storage) server. This project leverages the Pi’s USB 3.0 ports and Gigabit Ethernet capabilities to provide fast, reliable storage accessible from any device on your network.
Start by connecting an external hard drive or SSD to one of the USB 3.0 ports. For optimal performance, use a powered USB hub if you’re planning to connect multiple drives. Install OpenMediaVault, a popular Linux distribution designed specifically for NAS applications, which provides a user-friendly web interface for management.
Configure your storage by formatting the drives and setting up appropriate file systems. ext4 is recommended for Linux compatibility, though you can also use NTFS if you need Windows compatibility. Create shared folders and set up user permissions to control access to your files.
Enable essential services like SMB/CIFS for Windows networking, NFS for Linux/Unix systems, and FTP for remote access. Consider implementing RAID if you’re using multiple drives for redundancy or performance improvement. Don’t forget to set up automatic backups to protect your data.
For media streaming capabilities, install Plex Media Server or Emby through OpenMediaVault’s plugin system. These services organize your media library and provide streaming access to your content from any device, complete with metadata and cover art.
To enhance security, enable HTTPS for the web interface, set up a strong password, and consider implementing VPN access for remote connections. Regular system updates and monitoring will ensure your NAS remains reliable and secure.
For optimal performance, place your Pi in a well-ventilated area and consider adding a cooling solution, as running a NAS can generate significant heat during continuous operation.
Security Camera System
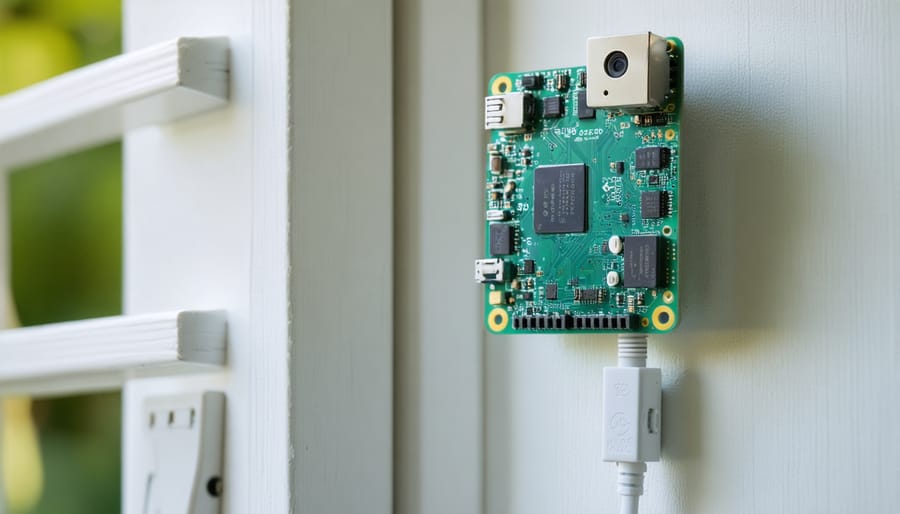
Camera Module Setup
Setting up the Raspberry Pi camera module is an exciting first step toward creating fascinating photography and surveillance projects. Begin by locating the Camera Serial Interface (CSI) port on your Raspberry Pi 4 – it’s the small ribbon connector between the HDMI and ethernet ports. Before handling any components, ensure your Pi is powered off to prevent damage.
Gently lift the black clip on the CSI port and insert the camera module’s ribbon cable with the blue side facing the ethernet port. Press down the clip to secure the connection. Once connected, boot up your Pi and open the terminal to enable the camera interface:
1. Type ‘sudo raspi-config’
2. Navigate to ‘Interface Options’
3. Select ‘Camera’ and enable it
4. Reboot your Pi when prompted
To test your camera setup, try these simple commands:
– For a still photo: raspistill -o test.jpg
– For video recording: raspivid -o test.h264 -t 10000
If you’re getting errors, double-check the ribbon cable connection and ensure it’s properly seated. The camera should be recognized automatically by the latest Raspberry Pi OS, but you might need to update your system using ‘sudo apt-get update’ and ‘sudo apt-get upgrade’ if you’re running an older version.
Motion Detection
Transform your Raspberry Pi 4 into a sophisticated security system with motion detection capabilities. Using the Pi Camera Module or a USB webcam, you can create an automated surveillance system that sends instant alerts when movement is detected in your space.
To get started, you’ll need to install the Motion software package and configure it to work with your camera. The setup process involves updating your Pi and installing necessary dependencies through simple terminal commands. Once installed, Motion continuously monitors the camera feed for changes in pixel values, triggering alerts when significant movement is detected.
Make your system more intelligent by implementing Python scripts that can distinguish between different types of motion. Using OpenCV libraries, you can set specific detection zones, adjust sensitivity levels, and even filter out false positives caused by lighting changes or small movements.
For real-time notifications, integrate your motion detection system with various alert methods. Send automated emails with captured images, push notifications to your smartphone using services like Pushbullet, or trigger local alarms through connected speakers. You can also set up a web interface to monitor your space remotely and view live footage from anywhere.
Take your project further by adding features like scheduled monitoring periods, motion-triggered video recording, or integration with smart home systems. Store captured footage locally on your Pi or automatically upload it to cloud storage for safekeeping. For enhanced security, implement facial recognition to distinguish between family members and unknown visitors.
This project showcases the Pi 4’s processing power while creating a practical security solution for your home or office. With some basic coding knowledge and careful configuration, you’ll have a reliable motion detection system that rivals commercial alternatives.
Retro Gaming Console

RetroPie Installation
RetroPie transforms your Raspberry Pi 4 into a powerful retro gaming console, and setting it up is easier than you might think. Following our detailed gaming setup guide, you’ll be playing classic games in no time.
Start by downloading the RetroPie image from the official website and use the Raspberry Pi Imager to flash it onto your microSD card. Once completed, insert the card into your Pi 4 and connect your controllers, display, and power supply.
During the first boot, RetroPie will automatically configure its settings. You’ll need to map your controller buttons when prompted – this ensures proper functionality across all emulators. Connect to your Wi-Fi network through the RetroPie configuration menu to enable additional features like game scraping and network transfers.
To add games, create a ‘roms’ folder for each system you want to emulate (NES, SNES, PlayStation, etc.) and transfer your game files via USB or network sharing. RetroPie supports various file formats and automatically organizes them by system.
For optimal performance, consider overclocking your Pi 4 through the configuration menu, but be sure to use adequate cooling. You can customize the interface theme, configure shaders for authentic retro looks, and adjust other settings to enhance your gaming experience.
Controller Configuration
Setting up game controllers on your Raspberry Pi 4 is straightforward and opens up endless possibilities for retro gaming and custom control applications. For USB controllers, the process is nearly plug-and-play, with most modern gamepads being automatically recognized by the system.
To configure your controller, first connect it to one of the Pi 4’s USB ports. Open a terminal window and install the required packages by running ‘sudo apt-get install joystick jstest-gtk’. Use the jstest-gtk tool to test your controller’s inputs and ensure all buttons and axes are working correctly.
For mapping keys, tools like antimicro or qjoypad are excellent choices. These applications allow you to assign keyboard keys or mouse movements to your controller’s buttons. Install antimicro using ‘sudo apt-get install antimicro’ and launch it to create custom mapping profiles for different games or applications.
Bluetooth controllers require additional setup. Enable Bluetooth through the Raspberry Pi Configuration menu, then use ‘bluetoothctl’ in the terminal to pair your device. Popular controllers like the PS4 DualShock or Xbox One controller work well, though some may need additional drivers.
For RetroPie users, controller configuration happens during the first boot. Follow the on-screen prompts to map your buttons, and remember you can always reconfigure through the RetroPie menu if needed. Save your mappings as profiles to quickly switch between different controller setups for various emulators or games.
Network Ad Blocker
Pi-hole Setup
Pi-hole transforms your Raspberry Pi 4 into a powerful network-wide ad blocker and DNS server. To get started, ensure your Pi is running the latest version of Raspberry Pi OS and has a static IP address configured. Open the terminal and execute the one-step installation command: `curl -sSL https://install.pi-hole.net | bash`
Follow the installation wizard’s prompts, selecting your preferred upstream DNS provider and interface settings. The installer will guide you through choosing your network settings and configuring the web interface password.
Once installed, access the Pi-hole admin interface by entering `http://pi.hole/admin` or your Pi’s IP address followed by `/admin` in your web browser. Here, you can monitor your network’s statistics, manage blocked domains, and customize your filtering preferences.
To utilize Pi-hole across your entire network, configure your router to use your Raspberry Pi’s IP address as the primary DNS server. Alternatively, you can set up individual devices to use Pi-hole by manually changing their DNS settings.
For optimal performance, consider adding custom blocklists and whitelisting trusted domains through the web interface. Regular updates can be performed using the `pihole -up` command to ensure you have the latest features and security patches.
Custom Filtering
The Raspberry Pi 4 Model B can serve as a powerful network filtering solution, allowing you to implement advanced content filtering and access control for your home or small office network. By utilizing tools like Pi-hole and custom DNS configurations, you can create sophisticated filtering rules that go beyond basic website blocking.
Setting up custom whitelists enables you to maintain granular control over network access while preventing false positives. You can create category-based filters for different user groups, perfect for families who want different access levels for adults and children. The Pi 4’s improved processing power handles complex filtering rules without noticeable network slowdown.
Advanced users can implement regex-based filtering patterns to catch dynamic content and emerging threats. The system can be configured to log filtering activities, providing insights into network usage patterns and potential security concerns. You can also integrate external blocklists from trusted sources while maintaining your custom exceptions.
For maximum effectiveness, combine your filtering setup with a VPN server to extend protection to devices outside your network. Regular updates to your filtering rules and whitelists ensure continued protection against new threats while maintaining access to legitimate services.
The Raspberry Pi 4 Model B opens up a world of exciting possibilities for makers, hobbyists, and tech enthusiasts. From creating your own home media center to building an automated garden system, the projects we’ve explored demonstrate the incredible versatility of this powerful single-board computer.
Whether you’re a beginner just starting your journey into the maker world or an experienced tinkerer looking for new challenges, there’s a project here for everyone. The Pi 4’s enhanced processing power, improved RAM options, and dual 4K display support make it the perfect platform for bringing your creative ideas to life.
Remember that the best way to learn is by doing. Start with simpler projects like the retro gaming console or smart home hub to build your confidence and understanding of the Pi’s capabilities. As you become more comfortable, challenge yourself with more complex builds like the network-attached storage system or the home security setup.
Don’t be afraid to experiment and modify these projects to suit your needs. The Raspberry Pi community is incredibly supportive and full of resources to help you overcome any challenges you might face. Share your successes, learn from your setbacks, and most importantly, enjoy the building process.
So grab your Raspberry Pi 4, gather your components, and start creating. The satisfaction of building something with your own hands and seeing it work is truly rewarding. What will you build first?