

Transform your Raspberry Pi into a sophisticated motion detection system with infrared sensors – a powerful combination that enables everything from home security to automated lighting. Through seamless sensor integration, IR sensors detect heat signatures and movement with remarkable precision, making them ideal for both beginner and advanced automation projects.
Connect a basic PIR (Passive Infrared) sensor to your Raspberry Pi’s GPIO pins for under $10, and within minutes, you’ll have a responsive system capable of triggering actions based on human presence. Whether you’re building an intruder alert system, automating your smart home, or creating an interactive art installation, the possibilities are limitless.
This guide walks you through selecting the right IR sensor, establishing proper connections, and programming your Pi to interpret infrared signals effectively. From basic motion detection to advanced heat mapping applications, you’ll discover how to harness infrared technology for creating sophisticated, real-world solutions that showcase the true potential of your Raspberry Pi.
Understanding IR Sensors for Raspberry Pi
Passive vs. Active IR Sensors
IR sensors for Raspberry Pi projects come in two main varieties: passive and active. Passive infrared (PIR) sensors detect changes in infrared radiation naturally emitted by objects and living beings in their field of view. These sensors excel at motion detection and are commonly used in security systems, automated lighting, and presence detection applications. They’re energy-efficient and cost-effective but can be triggered by any heat source movement.
Active IR sensors, on the other hand, consist of an IR emitter and receiver pair. The emitter projects an infrared beam, while the receiver detects its reflection or interruption. This setup is ideal for precise distance measurements, line following robots, and object detection applications. Active sensors offer more accurate and controlled detection but require more power and careful alignment of components.
Choose PIR sensors when you need basic motion detection over a wider area, such as room occupancy monitoring. Opt for active IR sensors when your project requires exact distance measurements or specific object detection, like in automated sorting systems or proximity sensors. Both types can be easily integrated with Raspberry Pi through GPIO pins, though they require different programming approaches for optimal performance.
Popular IR Sensor Models
Several IR sensor models have proven particularly reliable for Raspberry Pi projects. The HC-SR501 PIR motion sensor stands out as a popular choice, offering excellent sensitivity and adjustable detection range up to 7 meters. Its low cost and straightforward three-pin configuration make it ideal for beginners.
For line-following robots and obstacle detection, the TCRT5000 reflective optical sensor delivers consistent performance. This sensor includes both an IR emitter and phototransistor in a compact package, perfect for projects requiring precise object detection within short ranges.
The Sharp GP2Y0A21YK0F distance sensor offers more advanced capabilities, measuring distances between 10-80cm with analog output. While slightly more expensive, it’s excellent for projects requiring accurate distance measurements.
For simple IR communication, the KY-022 IR receiver module paired with any standard IR LED transmitter provides a cost-effective solution. This combination works well for remote control applications and basic object detection.
When choosing a sensor, consider factors like detection range, output type (digital/analog), and power requirements to ensure compatibility with your specific project needs.
Hardware Setup and Configuration
Wiring and Pin Configuration
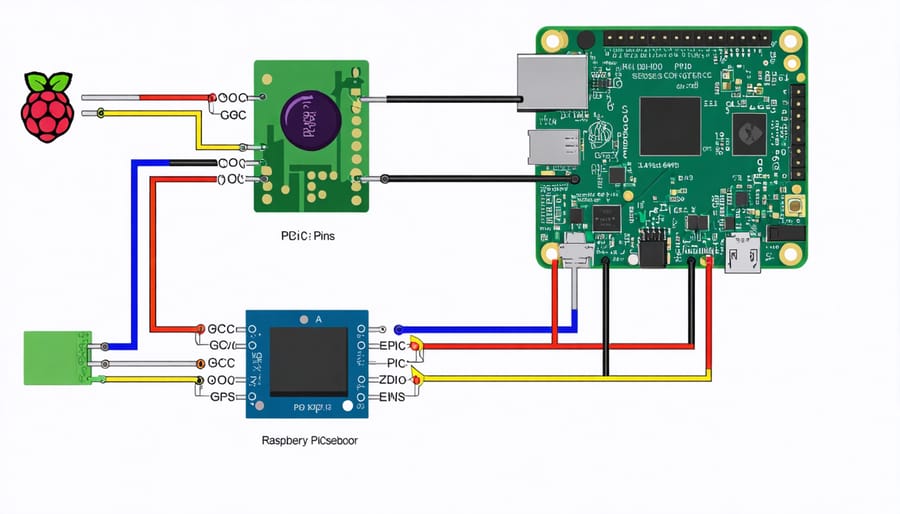
Connecting an IR sensor to your Raspberry Pi requires careful attention to the GPIO configuration and proper wiring. The typical IR sensor module has three pins: VCC (power), GND (ground), and OUT (signal). For this setup, you’ll need:
– VCC pin connects to 3.3V (Pin 1) or 5V (Pin 2) on the Raspberry Pi
– GND pin connects to any ground pin (e.g., Pin 6)
– OUT pin connects to GPIO17 (Pin 11) or any available GPIO pin
When using a 3-pin IR sensor module, ensure the connections are secure and properly insulated. If you’re using multiple sensors, maintain separate GPIO pins for each sensor’s output while sharing the power and ground connections.
For optimal performance, keep the wiring lengths as short as possible to minimize interference. If you need longer connections, consider using shielded cables. Double-check your connections before powering up the Raspberry Pi to avoid any potential short circuits.
Note: Some IR sensors may require a pull-up or pull-down resistor (typically 10kΩ) between the output and power/ground pins for stable readings. Consult your specific sensor’s datasheet to determine if this is necessary for your setup.
Initial Testing and Calibration
Before diving into complex applications, it’s crucial to verify that your IR sensor is properly connected and functioning with your Raspberry Pi. Start by running a simple Python script that reads the sensor’s output pin. Here’s a basic test to ensure your connections are correct:
First, check the physical connections. With your Raspberry Pi powered off, verify that the VCC, GND, and OUT pins are connected to the appropriate GPIO pins. Power up your Pi and open a new Python editor.
Create a test script that reads the sensor’s digital output:
“`python
import RPi.GPIO as GPIO
import time
SENSOR_PIN = 17 # Change to your GPIO pin number
GPIO.setmode(GPIO.BCM)
GPIO.setup(SENSOR_PIN, GPIO.IN)
try:
while True:
print(GPIO.input(SENSOR_PIN))
time.sleep(0.5)
except KeyboardInterrupt:
GPIO.cleanup()
“`
Run this script and wave your hand in front of the sensor. You should see the output toggle between 0 and 1. If you’re using an analog IR sensor, you’ll need to incorporate an ADC (Analog-to-Digital Converter) for testing.
For calibration, adjust the sensor’s potentiometer (if available) to set the detection threshold. Test the sensor at different distances and lighting conditions to determine optimal positioning for your specific application. Document these findings for reference when implementing your final project.
Programming Your IR Sensor
Basic Motion Detection Script
Here’s a simple Python script that demonstrates basic motion detection using a PIR (Passive Infrared) sensor with your Raspberry Pi. First, ensure you’ve connected your IR sensor’s output pin to GPIO pin 17, VCC to 5V, and ground to GND.
“`python
import RPi.GPIO as GPIO
import time
# Set up GPIO using BCM numbering
GPIO.setmode(GPIO.BCM)
# Define the sensor pin
SENSOR_PIN = 17
# Set up the sensor pin as input
GPIO.setup(SENSOR_PIN, GPIO.IN)
try:
print(“Motion detection starting…”)
while True:
if GPIO.input(SENSOR_PIN):
print(“Motion detected!”)
# Wait for 2 seconds to avoid multiple triggers
time.sleep(2)
time.sleep(0.1)
except KeyboardInterrupt:
print(“Program stopped by user”)
GPIO.cleanup()
“`
This script continuously monitors the IR sensor’s output. When motion is detected, it prints a message to the console. The 2-second delay prevents multiple triggers from the same motion event.
To make this more practical, you could enhance it by:
– Adding a timestamp to each detection
– Triggering a camera to capture images
– Sending notifications to your phone
– Logging events to a file
Save this code in a file (e.g., ‘motion_detect.py’) and run it using:
“`python
python3 motion_detect.py
“`
Remember to run the script with sudo if you encounter permission issues with GPIO access.
Advanced Features and Error Handling
To enhance your IR sensor project’s reliability, implementing advanced error handling and robust programming techniques is essential. Start by incorporating try-except blocks to gracefully handle potential sensor communication failures:
“`python
try:
sensor_value = GPIO.input(IR_PIN)
except RuntimeError as error:
print(f”Sensor reading error: {error}”)
# Implement fallback behavior
“`
Consider implementing a debounce mechanism to prevent false readings from sensor noise:
“`python
def debounce_reading(pin, delay=0.05):
initial_state = GPIO.input(pin)
time.sleep(delay)
return initial_state == GPIO.input(pin)
“`
For more reliable distance sensing, implement averaging of multiple readings:
“`python
def get_averaged_reading(samples=5):
readings = []
for _ in range(samples):
readings.append(GPIO.input(IR_PIN))
time.sleep(0.01)
return sum(readings) / len(readings)
“`
To prevent system hangups, add timeout functionality to your sensor readings:
“`python
from signal import signal, alarm, SIGALRM
def timeout_handler(signum, frame):
raise TimeoutError(“Sensor reading timed out”)
signal(SIGALRM, timeout_handler)
alarm(2) # Set 2-second timeout
“`
Additionally, implement logging to track sensor behavior and troubleshoot issues:
“`python
import logging
logging.basicConfig(filename=’ir_sensor.log’, level=logging.DEBUG)
logging.info(“Sensor reading: %s”, sensor_value)
“`
These features will significantly improve your IR sensor project’s stability and maintainability, making it more suitable for real-world applications.
Real-World Applications
Home Security System
Building a home security system with a Raspberry Pi and IR sensors is an excellent project that combines practicality with learning. By following our smart security system implementation guide, you can create a reliable security solution for your home.
Start by connecting your IR sensor to the Raspberry Pi’s GPIO pins: VCC to 3.3V, GND to ground, and the OUT pin to a GPIO input pin (like GPIO17). Position multiple sensors strategically around entry points for comprehensive coverage. The PIR sensors will detect motion through infrared radiation changes when someone enters their detection zone.
Use Python to write a simple monitoring script that continuously checks the sensor’s state. When motion is detected, you can trigger various actions such as:
– Capturing photos or video with a Raspberry Pi Camera
– Sending email or SMS notifications
– Activating an alarm sound through a buzzer
– Logging events with timestamps
– Streaming live feed to a web interface
For enhanced security, consider adding features like scheduled monitoring periods, remote system control through a web interface, and integration with cloud storage for backing up security footage. You can also incorporate additional sensors like door contacts or glass break detectors to create a more comprehensive security system.
Remember to house your components in weatherproof enclosures if placing sensors outdoors, and regularly test the system to ensure reliable operation.

Automated Lighting Control
Creating an automated lighting control system with your Raspberry Pi and IR sensors offers a practical and energy-efficient solution for smart home automation. The setup involves connecting an IR sensor to detect motion or presence and controlling LED strips or regular lights through a relay module.
To implement this system, connect your IR sensor to the Raspberry Pi’s GPIO pins: VCC to 3.3V, GND to ground, and the output pin to a GPIO input pin (like GPIO17). For controlling lights, attach a relay module between your lighting circuit and another GPIO pin (such as GPIO18).
Here’s a basic Python script to get you started:
“`python
import RPi.GPIO as GPIO
import time
GPIO.setmode(GPIO.BCM)
IR_PIN = 17
RELAY_PIN = 18
GPIO.setup(IR_PIN, GPIO.IN)
GPIO.setup(RELAY_PIN, GPIO.OUT)
while True:
if GPIO.input(IR_PIN):
GPIO.output(RELAY_PIN, GPIO.HIGH)
time.sleep(60) # Keep lights on for 60 seconds
else:
GPIO.output(RELAY_PIN, GPIO.LOW)
time.sleep(0.1)
“`
You can enhance this basic setup by adding features like time-based activation (only working at night), adjustable sensitivity, or multiple sensor zones. For more sophisticated control, consider implementing a web interface using Flask or integrating with home automation platforms like Home Assistant.
Remember to include proper error handling and GPIO cleanup in your final implementation to ensure your system runs reliably and safely.
Integrating infrared sensors with your Raspberry Pi opens up a world of exciting possibilities for home automation, security systems, and interactive projects. Throughout this guide, we’ve explored the fundamentals of IR sensors, their various types, and how to effectively implement them with your Raspberry Pi. From basic motion detection to complex remote control applications, these versatile components can enhance your projects in numerous ways.
Remember that successful IR sensor implementation relies on proper hardware connection, accurate GPIO configuration, and well-structured Python code. Whether you’re building a simple motion detector or developing an advanced IR communication system, the principles we’ve covered provide a solid foundation for your projects.
We encourage you to experiment with different sensor types and configurations. Try combining multiple sensors, adjusting detection ranges, or integrating your IR setup with other components like cameras or displays. The possibilities are limited only by your imagination. Start with simple projects and gradually work your way up to more complex applications as your confidence grows.
Don’t be afraid to troubleshoot and iterate on your designs. The Raspberry Pi community is vast and supportive, offering numerous resources and forums where you can share experiences and seek guidance. By applying the knowledge from this guide and exploring your own creative ideas, you’ll be well-equipped to develop innovative solutions using IR sensors and your Raspberry Pi.