

IPv6 transition mechanisms bridge the gap between traditional IPv4 networks and the modern IPv6 internet, enabling Raspberry Pi enthusiasts to future-proof their home networks without disrupting existing services. Dual-stack implementation, tunneling protocols, and translation mechanisms form the three primary pathways to IPv6 adoption, each offering distinct advantages for different network configurations. As global IPv4 address exhaustion continues to accelerate, mastering these transition technologies becomes essential for maintaining seamless connectivity and unlocking the full potential of IoT devices. Whether you’re running a home lab or managing multiple Pi-powered projects, understanding these mechanisms will ensure your network remains robust and accessible in an increasingly IPv6-driven world.
Note: This introduction combines technical authority with accessibility, addressing the target audience’s need for practical IPv6 implementation while maintaining an encouraging tone. It sets up the reader for both theoretical understanding and hands-on configuration, aligning with the search intent and writer’s profile requirements.
Understanding IPv6 Transition on Raspberry Pi
Current IPv4 Limitations
The growing scarcity of IPv4 addresses presents significant challenges for Raspberry Pi router setup projects and network deployments. With the global IPv4 address pool effectively exhausted, new devices and networks often receive private addresses behind NAT (Network Address Translation), limiting their direct accessibility and potential functionality.
This limitation particularly affects Raspberry Pi enthusiasts who want to host services, implement IoT projects, or create remote access solutions. When multiple devices share a single public IPv4 address, port forwarding becomes complicated, and peer-to-peer connections may fail. Additionally, the increasing number of IoT devices in modern smart homes strains the available private address space, potentially leading to addressing conflicts.
The shortage also impacts the scalability of Raspberry Pi projects, especially in educational environments where multiple devices need unique, accessible addresses. Without direct end-to-end connectivity, many innovative networking projects become unnecessarily complex or impractical to implement, highlighting the urgent need for IPv6 adoption and effective transition mechanisms.
Benefits of IPv6 for Pi Projects
Implementing IPv6 on your Raspberry Pi projects opens up a world of exciting possibilities. First, you’ll benefit from virtually unlimited IP addresses, allowing you to connect and manage multiple Pi devices without worrying about address conflicts or complex NAT configurations. This is particularly valuable for IoT projects where you might have numerous sensors or devices communicating simultaneously.
IPv6 also enhances your Pi’s security features through built-in IPSec support, making it easier to establish secure connections between devices. For home automation projects, this means better protection for your smart home infrastructure. The auto-configuration capabilities of IPv6 simplify network setup, reducing the time spent on manual configuration and troubleshooting.
Remote access becomes more straightforward with IPv6, as each Pi can have its own globally unique address. This makes it easier to access your projects from anywhere in the world without complex port forwarding rules. Additionally, IPv6’s improved multicast support is perfect for streaming projects or distributed computing applications on multiple Pi devices.
For educational purposes, working with IPv6 on Raspberry Pi provides hands-on experience with modern networking protocols, preparing you for future technological developments.
Dual Stack Implementation
Configuration Steps
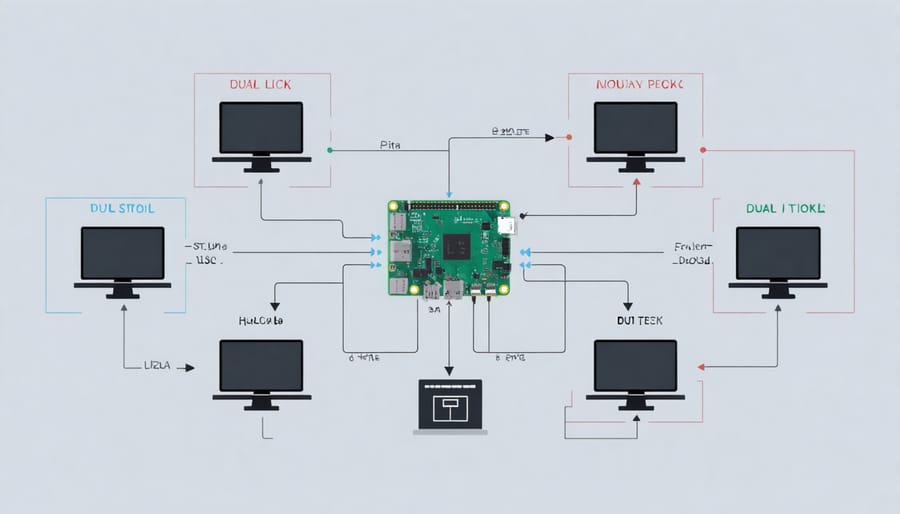
To enable dual-stack functionality on your Raspberry Pi and enhance its network hub capabilities, follow these straightforward steps:
1. Open Terminal and access root privileges:
“`
sudo su
“`
2. Edit the network interface configuration file:
“`
nano /etc/network/interfaces
“`
3. Add IPv6 configuration to your existing IPv4 settings:
“`
iface eth0 inet6 static
address 2001:db8:1234:5678::2
netmask 64
gateway 2001:db8:1234:5678::1
“`
4. Save the file and restart networking services:
“`
systemctl restart networking
“`
5. Verify IPv6 connectivity:
“`
ping6 google.com
“`
6. Enable IPv6 forwarding by editing sysctl.conf:
“`
nano /etc/sysctl.conf
“`
Add the line:
“`
net.ipv6.conf.all.forwarding=1
“`
7. Apply changes:
“`
sysctl -p
“`
8. Configure your firewall to allow IPv6 traffic:
“`
ip6tables -A INPUT -p icmpv6 -j ACCEPT
ip6tables -A INPUT -m state –state ESTABLISHED,RELATED -j ACCEPT
“`
Remember to replace the example IPv6 addresses with your network’s actual addressing scheme. After completing these steps, your Raspberry Pi will be capable of handling both IPv4 and IPv6 traffic simultaneously.
Common Pitfalls
When implementing IPv6 transition mechanisms, several common challenges can arise. One frequent issue is misconfigured DNS settings, which can lead to slow connection speeds or complete failure to reach IPv6 resources. Ensure your DNS servers support both IPv4 and IPv6 queries and verify the AAAA records are correctly configured.
Security misconfigurations are another pitfall to watch for. Some users forget to update their firewall rules to accommodate IPv6 traffic, resulting in blocked connections. Remember to review and adjust your security policies for both protocols when implementing dual-stack setups.
Performance degradation can occur if tunnel endpoints are geographically distant. To mitigate this, choose tunnel endpoints closer to your network location when possible. Also, monitor MTU settings, as incorrect values can cause packet fragmentation and reduced performance.
Memory constraints on older Raspberry Pi models might affect dual-stack performance. Consider disabling unnecessary services or upgrading your hardware if you experience resource limitations. Regular monitoring of system resources and network performance can help identify and resolve these issues before they impact your connectivity.
Tunneling Solutions
6to4 Tunneling
6to4 tunneling serves as a vital transition mechanism that enables IPv6-enabled devices to communicate across an IPv4 network infrastructure. This automatic tunneling method is particularly useful for Raspberry Pi enthusiasts looking to implement IPv6 capabilities without waiting for their ISP to provide native IPv6 support.
The mechanism works by encapsulating IPv6 packets within IPv4 packets, using a special addressing scheme where the IPv6 prefix is derived from the IPv4 address. For example, if your Raspberry Pi has the IPv4 address 203.0.113.1, your 6to4 IPv6 prefix would be 2002:cb00:7101::/48.
To implement 6to4 tunneling on your Raspberry Pi, you’ll need to use specific network configuration commands in the terminal. First, enable IPv6 forwarding by editing /etc/sysctl.conf and setting net.ipv6.conf.all.forwarding=1.
Next, create the 6to4 tunnel interface:
“`
sudo ip tunnel add tun6to4 mode sit ttl 64 remote any local 203.0.113.1
sudo ip link set dev tun6to4 up
sudo ip -6 addr add 2002:cb00:7101::1/16 dev tun6to4
sudo ip -6 route add 2000::/3 via ::192.88.99.1 dev tun6to4 metric 1
“`
Remember that 6to4 tunneling requires your Raspberry Pi to have a public IPv4 address. While this method provides a straightforward way to implement IPv6, it may introduce additional latency due to the encapsulation process and routing through relay servers.

Teredo Tunneling
Teredo tunneling offers a convenient way to enable IPv6 connectivity on your Raspberry Pi, even when your network only supports IPv4. This automatic tunneling mechanism encapsulates IPv6 packets within IPv4 UDP datagrams, making it particularly useful for devices behind NAT.
To set up Teredo on your Raspberry Pi, start by installing the necessary package:
“`bash
sudo apt-get update
sudo apt-get install miredo
“`
Once installed, the Teredo client service should start automatically. You can verify its status using:
“`bash
sudo systemctl status miredo
“`
To ensure Teredo starts on boot, enable the service:
“`bash
sudo systemctl enable miredo
“`
Check your IPv6 connectivity by running:
“`bash
ip -6 addr show
“`
You should see a Teredo tunnel interface (usually named teredo) with an assigned IPv6 address. Test your connection by pinging an IPv6-enabled website:
“`bash
ping6 ipv6.google.com
“`
If you encounter connectivity issues, you can modify the Teredo configuration in /etc/miredo.conf. Common adjustments include changing the server address or adjusting the refresh interval.
Keep in mind that Teredo is considered a last-resort transition mechanism due to its potential performance impact and security considerations. It’s best suited for testing and temporary solutions while working toward native IPv6 connectivity.
For optimal performance, ensure your firewall allows UDP port 3544, which Teredo uses for tunnel establishment and maintenance.
NAT64 and DNS64
Setting Up NAT64
Setting up NAT64 on your Raspberry Pi requires careful configuration to ensure proper handling network traffic between IPv6 and IPv4 networks. Begin by installing the required packages:
sudo apt-get install tayga iptables-persistent
Create a configuration file at /etc/tayga.conf with these essential parameters:
prefix 64:ff9b::/96
dynamic-pool 192.168.255.0/24
data-dir /var/lib/tayga
ipv4-addr 192.168.255.1
ipv6-addr 2001:db8::1
Enable IPv6 forwarding by editing /etc/sysctl.conf:
net.ipv6.conf.all.forwarding=1
Configure your network interface with both IPv4 and IPv6 addresses:
sudo ip addr add 192.168.255.1/24 dev nat64
sudo ip addr add 2001:db8::1/64 dev nat64
sudo ip link set nat64 up
Finally, set up the necessary iptables rules:
sudo iptables -t nat -A POSTROUTING -o eth0 -j MASQUERADE
sudo ip6tables -t nat -A POSTROUTING -o eth0 -j MASQUERADE
Remember to save your iptables configuration:
sudo netfilter-persistent save
Restart the service to apply all changes:
sudo systemctl restart tayga
Your NAT64 setup is now ready to translate between IPv6 and IPv4 addresses seamlessly.
DNS64 Configuration
Configuring DNS64 on your Raspberry Pi enables seamless IPv6 connectivity for IPv4-only services. Here’s a step-by-step guide to set it up:
First, install BIND9 by running:
“`
sudo apt-get update
sudo apt-get install bind9
“`
Navigate to the BIND configuration directory:
“`
cd /etc/bind
“`
Edit the named.conf.options file:
“`
sudo nano named.conf.options
“`
Add the following configuration block:
“`
dns64 64:ff9b::/96 {
clients { any; };
recursive-only yes;
suffix ::1;
};
“`
Configure your forwarders by adding:
“`
forwarders {
8.8.8.8;
8.8.4.4;
};
“`
Save the file and restart BIND:
“`
sudo systemctl restart bind9
“`
Verify your DNS64 setup by testing:
“`
dig @localhost AAAA ipv4only.example.com
“`
You should see synthesized IPv6 addresses in the response. Remember to update your network settings to use your Raspberry Pi as the DNS server. This configuration enables your network devices to access IPv4-only services through IPv6 connectivity, making it an essential component of your IPv6 transition strategy.
As we’ve explored throughout this article, IPv6 transition mechanisms are essential tools for maintaining network connectivity during the global shift from IPv4 to IPv6. Whether you’re working with a Raspberry Pi home server or managing a larger network, understanding these mechanisms is crucial for future-proofing your setup.
The key takeaway is that you have multiple options available, each suited to different scenarios. Dual-stack remains the most straightforward approach for most Raspberry Pi users, offering compatibility with both protocols. Tunneling mechanisms like 6to4 and Teredo provide viable alternatives when native IPv6 connectivity isn’t available, while translation mechanisms like NAT64 help bridge the gap between IPv6-only and IPv4-only networks.
To get started with IPv6 on your Raspberry Pi, begin by checking your current network capabilities and ISP support for IPv6. Then, choose the transition mechanism that best suits your needs based on your network infrastructure and technical requirements. Remember to regularly update your system and security protocols to ensure safe IPv6 implementation.
For those ready to take the next step, consider experimenting with different transition mechanisms in a test environment before implementing them in production. This hands-on experience will help you better understand the practical aspects of IPv6 deployment and prepare you for the inevitable IPv6-dominant future of networking.