


Master your Raspberry Pi’s network management through powerful command-line tools that transform basic connectivity into advanced network hub capabilities. The command line interface offers precise control over wireless connections, ethernet configurations, and network security protocols – making it the preferred choice for both automation scripts and manual network administration.
Configure wireless networks instantly using nmcli, monitor real-time network performance with iftop, and deploy custom routing rules through ip route commands. These built-in tools provide enterprise-level network management capabilities while maintaining the lightweight efficiency that makes Raspberry Pi an ideal platform for network projects.
Whether you’re setting up a home server, creating an IoT gateway, or managing multiple network interfaces, the command line approach offers unmatched flexibility and control. From basic connectivity troubleshooting to advanced network automation, mastering these tools opens up endless possibilities for your Raspberry Pi projects.
Essential Network Manager Commands for Raspberry Pi
Checking Network Status and Connections
The command line offers several powerful tools for monitoring your Raspberry Pi’s network status and connections. To check your current network configuration, use the `ip addr show` command, which displays all network interfaces and their assigned IP addresses. For a quick overview of your wireless connection status, enter `iwconfig` in the terminal.
To view active network connections and listening ports, the `netstat -tuln` command is invaluable. This shows all TCP and UDP connections, helping you monitor network traffic and identify potential issues. For real-time network activity monitoring, use `iftop` (you may need to install it first with `sudo apt-get install iftop`).
Want to check your Wi-Fi signal strength? The `iwlist wlan0 scan` command provides detailed information about available wireless networks, including signal quality and encryption status. For a more user-friendly signal strength indicator, try `watch -n 1 cat /proc/net/wireless`, which updates the display every second.
To test network connectivity, use the familiar `ping` command followed by a domain name or IP address. For DNS resolution testing, `nslookup` helps verify that your network’s domain name resolution is working correctly. These tools combined give you a comprehensive view of your Raspberry Pi’s network status and help diagnose any connectivity issues that may arise.

Managing Wi-Fi Connections
Managing Wi-Fi connections through the command line on your Raspberry Pi is straightforward once you know the essential commands. To scan for available wireless networks, use the command:
“`
sudo iwlist wlan0 scan
“`
This will display all nearby networks with their SSID, signal strength, and encryption type. To connect to a wireless network, you’ll need to modify the wpa_supplicant configuration file:
“`
sudo nano /etc/wpa_supplicant/wpa_supplicant.conf
“`
Add your network details using this format:
“`
network={
ssid=”YourNetworkName”
psk=”YourPassword”
}
“`
To apply the changes and connect to the network, use:
“`
sudo wpa_cli -i wlan0 reconfigure
“`
Need to disconnect from the current network? Use:
“`
sudo ifconfig wlan0 down
“`
And to reconnect or enable the wireless interface:
“`
sudo ifconfig wlan0 up
“`
To check your current connection status and IP address:
“`
iwconfig wlan0
ifconfig wlan0
“`
These commands will show you detailed information about your wireless connection, including signal strength and IP configuration. Remember to replace “wlan0” with your actual wireless interface name if it’s different on your system.
Advanced Network Configuration Commands
Setting Up Static IP Addresses
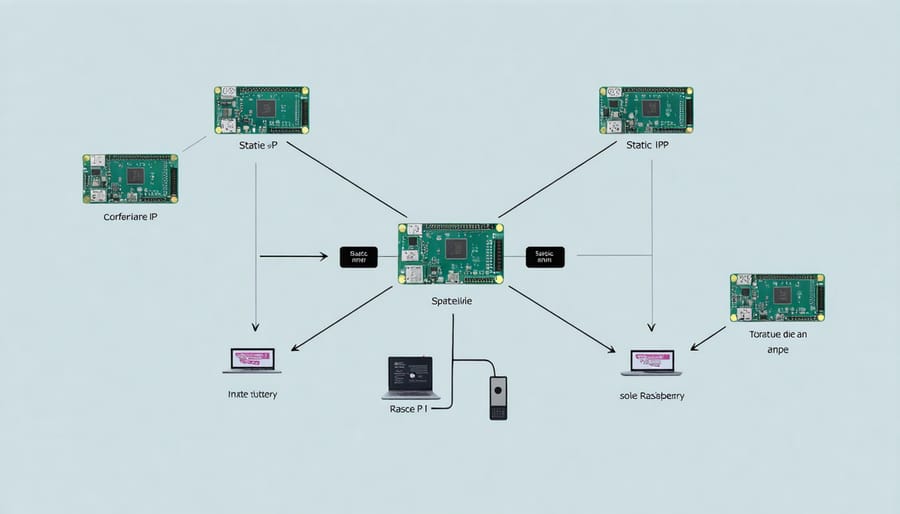
To set up a static IP address on your Raspberry Pi using the Network Manager command line interface, you’ll need to modify your connection settings. This is particularly useful when you want to configure your Pi as a router or ensure your device maintains the same IP address across reboots.
First, identify your connection using:
“`
nmcli connection show
“`
To set a static IP address, use the following command structure:
“`
sudo nmcli connection modify [CONNECTION-NAME] ipv4.addresses [IP-ADDRESS/SUBNET]
sudo nmcli connection modify [CONNECTION-NAME] ipv4.gateway [GATEWAY-ADDRESS]
sudo nmcli connection modify [CONNECTION-NAME] ipv4.dns [DNS-SERVER]
sudo nmcli connection modify [CONNECTION-NAME] ipv4.method manual
“`
For example, to set IP address 192.168.1.100 with subnet mask 255.255.255.0:
“`
sudo nmcli connection modify eth0 ipv4.addresses 192.168.1.100/24
sudo nmcli connection modify eth0 ipv4.gateway 192.168.1.1
sudo nmcli connection modify eth0 ipv4.dns “8.8.8.8,8.8.4.4”
sudo nmcli connection modify eth0 ipv4.method manual
“`
After configuring, restart the connection:
“`
sudo nmcli connection down eth0 && sudo nmcli connection up eth0
“`
Verify your settings using:
“`
ip addr show
Managing Network Profiles
Network Manager allows you to create and manage multiple network profiles, making it easy to switch between different network configurations. To create a new network profile, use the nmcli connection add command followed by the connection type and essential parameters:
nmcli connection add type wifi con-name “Home_Network” ssid “MyHomeWiFi”
To edit existing profiles, use the nmcli connection modify command. For example, to update the WiFi password:
nmcli connection modify Home_Network wifi-sec.psk “newpassword”
You can view all available network profiles with:
nmcli connection show
To switch between profiles, simply activate the desired connection:
nmcli connection up Home_Network
To delete unused profiles, use:
nmcli connection delete profile_name
For better organization, you can clone existing profiles to create variations:
nmcli connection clone Home_Network Work_Network
After cloning, modify the new profile’s settings as needed. Remember to save your changes:
nmcli connection reload
These profiles persist across reboots, making it convenient to manage multiple network configurations for different locations or purposes. You can also export and import profiles using the nm-settings command, which is particularly useful when setting up multiple Raspberry Pi devices with identical network configurations.
Troubleshooting Network Issues
When network issues arise on your Raspberry Pi, several command-line tools can help diagnose and resolve the problem. Start with the ping command to test basic connectivity:
“`
ping -c 4 8.8.8.8
“`
If ping fails, check your network interface status using:
“`
ip addr show
“`
This displays all network interfaces and their configurations. Look for your wireless (wlan0) or ethernet (eth0) interface to ensure it has an IP address assigned.
To verify DNS resolution, use:
“`
nslookup google.com
“`
If you’re experiencing wireless connectivity issues, these commands are particularly helpful:
“`
iwconfig # Check wireless interface status
iwlist wlan0 scan # Scan for available networks
iw dev wlan0 link # Show current connection details
“`
For comprehensive network diagnostics, use:
“`
traceroute google.com # Track network path
netstat -tuln # List active network connections
“`
If you need to restart networking services:
“`
sudo systemctl restart NetworkManager
sudo systemctl restart dhcpcd
“`
Remember to check your network configuration files in /etc/NetworkManager/system-connections/ if problems persist. Sometimes, simply deleting problematic connection files and recreating them can resolve stubborn issues.
Automation and Scripting
Creating Network Management Scripts
Here’s a collection of useful scripts to automate common network management tasks on your Raspberry Pi. These scripts can streamline your remote network management and daily operations.
Create a network status checker script:
“`bash
#!/bin/bash
echo “Network Status Check”
hostname -I
iwconfig wlan0
ping -c 4 8.8.8.8
“`
Automate Wi-Fi reconnection with this simple script:
“`bash
#!/bin/bash
while true; do
if ! ping -c 1 8.8.8.8 &> /dev/null; then
sudo nmcli radio wifi off
sleep 5
sudo nmcli radio wifi on
fi
sleep 60
done
“`
Monitor network bandwidth usage:
“`bash
#!/bin/bash
interface=”wlan0″
while true; do
rx_bytes=$(cat /sys/class/net/$interface/statistics/rx_bytes)
tx_bytes=$(cat /sys/class/net/$interface/statistics/tx_bytes)
echo “RX: $((rx_bytes/1024/1024)) MB”
echo “TX: $((tx_bytes/1024/1024)) MB”
sleep 5
done
“`
Save these scripts with a .sh extension, make them executable with chmod +x script.sh, and run them as needed. Consider adding them to your startup routine using crontab for automated network monitoring.
Scheduling Network Tasks
Automating network management tasks on your Raspberry Pi can save time and ensure critical network operations run smoothly. The most effective way to schedule these tasks is by using cron jobs, which allow you to execute commands at specified intervals.
To create a new network-related cron job, open your crontab file by typing:
“`
crontab -e
“`
Here are some useful examples of network management automation:
1. Monitor network connectivity every 5 minutes:
“`
*/5 * * * * ping -c 1 google.com || sudo systemctl restart networking
“`
2. Log network statistics hourly:
“`
0 * * * * ifconfig > /home/pi/network_stats/$(date +\%Y\%m\%d_\%H).log
“`
3. Check and update network settings daily:
“`
0 0 * * * sudo netplan apply
“`
Remember to use absolute paths in your cron jobs, as the working directory might be different when running automated tasks. You can also create a dedicated script file containing multiple network commands and schedule it to run:
“`
0 6 * * * /home/pi/scripts/network_maintenance.sh
“`
For logging purposes, append `>> /var/log/network_cron.log 2>&1` to your commands to capture both output and errors. This helps in troubleshooting when automated tasks fail.
Security Best Practices
Securing Network Connections
To enhance your Raspberry Pi’s network security measures, you can implement several command-line techniques. Start by encrypting your Wi-Fi connection using the following command:
sudo nmcli connection modify [SSID] 802-11-wireless-security.key-mgmt wpa-psk
Set a strong password with:
sudo nmcli connection modify [SSID] 802-11-wireless-security.psk ‘your-strong-password’
Enable MAC address filtering by adding trusted devices:
sudo nmcli connection modify [SSID] 802-11-wireless-security.mac-address-filter yes
To monitor network activity and detect potential security threats, use:
sudo tcpdump -i wlan0
Additionally, you can disable network interfaces when not in use:
sudo nmcli radio wifi off
For public networks, always use a VPN connection:
sudo nmcli connection import type openvpn file /path/to/vpn-config.ovpn
Remember to regularly update your network configurations and monitor connection logs for suspicious activity using:
sudo journalctl -u NetworkManager
These commands help create a robust security foundation for your Raspberry Pi’s network connections.
Monitoring Network Activity
Monitoring your Raspberry Pi’s network activity is crucial for maintaining security and optimizing performance. The ‘tcpdump’ command is your first line of defense, allowing you to capture and analyze network packets in real-time. Use ‘tcpdump -i wlan0’ to monitor wireless traffic or ‘tcpdump -i eth0’ for ethernet connections.
For bandwidth monitoring, ‘iftop’ provides a dynamic view of network usage. Install it with ‘sudo apt-get install iftop’ and run with ‘sudo iftop’ to see current network connections and their bandwidth consumption. The ‘nethogs’ utility offers a process-specific view of network activity, helping you identify which applications are using your bandwidth.
To detect potential security issues, use ‘netstat -tuln’ to list all active network connections and listening ports. The ‘fail2ban’ service can help protect against brute force attacks – install and configure it to automatically block suspicious IP addresses.
For long-term network statistics, consider setting up ‘vnstat’. It tracks network usage over time and can generate detailed reports with commands like ‘vnstat -h’ for hourly statistics or ‘vnstat -d’ for daily summaries.
Managing your Raspberry Pi’s network through the command line interface gives you powerful control over your device’s connectivity. We’ve covered essential commands from basic network status checks to advanced configuration options, equipping you with the tools needed for effective network management. Remember to always back up your network configurations before making changes and keep your system updated for optimal security.
Ready to take your Raspberry Pi networking skills further? Practice these commands in a test environment, explore network automation scripts, and consider implementing some of the security measures we discussed. With these command-line tools at your disposal, you can confidently manage your Pi’s network connections and troubleshoot issues effectively.
Whether you’re building a home server, setting up IoT devices, or working on educational projects, mastering network management through the command line will prove invaluable in your Raspberry Pi journey.