


Load balancing transforms your Raspberry Pi into a powerful network hub by intelligently distributing network traffic across multiple servers, ensuring optimal performance and reliability. This critical networking technique prevents server overload, reduces response times, and maintains high availability for your applications and services.
Modern load balancing algorithms dynamically adapt to changing network conditions, automatically routing requests to the most available servers while monitoring health metrics in real-time. Whether implementing round-robin distribution, least connection methods, or advanced weighted algorithms, load balancing serves as the cornerstone of scalable network architecture.
For Raspberry Pi enthusiasts, implementing load balancing opens up exciting possibilities: from creating redundant home media servers to building robust IoT networks. By mastering load balancing concepts, you’ll transform basic networking projects into professional-grade solutions capable of handling significant traffic loads while maintaining consistent performance.
The following guide walks through essential load balancing strategies, from basic setup to advanced configurations, specifically optimized for Raspberry Pi hardware limitations and capabilities. We’ll explore both software-based solutions like HAProxy and hardware-based approaches, helping you choose the perfect solution for your specific needs.
Why Load Balancing Matters for Raspberry Pi Networks
Performance Benefits
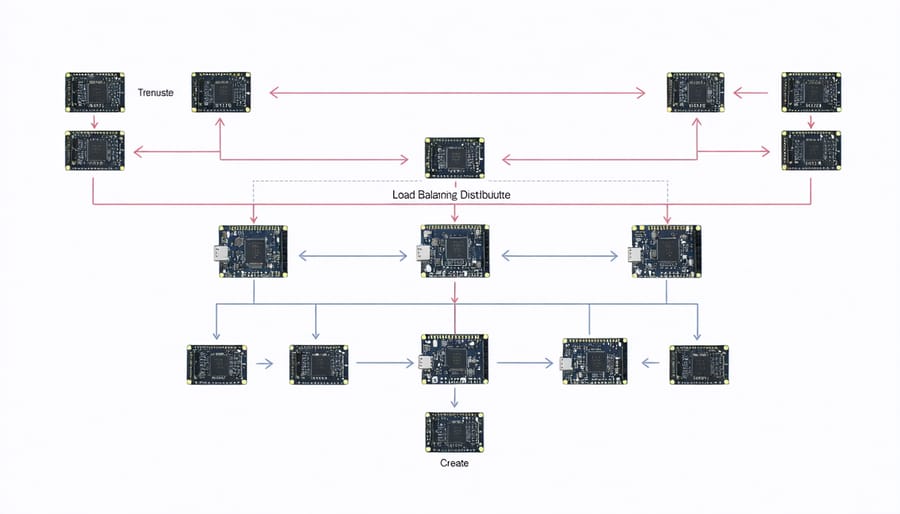
Load balancing significantly enhances network performance by distributing incoming traffic across multiple servers or network paths. This distribution prevents any single server from becoming overwhelmed, reducing response times and ensuring consistent service delivery. For Raspberry Pi enthusiasts, implementing load balancing can transform a basic network into a robust, high-performance system.
One of the key benefits is improved reliability through redundancy. If one server fails, the load balancer automatically redirects traffic to healthy servers, maintaining continuous operation. This failover capability is crucial for projects requiring high availability, such as home automation systems or media servers.
Load balancing also optimizes resource utilization by intelligently distributing requests based on server capacity and current workload. This smart distribution means your Raspberry Pi cluster can handle more concurrent users and process more requests efficiently. For example, a web server cluster can maintain fast page load times even during peak usage periods.
Additionally, load balancing provides scalability benefits. As your project grows, you can easily add more Raspberry Pis to your network without disrupting existing services, allowing your system to grow alongside your needs.
Cost-Effective Scaling
Load balancing offers a remarkably cost-effective approach to scaling your network infrastructure, especially when working with Raspberry Pi clusters. Instead of investing in expensive, high-capacity servers, you can distribute the workload across multiple affordable single-board computers. This approach allows you to start small and gradually expand your network capacity as needed, without significant upfront costs.
By implementing load balancing, you can maximize the utilization of existing hardware resources before adding new ones. When traffic increases, simply add another Raspberry Pi to your cluster rather than replacing entire systems. This incremental scaling approach helps maintain optimal performance while keeping costs under control.
Moreover, load balancing reduces maintenance costs by preventing server overload and extending hardware lifespan. The distributed nature of the system means you can perform updates and maintenance on individual nodes without downtime, eliminating the need for expensive redundant systems. For hobbyists and small projects, this makes high-availability solutions accessible without breaking the bank.
The ability to mix and match different Raspberry Pi models in your cluster further enhances cost flexibility, allowing you to upgrade specific nodes based on performance requirements and budget constraints.
Setting Up Your Load Balancing Infrastructure
Hardware Requirements
To build an effective load balancing network with Raspberry Pi, you’ll need several key hardware components. First, you’ll need at least two Raspberry Pi units (Model 3B+ or newer recommended) to serve as your network nodes. For enhanced networking capabilities, consider upgrading to dual Ethernet ports on your primary load balancer unit.
A reliable network switch (preferably gigabit) is essential for connecting your Raspberry Pi nodes. Make sure it has enough ports to accommodate your planned network size, plus room for expansion. You’ll also need high-quality Ethernet cables (Cat 6 or better) to ensure stable connections between components.
For power management, invest in good-quality power supplies (2.5A or higher) for each Raspberry Pi. A UPS (Uninterruptible Power Supply) is recommended for critical applications to prevent downtime during power fluctuations.
Storage requirements include microSD cards (32GB or larger) for each Pi, though for better performance, consider using SSDs with USB adapters. Don’t forget to have a spare microSD card for backup purposes.

Network Configuration
Setting up a reliable network configuration is crucial for an effective load balancing system. First, you’ll need to configure your Pi as a router and establish stable network connections between all Raspberry Pi nodes in your cluster.
Start by assigning static IP addresses to each Pi in your network. This ensures consistent communication between devices and prevents IP conflicts. For example, you might use the 192.168.1.x range, with your main load balancer at 192.168.1.100 and worker nodes at 192.168.1.101, 102, and so on.
Configure your network interfaces by editing the /etc/dhcpcd.conf file on each Pi. Add the following parameters:
– Static IP address
– Router gateway address
– DNS server information
– Network mask
Enable IP forwarding by modifying /etc/sysctl.conf and setting net.ipv4.ip_forward=1. This allows your load balancer to properly direct traffic between nodes.
For optimal performance, use Cat 6 ethernet cables for physical connections, as they provide better bandwidth than wireless connections. If using Wi-Fi, ensure all Pis are connected to the same network with strong signal strength.
Remember to configure your network security:
– Set up SSH keys for secure communication
– Implement firewall rules using iptables
– Restrict access to necessary ports only
– Regular security updates
Test your network configuration using ping and traceroute commands to verify connectivity between all nodes before proceeding with load balancer software installation.
Popular Load Balancing Methods for Raspberry Pi
HAProxy Implementation
HAProxy stands out as a popular choice for implementing load balancing on Raspberry Pi systems, offering robust command line network control and configuration options. Let’s walk through a basic HAProxy setup:
First, install HAProxy using:
“`
sudo apt-get update
sudo apt-get install haproxy
“`
Create or modify the configuration file at /etc/haproxy/haproxy.cfg with this basic structure:
“`
global
daemon
maxconn 256
defaults
mode http
timeout connect 5000ms
timeout client 50000ms
timeout server 50000ms
frontend http_front
bind *:80
default_backend http_back
backend http_back
balance roundrobin
server server1 192.168.1.10:80 check
server server2 192.168.1.11:80 check
“`
This configuration creates a simple round-robin load balancer listening on port 80. The ‘balance roundrobin’ directive ensures requests are distributed evenly across your servers. After making changes, restart HAProxy:
“`
sudo systemctl restart haproxy
“`
To monitor your setup, access HAProxy’s statistics page by adding these lines to your configuration:
“`
listen stats
bind *:8404
stats enable
stats uri /stats
stats refresh 30s
NGINX Load Balancing
NGINX is a powerful and popular choice for implementing load balancing in your network infrastructure. Its configuration is straightforward, making it an excellent option for both beginners and experienced users. To set up NGINX as a load balancer, you’ll first need to install it on your server using the package manager of your choice (apt-get for Debian-based systems or yum for Red Hat-based systems).
The core of NGINX load balancing is configured in the nginx.conf file, typically located in /etc/nginx/. Here’s a basic configuration example:
“`nginx
http {
upstream backend_servers {
server 192.168.1.10:80;
server 192.168.1.11:80;
server 192.168.1.12:80;
}
server {
listen 80;
location / {
proxy_pass http://backend_servers;
}
}
}
“`
NGINX offers several load balancing algorithms:
– Round Robin (default): Requests are distributed sequentially
– Least Connections: Requests go to the server with fewest active connections
– IP Hash: Ensures requests from the same IP go to the same server
– Weighted Round Robin: Assigns different priorities to servers
To enable health checks and ensure only healthy servers receive traffic, add:
“`nginx
upstream backend_servers {
server 192.168.1.10:80 max_fails=3 fail_timeout=30s;
}
“`
Remember to test your configuration with nginx -t before restarting the service.
Round-Robin DNS Method
Round-Robin DNS is one of the simplest and most cost-effective load balancing methods available for Raspberry Pi projects. This approach works by configuring multiple A records in your DNS settings, each pointing to a different server IP address. When clients request your domain, the DNS server rotates through these IP addresses in sequence, effectively distributing incoming traffic across multiple servers.
For example, if you have three Raspberry Pi servers hosting your application, you can configure your DNS records to associate your domain (like myapp.com) with all three IP addresses. When users try to access your application, they’ll be automatically directed to one of these servers in a rotating fashion.
While this method is easy to implement and requires no additional hardware, it does have some limitations. DNS records are cached by browsers and intermediate DNS servers, which means the load distribution isn’t always perfectly balanced. Additionally, if one server goes down, DNS will continue sending requests to it until the DNS cache expires.
Despite these drawbacks, Round-Robin DNS can be an excellent starting point for small to medium-sized projects. It’s particularly useful when you’re working with multiple Raspberry Pi nodes and want to implement basic load balancing without investing in expensive hardware or complex software solutions.
Monitoring and Maintaining Your Load Balanced Network
Performance Monitoring Tools
Monitoring your Raspberry Pi cluster’s performance is crucial for maintaining optimal load balancing. Several user-friendly tools can help you track system health and resource distribution across your nodes.
Prometheus and Grafana form a powerful combination for cluster monitoring. Prometheus collects metrics from your Pi nodes, while Grafana creates beautiful, real-time dashboards to visualize this data. You can track CPU usage, memory consumption, network traffic, and temperature across all nodes from a single interface.
For beginners, Node Exporter is an excellent starting point. This lightweight tool exports hardware and OS metrics in a format that Prometheus can understand. Install it on each Pi in your cluster to gather basic performance data.
htop offers a terminal-based solution for real-time monitoring. While simpler than Prometheus/Grafana, it provides essential information about CPU, memory, and process management. Use the -H flag to view processes in a tree format, making it easier to understand resource relationships.
Netdata is another popular choice, offering zero-configuration monitoring with an intuitive web interface. It’s particularly useful for tracking network performance between nodes and identifying bottlenecks in your load balancing setup.
Remember to set up alerting thresholds for critical metrics like CPU temperature and memory usage. This proactive approach helps prevent performance issues before they impact your cluster’s operation.

Troubleshooting Common Issues
When troubleshooting load balancing issues, start by checking your network connectivity and server health. A common problem is uneven load distribution, which often occurs due to misconfigured weight settings or improper health checks. Verify that all servers in your pool are responding correctly and adjust their weights if necessary.
Connection timeouts are another frequent issue. These can be resolved by reviewing and adjusting your timeout settings and ensuring your backend servers aren’t overloaded. If you notice persistent timeouts, check your network latency and consider implementing connection queuing.
SSL certificate problems can disrupt load balancing. Ensure all certificates are up-to-date and properly installed across all servers. Missing or expired certificates will cause connection failures and security warnings.
Session persistence issues may arise when users are incorrectly redirected to different servers. Review your session handling configuration and verify that sticky sessions are properly implemented if required for your application.
Monitor your logs regularly for error patterns. High error rates or sudden spikes in response times often indicate underlying problems with server resources or network configuration. Use monitoring tools to set up alerts for these scenarios.
If you experience sudden performance degradation, check for hardware limitations and network bottlenecks. Sometimes, adding more resources or optimizing your configuration can resolve these issues. Remember to regularly update your load balancer firmware and configuration to prevent security vulnerabilities and maintain optimal performance.
Load balancing networks are essential for maintaining reliable, efficient, and scalable systems in today’s digital landscape. By implementing load balancing solutions in your projects, you can significantly improve performance, ensure high availability, and create more robust applications. Whether you choose hardware load balancers, software solutions, or cloud-based services, the key is to select the approach that best fits your specific needs and resources.
Remember that successful load balancing isn’t just about initial setup – it requires ongoing monitoring, maintenance, and optimization. Start small with basic configurations, test thoroughly, and gradually expand your implementation as you become more comfortable with the technology. With the knowledge and techniques covered in this guide, you’re well-equipped to begin implementing load balancing in your own projects and experiencing the benefits firsthand.
Don’t hesitate to experiment with different algorithms and configurations to find the perfect balance for your unique requirements. The future of network reliability and performance is in your hands!